Sound Isolation for Single Room in Basement Recent Status Update -
The finer things like trim and acoustics are underway.
Lighting has been completely wired and power to the room is all set.
The room is fully functional for isolation and we've been able to have weekly rehearsals during nap times for the family. - This was my stated goal, so I am happy.
Upcoming things are the moulding around the ceiling, cutting holes for the other two windows, and hangers for instruments and cables.
End Recent Status Update Reference Section Drum Riser - Using rockwool directly on the floor with mdf or other framed surface as mass on top to deal with frequency transmission. Pretty cool and addresses the fundimental problem. Anyone new to the concept can easily deduce WHY this is a good method. There are ancilary points bantered about, but the concept is the same.
Nails through the Subfloor into the basement? - this was my query to the group which was answered and I followed through on the advice in this thread.
Insulation contacting the surface it's installed against - this was a simple question I had in mind when starting this build. It was helpful. Just info about how to deal with laying or applying the insulation. Good info...
Insulation info that was helpfulDoor Seal Good suggestion there.
Knightfly - Good advice on how to transform a normal door frame into a better form of isolationA good way to frame a door - useful.
Other door research I found useful.Building Panels -noted this as good somewhere in this thread.
Fabric for covering room treatmentJohnsmainville - Brad; "I paid $80.13 for 9 panels (72 sq. Ft.) " on 2/10/2008.
Vertustudio - Want to see a project where the builder has some skills in detail work? Check out the clean work on the doors. Hats off to you sir! Great workmanship.
Vertustudio Doing a fantastic job of room treatment. Check out his upper corner trap constructed as a triangle frame.
Jester Used the same electrical boxes and putty packs as I did.
Now for the Build Intro
I’m in the beginning of construction for a 1 room jam room in our basement of a modified Cape in New Hampshire. It is not a huge space and doesn’t need to be. My basic goal in this is to have a place I can turn up to modest levels and not interfere with others enjoying what they are doing (talking on the phone, sleep, touchy part of a chick flick…).
I’ve had Rod’s book for the better part of a year now and most of my reading has been to do with the construction techniques in framing, drywall and insulation as well as door framing. Honestly, it’s that way because I’ve done carpentry and woodworking for years – easiest to wrap my head around. I’ve done less reading of electrical in areas of my concern for this room.
I’ll do my best with photographic detail. I am not set up with a competent architect program to draw wall and flooring detail at the time, but the start of construction after much reading on this forum has me starting my thread anyway. I’ve poked around to see a few named on this forum, but wonder if someone might suggest one over another and the reasons why.
Type of music we play is rock/blues/pop. Mostly, myself and two of my brothers are the ones playing music. I make cabinets and chassis for amp heads so I always have an ample amount of speakers and power behind them. We’re not terribly loud, but with no insulation to speak of right now I feel guilty playing while my wife is with our young daughter upstairs.
The nearest neighbors are hundreds of feet away so noise really isn’t that much of an issue. My concern is for the people within the house.
Basement Construction Details. Location Southern NH. House constructed in 1976.
Code – I’ve only approached our town with putting layers of drywall within the joists. Stating that I am doing only this and insulation underneath that as my isolation to get the ok with the passive load. I did this because at the time I was introduced to the inspector it was the only thing I knew I was planning on doing. I wasn’t sure about the area of the basement this was going to be constructed within and there were plumbing boundaries in both areas, so with the measurement of each section we had a good conversation. I’m ok for several layers of drywall and more because the span is so short (9 & 10 feet) in this area of the basement. .
Floor Joist – 2x10
- Span – 10’ & 11’ on either side of center support beam.
- Support Beam – Triple 2x10 w/columns & chimney foundation/footing in middle of house.
- Span: Beam spans foundation wall to center chimney footing with 2 column supports.
- Support Column Positioning: The room span is 14 feet with the middle column supporting 6’ in.
Flooring Material – 5/8 plywood, MDF ¾’ & Oak Hardwood Flooring.
- Voids - The mdf looks to be fitted properly from what I see in the two carpet sections of the house I replaced not too long ago. I’m not taking up the hardwood flooring to check, but this house does appear to be put together properly. I do not notice any issues with the plywood attached to the floor joists.
Basement Section of Interest – Under Bedroom, Bath (bedroom)
Areas of Concern:
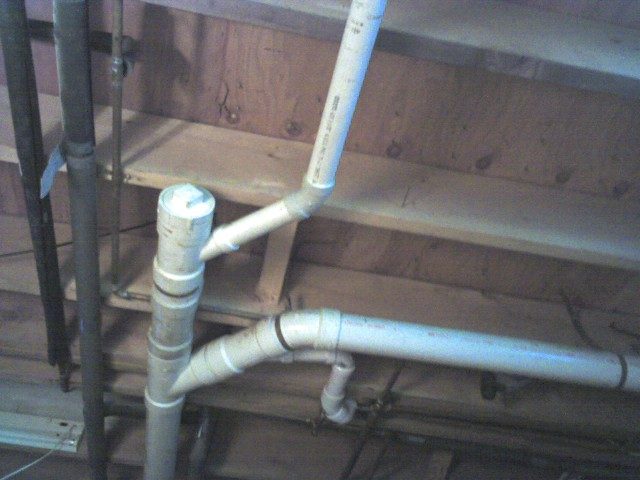
- Bathroom Plumbing – The water supply and the drain pipes (pvc) which dip down for their trap section. Some of this will be rerouted to the foundation wall to enter the main outside of the room.
- Copper Piping - Forced Hotwater Heat and Water supply for bath. ½ and ¾ tubes. I would love to move these to run in the same area as the shower/toilet drain pipes, but I’m not sure the expense/benefit will be worth it.
Basement Water System – Last winter we had a basement system to pull water out along the parameter. The slab along the foundation walls have approx 4” of space where we wouldn’t want to nail into.
TODO: a crew is coming to bury the exhaust lines for this system which pump out of two points of our front yard. Winter frost prevented them from doing this work, so I will use this time to ask about how far in they may recommend for sinking nails with a Hilti gun.
Applying Drywall Between Joists – I’ve been provided with 1/2” drywall at no cost from a friend. This layer has already been applied. Backer rod and calking are in place aside from a few trouble spots which I will highlight.
- Question: With having one layer of ½ drywall in place, I’m left thinking I should put the next layer as 5/8 drywall as it would handle a lower level of frequencies in isolation. Which would be better; 2 more layers of ½ drywall or one more layer of 5/8?
- Resource I’ve Found BACKER ROD: My brother works with commercial glass. He installs glass in anything from see through flooring for high end condos in beacon hill to plate glass for office buildings. I had purchcased the first round of this stuff from Hell Depot and was bitching about it being too small of an amount and that I was looking for spools of it. So: I may have a resource for anyone needing some in the area. Please respond to this thread or PM my username to get some from me.
Wall Construction – Foundation Walls (3) – I plan on getting WIC from Mason Ind. to attach the walls to the foundation walls. There is one section where there is a sump pump and piping in a corner opposite the bottom of the stairwell (which will be outside of the room).
Question: There are three windows in the foundation walls. I’d like to keep them and not fill them in with cement as I’ve seen others do. Any advice on this one?
Double Wall assembly – This wall will be along the stairwell and continue along to both foundation walls to complete the room. It will also contain the doorway to the room. The wall assembly will be framed from 2x4. I plan on having 2 layers of 5/8 drywall on the outside facing wall and the same on the inside along with r13 insulation in between.
And yes, I’ll be putting in a fire block at header of each wall.
Question: what’s a guide or recommended amount of spacing between these wall assemblies? Will one inch between walls suffice?
Framing Center Beam – I plan on having no contact between the beam and one ceiling on the front side of the house. The other will be attached via rc clips or another method – this side has plumbing which would make an independently framed ceiling hard to manage.
The column in the center of the span under the beam will be boxed in with 4x4 (2, 2x4 sistered) where headers will rest on both sides of the beam. These headers will span from each wall to the center column support box. The ceiling will attach to this header on both sides of the center beam.
Question: Does putting the effort into keeping one side of the beam as an independently framed ceiling, where the other side is attached via RC lend itself to flanking between the two? The benefit is to remove the weight from the deck above on where I can (which is one side).
Framing the SumpPump - This is an item which will need utility access. I plan on boxing this section in the corner and having an insulated door to open up for viewing.
Framing the Three Cellar Windows - There are three windows in this area of the basement. I planned on having removable
Large Hole For Drain of Tub –
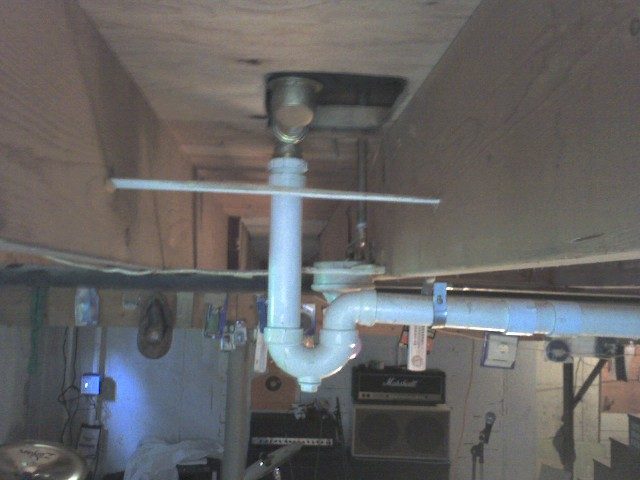
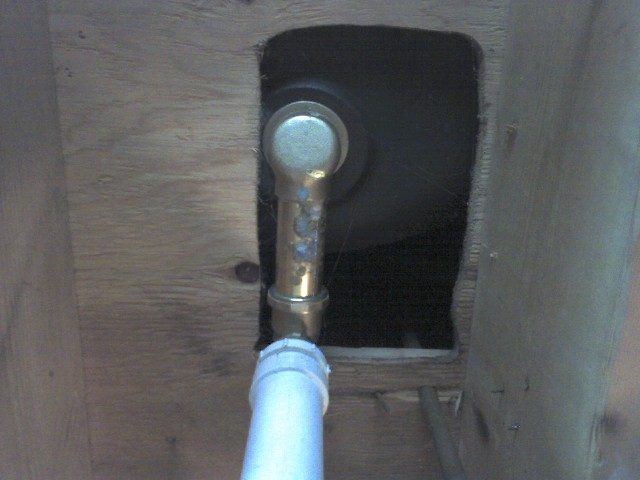
I’m really interested in suggestions for this one. As you may see in my photos, there’s a 10 diameter hole for the drain of the tub. How should I seal this up best? Anyone have to deal with this before? Should I box it in such a way that I have access to it in the future without having to cut a hole through the many layers of drywall?
Electric –
This room may end up as a family entertainment room (kids here…) albeit, through my cold dead hands. I am planning on utilities in the room being able to support a standard outlet configuration along with media drops for cable and Ethernet.
My general plan is to run 3 chase/channels made from piping with wires that will be in use for the current setup and dummy or pull wires for running other types of wiring. These would be against the foundation and within the center beam.
Resource: Another brother of mine works with metal piping. I could get this for free from him. Well, I'd have to carry his bass amp for a little bit when we play out, but I digress. I've read in the electrical section of this forum that pvc can be preferable, but again; I am at a cost/benefit decision.
Outlets
For current wiring I plan on having a drop to the far central wall and have the outlets affixed to the wall as exterior outlets are done. I plan on only having 4 double gang boxes in the room. I figure this will give me the least amount of incidence with holes in the wall for outlets.
At the time this room is intended for use other than drums and bass thumping away, the electric and pull lines can be accessed by cutting into the walls at the end points and dropped to the desired locations for an outlet box by the guy my wife hires to do the work as I will be bartending in Paia, HI.
Lighting
I plan on running overhead lighting from the center beam out to the center of each span for lighting fixtures. I will wire for switches near the doorway and will put them on the exterior of the room for the current use.
Heat
I plan on putting 2, 4’ baseboard electric heat units with dial controls installed within the units. I’ll rarely use this as the basement is fairly comfortable year round; again, I’m leaving options for when and if this isn’t a jam room.
Review of Questions and other Points to consider –
This seems to be a bit verbose compared to some I’ve seen so I think a summary of chapter questions are in order.
- Is there anyone with experience in framing walls on or near a basement drainage system?
- Drain for Tub having a hole. Can someone recommend an example for constructing an access panel that still provides isolation?
- Two sides of the beam having differently framed and attached ceiling construction. Is this more effort than needed? Advice?
- Double wall assembly spacing: as noted, the non foundation wall will be a double wall assembly and will contain the sole door to the room.
- Windows: what to do and how to construct around these.
- Next layer of Drywall in between studs? 5/8 or 2 layers of ½?
- Walls as they are attached to the slab - Should I use pressure treated wood on the bottom of my frames? Flood is not a concern, but moisture is. Anyone have experience with this or is it not much of a concern?
I think this is a good start. Your thoughts and suggestions are greatly appreciated.
Also - fire block here [Find photo of forced hotwater pipe located at the top of the foundation wall] will be tricky. Any ideas? It's supposed to rest on the top of the foundation and then the wall assembly. With this piping in the way would it be worth doing some plumbing here?
Budget - under 2k would be ideal. I'm getting some good return on favors from people I know working in the business, so I'm seeing some lower prices on some material, but not all.
Now that, ladies and gentlemen, is one really awesome project introduction!
Cram, hat's off to you, Sir. 8)
I'm very short on time right now (I should have left work an hour ago)... But hopefully I (and others!!) will be able to digest this and offer some feedback.
--Keith :mrgreen:
. . . putting layers of drywall within the joists. . . I am doing only this and insulation underneath that as my isolation to get the ok with the passive load. . . I’m ok for several layers of drywall and more because the span is so short (9 & 10 feet) in this area of the basement.
If you only put drywall strips ("beef up") between the joists flush with the upstairs floor, then that's one leaf. For any decent amount of isolation, you'll need two (and ideally only two) leaves.
Cram wrote:
Flooring Material – 5/8 plywood, MDF ¾’ & Oak Hardwood Flooring.
You know, you may not even need to do beef-up -- that's a pretty thick, dense floor you have there.
Cram wrote:
Basement Water System – Last winter we had a basement system to pull water out along the parameter. The slab along the foundation walls have approx 4” of space where we wouldn’t want to nail into.
Good move. You don't want to build anything down there unless the moisture issues have been resolved, and it seems that it has been. Although, ideally, it would be best to wait until next spring to build, just to see how well the system works for an entire winter season.
Check out Luftweg's "Basement studio-room project in Boston area" thread and Andy Eade's Rotten Basement Conversion Thread for some great stories about basement waterproofing/issues.
Cram wrote:
Applying Drywall Between Joists – I’ve been provided with 1/2” drywall at no cost from a friend. This layer has already been applied. Backer rod and calking are in place aside from a few trouble spots which I will highlight.
[list]Question: With having one layer of ½ drywall in place, I’m left thinking I should put the next layer as 5/8 drywall as it would handle a lower level of frequencies in isolation. Which would be better; 2 more layers of ½ drywall or one more layer of 5/8?
Again, I don't think you need to add any more beef-up. You've got four layers of pretty dense material there now.
Cram wrote:
Question: There are three windows in the foundation walls. I’d like to keep them and not fill them in with cement as I’ve seen others do. Any advice on this one?
Definitely talk to your local building department again about this one... There may be strict rules governing the windows. Check out infiniteposse's "Mystery Machine studios - 3-Room basement studio project" thread -- a very ambitious project indeed -- but specifically don't miss how he had to install a special egress window, enlarging the opening and making a pit outside for it.
Cram wrote:
Double Wall assembly . . .I plan on having 2 layers of 5/8 drywall on the outside facing wall and the same on the inside along with r13 insulation in between. . . what’s a guide or recommended amount of spacing between these wall assemblies? Will one inch between walls suffice?
One inch of separation between double framed 2x4 walls translates to an air gap of 8". That's really good, and in fact is the main benefit of double wall framing because it's impossible to get an air gap much smaller than that.
If you have the space and can easily afford another four inches, then that's even better, especially for low frequencies. I remember reading a couple of years ago when I started my build that 12" is kind of a "sweet spot" where more is still better but the improvement is more negligible and requires even greater gaps in order to have noticable improvement.
Cram wrote:
Does putting the effort into keeping one side of the beam as an independently framed ceiling, where the other side is attached via RC lend itself to flanking between the two? The benefit is to remove the weight from the deck above on where I can (which is one side).
Independent ceilings win over RC, hands down.
Perhaps you'd be better with RSIC clips instead of RC...? Same concept, better technology.
I'm not the expert on this, but I thought I'd mention that so that you can do homework on the subject and/or others can chime in.
Cram wrote:
Framing the SumpPump - This is an item which will need utility access. I plan on boxing this section in the corner and having an insulated door to open up for viewing.
This is where it really helps to have a floor plan. You might have an opportunity to make a combination utility access and storage closet or something...? :roll:
Cram wrote:
Framing the Three Cellar Windows - There are three windows in this area of the basement. I planned on having removable ------------
Incomplete thought. 8)
Cram wrote:
Large Hole For Drain of Tub –
I’m really interested in suggestions for this one. As you may see in my photos, there’s a 10 diameter hole for the drain of the tub. How should I seal this up best? Anyone have to deal with this before? Should I box it in such a way that I have access to it in the future without having to cut a hole through the many layers of drywall?
Having access in future is a good idea. In our first house our upstairs bathtub had a couple of leaks that damaged the ceiling in our kitchen. It wasn't a huge problem, but I could see how it could have been if an isolated studio had been built beneath it! :shock:
You may want to explore reorienting the drain line so that it runs parallel to and up/between the joists so that the perpendicular part is able to run alongside one of the exterior walls.
Cram wrote:
. . . by the guy my wife hires to do the work as I will be bartending in Paia, HI.
You may want to hold off until you can supervise everything with your own eyes.
Cram wrote:
Is there anyone with experience in framing walls on or near a basement drainage system?
Yes -- see Andy Eade's thread, linked above.
Cram wrote:
Drain for Tub having a hole. Can someone recommend an example for constructing an access panel that still provides isolation?
Two come to mind, but only one that I remember specifically. Check out SonicClang's videos. His basement ceiling is made up of removable panels for that sort of thing.
I wish I remembered the other one I saw last year... :roll: ...I'll bet you'll find it if you do some searches.
Cram wrote:
Next layer of Drywall in between studs? 5/8 or 2 layers of ½?
You can possibly get away with no more than the one layer you have. Strictly speaking, 5/8" is better because it's more mass. There's consensus among the experts here that the concept of using varying thicknesses of material is inferior to using all thicker material -- the slight benefit of the variance is beat by the sheer mass of the thicker material.
Cram wrote:
Walls as they are attached to the slab - Should I use pressure treated wood on the bottom of my frames? Flood is not a concern, but moisture is. Anyone have experience with this or is it not much of a concern?
Pressure treated soleplates are typically required by modern building codes. There are also different levels of pressure treatment -- some are for indoor/outdoor use, and some is for outdoor use only.
Bear in mind that the moisure tends to wick up from the floor, even if it is not visible.
Sillseal is also a good product that can be used in conjunction with the pressure treated soleplates.
I recommend anchor bolts for securing your soleplates to the floor, rather than concrete nails. It's more time consuming, but the result is far superior. 8)
I realize you asked more questions than I answered. I only touched on things on which I have some familiarity. Hopefully others will chime in with their thoughts as well.
--Keith :mrgreen:
Thank you for the reply. I've saved the text from your reply and will go through it this weekend as I'll be offline for most of the weekend.
I very much appreciate the time and thought.
One thing in reply -
Your thought about the existing deck being enough mass to live with for my isolation needs: I am suspect of this being enough. I can hear foot traffic and conversation from within the room above very easily. It seems that room just BOOMS with sound when we're down there jamming as it is and I know it will be drastically different once I put the other layer of the ceiling in, but I think I'll definately put another layer up.
Also - I made an error in my initial post - it's actually 1/2 subfloor. Easily verifiable with the image of the drainpipe for the tub.
Does that change your thought about there being enough mass or was the MDF (which is there...) actually what you're referring to?
Have a great weekend.
EDIT - I goofed in my statement of the subfloor. It's 1/2 inch. I made an assumption without the tape while being in a rush to get out the door for the weekend.
I'm not the last bit surprised. You have a one leaf system right now: that's awful. Adding another layer will make itonly slightly less awful.
You need an air-tight decoupled two leaf system without any weak spots.
Study the two leaf mass-air-mass principle thoroughly.
You'd be wiser investing your time and materials into shoring up the weak areas and then planning on a t least a two layer lower leaf, assuming you can afford the weight. Using Green Glue between the two lower leaf layers would make it awesome.
--Keith :mrgreen:
You
I'm not the last bit surprised. You have a one leaf system right now: that's awful. Adding another layer will make itonly slightly less awful.
I fully intend to have MAM working on all sides of the room excepting the basement slab.
Deck will have drywall added between the joists, which is 85% complete with one layer of 1/2' drywall. The remaining work for this layer is a few tight spots along with around the plumbing of the bathroom.
Then I plan to have the side of the room (one side of the center beam) with a ceiling that is independantly framed. This can be done because there is no plumbing.
The other side I don't have the spacing with the plumbing to do the same.
All of the interior ceiling will have two layers. I may put greenglue, but will weight the expense at the time after the other work [plumbing, electric, framing] is complete.
I asked for clarity on the deck level because I was just suprised when you suggested what I had on the deck level (oak flooring, mdf, plywood) was enough that I wouldn't need more mass on that side of the MAM.
-- Edit: I am re-reading your last entry. Are you suggesting that I should just patch up all weak areas in one layer under the subfloor - making sure all spots are wrapped and sealed appropriately with the acoustic calking I'm using, put insulation between the joists, then frame my ceiling with 2 layers of drywall?
Ceiling Layer Review:
MASS
----- Oak flooring = 3/4
----- MDF = 3/4
----- Plywood Sub = 1/2
----- Drywall = 1/2
AIR
----- R-19 insulation between 2x10 joists
MASS
----- Ceiling frame
----- Drywall 5/8
----- Drywall 5/8
Framing the SumpPump - This is an item which will need utility access. I plan on boxing this section in the corner and having an insulated door to open up for viewing.
sharward wrote:
This is where it really helps to have a floor plan. You might have an opportunity to make a combination utility access and storage closet or something...? :roll:
I am leaning toward having either an angled 45° with access to the pump assebly and shelving on the top areas. I've sketched this out on drafting paper about 10 times. Had thoughts of making it into a seat or counter with more space in the room from waist level up.
Cram wrote:
Question: There are three windows in the foundation walls. I’d like to keep them and not fill them in with cement as I’ve seen others do. Any advice on this one?
sharward wrote:
Definitely talk to your local building department again about this one... There may be strict rules governing the windows. Check out infiniteposse's "Mystery Machine studios - 3-Room basement studio project" thread
-- a very ambitious project indeed
-- but specifically don't miss how he had to install a special egress window, enlarging the opening and making a pit outside for it.
All windows are above ground level on the outside. I'll check out these threads to see what mods were made and why. I'll also talk to the town within a week or so.
Cram wrote:
Large Hole For Drain of Tub –
I’m really interested in suggestions for this one. As you may see in my photos, there’s a 10 diameter hole for the drain of the tub. How should I seal this up best? Anyone have to deal with this before? Should I box it in such a way that I have access to it in the future without having to cut a hole through the many layers of drywall?
sharward wrote:
Having access in future is a good idea. In our first house our upstairs bathtub had a couple of leaks that damaged the ceiling in our kitchen. It wasn't a huge problem, but I could see how it could have been if an isolated studio had been built beneath it! :shock:
You may want to explore reorienting the drain line so that it runs parallel to and up/between the joists so that the perpendicular part is able to run alongside one of the exterior walls.
That tub drain will be lifted as close to the tub as I can re-glue the trap and will be rotated 90° to flow within the floor joist.
It will travel ~5' to the foundation wall where it will have an elbow at the bottom of the floor joist to route it outside of the room where it willl elbow again to the main.
I'm working out specifics with my other brother who does plumbing to figure out if this is going to mess with where the vent sits. He spouted off about 5 different ideas when I showed him. I'm going to draw up a few of his suggestions to review again with him and the code.
sharward wrote:
Cram wrote:
. . . by the guy my wife hires to do the work as I will be bartending in Paia, HI.
You may want to hold off until you can supervise everything with your own eyes.
Slight attempt at a joke there by me, but I'm quite serious actually... If she thinks we're adopting this as a family room within the next 5 years, she's going to have to think about the HUGE amount of space available after it is done as I'll be GONE! ;)
sharward wrote:
Bear in mind that the moisure tends to wick up from the floor, even if it is not visible.
Sillseal is also a good product that can be used in conjunction with the pressure treated soleplates.
I'm confident with the rain and following pressure we received from the ground this season. There was only one road left to our house after the rains and the basement was dry. Since my post, I've asked about basement construction of a few guys I know doing the work and they always use treated wood for soleplates. It was a detail I was unfamiliar with.
UPDATE -
I had asked a question earlier this year about one of my identified "problem spots" to address.
Nails are protruding down in between the joists through the subfloor. These nails are for the tile in the bathroom.
http://www.johnlsayers.com/phpBB2/viewt ... sc&start=0
I've udated that thread with status, but wanted to tie it into this thread. Rod and others had good replies.
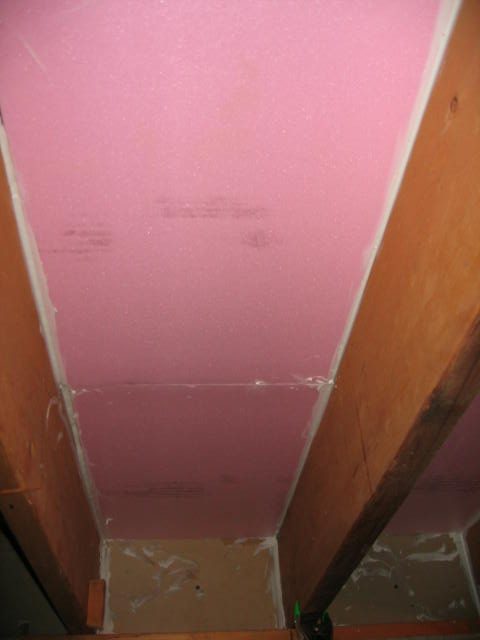
So, I've gathered all the spare rigid foam I had and then went to buy the rest of what I'd need at the local building supply store. I'll add photo's that I take of the process later today.
Modified: add of pictures.
I put calking & backer rod around all of them. Wasn't sure how important it is at this level, but air holes are air holes right?
Thanks for cross-referencing that useful thread. 8) It's always great when folks take extra steps to make their project threads especially useful to other visitors, present and future. :D
--Keith :mrgreen:
I am nearing the point where will have my first layer of drywall finished between the floor joists. I look at every section to make sure the calk work I did is tight with no holes or voids for air to go.
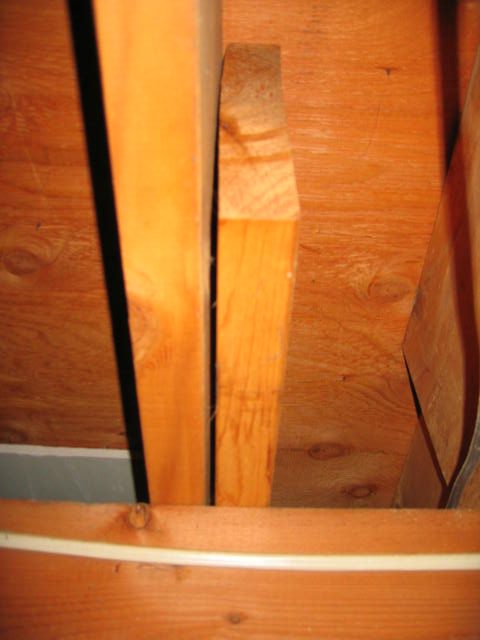
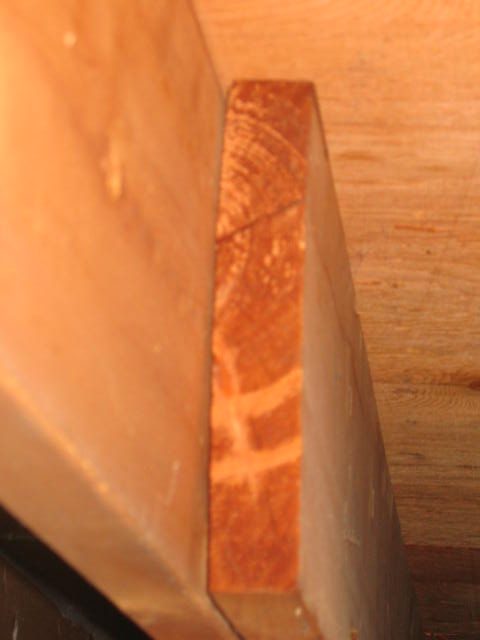
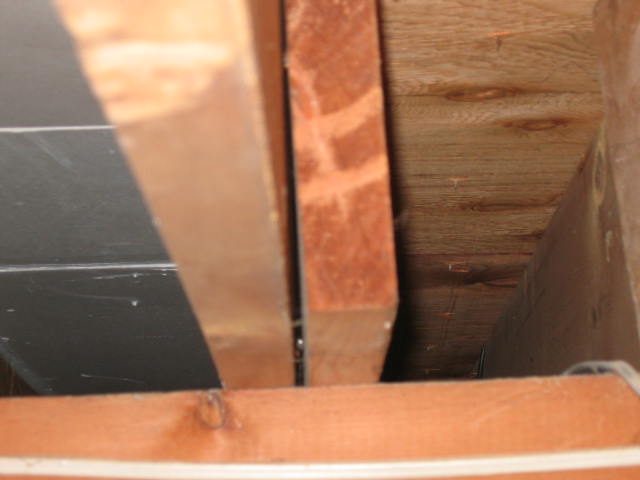
I wonder about the section of the floor joists where they meet and are resting over the support beam. They are obviously nailed together, but some of them have kicked away from the other. (images should illustrate this).
Is this worth paying attention to from an isolation perspective?
Would it make sense to correct this or firm it up anyway?
Would drilling through in a couple spots to fit a bolt through to pull the kick back work or be worth it in this scenario?
This is not a direct and applicable example, but in terms of using bolts to firm up a frame -
I've done framing work for new england houses that were +200 years old where the wood was literally cut from the property to frame the house. We sistered up the old support beams (which sagged) with level ones and screwed them together with bolts.
Has anyone else seen this?
Another thought would be to plug this area the best I can with calk and rod...
Please don't act on this until you verify with someone who really knows for sure says it's OK... But I would think that carefully cutting the extending piece with a reciprocating saw (being sure not to cut or in any way harm the joist that it's up against) so that its edge is flush with the bearing edge would be OK.
Anyone? :roll:
Please don't act on this until you verify with someone who really knows for sure says it's OK... But I would think that carefully cutting the extending piece with a reciprocating saw (being sure not to cut or in any way harm the joist that it's up against) so that its edge is flush with the bearing edge would be OK.
Anyone? :roll:
I'm not planning on doing any cutting into the beam. I see what you're saying about cutting the joist that is kicking out in order to calk up an air gap, but this would kill the structural strength of it because in more than one instance there is a nail at the top of the board, near the floor (where it has not kicked). When you frame the floor of a house, these joists are laid across the beam and a guy will sink staggered nails in at an angle where they overlap. When I've done this, I've put two on the end points for this exact reason.
You'd want as much overlap contact as can be had for this so to be clear, that's not an option. No way, no how.
I did suggest the possibility of drilling a hole for a hex bolt to pull the kick/warped board in, but am not married to the idea. Plus, it's right next to the support beam where a hole would leave the least impact (floor has the least sway at the standard).
Another option -
I did check one spot, by using my furniture clamps to pull the kick in. I did this in gentle/intervalic turns and the travel was 1/4-3/8 inches. I was able to get the peices snug and I could have sunk a nail into it, but stopped because of the split potential. I'd likely do a combination of predrilling peice that we're at the end of and tapping the tip of the nail flat. But that's being anal about it.
So to review and clarify all that diatribe...
Can anyone recommend one over the other or another idea entirely?
1) Pull the kicks together with hex bolt.
2) Use clamps and nail it together carefully.
3) stuff the gaps with backer rod and calk to seal the void of air.
It is friday, it is sunny, I will not be working in the basement today.
- Thanks for the replies.
I read you. :-)
I like the lag bolt plan myself... But you might run the risk of affecting the boards upstairs.
Probably best to leave them alone and use a small strip of drywall along the bottom of where the two joists intersect, with acoustic sealant beads on the bottom of each joist. Since that's a couple of two-point bonds, you wouldn't need backer rod.
--Keith :mrgreen:
Another option -
I did check one spot, by using my furniture clamps to pull the kick in. I did this in gentle/intervalic turns and the travel was 1/4-3/8 inches. I was able to get the peices snug and I could have sunk a nail into it, but stopped because of the split potential. I'd likely do a combination of predrilling peice that we're at the end of and tapping the tip of the nail flat. But that's being anal about it.
after my last post, I took another look and found that 3 of the 4 candidates on this matter could be clamped together and nailed. I did this because I could see the grain and quality of joist would not fracture or split with the movement and sinking new nails in.
The last one is not going to work - You can see by the rings on the butt; this was cut near a significant branch was starting. There is also a fracture starting near the top. I think I'll leave this one as is.
Other detail provided illustrates the gap on the bottom that caused me to think this through.
It's been some time since my last update, but there have been some updates to the work in this room.
The easy side
I've completed one side of the center support beam with two layers of 1/2 drywall in between the joists, up against the floorboards. Yesterday, my brother and I put in Owens C. R30 insulation in this space.
It is the side which has the least amount of utility in terms of plumbing and electric, so it was a good spot to isolate, and complete through these steps.
Question - I stapled plastic on most of the insulation because I cannot guarantee how long it will be before I get to the ceiling and I'd rather have it "wrapped" up for the musicians rehearsing there. Should I keep it there when I put the ceiling in? No harm no foul? What are the considerations? Vapor and condensation?
The harder side
On the other side there are several pipes and wires to deal with. This is also the side where I had to put 1'' foam to buffer the nails coming through the floorboards.
Bathroom Tub
There was an access hole to the bottom of the tub where the drain came out as well as hot and cold 1/2'' copper water supply.
For the hole, I did patchwork drywall against the floor boards and I believe with all said and done - in this area I have about 4-5 layers of 1/2'' drywall with a rediculous meticulous amount of backer rod and caulking work around these pipes and layers.
Another tub insulation measure was on the top side - we have an access panel to the underside of the tub (picture the inside of the form on a tub). I was able to stuff a bunch of spare fiberglass I have left over from the demo work I've done in other areas of the house. I used a broom handle to stuff it in the length of the tub along the sides. This will hopefully have an effect upon the sound waves using the tub as a speaker box (so to speak).
Also, on the top side of the piping, I circled a bunch of backer rod and calked down to ensure there are no air gaps in that access hole.
Bathroom Toilet
Still pending. I have a layer of foam (tile nails through floor) and 1/2'' drywall around the 4'' pvc pipe. I still have to do some work with filling air gaps there.
Bathroom Sink
These pipes (supply and drain) have been wrapped with foam (tile nails through floor) and 1/2'' drywall. I have gotten most of the work with this layer sealed up in this area. A second layer will be put in soon.
Vent Pipe
Same thing as the toilet pipe. I have to wrap this better.
The great divide. I'll attach a picture, but basically: I have all of this spare drywall from cutting peices and demo work in other areas of the house. I have put 4-6 layers of 1/2'' drywall on most all of the sill plate areas. I have had a lot of time by myself down there to do some assembly line style work with cutting, so I made all these boxes for the ends of the joist lengths.
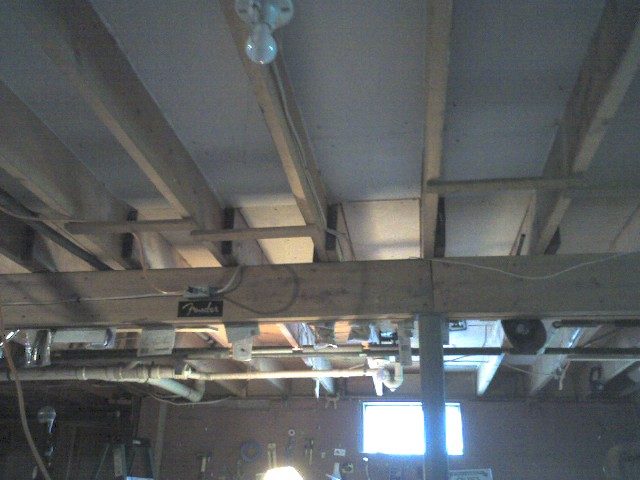
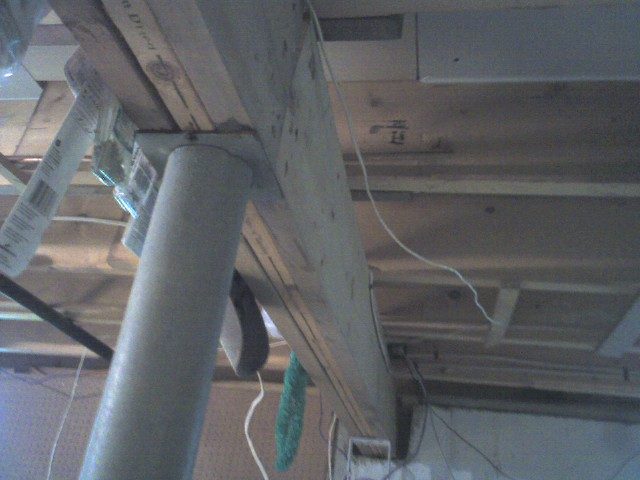
This got me thinking about the center beam - why not do the same thing there to separate the two sections of the room? So I've put 5 peices of drywall (cut to measurement) on top of the center beam, in between each floor joist.
This isn't a true isolation as sound waves will travel around the housed in beam and effectively flank to the other side, but it was of little consequence in terms of labor and supply - I have a large amount of all three supplies to do this - backer rod, calk and small peices of drywall.
I'll post images in my next post here... [/b][/u]
Images -
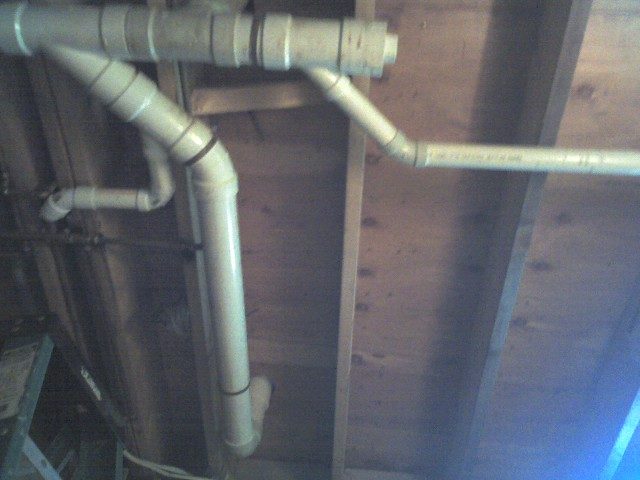
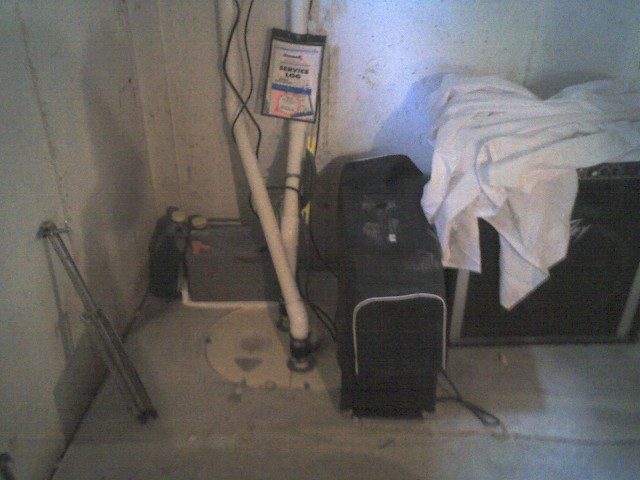
2007_11_21 011.jpg - First image is of the area near the stairwell. There's the pipe for the front faucet or outside water source.
2007_11_21 013.jpg - corner of basement with utility pipe for our basement system. This is 2'' pipe I believe. I have 4-6 layers of 1/2 drywall on these ends.
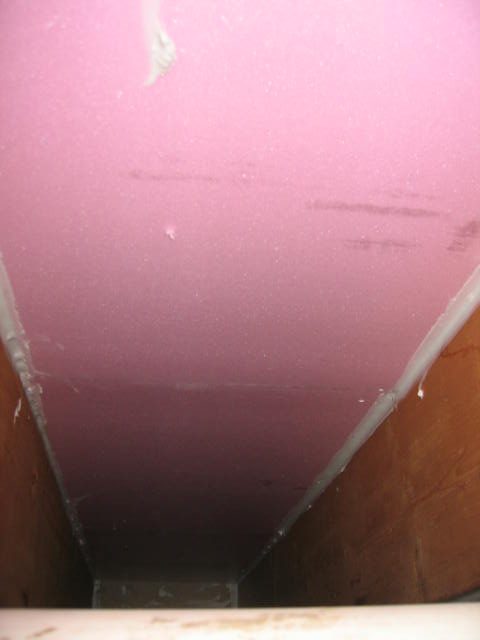
2007_11_21 020.jpg - this is a photo illustrating the block of drywall I put over the center beam.
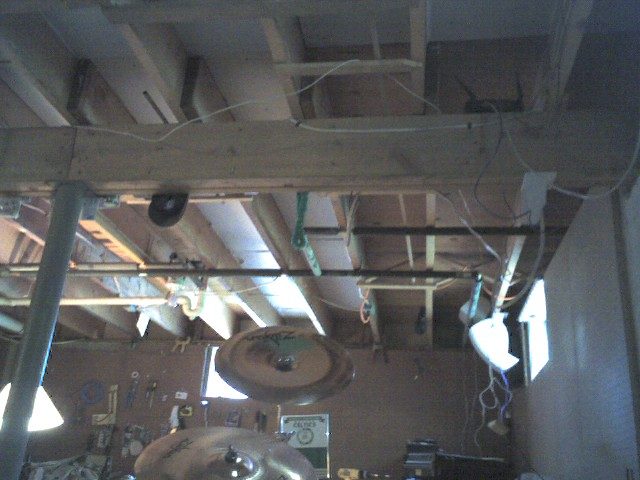
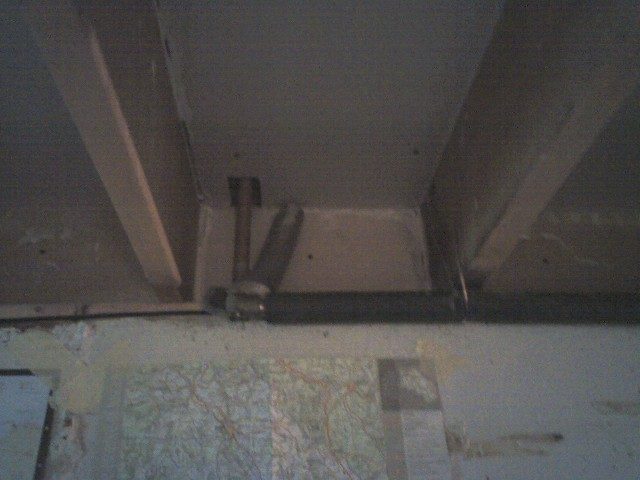
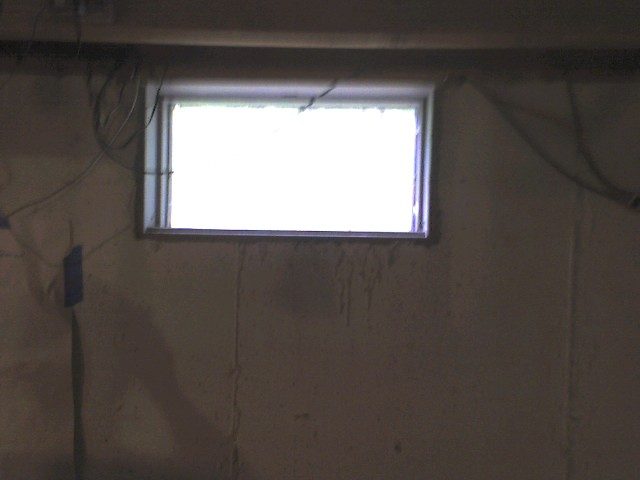
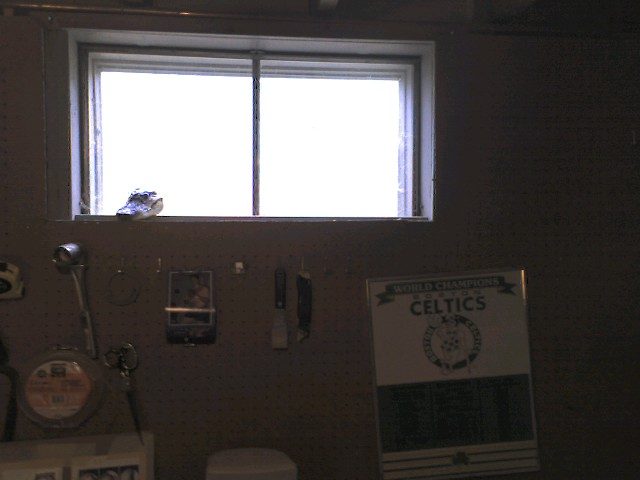
2007_11_21 021.jpg - Other side or un insulated with fiberglass side... You can see one of the three basement windows here, the basement water system, a map of the olympic peninsula of washington and the top of our working set list...
Further note here: I'll be removing that plastic wrap. I put it up not knowing that it'd be useless in a sound isolation scheme, but I really did it because I was unsure about how long it would be until I got to framing, but that seems to be happenning quick enough...
From what I gather in reading and searching here, it is better to not have it.
My ceiling joists for the interior ceiling under the deck will have 2x6 lengths touching the insulation in here.
Notice the bracket work I did here: they come up from the bottom edge of the floor joist to the center of the bay. I cut small blocks for where they meet in the center.
This gives me a few more inches of clearance for the ceiling.
crude representation I just did...
I've been tooling away at different parts of this project -
More work around plumbing to add layers between the joists. I've really focussed on making sure I have a tight seal on everything I put up. There have been some not so perfect fits like around the ventpipe (4'' pvc) where I've had to come back for another touchup with the calking before putting another layer up and there have been pin holes on either side of the rod/drywall that I've had to redo or touch up.
Conserving space
We have a lot of things in our basement from my workshop tools, fooz ball table, band equipment, stove, beer fridge, scrap wood, more tools, more tools etc...
I've been trying to find ways to organize so anything that isn't essential to this project and area has either been packed up or moved to a different part of the house.
The Bench
When we had our first look at this house, this was a "DING DING DING DING!!!" moment in my consideration. There were workbenches around most of the parimeter of the foundation and it had electric wired in for utility work. It's 3/4 mdf and a pressed laminate top. The original owners were old folks and they did arts and crafts woodworking.
This utility was great for me because I have always done woodworking and it has served me well. Having to demolish this part of the room has been a big thing for me when I consider this... I guess it's making this project more of a reality to me. Anyway, I took one section of it down last night.
I'm burning it in the stove (along with my split oak and maple to suppliment) here as I type. "Die Die Die!!!"
This is where it used to be....
Isolation Work
All strips between the joists have been put up aside from three sections. These have plumbing in them and I've got to put some special attention in around these spots. I've put this off in effort to get easier work I can get done in bulk (which also gets rid of the rolls of insulation I have kicking around down there - more space!)
Next week I'll be cutting into the pvc septic pipe. I've mentioned this earlier, but the shower trap will be raised to be within the floor joist and flow toward the foundation wall and then turn to flow outside of the room to join in with the main. This will also cut down on the length the main needs to protrude into this room's ceiling.
Deck Work -
All areas in between floor joists, against the floorboards have been sealed up with drywall, mdf and calking. As I was contemplating how to utilize the scrap wood from my workbench, I realized that the counter top to it was made from MDF and subsequently cut it up to fit in the remaining sections in need of more work.
After doing work with caulking on all these sections, I put up the remaining bats of insulation. With the pink stuff hanging up there it sounds a bit like walking into our closet...
Plumbing -
I'm stopping by the local hardware store today to get pvc peices. The laundry list here is -
-------------------------
12' - 1.5'' pvc
2, 45° long sweep peices.
T-Y connector from 1.5'' to 4'' (connects to the main)
-------------------------
Then it's a matter of scheduling a saturday with a huge family dinner so I can get more hands in on getting the framing done.
Wall Frame -
I'll be doing framing for the walls starting in one week (hopefully).
Relevant thread to what I am going to do with one side of my center beam - meaning the side with no pipes so I can put ceiling joists up inside the joists of the 1st floor.
http://www.johnlsayers.com/phpBB2/viewt ... c&start=15
Knightly's post of how to manage a basement ceiling height is where my aim is on this side. RCIS clips and using the wals built up to within a half inch of the joists above. This is only one side of the basement. I will be using a different method on the other side which contains piping (I think..)
Insulation contact with the layers of the ceiling -
This was a question I had; I am putting r30 in the floor joists above head. This is quite thick and takes the entire joist height.
I am putting the ceiling joists within or in between the ceiling joists for one section of the basement room.
My question - is it bad to have these ceiling joists pushing upon the insulation I have within the floor joists? My naive suspiscion was that this was a form of contact between the layers, but terminology on the site indicates that insulation can be considered "air" in the MAM principle...
I found that Knightfly addressed this in his post in reply:
http://www.johnlsayers.com/phpBB2/viewt ... insulation
quote from thread:
knightfly wrote:
You should have insulation batts in snug contact with BOTH upper and lower ceiling surfaces for best isolation - this damps each panel to minimise any ringing, and further disperses sound within the barrier.
Started Framing Today -
Myself and my brother started this morning on doing the framing work. My day started with picking through a pile of hockey sticks to find straight 2x4's at the local home depot. But after that things got a bit better.
We framed the walls on all sides of the basement walls. We have not done the wall that opens to the rest of the basement. This wall will be against the stairwell and will be a double wall assembly.
We used a hilti gun to fasten pressure treated 2x4 lengths to the basement floor, being careful not to interrupt the basement drainage system around the parimeter.
The heights of the walls were tricky because the basement floor was off a bit, which just meant that we had to have different stud measurements for the frame as it went along the wall.
We fastenned the walls as a temporary measure to the basement wall with crude scrapped 2x4 peices. This will be done with clips from mason industries (which I have to get on the ball and order...).
Windows are nearly framed in. I have some work to do in framing around the pump assembly of the basement drainage system. I will likely get most of that done tomorrow.
PLUMBING - I was looking forward to getting that trap from the tub in the above bathroom switched to run in between the joist and along the wall to go out the room. Much better now with less interruption in the ceiling of the room.
Tomorrow I hope to get most all of the remaining framing work done.
If that is a vapor barrier between the concrete wall and new framing (picture: 2007_12_7 018.jpg) I believe this is on the wrong side. Once you insulate, the plastic will be between the insulation and concrete. I did the same thing and Rod pointed out that is needs to be on the "warm" side of the wall because otherwise, condensation will happen on both sides - and this can damage your rock.
I ripped it out and had to insulate - THEN installed the plastic against the studs. So to simplify, you frame, insulate, then put up the plastic, and then rock.
Hope this helps.
Brad, thanks for taking a look here.
My aim (and yours may have been the same) was to keep the moisture from the wall out of the insulation and framing. I can see that moisture changes will exist in the setup now against the drywall, but wonder about putting another vapor barrier to have protection on the backside of the wall board and the foundation to keep it from the frame and insulation.. Or is this un necessary?
I will read your thread and ask around. But again, thanks!
Second day of framing. There have been two framing issues which occurred where I was working on something else to speed things up and my brother was going along with what he does best in framing up people's basement rooms, started in on a corner and had the external frame for the second wall in the double wall frame (non foundation - remember, three foundations, one double wall for the room...) touching at the corner.
We worked through to a point where the next move needed supplies (more pt wood) and we were coming up on the end of the time we had so I think we've set a time for after hours on this wednesday..
But as a list of things done today:
- One wall for the box/closet containing the basement drainage system pump. The second wall still needs to be constructed. I need to plan out how large I need to have this openning for utility access.
- 2 Layers of external facing wall board 5/8 against the stairs.
- 1, 1x12 trim pine peice as a molding board for the stairs. I put a 45 bevel route on the top corner to make it look nicer. This will be painted.
- Frame for this wall extending to support beam / lolly column.
- - I will be boxing this pole in because the wall is interrupted by the beam where it is inline with the stairs/molding/drywall layers...
- continued the both sides of the basement foundation walls to meet up with the 4th wall.
A note on framing the wall adjoining the stairs.
I had drawn this out and presented it to my brother about how I'd like it done and we did something I wound't have thought to do on my own, which was -
-- Nail the molding to the stringer of the stairs after the angles are cut to meet it up with the edges nicely.
-- Screw the externail facing layer of 5/8 drywall to the molding which has been screwed into the stringer.
-- Put the second layer of drywall against the drywall with longer screws to hit the molding peice. And keep it all in place.
------ While doing all of this, being gentle with the drywall sitting there with a temporary fastenning to the stringer.
- THEN using a level and plotting it out correctly, nail the pressure treated baseplate to the concrete floor.
- assemble the frame with the top plate and studs (so you can nail down through to the studs marked out)
- put it in place and nail to the bottom plate.
- level vertical and horizontal measurements and then nail to the floor joists above. (remember, this is the external wall.
We were going to frame around the door, but I left that in a storage area which is only accessible through a room someone special was sleeping in, so we held off on that work as well.
Pictures that detail some of what I speak of are in here...
Other stuff -
Caulking around the edges of the drywall against the pole.
Caulking against the edges of the drywall against the foundation and heating pipe.
The stub peice of 2x4 floating against the drywall in between studs was put there to pull in the seam which is above the stairs on the other side.