Here you can see how I painted the walls. I used pale creamy yellow for the base coat and then sponged on a slightly darker color. I painted the ceiling white. Because the space doesn't have much natural light I wanted it to feel light. You can also see some of the trim at I am currently putting up.
I am starting on my doors and I wanted to run my plans by you guys and make sure I’m not doing anything stupid. I have air locks between all of my rooms so I’m just using single doors.
The doors I am using are 1 3/8” sold core interior doors. I plan on adding a layer of 5/8 plywood. I’m mounting them on huge ball bearing hinges. I’m not using a lead sheet as I have some weight concerns.
I am using GM Trunk rubber for the two seals around the doors. I’m not planning on using magnetic seals as I’m quickly running out of money and I want the doorways to be as wide as possible. If I feel I need them later on I’ll add them.
I was originally thinking I wouldn’t use thresholds and just use drop seals as I really want to avoid have anything to trip over or lift rolling gear over. I compromised by ordering the pemko 2005 threshold because its only 1/2" tall, is wheelchair approved, and looks like it would be easy to roll stuff over. BTW I got an incredible deal off ebay for the thresholds. They are solid brass and normally sell for $81 a foot but I got 4 off ebay for $40 with free shipping :D (see pic). I may need to change out the seals as they didn't come with the one they recommend for sound although they look similar. My question now is what is the best way to use it with the drop seals: fully-mortised, semi- mortised, or surface mounted? (see pics)
I am using LCN 4041 door closers. I am planning on not using door latches and just using surface mounted push/pull handles. My doors have no holes cut for handles as back when I bought them (long ago) people were recommending against using latches but I know Rod recommends using them in his book. Do I need them or can I just use the door closer?
What is the best way for the side seals and the top seal to meet? Is it better to have them meet at a 90 or a 45 degree angle?
Thanks for any help or advice you guys can give.
I have been hard at work on my doors and I have 7 of them so it's taking a while. I'll post some pictures soon.
If my door stops don't go all the way to the edge of my door jambs is that going hurt my isolation?
All of the electrical other than the mini splits is in. I used isolated ground 20amp receptacles through out to go along with my star grounding system. I put outlets behind where my 5.1 soffits will be for my powered monitors. They are attached to 2 on/off switches one for the L/R and one for the C/Ls/Rs speakers. For lights I used line level track lighting so I can use energy efficient compact fluorescents. I didn’t use faders but in my control room and studio A I have two sets of lights each on their own switch so I can have two brightness settings. I put in about 30 keystone RJ-45 jacks. These will be used for networking, phone, Isdn, and a Hear Back cue system. Each room also has coax and RGB outlets.
This is a 1 ¾” door I got from a salvage yard. I striped the finish off the face that will be seen and filled the door knob hole with wood filler. I then glued a sheet of ¾ birch plywood to the face leaving 1” on the sides and top. Most of the doors I am making will be 1 3/8” doors with ¾” in plywood but this one is going on my live room and I wanted it to be a little bit beefier.
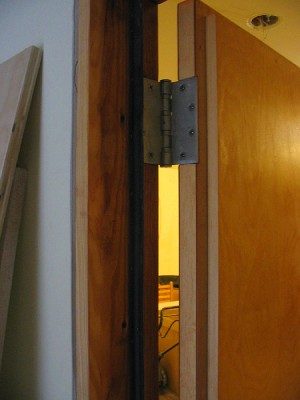
For the door frames I’m using 1” (5/4) pine stock. I measured out where I want the hinges to go then I routed them out using a template I made. The hinges are 5” x 4.5" heavy duty Stanley ball bearing hinges. They are reversible by flipping the flush tips and pins. My understanding is that the pin should point down and the side with the most knuckles should attach to the jamb.
Like everything else in the studio the doors are taking me a lot longer than I thought they would. I have managed to get 3 doors hung. I still have to do the stops and hardware (not mention four more doors sigh). They do look good and after a lot of work they fit fairly tightly. I made sure the door frame fit the rough opening very tightly so that the door is well supported. Even without any seals they block a lot of sound.
I am ordering my glass this week and I have a couple of questions. First I want to make sure I am getting the right thickness. My walls have a layer of 1/2" and a layer 5/8" drywall on each side(4.725 psf) So I plan on getting a sheet of 3/8” and a sheet of 1/2" annealed glass for each window. Does that look correct? Second, I am trying to decide if I should angle my glass or not. Because my walls are fairly close together (one is very close) it seems like parallel would be best for sound. Plus it seems like angled would be a lot harder to build. What I am worried about is the reflections in the glass (visual). Will I still be able to see my clients through the glass? You guys that have done your glass parallel can you see through it alright?
Always the room that has more light is easier to see from the other side, so make sure you lighs are somehow equal on your rooms. If it happen to have a low light for the recording room, the singer will see you very well but you will see a lot of your control room reflections on your side. Somehow laminated glass acts like a "polarized" glass
The walls for my window between the Vocal booth and control room are very close together. Even if I only angle the glass on the control room side the glass will only be about 5" apart at the closest part. Would it still be worth angling? I can get about 9" apart if I do them parallel.
Would it be ok to use 3/4" plywood for my stops? That is what I'm using for my slats and it would be nice if it matched. If I only angled the glass a little would that sill help with visual reflections? Thanks for the help John.
I would not use plywood for a stop. You need a hardwood to stand up to time for something like that. Plywood would not stay true once the expansion and contraction of heat and cool starts in, plus humidity would take its toll I think.
I point you to my thread where I did a bit of photos on the glass. We have a similar wall construction. I did have the advantage of using a bunch of pews for the wood frames and stops (solid oak!) and am still using the pews for all sorts of wood details.
viewtopic.php?f=2&t=10533&start=30
-ashley
I'm curious about your decision to angle your glass horizontally instead of vertically. The way you did it seems like it would be a little easier. How are your reflections?
I thought plywood was more stable than solid wood. The stuff i would use is 3/4" cabinet grade with a maple veneer.
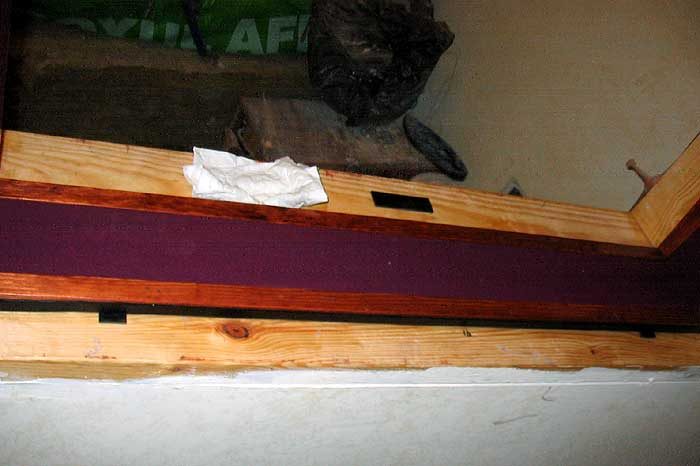
I am getting started on the windows. So far I have the stops ready for one window. I'm going to get the glass at the end of the week. I ended up using 4/4 pine stock for the stops. For my larger window I angeled both sides 3 degrees which put the pane about 6" apart at the bottom. Not sure how I'm going to do the other window yet.
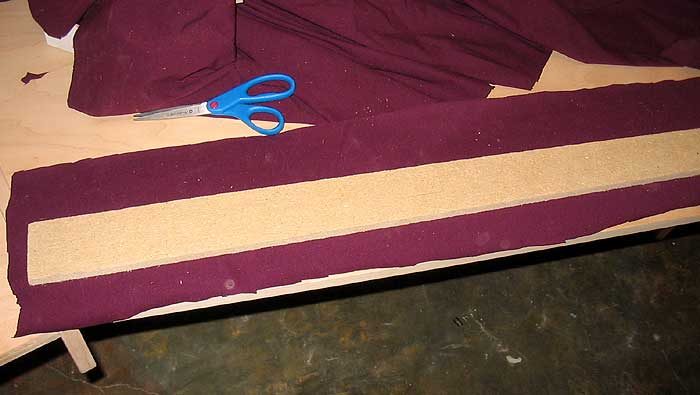
I'm also working on getting my first layer of door seals up. I started by stapling the trunk rubber to the frame. I tried to do the first door alone and it was tricky. It is really a lot easier with 2 people. I put a staple every 3". I used a my table saw to cut a slot in the stops that will fit over the seals and hopefully lock the stops into place. I am debating putting a small about of acoustical caulk in the slot when I install them.
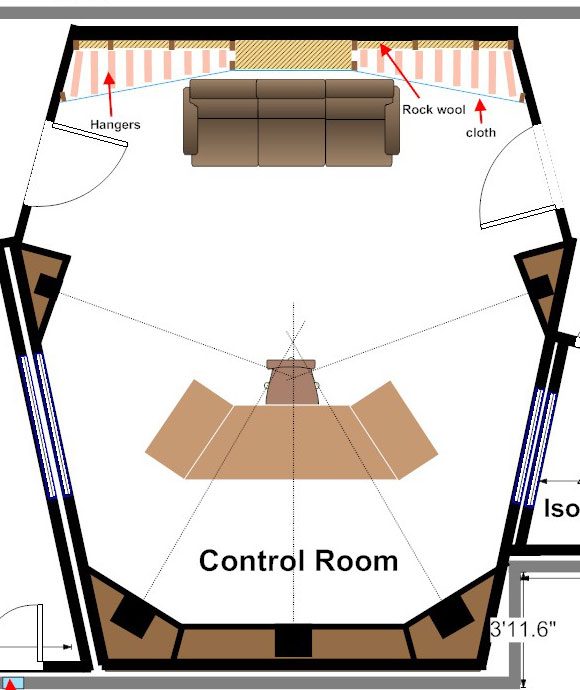
I am getting close to working on my acoustical treatment for the rear of my control room. I need to do this soon as my mini split will be mounted on this wall. I’m thinking most of the wall will be have a cloth front except where the mini split is mounted. My plan is to line the back wall with a layer of 3” mineral wool. On each side I will have hangers and in the middle I will have a 1’x4’ super chunk trap. Does this look like a good plan?
Hai Jester, update's looking cool!
About the wall aborber; seems like a plan. You might wanna skip the superchunk and use hangers all over.
IF there was any superchunk to be used, I'd put'm in the corners... but that's more a gut-feeling approach. you see the whole superchunk vs hangers comparison is still in debate (afaik). I know John's a fan of Hangers, while I'm a superchunk lover. The latter is more expensive tho..
the couch CAN be a part of your absorbing back-wall too. (depends on the construction of the couch itself)
Yeah I realize there is a lot of debate about hangers and not much testing data to back them up. Sill i'm going to give them a go though as it seems like a lot of other people have used them with good results. As I see it the advantage of hangers over super chunks is that they use a lot less insulation. I am running a bit low on funds at this point so anything I can do to save some dosh is helpful. I am going to make my cloth screens removable so I can make the corners into superchunks later if I need to.
I wanted to post a quick update as my windows are finally in!
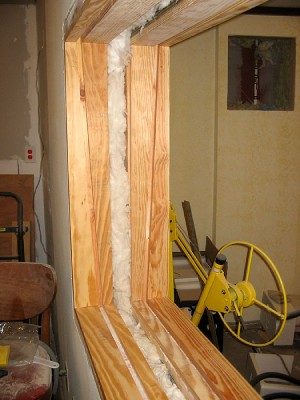
For the gap between the window frames I bought some Celotex which I wrapped in cloth. I attached it using construction glue on one side of the frame. I also added some silica gel packs between the windows in case there is ever any moisture. Speaking of moisture we had a huge rain storm and some water came up through the floor in the control room. The studio has been very dry up to this point but now I am worried about moisture problems. I’m going to look at what it would take to install a sump pump. Anyway it is something I am going to have to research so back to the windows. I had the company I bought the glass from install it. I made sure they installed it using the method in Rods book. They used 2 setting blocks on each window, butyl tape on the stops, and caulk around the perimeter. They had some trouble getting the butyl tape to stick to the wood stops and on one sheet of glass the tape moved a little as they were putting it in so the now you can see the tape sticking up in two corners. It looks like the glass still has a good seal and it’s really not that noticeable. I am going to leave how it is as it would really be a pain to remove the glass at this point. The other 3 sheets went in perfectly. It looks really good! Even though the doors only have one set of seals and no seals at the bottom yet I can still only barely hear someone shouting in the other rooms.