Well, hello fellow forum dwellers. I, too, get to finally start building my studio here in the basement of a church in Newport, KY. Here's the link to the design thread for reference:
viewtopic.php?t=9159&postdays=0&postorder=asc&highlight=audio+grotto&start=0
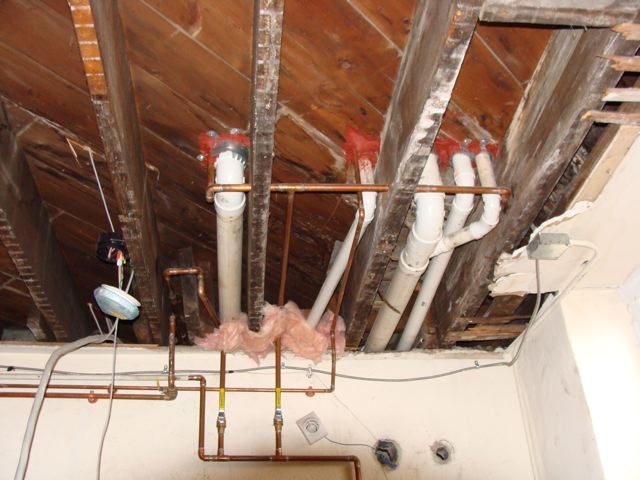
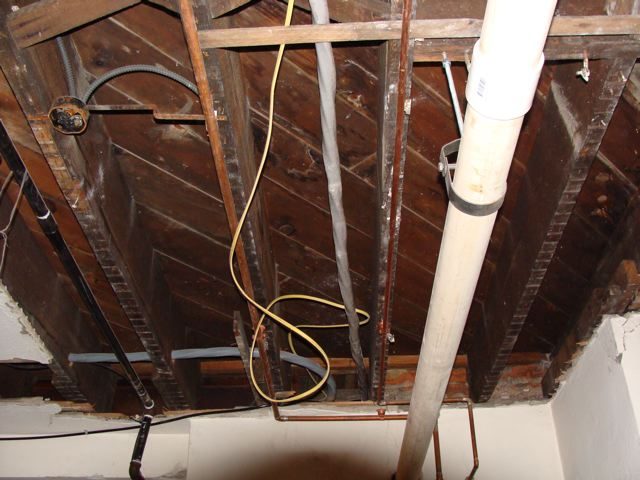
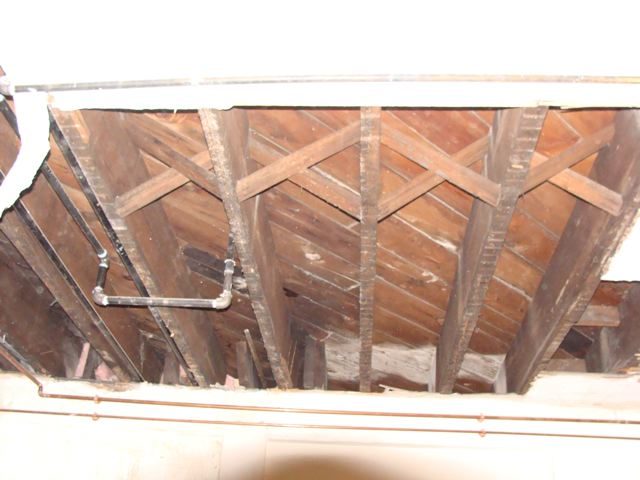
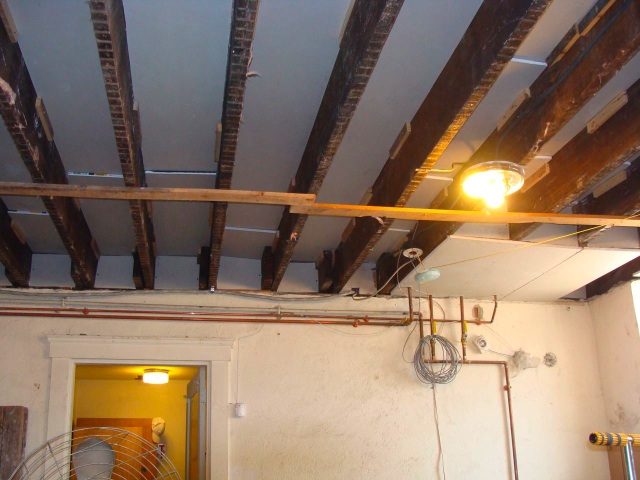
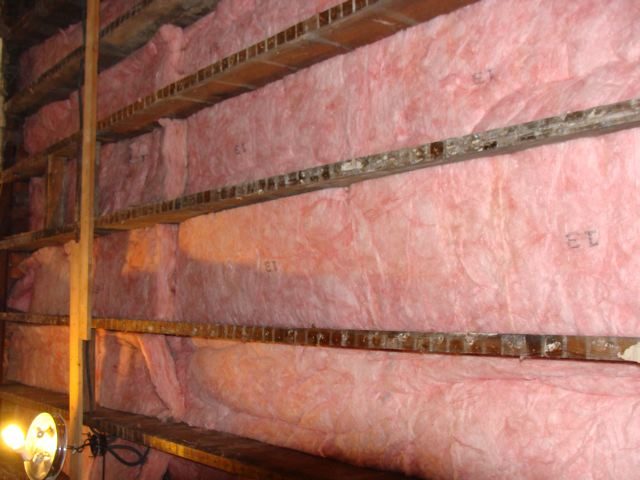
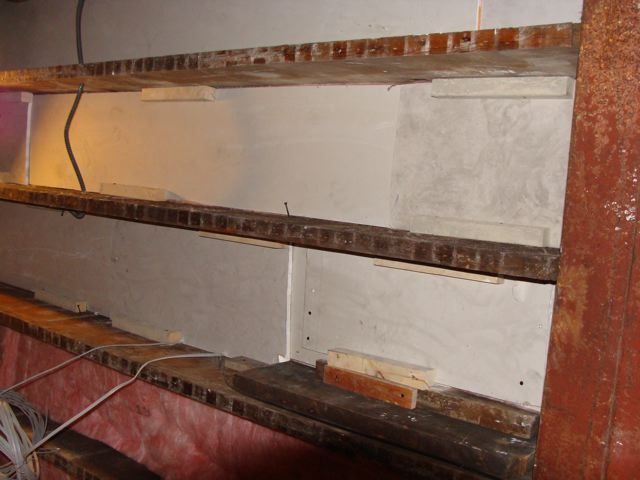
We have spent several weeks with the demo of the existing ceiling and then placing drywall up in between the joists to beef up the upper layer. The beef up layer proved to be problematic since we had all sorts of nails, blocks, pipes, wires and anything else you can imagine up there blocking the drywall from sitting flush on the subfloor above. A compromise was needed. I have to put up batts of R13 and then press the drywall up as far as possible. We blocked up that layer and doubled up on each seam with another piece of drywall. Its all been caulked and the improvement in TL to the upstairs apartment is already apparent. I just notice the difference upstairs when they are running the saw downstairs. This is good! :P
Now I know that this creates a form of third leaf in the MAM system by putting the R13 batts in there but there would have been air gaps anyhow since all the nails and other imperfections in the joist bays would prevent the drywall from being flush up against the subfloor. There were so many gaps in the subfloor and in some areas, holes up into the upstairs walls that even this single sealed layer of drywall really helps more than hinders as far as I can tell now.
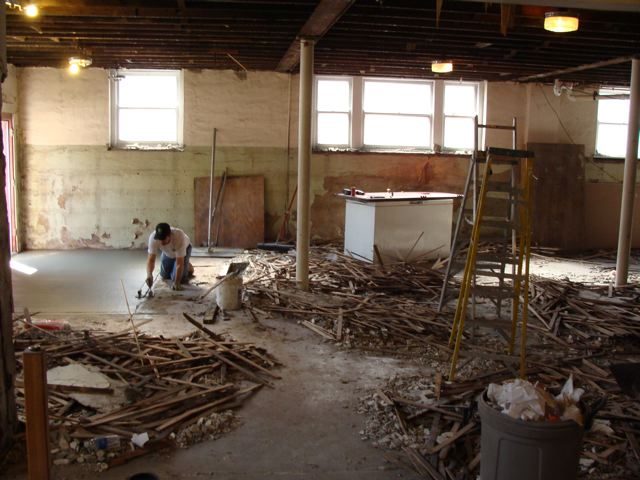
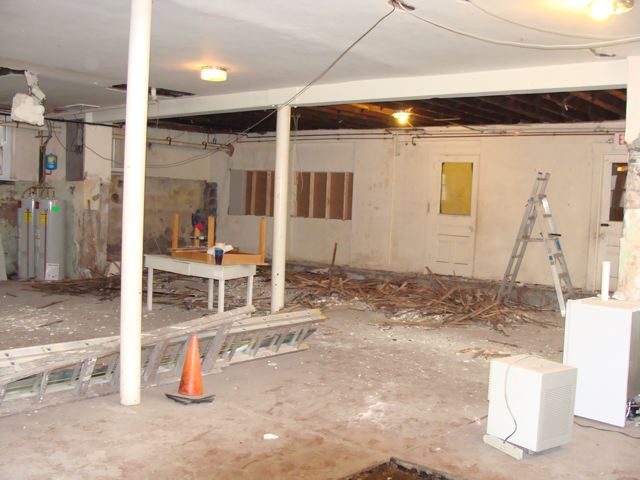
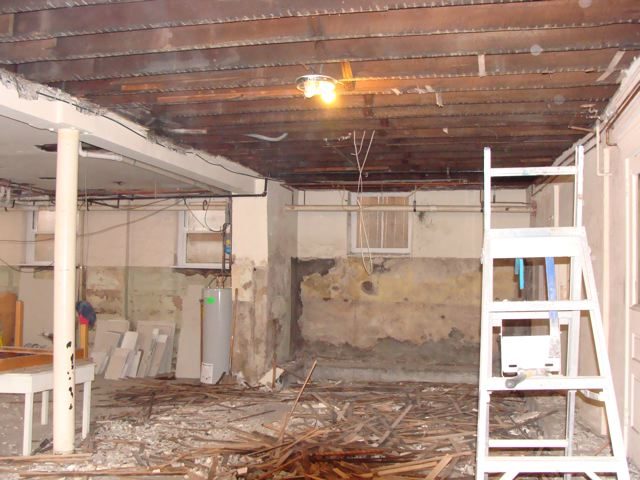
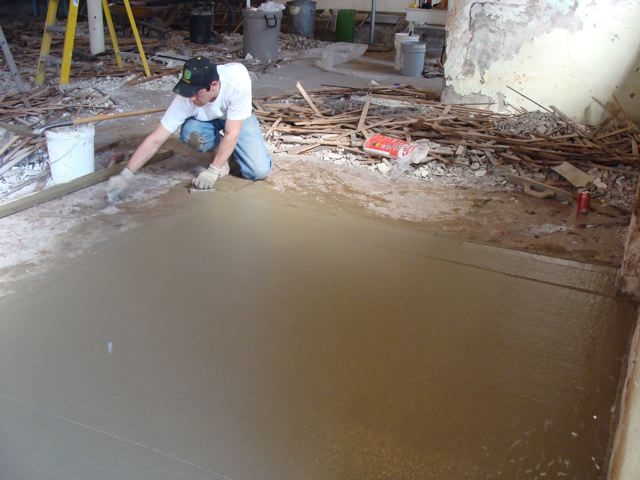
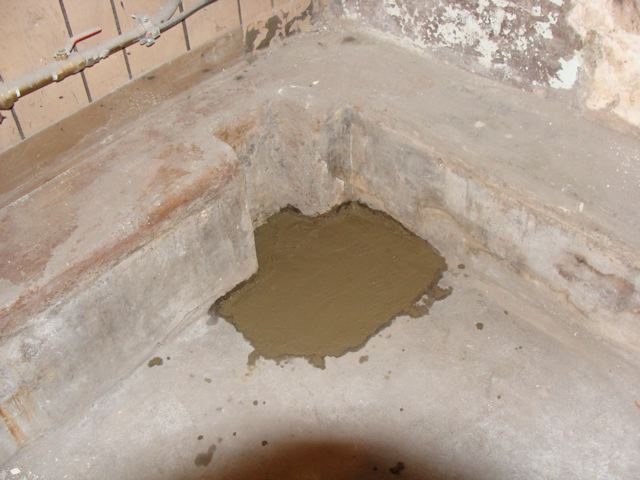
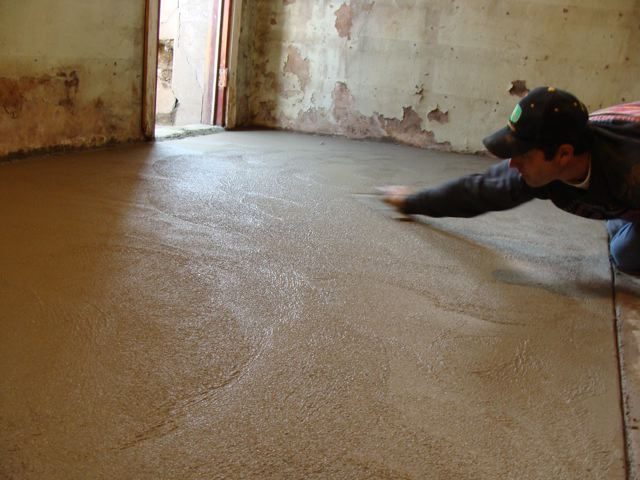
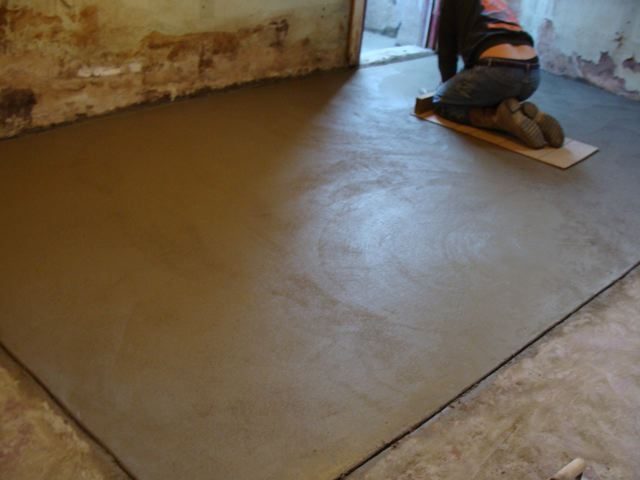
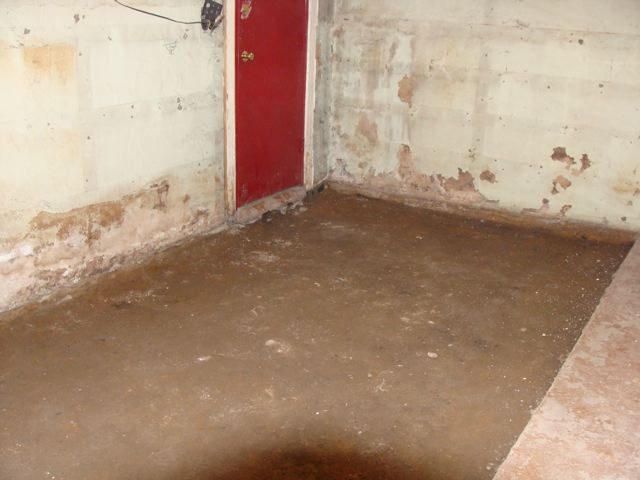
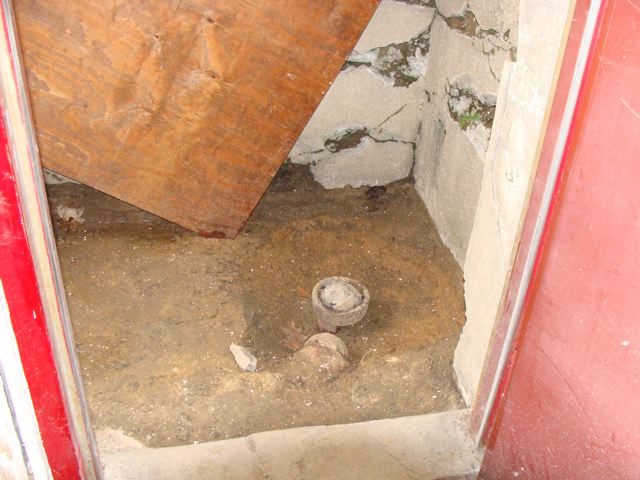
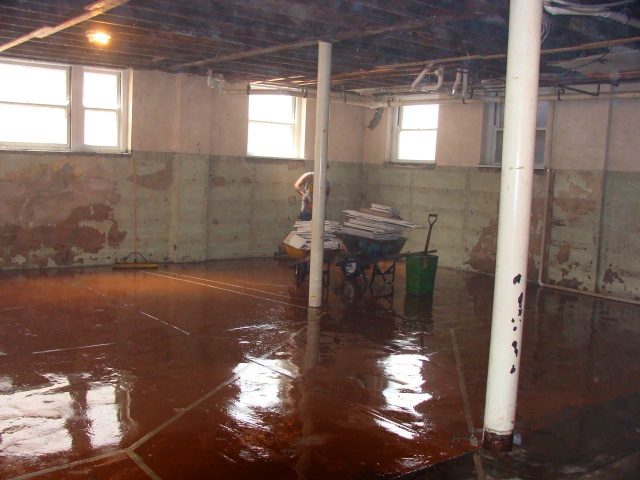
Pics or it didn't happen, right?? Of course, there are not in the right order, but just see how much crap comes down when you drop a plaster ceiling!!! Oh, yea, we had to re-pour part of the slab since it had some minor water damage from an overflowing drain. More on that to come....
-bassman
Hail Bassman!
That sure looks like a great space to remoddel into a studio :)
Can't wait to see what you cook up there.
all the luck with your project!
Thanks, Ro. I need all the luck I can get!
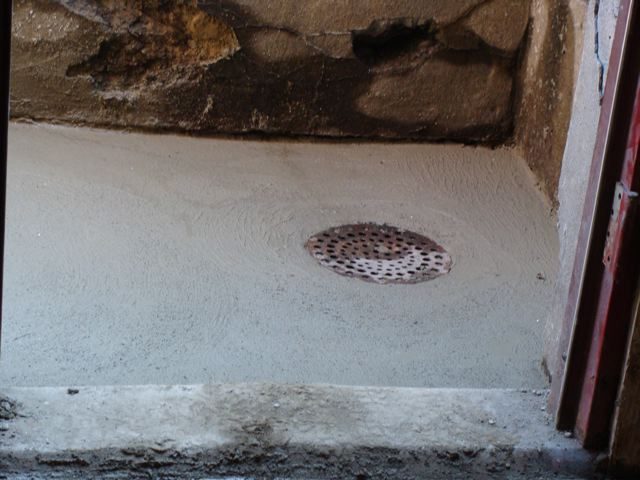
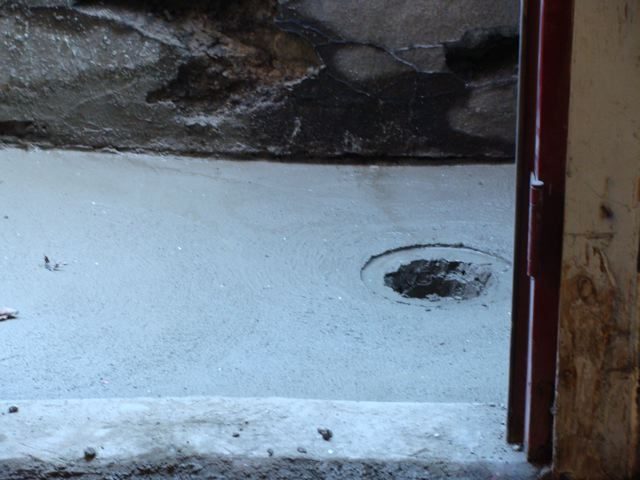
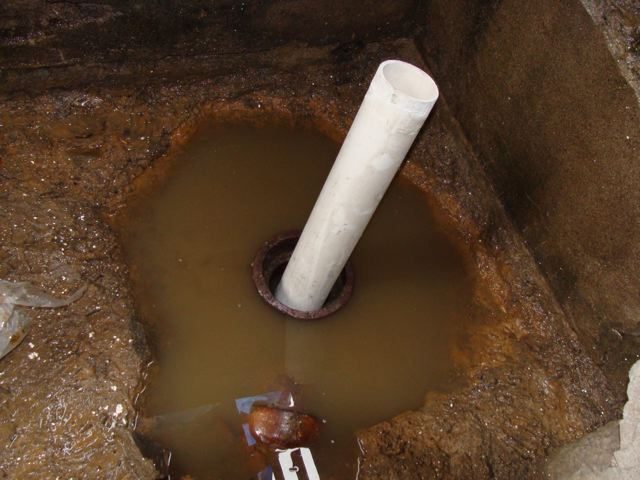
OK. Part of the basement floonr had cracked due to overflowing water from an outside drain. We had to repour that chunk and the outside area at the bottom of the stairs so this would not happen again... I had to create an inner lip for the drain so debris would gather there before going down the drain and clogging it. Now, I just clean out the lip and things work mucho better.
Here's the shots:
-bassman
Here's the prep area how it looked before the pour. I tried to get pics during the pour but sheesh, that is a load of work, so didn't have a chance till after it was poured.
-bassman
Right then! More progress....
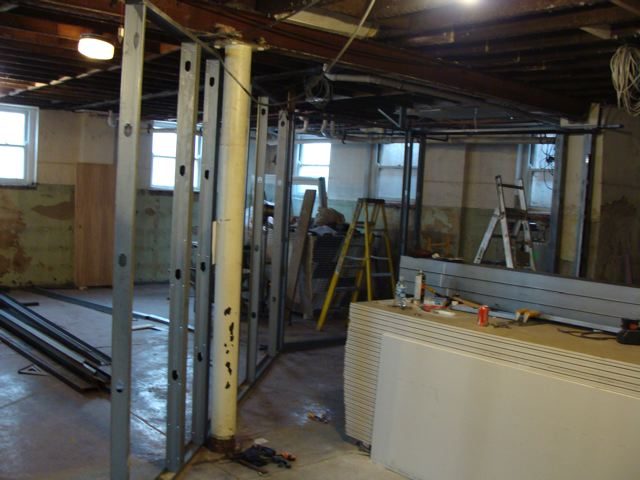
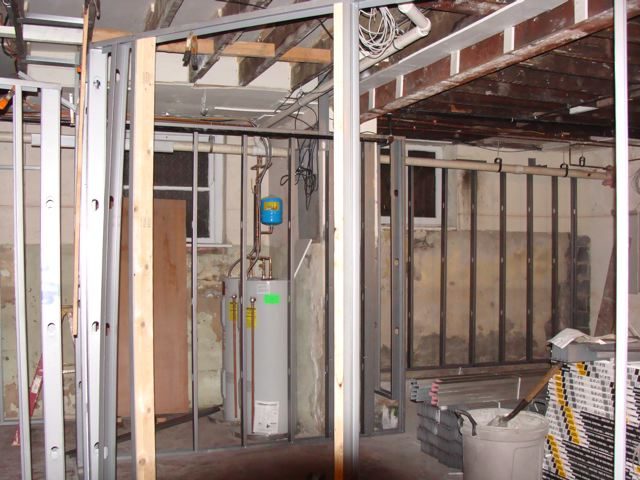
We have a bunch of walls up and its got me a bit excited to actually see the design get born! We are using steel framing and I must say, I like it! Its always straight and its easy to change/alter things after its in. Some of the leveling of things would be damn near impossible with wood. Plus, we would be wasting a whole lot of material in cutoffs and such. Anyhow, onto some piccies!
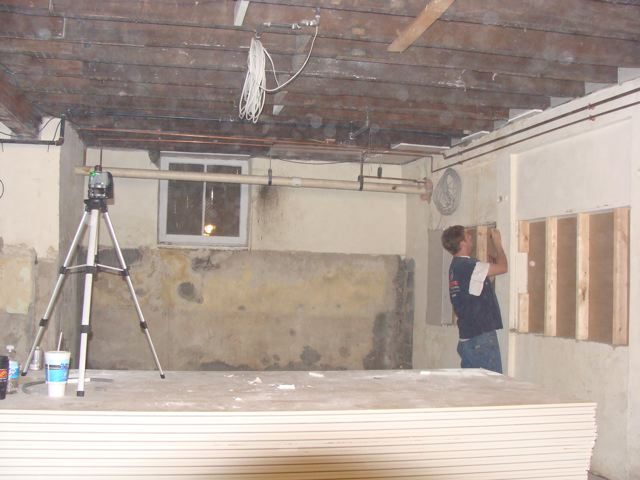
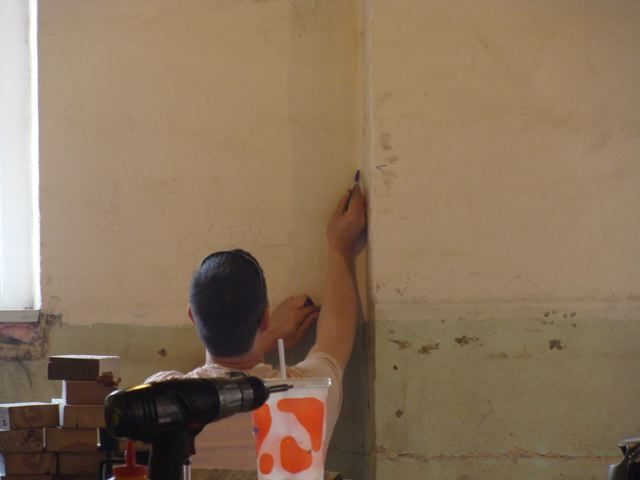
We used a cheap spinning laser to get our reference line up on the wall. I took it straight back to Home Depot as the laser was not really bright enough to bother keeping it. It did get the job done though after going through some walls, it appears that it gets around 1/4" off over 20-30'. Whatever, it worked for starters....
There's some shots of using the laser and marking things and then the first piece of track getting shot down with a ram set. We actually switched to using drive pins since there is a bit of foam sill seal under the plate that was causing the ramsets to blow right through the 20 gauge steel!
Still more to come....
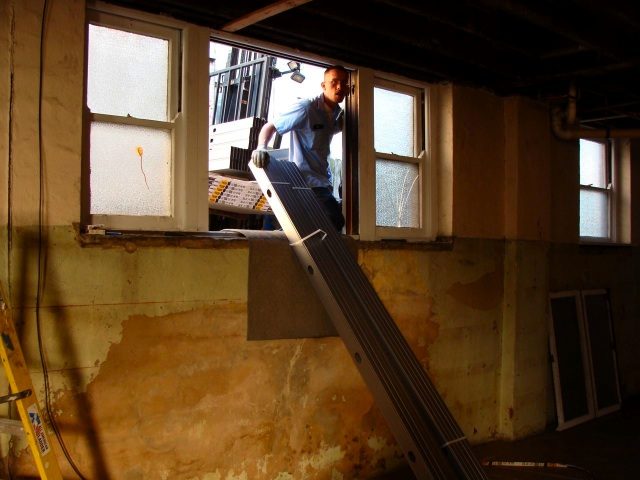
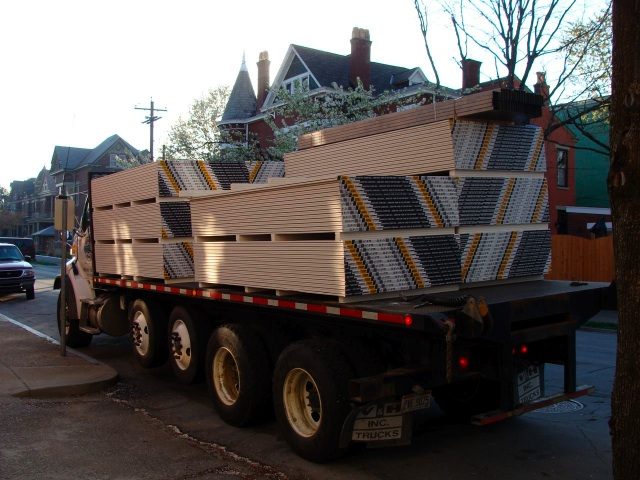
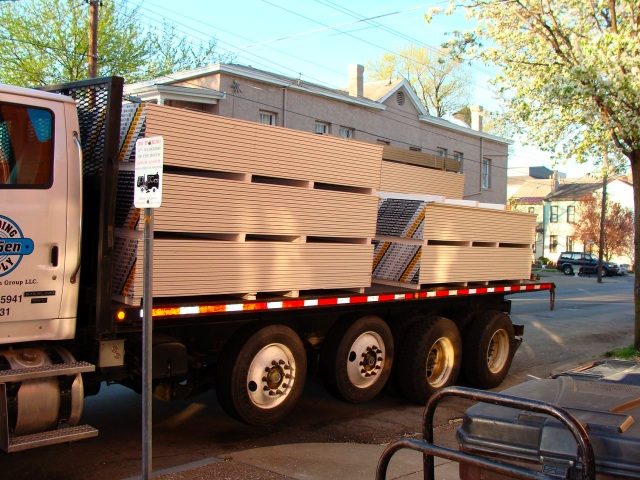
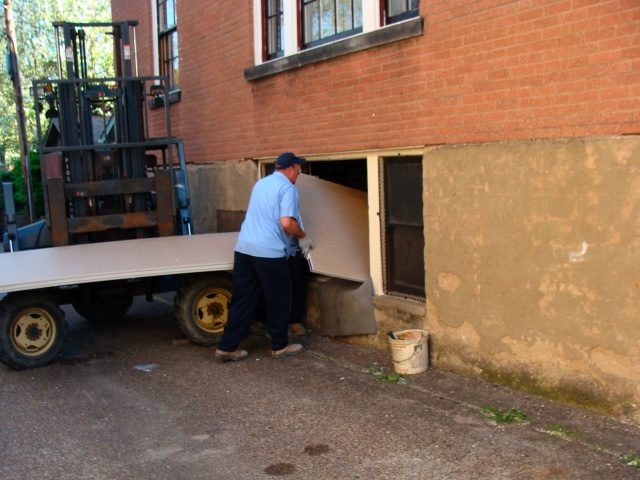
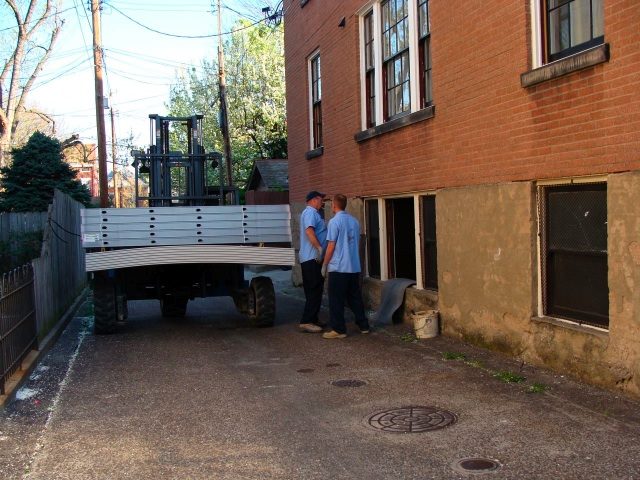
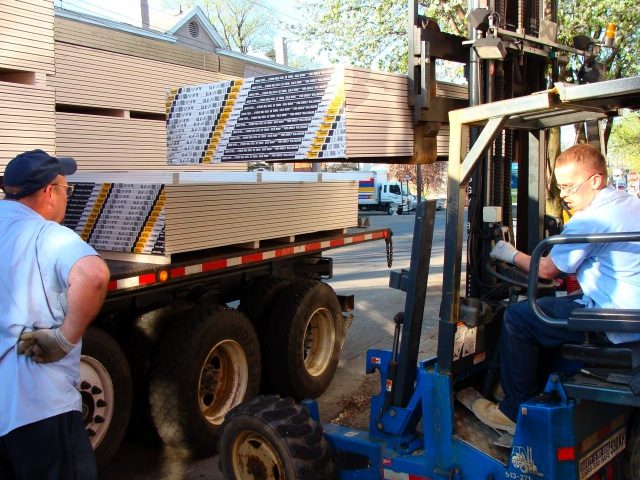
WAIT!!! I'm way ahead of myself..... Here's the truck delivering the 300 sheets of 5/8" rock and the metal framing through the window. Worked like a peach.
Next, you can see what we had to do on our build up layer. There were so many imperfections in the subfloor above that we have to put R13 batts up there first otherwise, you couldn't press up the drywall and get it flush. I'm not sure how this will affect us in terms of third leaf effect, but there was not much choice. Now that its all in and caulked, it does make a difference in the amount of noise going between floors. I still hear footfall noise but airborne noise from upstairs is lessened.
The upper layer is as follows:
-pine hardwood flooring.
-tongue and groove subflooring that has a great deal of gaps between the boards, definitely not airtight at all!
-Our R13 batts
-one layer of 5/8"
-caulked everywhere (5 cases of the USG variety)
-bassman
guess I only get 5 pics per post.....
here's the track shooting down and stuff
We had to clean the floor before the gyp came as this was the last chance to use the floor drain for this!
-bassman
:twisted:
I met with a local structural engineer regarding the ceiling spans, which get pretty large in the tracking room. I wanted all of the framing to be able to handle three layers if I need to. At the moment, only the big control room gets the third layer.
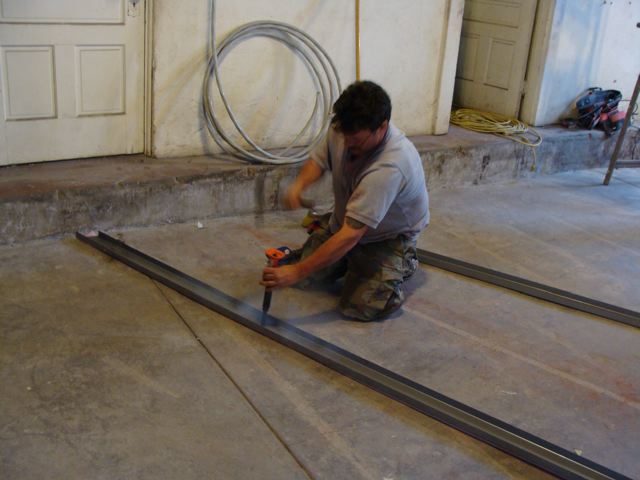
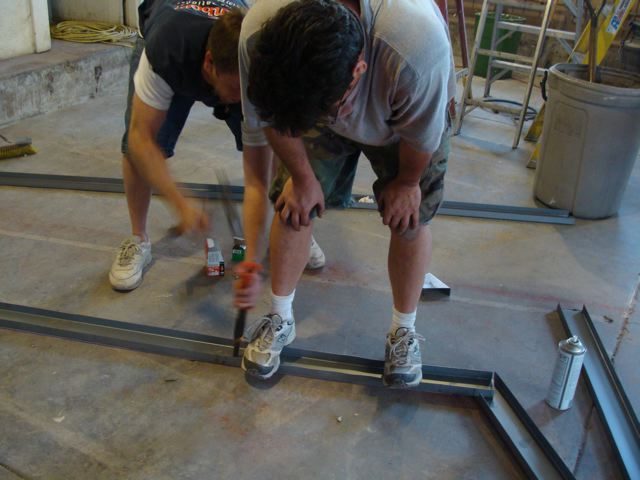
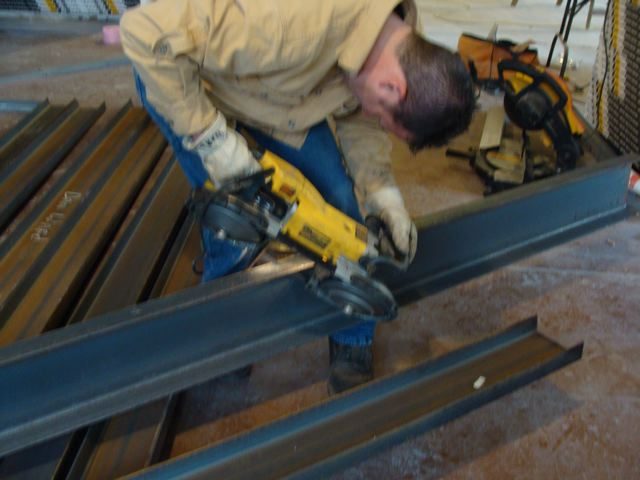
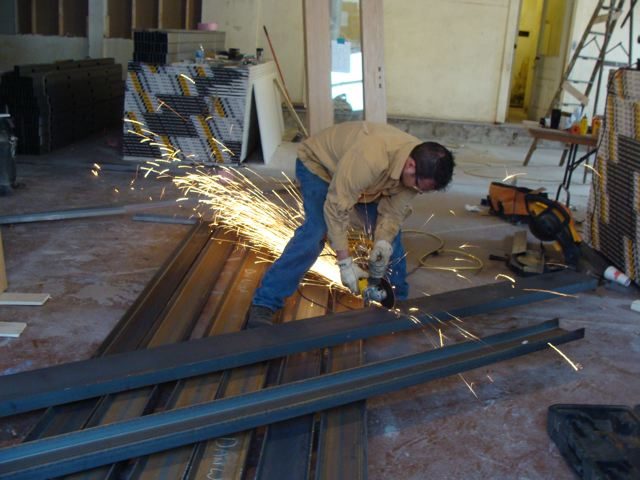
In any event, in order to cary that load across almost 20', we needed a beam. I could get 20 gauge or thicker metal 3 5/8" studs that will span 12' with three layers. The engineer specified structural steel channel, the lightest weight they make, to use as beams. just so happens that one of my neighbors up the street is a top notch steel craftsman, so he hooked me up!
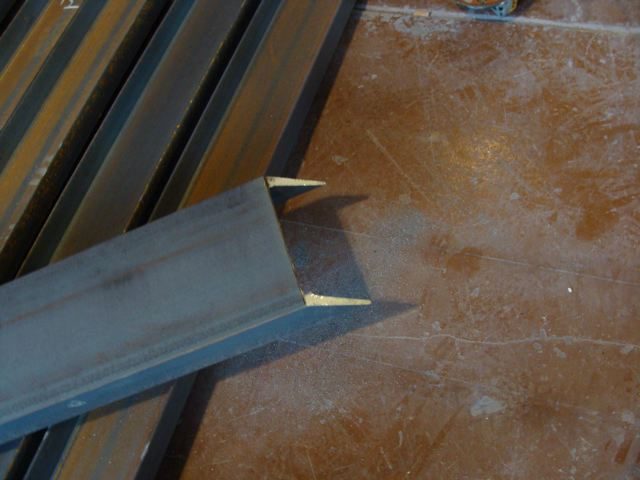
Here he is cutting the beams onsite to the length needed. they come in 20' or 30' lengths from the forge and then we cut them down. These things are BEEFY!!! It will be overkill but that's the way (un huh), I like it!
The last pic shows the big 8" beam that was cut at an angle to match the wall. Try mounting that on the front of your pickup!!! road warrior...
:evil::evil::twisted:
piccies....
-bassman
Awesome start bassman! :D:D
I would so love to have been a 'fly on the wall' to see your neighbors faces peeking through their windows when that dry-wall lorry turned up! :lol::lol:
Classic! :wink:
Take care dude, and best of luck with your build.
I remember those sort of pics like they were last August! :wink::wink:
Kind regards,
Lou. 8)
(PS - Any chance of a re-size on a couple of those shots?) :wink:
yea, the truck was a real hoot! It showed up at like 7:30am and I got a call. Had to run down and get the place open for them to bring it in.
-bassman
gyp truck supplemental:
More framing:
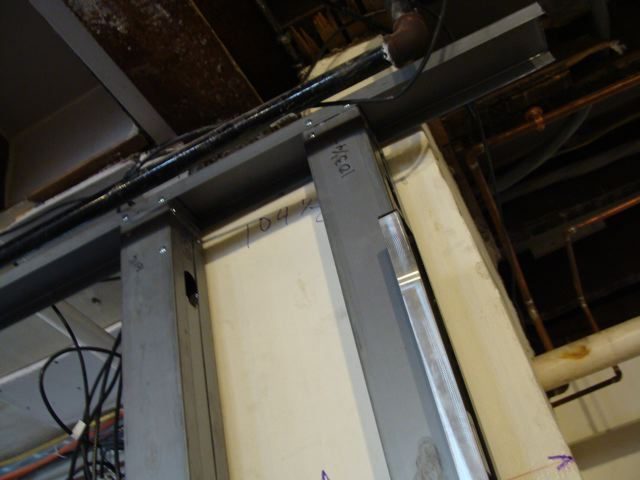
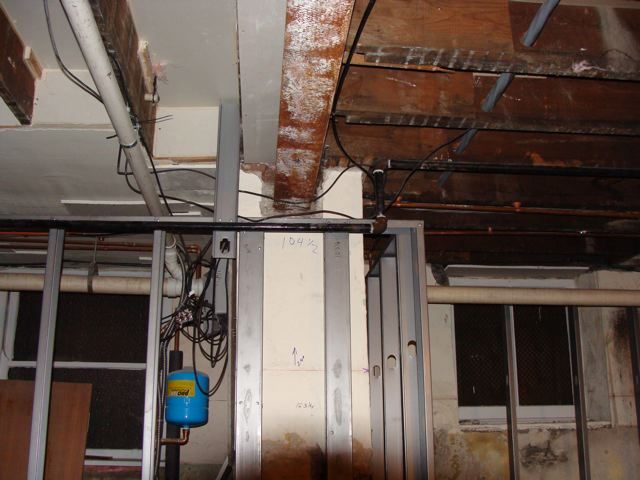
We are using 20 gauge steel studs and track. When you combine two studs and wrap them in two pieces of track, it makes a beam that can be used as a window or door header. We are also using them as vertical posts wherever the steel beams bear down on the wall.
You can see two of the posts, one on either side of the original steel beam, where our two new beams will go in order to span across the existing beam. Confusing enough for ya?? Me too. This has all taken quite a bit of head scratching to figure out but we are on the way...
The bracing you see connecting the new frame to the above floor joists is temporary..... it would not be good to leave it!!! :?
-bassman
Well, its been quite a while since I've posted on my progress here..... So many things going on. Several personal issues have kept me from having the free time to post more and then we went on family vacation... I hate vacation in the middle of a build project!!!!! All I could do was think of what I should be doing back on the studio build!!! Oh well, beer and sun kinda helps that....
None-the-less, progress has continued and we are closing in on insulation and drywall!!!
Framing is all but complete. We are putting in door frames, glass block windows, and starting on studio wiring. The subpanel has been installed along with all the electric including many "home runs" using 4-conductor MC wire with an isolated ground wire for use on the hospital grade iso-ground outlets.
Holy crap is metal expensive!!!!! :evil::evil::shock:
There have been so many details covered during these weeks its hard for me to encapsulate. Let's see....
-Fire Blocking is a bitch in studio construction!!!! Trying not to couple framing together but still blocking fire paths! Thankfully the code guys are going easy on me!
-Door Frames are Complex, expensive and critical.
I have bought all my doors from a recycler that takes building supplies from property that is being demolished or from donations. I bought many fire-rated solid core doors for $35 each!!! But I digress..... These doors require rather heavy duty frames (jams) that are also well sealed. I bought pre-fab exterior MDF frames with milled slots and weather stripping kits that will seal the door quite well. We had to get special step bumper thresholds for the doors to seal into at the bottom. All total, around $180 a frame.
Still, price out a new fire rated solid core door..... $600!!!!! Oy.... :shock::shock::shock:
I did happen to snag a very special door that has sheet lead on both sides under the veneer along with some sort of loose punk-board (sound damp stuff) floating in the middle of the door sandwich. This freekin' thing weighs at least 400lbs!!!! We are making a custom jam from Douglas Fir 2x8s into a 2x6 rough frame. Beefy bearing hinges to give it a swing. This will go at the outside door leading to the stairwell. That seems to be the weakest link to the outer shell.
-Electric is expensive!!!! The MC cable is metal and godawful expensive. We used a whole bunch. I've got around $2500 in materials alone in the electric system. This includes a 100 amp subpanel with surge suppressed breaker on the main and additional surge suppressed breakers for each isolated ground circuit.
Here was something tricky: if I have five iso-ground outlets in one control room, how do you keep the star ground scheme without using five breakers in the panel? We are pigtailing the five home runs together in the panel and then to one breaker. The grounds and neutrals all go together on their buss bars and voila, star ground.
The subpanel has a four conductor wire going back to the main panel (don't ask how much that was!!!) where the main panel also has a four conductor (two phases, neutral, and ground) going outside to the service panel where the neutral and ground finally combine with the other two services in the building. Whew!!!!! I think we'll be fairly noise free.
We have left open the option to drive a new ground bar in right below the studio sub panel and drop our iso-ground right there. Noise tests after the install will determine if this is needed.
-Framing needs to be STRAIGHT!!! When putting in the ceilings, it was key to use a string line to keep these big rooms straight and true. The ceilings used 18 ga steel 2x4 joinsts and are rated to hold three layers of 5/8" across a 12' span. We are even over spec'ed since we went with 12" OC where the spans were greatest.
The metal framing has been great to work with. While its more expensive, we were able to have less scrap and make things more level and plum due to the ability to unscrew and re-screw the material together. Plus each piece is dead-nuts straight to begin with. Scrap pieces are more readily used later for braces, soffits and whatnot. Metal framing, thumbs up! :)
-HVAC OK, this has taken some serious head scratching and custom metalwork to get together and we're only about halfway as of today. We have most of the main trunks installed and the routes planned for each room's send and return. My evil plan has been to penetrate the rooms only at two points each, supply and return. Once the duct is inside the room (through a canvas connector) the duct size is doubled via a T connection into an inner soffit. From there, the duct travels out in two directions to large grills in the bottom of the soffit. This is how we are slowing the air down and providing another turn in the path. We also have canvas connectors at the air handler so noise transfer via the metal should be minimized. All duct is lined with 1" material.
We originally went with a 3-ton heatpump unit with electric coil backup heat. Since this is in a basement and heavily insulated for the sound, we're not expecting too much need in the way of heating. Super insulated and a warm apartment above too.... HOWEVER..... the issue at hand as per my calculations on the space is that the max demand for AC is around 52,000 BTU. This is well beyond the 3 ton capacity of 36,000 BTU.
BUT..... most of the time there will only be 2-3 people working in 2-3 rooms which won't require very much by comparison. Even a 3-ton unit would be overkill in that situation. Here's the rub: The 3-ton unit would run short duty cycles and not really de-humidify very well since it would cool the temperature down quickly.
SOLUTION: My HVAC contractor advised that we should go to a 4-ton 18 SEER system that uses two compressors, one operating at 2-ton capacity and the other at a full 4-ton. That's how they get the high efficiency rating..... run 2-ton until the full load is needed and then kick in the 4-ton. The result should be that most of the time the unit runs in 2-ton mode with a longer duty cycle that will better de-humidify the space and when we have a full band in there with both control rooms running full blast and the "posse" in the kitchen hanging out.... the 4-ton mode will kick in and we won't burn up in there.
Also, the 4-ton inner coil is much larger which will help de-humidify better. Geez..... this is getting long winded.....
-Studio Wiring
I've going with Gepco multi-core for the main mic wire. I debated Mogami and Canare star-quad material but the cost was simply beyond the budget realm. The Gepco is quite good and about 30% less. The cable has 26 shielded pairs and is about 1" in diameter. Sweet!
The plan is to bring 48 lines to each control room and then 24 lines to each recording room. All of these will congregate in the machine/CPU room and will be patchable to any other room. This keeps it versatile. I ended up needing around 350 feet of the 26 pair wire. Around $1700 alone!!!!
The rest of the wiring plan involves CAT5/6, Coax and several speaker lines for running guitar amps remotely in other rooms. The CAT5/6 can run many things including video, USB, headphones (I use the HearBack system), network, and just about anything else you can think of. Trying to keep it versatile..... CAT6 is now fairly cheap to run. I got 1000' for around $120. I'm bringing in 6-10 lines per room depending on the need.
The Coax can run Wordclock, SMPTE, Video Bi and Tri level sync, HD video via component (uses three coax), and even MADI if the need arises. Plus the wire is stupid cheap so I can run a bunch. At least 6 lines per room, 8 up to the main sanctuary.
There will be dedicated mic lines from the booths to each control room for the highest quality recording of vocals (less connections). The speaker wires are run all around so you can setup your amp head in the control room and your cabinet in any other room. I also use a Leslie for mixing and need remote control.... hehehehe evilness.... Love the Leslie!
On the main cable runs I'm using conduit with rope pulls so later I can add more if needed. The panels in the rooms are going to come from Redco.com, where i can customize things real easy, plus labelling!!!!
All the mic cabling will terminate in Elco 90 pin connectors in each room so that hooking stuff up is more modular. We will have a preamp rack that is mobile and can be hooked in either control room as needed. Again versatility is a major goal for me.
There's so much more, maybe if folks have questions once the piccies have been looked at, I can answer specifics..... I'll post more often as the fun stuff starts and the walls take shape!
OK..... fingers...... getting...... so...... so...... t.....i.....r.....e....d......
g'nite
-ashley
PS Piccies in the next post....
Yeah! Piccies :D:shock::D:shock::D:shock::D:shock:
Should be a good size this page....
OK
829 looking through the back wall of CR 2 into the CPU hall with the HVAC trunk coming in overhead. that was a tricky fitting to get made.
830 we had to put up two layers here right on the upper joists for fire rating. this is the cpu room so noise to the upstairs is not an issue. notice the gyp going up vertical but not touching the ceiling layer. this is part of our fire blocking scheme.
832 electric boxes one iso ground and one utility in the front wall of CR 2
834 the panel..... notice the neutral bar is NOT connected to the ground bar.
835 CR 1 wall into the cpu hall. one window and one door
836 CR 1 looking to the kitchen
Right then.... a little backtracking. I was going through the photos of the build and realized in my haste that I forgot some more framing details that might be interesting (or damning if I didn't do them right :). Anyhow, here's more details on how we have done the ceiling framing.
In order to maintain the best ceiling height in this basement and still have a fully isolated ceiling frame, we used some steel. The steel channel that was spec'ed by the engineer needed to somehow be attached to the top plate of the wall frames. These beams bear down on posts that we made by screwing together two studs and two track pieces into a 4x4 metal pole. This technique is also used to make headers and sills in metal framing.
You can see around my support pole we have four of these posts holding up the ends of four separate steel channels in the live room. This breaks up the span down to a max of 12' on either side of the channel. No problem for the 3 5/8" 18 ga studs to make that span with three layers of 5/8 gyp.
So...... here comes my neighbor the steel man, Dan! This is his truck with the 3000 watt gennie on the back for welding the beams onto the wall frames. We also ended up tack welding some track to the beams as well. The track is used to screw in the ceiling joists and hold them in place. The place felt like a scene out of Blade Runner for a few hours while Dan hooked up the beams.
Piccies cause I ain't lyin'....... 8)
Well, couple of questions for the forum today.....
1. What type of insulation is sufficient for in between the walls? My understanding is that rockwool is not necessary since all we are trying to do is dampen the resonance of the drywall panels. R11, R13??
2. On the seams of the first layer of drywall, not the corners, do we use normal tape and mud or do we caulk those seams?
I have just received my framing inspection and are preparing to insulate all the wall cavities. Whooooo, freekin' HOOOOOOOO :lol::shock::D:):o:wink::P8)8):!::twisted::twisted:
Now the fun begins! Getting some drywall up on the frames is really going to make it start to come together visually. My diary is a bit out of sync and I will post some more details of the framing, electric and HVAC stuff here in a bit. I'm behind schedule on posting. But the progress marches on and I am starting to lighten in mood..... :P
-ashley
Well, we have more progress as the first layer of drywall goes up. I hate having to be the contractor on this because I just had to fire my whole crew. They were getting lazy and also trying to stiff me on time (lunch breaks, smoke breaks etc...) and on Friday they went out to lunch at 1 after I had cut checks to them early including the time set for Friday. They didn't show back up until 3:45 after drinking all day at the bar..... OY!
IT REALLY IS HARD TO FIND GOOD HELP THESE DAYS!!!!!! :evil::evil::evil::evil::evil::evil::evil::evil::evil::evil::evil::evil::evil:
Sooooooooooooooo, I have another crew coming Monday and all of the old crew's tools are parked at the door. Life is just grand, isn't it?
I do have a question or two about laminate glass....
1. Does it matter if the two layers of glass are of differing thicknesses themselves? My this I mean for a 1/2" piece of glass, is it better to have a piece of 1/8" laminated to a 3/8" piece or two 1/4" pieces laminated together? My intuitive guess is that differing thicknesses are better.
2. Does the thickness of the laminate layer itself make any difference? The guy I have spoken to asked whether 003 005 or 006 thick laminate material would be better. I have no idea which if any is better.
Perhaps Rod has some helplful info on this. My glass plan goes something like this:
Walls are double 5/8 gyp with green glue inbetween.
One pane will either be 3/8 or 1/2 thick.
The second pane will either be 1/2 or 5/8 thick.
I prefer to go the thicker amount if the budget allows. I don't have prices yet but my largest window is 3' x 5'. I imagine its going to be REAL expensive for this.
:shock::shock::shock::shock:
OK, I need to post some pics here soon. Next post.
-ashley
OK, some more glass info:
1. Its helpful to have two thicknesses of glass laminated together, for example: 3/8 lam to 1/2 for a 5/8 laminate piece.
2. This sh*t is expensive! My first quote for 6 panes was $4800. There are a couple of 4x5' panes that really eat up the budget. I am going to reduce the thickness to 3/8 and 1/2 to see how that affects the number.
One question I have is if the budget makes all laminate glass impossible for me, how would having on pane be laminate and the other being tempered work? I could go with 3/8" laminate and 1/2" tempered for one set of panes. Will that work reasonably well? I could up the tempered glass to 5/8" as well. Tempered is just soooooo much less money per square foot its ridiculous!
It seems some of the issue is laminate is easier to break so the installer needs a higher price in case he manages to break it while delivering and installing it.
I am getting closer and really need to post some pics. All the drywall is up and the HVAC runs are being hung in the rooms so that I can soffit around them. Once this is done, the finish work begins. I am trying to get my concrete finishing guy to come in and do some tests. I want to polish down the concrete to expose the stones and aggregate and then clear epoxy seal it for the the natural stone look.
I am designing the adjustable panels for the recording rooms now and will post those designs here to see what you all think. They are basically a hinged panel that has slats on the outside and fabric covered rockwool on the inside. When closed, we'll have more ambience but still absorption in the lower mids and upper bass. When opened, the highs will get absorbed more, reducing the HF RT.
Just picked up a used pair of PMC AB-1's that will be soffit mounted in the main control room. These puppies crank! the low end is simply amazing out of the box. I have them stashed at the mastering studio where I work so I can get used to them before installing them in the soffits.
I have two other pairs of PMC's, the LB-1's and TB-2's. All together, I am creating a 5.1 film mixing system that will have two AB-1's for the L & R, 1 LB-1 for center, and the two TB-2's for surrounds. I have a Tannoy 15" powered sub for the .1 channel and voila!!!! Surround. I just can't wait to fire this system up and watch some killer movies!!!! ..... Oh, yea.... and then mix some killer movies!!!
OK. Piccies or it didn't happen, right?
-ashley
OK, some more......
More ceiling details and the completed live room ceiling
Me having to use the dreaded jackhammer to remove a concrete base for some very old cabinets.... sheesh they don't build em like they used to!
Finally, the new main control room door from the kitchen, apres jackhammer....
-ashley
Here's my design for the variable acoustic panels. I want to make a bunch of these in a standard size to simplify fabrication and use standard 2' x 4' bales of rockwool. Sketchup file included....
-ashley
Image not preserved: Variable Acoustic Panel AG.jpg
File not preserved: Variable Acoustic Panel AG.skp
I have more questions regarding glass:
1. If we take two pieces of 1/4" laminate glass and glue them together around the edges, will that come close to a piece of 1/2" laminate glass in terms of sound performance or will it be much worse?
2. Would a 5/8" pane of tempered glass perform as well as a 1/2" pane of laminate?
The costs on 1/2 and 5/8 laminate are gratuitous at best. We are trying to find a reasonable compromise that will give me good performance for sound.
I am in the process of framing in the soffit wall now and other soffits for the HVAC ducts inside the rooms. I will have piccies forthcoming....
For now, here are some wiring shots.... We are using hospital grade iso-ground circuits for the audio gear and separate normal runs for utility stuff like laptops, lava lamps etc... You can see the new subpanel and then all the isolation boxes getting wires run into them. There's my assistant Bryan, with the audio wiring spools of Gepco multicore, RG6 and CAT6. All of this gets caulked real good before the insulation guys come.
-ashley
I have been remiss in posting here on the build because this year has just been the most demanding of my life so far. I have been taking pictures and now that I'm closing in on the final I have found a bit more time to post progress. Anyhow, the latest episode: Glass Block Windows
We had to make frames for the glass block to go into the metal framing of the walls. Also, the window frames had to extend out from the framing so they will be even with the layers of drywall that are coming. Here are some shots of the frames as we made them and plopped them in right ahead of the glass block guy who had the panels pre-made and ready to go. We had to have the actual glass panels on site in order to make the frames just right and a tight fit. Tolerances are everything!!
The frames have a 3/4" stop at the back that will be siliconed to hold the glass in. The edges will also be siliconed once they are in. Acoustic caulk would be visible so we are using the standard clear silicone.
-ashley