I know that technically I should probably use mud and tape.
WOW... Keith ain't following the rules :shock:
From the stickies:
How to drywall and caulk? Step Sequence....http://www.johnlsayers.com/phpBB2/viewtopic.php?p=20003
I think you'll end up in the same spot or better than your goal. Sounds like a good topic for argument though.. Caulk VS drywall mud & tape.
I just ordered a 12 pack of Green Glue, 1000ft of 1/4" & 200ft of 3/8" backer rod, and a 24 pack of OSI SC-175 sound caulk.
I'm off to Lowe's for more mud, tape, and stuff.
Marc
Thanks for the link, Marc. It's probably been a year or more since I last saw that thread, so it's an excellent refresher.
Remember that in my case, it's the middle leaf and I'm going for the total overkill... So I wouldn't think it would matter much.
We've also learned more since that thread was finalized -- that in reality, tiny cracks or holes don't really amount to much loss in TL at the low end, which is what I'm most concerned about.
--Keith :mrgreen:
I got the new revised drawings with corrections for footer and header. See pics below. :D
For the header I'm going to rip out entire previous screen wall header or "pony wall", along with more stucco and part of existing patio ceiling green-board/stucco/2x4's/ and maybe part of furring strips. Every stud of new wall will be strapped to bottom chord of existing truss. In my new smaller patio I'll be replacing the "pony wall" will double 2x8's for a new header to new screen wall. One end will bear on large joist hanger attached to side and top of existing concrete block wall. The other side will be built into new corner of "storage room" walls.
The footer...... he has me cutting 2' of edge of the existing patio slab. See pics for more details. :shock:
In addition to pics they recommend I do use 15 pound felt in the joint between new and old concrete.
If you can't make something out ask and I'll type it out.
Interior walls, for now I can't do anymore on garage side. Waiting on backer rod, caulk and green glue. So I've been prepping the rest of garage for painting and getting ready for...
Tropical Storm Ernesto. It's suppose to arrive here tomorrow mid day. It looks pretty wimpy as is, probably I'll just get a lot of rain BUT I still got to go through the hurricane prepping ritual. Bottled water, batteries, trim trees, pick up all the extra wood from new play set in back yard... and I only pray that my power does not get knocked out. My wife is a school teacher and they've already canceled school for tomorrow... my evening (inside) gig has not been canceled YET though.
I submitted the revised plans to building department, they should be approved by Monday... Architects say "JUST BUILD". :twisted::twisted:
Now I got to stare at plans and figure out if I am and how I am going to tackle the header and footer demo and (re)build OR got to get the hulk back over to give me a quote on the footer work. Though I'm leaning on doing this one myself. 8)
Marc :twisted:
At the risk of not knowing what I'm talking about (a very high risk indeed):
I noticed in your specs, the concrete floor (or base, etc.) is to be 3.5 inches thick, and then in the drawing notes it says that the compressive strength is to be 2500 PSI minimum...
Is that a typical compressive strength for 3.5 inch thick concrete (with or without rebar?)?... and, IMPORTANTLY, would that be the same as the amount of weight that the surface could support?
If that IS true, then that would give 360,000 PSF of strength....
Hmmm... I'm just trying to understand why -- if the substrate is firm and solid -- footings might be necessary (other than spreading out the load, or as a precaution if the substrate sinks or voids).
Of course, I would suppose that in any case support would be dependent upon the substrate beneath the concrete as well, since voids or soft spots would allow the concrete to be loaded with tensive forces?
I'm led to understand that tensile strength is about only 1/10 of the compressive strength (and there are probably other factors that are probematic with concrete in tension?)..,
Okay, so I've exposed my ignorance like the Emperor's New Clothes...
thanx,
K
Looking good Marc!
I learned that 2,500 psi concrete is the minimum, and that by increasing the "sack" number in the mix, you can achieve higher than 3,000 psi. And, you should do that! 8) It's just a few extra bucks.
Of course, the footing is thicker than 3 1/2" -- is that written as 1' 4" or 1' 0"? Anyway, I expect that the actual minimum thickness will be closer to 4 or 5" when the excavation is done.
Marc, don't miss that "termite treated" fill! That's what I did before my concrete was poured. You want Termidor® -- ask for it by name and don't accept any imposters! And prepare to pay a hefty sum for it... :roll: ...The stuff is expensive and is only available to licensed pest control operators.
I spent $550 for my Termidor® treatment. :shock: And they say they were going easy on me -- that their minimum charge is usually $750, but since it was such a small area and I'm a current customer, they cut the price by $200 and split it into two installments for me. Hopefully your much smaller area can be treated for a lot less than that.
I've been hearing about Ernesto and wondering how close it might come to you. Hopefully it's just way you say it will be -- a relatively wimpy rain delivery.
Hey, I'm surprised the footing drawings don't show rebar running along the entire length. Usually footings have those. (Mine does -- double on the bottom even!) Perhaps they're not needed, but rebar is cheap, so you may as well throw a couple of those in there on some "dobies" (little half-brick sized risers with wire sticking out of them).
I kind of wish I had run rebar into my existing floor and tied my outer leaf foundation into it the way your architect drew up... :roll: ...Oh well! :P
--Keith :mrgreen:
At the risk of not knowing what I'm talking about (a very high risk indeed):
I have no idea what these specs on the concrete mean and won't even attempt to answer your questions. As long as the plans examiner OK's this foundation plan (as well as Sharward, Rod & Knightfly too) I'm fine with not knowing. Though after I read through some "how to's" I might be able to comment.
Sharward
Marc, don't miss that "termite treated" fill! That's what I did before my concrete was poured. You want Termidor® -- ask for it by name and don't accept any imposters! And prepare to pay a hefty sum for it... ...The stuff is expensive and is only available to licensed pest control operators.
I spent $550 for my Termidor® treatment. And they say they were going easy on me -- that their minimum charge is usually $750, but since it was such a small area and I'm a current customer, they cut the price by $200 and split it into two installments for me. Hopefully your much smaller area can be treated for a lot less than that.
GREAT!!!!!!!!!!!!!!!!!!!!!!!!!!!!!:twisted:
I've been hearing about Ernesto and wondering how close it might come to you. Hopefully it's just way you say it will be -- a relatively wimpy rain delivery.
Well the eye of this wimpy now tropical depression is due to pass right over my house in an hour or so. So far it's just been a regular rainy day. BUT what also really sucks about tropical systems how ever large, is that around the perimeter of the storm OR before the storm gets here, it's really sunny, drier and HOTTER than usual. Yesterday working in the garage wore me out. My wife dug our oscillating fan out of the back of the babies/storage room for me and that did help.
I got my Green Glue and Backer Rod today. :mrgreen:
Green Glue ordered right from website http://www.greengluecompany.com/ took 2 days to my door.
Backer Rod ordered by phone from http://www.loghelp.com/backerod.html as well 2 days. Thanks to Dan F for reference to the cheap backer rod source. :D
Still waiting on Acoustic Caulk BUT just figured out I need a bigger Caulk Gun. I bought a decent 10oz gun but now that my green glue is here in 29oz tubes I realize I need a bigger one for that and 29oz tubes of caulk I'm waiting on. Urh :roll:
Marc
I have a nice how-to DVD on building a monolithic slab that I'll be happy to donate to the cause... If you PM me with your address, I'll mail it off to you.
Sharward,
You think that DVD would help me build my footer?
The "Hulk" is not answering his phone, other cement contractors I've called appear to busy, I think the only way I'm going to get this done in the next few weeks is to do it myself.
Any links to good concrete sites you've found would also be greatly appreciated... I'm on a mission now.
Marc
Hey Marc!
Maybe... But since time is of the essence, I think you can probably do this without it.
You have Rod's book, and he does cover this at some length (pretty impressively as I recall).
You'll want to rent a walk-behind concrete saw and you'll have to buy a blade at time you rent it. Don't get the cheap-o abrasive blade, but don't spend big bucks for the diamond blade... Get the moderately priced ($100ish?) metal one. Cut about 1/4" to 1/2" on each pass, getting progressively deeper with each pass. You'll need a vehicle with a trailer hitch.
After returning the saw, a 60 pound stand-up electric impact hammer (a.k.a. jackhammer) will make quick work of the break-up and removal of the 2 feet of concrete you're removing. I would think you'd be done with that tool within the yard's "minimum" (2 hour minimum? 3 hour minimum?). You could use one of those hand-held demolition hammers, but it will take longer, and you don't need that level of precision. Using the 60 pound impact hammer is a LOT less intimidating than it seems! I actually found it kind of fun (and I'm a scardy-cat usually).
Once the area is cleared, you'll want to dig down with a shovel. It looks in the images like you need 16" of footing. I would suggest you dig down about 20" to 22", then dig out from under the cut slab a few inches, then set your forms on the outside edge. Use steel stakes -- the're much easier to drive into and pull out of the ground.
You'll need to rent a rotohammer and a long bit to drill those horizontal holes into your cut slab so that you can get that rebar in there. Fortunately, Home Depot sells rebar precut into various lengths.
In the trench, so that you can lay in 4" to 6" of crushed rock as your base, then lay down plastic sheeting. This will reduce capilary action (wicking) of moisture up from the ground into the footing. Like I mentioned before in your thread, you may as well lay a couple of rebars in there.
Use small pieces of wood with holes drilled in them to position your J-bolts -- you should use 12" bolts, submerging them 8". This gives you plenty of penetration and leaves you plenty of exposed bolt for you to do either a single or a double soleplate.
As far as the the edge of the existing concrete is concerned, I recall you wrote that your architect specified roofing felt as your cold joint. That's strange. I would have thought the closed cell foam stuff I used would be better. Nevertheless, follow their advice -- it may help for you to call them for specifics.
Here are a couple of photos of what I did.
Just a bit nervious about taking this on myself... want to prep myself.
You've described basically the same method I've been thinking.
Got Rod's book, read the section, hopefully I'll get rained out of my gig tonight (and tommorow afternoon) will read it again or atleast on down time.
I've never seen the "metal" moderatlely priced concrete blade. I was planning on buying a few carbon masonary blades and returning ones I don't use.
I can't just make one cut in one pass through this 4" of concrete... 22' long :cry:
I think 2 men can handle the saw in and out of my van? Think I could do it bymyself?
I'm planning on renting the walk behind saw on Sunday. It's a 4 hour min rental from HD on all tools.
60 pound electric impact hammer will have to wait until Tuesday unless my Monday 12pm gig gets rained out.
What about the wood for the form... I got all this 3/4" plywood lying around. I should be able to use that.
Curing time is 3 to 7 days as far as I can tell from internet.. right?
Got to run for a gig... and looks like I'l get rained out. BTW I love getting rained out cause all I have to do is show up and I still get paid (on most of my gigs) :twisted:
Marc
I've never seen the "metal" moderatlely priced concrete blade. I was planning on buying a few carbon masonary blades and returning ones I don't use.
That might work. Talk to the people at Home Depot -- maybe they can advise you. I bought the metal blade from the rental yard here -- I still have it (it has about 2/3 of its life left in it). Too bad we don't have an abundance of time, else I'd send it to you.
guitardad72 wrote:
I can't just make one cut in one pass through this 4" of concrete... 22' long :cry:
Nope. :!: You have to take it slow and easy. You're not digging through foam, brother! :lol: My landscaping buddy, during the cutting of my concrete, probably did at least 10 to 12 passes.
Be sure to have a good hose with a good male end. You're going to have lots of water everywhere. You might want to have a helper with a gas leaf blower blowing the water away from the house/garage during the cutting! :shock:
guitardad72 wrote:
I think 2 men can handle the saw in and out of my van? Think I could do it bymyself?
I don't know... Those things are really heavy. Maybe you should take a trip to the rental yard to put your hands on it and to get acquainted with it before "the big day."
guitardad72 wrote:
What about the wood for the form... I got all this 3/4" plywood lying around. I should be able to use that.
I think you might be able to use it, but I think you have to double it up. Be sure to stagger the seams. Your forms will be inspected, so make sure they are solid, don't move when you kick them hard, etc.
Curing time is 3 to 7 days as far as I can tell from internet.. right?
I've heard 28 days for cured enough to build on. Perhaps 3 to 7 days is cured enough to walk on though.
That reminds me -- you'll probably want to use an accelerant additive in the concrete mix. And you might as well add fiber mesh too -- it's cheap! (Your architect indicated either rebar or fiber mesh, but I recommend both. Why not? :twisted:)
--Keith :mrgreen:
Hey, I'm surprised the footing drawings don't show rebar running along the entire length
Drawing does have the rebar, it might be to small to see in the pic (plan3footerheader 015.jpg above) it's the 2 small dots in foundation cross section, attached to the bottom of the L shaped piece. A line to the dots are the words: (2)#5 CONT, 5" MIN COV
I just remember the other day at HD rental I was looking at the walk behind concrete saws and my HD does rent diamond tip blades. The blade rental was kind of pricey but... this needs to get done the right way. I'm planning on a trip to HD tomorrow for more drywall so I will ask my questions about the saw then.
I can get more drywall cause I got my 24- 29oz tubes of caulk today.
I got rained out from my afternoon gig today and had time to go to building department and pick up approved revised plan, caulk perimeter of wall and start adding 2nd layer of drywall.
Apart from being a little nervous to cut my patio slab myself, in the back of my mind I wondered if my revised drawing by Lenny would pass. Would have been a real pain if I had cut the slab and then plans inspector said otherwise. Lenny has screwed up previously. :roll:QUESTION For those who have handled drywall more than I....
Goal is to slide a full sheet of 4'x8', 5/8" drywall (2nd layer, horizontal position) covered in expensive Green Glue, into the 3" to 6" space between 1st layer of drywall and my AC unit/plywood box without destroying the drywall and wasting the Green Glue.
Either I simply cover the new piece of drywall in green glue and uncomfortably slide it in trying to not smear the glue against 1st layer of drywall until it's in place OR...
Will this work: Put a make shift handle on the center of the drywall. Locate on drywall spots where screws will make holes anyways once in position, temporarily use those holes to attach a 2x? to the drywall to use as a "handle". Screws would only just stick out the other side maybe 1/8". Maybe I'd use 3 screws. This way I could hopefully easily tilt the drywall back enough, so I don't smear the glue while I slide it into place.
Well, I may try this before someone answers/guesses/says don't bother. I'll try sliding it in without the glue 1st and if I destroy the full piece I can use it else where as beef up between studs. 8)
Man I got to go to bed.
Marc
....The "Hulk" is not answering his phone, other cement contractors I've called appear to busy, I think the only way I'm going to get this done in the next few weeks is to do it myself...
Well, in the movie and TV show, didn't someone usually have to get the Hulk PO-ed before he would be set into action??
Of course, that can be risky I would guess....
Anyway, I know that this following site is kinda commercial in nature (due to the association with various businesses offering concrete products and services), but I still think it might be very informative...
Look at the lefthand column for the 'good' stuff.... I found it facsinating what can be done with the stuff...
http://www.concretenetwork.com/
K
Always my pleasure, Marc! 8) Hey, I consider you a "concrete buddy" now... Or soon to be! :lol:
A line to the dots are the words: (2)#5 CONT, 5" MIN COV
OK, got it. FYI, #5 is 5/8" in diameter. (Each "#" is 1/8" of an inch.) The 5" min cov comment is, I think, the minimum number of inches of concrete that it must be buried under. Verify that.
. . . my HD does rent diamond tip blades. . .
Oh yeah -- I remember being offered that. Yes, it is rather expensive. You're charged for usage -- they measure it before and after and charge you for each 5/100" or something like that. That may be your best bet. You aren't going to run into any rebar while cutting (a good thing).
Will this work: Put a make shift handle on the center of the drywall. Locate on drywall spots where screws will make holes anyways once in position, temporarily use those holes to attach a 2x? to the drywall to use as a "handle". Screws would only just stick out the other side maybe 1/8". Maybe I'd use 3 screws. This way I could hopefully easily tilt the drywall back enough, so I don't smear the glue while I slide it into place.
I would think that would work.
But obviously you haven't had the pleasure of working with Green Glue yet! :P It's pretty strange stuff. Like I've written about in my thread, it's kind of the consistency of shaving cream or hair moisse when it comes out (it seems like there's a lot of "air" in it). It's not at all like construction adhesive or caulk, which are very dense by comparison. Anyway, some smearing would be OK -- in fact, it's designed to spread upon having pressure placed on the panel when it is screwed into place.
Read the instructions! If you've already read them, read them again. It couldn't hurt! ;-)
--Keith :mrgreen:
Luftweg, thanks for the link. I’ve been to that web site many times; it shows up on the 1st page of a Google search for almost any phrase with concrete as one of the words. Web site has a lot of info but as far as “how to” it’s short. :roll:
“The Hulk”… calling from my cell I got no answer, but calling from a land line gives a disconnected message. Guess he’s gone into hiding. Did I mention I got referred to the Hulk by the “general kinda of Contractor” who used to live next door…, the same guy who referred me to Lenny. :oops:Sharward,
Thanks for the info on rebar specs, I did not quit understand the numbers and yes of course I will be verifying.
Yesterday, on my short wall, garage side I got a complete 2nd layer of drywall up, just one more to go. I got the long wall already to slide that piece of drywall with green glue in. In the tight spot beside my air handler, I took a 2” putting knife and taped it to the end of a pole. I put amounts of caulk onto the putting knife and reached in there and jammed the caulk around the perimeter of the 1st layer of drywall. It’s not pretty, was not fun but I am 99% sure I got a good seal. Maybe tonight I’ll try to get that piece of drywall in and complete 2nd layer with green glue.
I don’t know if I had posted this before or not, but original plan was to use green glue on my inner leaf which would use less glue, it’s less square footage. I’ve now decided to use it on outer for several reasons. Tight spot between air handler and wall, I’m kinda trying to match density of eventual concrete block with sand fill wall, plan to use green glue in beef up of family/studio room outer leaf wall anyways and my outer ceiling… Now that I am ripping out the pony wall/old screen wall header and will need room to hurricane strap my studs to bottom chord of joist above, I will be taking out a good amount of ceiling stucco/green board to do so and will make a mess of the edge of ceiling next to pony wall. I may as well take out all the stucco/green board & furring strips on patio side of my studio, take out the single layer of ½” drywall of garage side of studio and replace all with 2 layers of 5/8” drywall with green glue. This way I will know exactly how much weight I’ll be adding to existing truss system (which can handle this dead load), I’ll have an even density of material above the entire studio and when (if) I do take the existing ceiling out I’ll have easy access to attic for wiring.
My inner leaf(s) will consist of 2 layers of drywall and left over green glue in spots. If I figure I don’t have enough isolation at that point I can add a 3rd layer of drywall.
Now for todays progress…
I have no fear of walk behind concrete saw any more. :twisted: It was easy. :wink:
I rented the walk behind MK concrete saw from HD, with a 14” diamond tip blade. $49 for the saw, $55 for blade rental with insurance and tax total $115.14. Note the saw was $1,400 to buy, the blade was $139 to buy.
I man handled the saw in and out of van all by myself. NO problem.
Advice from HD rental guy was 1 pass to cut, and that’s what I did. 1st I used a chalk line to mark the cut, then marked a line with a permanent marker using a 2x4 as guide beside the chalk line.
Cutting this was like slow motion cutting through butter. Very easy to guide saw. The only thing to watch out for was stalling out the engine caused by going to fast. I did not stall it once.
I used water with the cutting via hose plugged into saw... it was great, 99% less dust then the wall. Pictures below are after I clean patio slab off with hose & cleaned the saw (which did not get that dirty), it would have been a $50 cleaning fee if I did not clean it.
I was hoping to have the saw for less then the 4 hour min. It's 15min drive from HD, 30 mins of cutting... 45mins into rental I had the 22 foot long cut done. I decided since I had the saw I would cut up as much concrete as I could into manageable pieces. I cut perpendicular from about 2" from the main cut line to edge of patio every 16” to 24”. Then I made another long cut parallel to the main cut to set these pieces free. I was done all my cutting 2 hours and 30 mins into the rental. Cleaned machine and took it back.
I had to use my sedge hammer and destroy one of the pieces I cut to get it out. Sand had filled the cut lines, all pieces moved together making it difficult to get the 1st piece out. Taking the other pieces out was easy.
Tuesday I plan to rent the open back trailer again to take this concrete to the dump.
I don’t think I’m going to need a jack hammer to finish the job. I’m not going to rent at $20 for 24hrs a grinder/angle cutter; I will buy one for about $100. I imagine I’ll find other uses for this tool down the road. With the sledge hammer and angle cutter I think I can finish cuts on walls and cleanly cut the rest of this slab away from portion of slab I’m keeping and existing concrete block wall footers.
Soon as I said it was OK to come on to the patio my son started the excavation for footer. :D
Marc
That's so awesome, Marc! 8) I actually saw your post earlier today on my Treo, but I wasn't able to see the photos.
I'm so glad that your concrete cutting experience went so well for you. You've got more courage than I do -- I had my landscaper buddy do mine for me! :lol: But after having seen him do it, I'd probably not feel so apprehensive next time I need concrete cut.
I'm sure you feel very good about this step! If not, you definitely should! 8)
You should be able to sledge out that long piece. You've already perforated it along the outer edge, so they should break off without too much trouble. You might put some plywood down along the concrete you don't want to remove in an effort to protect it somewhat from an imprecise slam of the hammer.
Make sure Junior gets his bath after playing in that stuff. The calcium hydroxide contained in portland cement is a very corrosive compound that will cause chemical burns. (Just ask Paul Woodlock! :shock:)
Have fun digging your footing! (It's clear someone is having fun already!)
--Keith :mrgreen:
...Make sure Junior gets his bath after playing in that stuff. The calcium hydroxide contained in portland cement is a very corrosive compound that will cause chemical burns. (Just ask Paul Woodlock! :shock:).
.--Keith :mrgreen:
This is interesting to me because I developed, mostly likely, a chemical irritant rash on my hands and arms, when working on digging a sump pit out -- even though that there was no curing cement/concrete around (since it had 'dried' some 45 years ago)....
I ended up having to use my hands to pull certain stones and pieces of hardened concrete out of the pit, and I had gotten wet with the groundwater that had been mixed in...
I did wear gloves but the water got inside and ended up running down my arms...
It was very hot that day and I was sweating, so my pores were all opened up...
I wonder if pulverized cured concrete can cause an irritation? It's either that or perhaps the iron ochre in the water caused it...
I didn't get it anywhere else except on both hands and forearms, and that's what got wet during the work...
Who knows...
But make sure your son stays away from the cement dust and wet mix, as a childs skin and lungs (due to the smaller trach, brochi, and bronchioles, etc) could be extra sensitive...
In addition to the alkaline CaOH2, chromates and chromium are also irritants...
K
...Make sure Junior gets his bath after playing in that stuff. The calcium hydroxide contained in portland cement is a very corrosive compound that will cause chemical burns. (Just ask Paul Woodlock! ).
.--Keith
OK, my son was digging in 99% (??) sand. My house sits on sand. I had cleared all the concrete dust off patio with water & hose. AND like always shortly after he was "working" with me in anything dirty, he and I took a shower. My wife is a clean freak, if it was not for her showers mught not be so prompt.
BUT come to think of it... after moping the floor indside my house now 4 or 5 times we still have concrete dust (that was tracked in from cutting the wall) visable on the floor. None of us have had itchy feet.
More progress...
I got the 2nd layer of drywall with green glue up on that longer wall in garage. It was just over 2 1/2 a sheets of drywall so I decedided to use 3 tubes of green glue shooting for just over 70% effectiveness as stated on there instructions. (2 tubes per 4x8 sheet = 100%, 1 tube = 70%). I figured that would equal the other wall with 3 layers of 5/8" drywall, I'd stand a chance of screwing up less expencive green glue and I decided to be a little cheap. 8)
I slid the drywall into the spot with out previously thought of "handle", so I applied green glue, slid it in ontop of my shims and got a few 2" drywall screws in covering maybe 1/3 of drywall. I jammed into the hard to reach spots some 2x4's and other scraps to but the 2nd layer tight against the 1st. AND guess what... I only could get 1 screw into the top corner of hard to reach area.... with 2nd layer I have less space and I'm using longer 2" (not 1 1/4" like on 1st layer) drywall screws. It was to late to hammer in nails, don't really want to bounce my hammer off my air handler getting nails in and at the plywood box area I'm doubting I can get a nail in... So
QUESTION:
I am thinking about (almost have my mind made up to) drill a long skinny holes from 2x4 studs and plates on other side of wall, all the way through to the other side of 2 layers of 5/8", insert long bolts on 2x4 side and washers (maybe fender) with nuts on the other side. I may have to use bolts in 5 to 7 locations. I can't think of any other way to permantly fasten this 2nd layer of drywall to 1st, space is just to tight.
Question is...
Guess I'll be lossing only a couple db's with above method, I can make up for it with drywall and caulk on the other side... I'll have room to add drywall right on studs becuase this will be a corner where my inner leaf is set back from outer for splay.... am I correct with db loss?.
Anyone have any other bright :idea: idea?
Marc :twisted:
So, basically you're proposing to use nuts and bolts to "pull" the board against the studs, as opposed to screws that would "push" the board against the studs.
I would think that would work. It's a limited area after all.
I'm concerned though about the fact that the Green Glue has cured in a less-than-ideal state. :roll: You've allowed it to cure without having the benefit of being compressed by fasteners all the way around. Again, it's a small area, so hopefully that's not a huge problem -- especially if you used wood scraps as temporary shims between the face of the board and the air handler and pedestal.
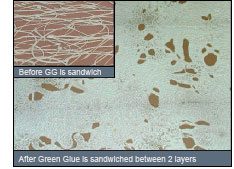
Always bear in mind that Green Glue's "magic" comes from its ability to spread upon being compressed...
Recovered from web.archive.org — originally hosted at http://www.greengluecompany.com/images/greenGlueApplication/Capture7.jpg"Do not let dry. Apply Green Glue within 15 minutes. Drywall sheets must be screwed together while the material is still wet." (Source)
--Keith :mrgreen:
I'm concerned though about the fact that the Green Glue has cured in a less-than-ideal state.
YUP, exactly my concern. I knew about the 15 mins and believe me I was running as fast as I could. I got the drywall Jammed in there in 3 spots with 2x4's spread the length of the unfastened areas. I'm 90% sure I got the drywall compressed as it would have been with fasteners how ever I'll never know for sure. SO I'm going to add beef up on the other side in between studs AND glad I did not use 2 tubes of green glue per sheet.
I might be able and see if the nuts and bolts pull the drywall in, if I don't see movement I'll be happy.
I knew this might happen, took the risk and I'll live with the result. :twisted:
Only wish I woulod have thought of the nuts and bolts before I put the drywall in.
EDIT Got to make a correction from previous post... I got 1/2 the screws in on the piece of drywall beside air-handle, not just 1/3rd.
Marc
Progress: good news, one more thing to figure out and important question/concern.
Good news…I hit my head on my new wall (jumping up and down while leaning over) as I tightened my nuts, bolts and washers into drywall and saw no movement of drywall towards studs, meaning I’m 99% sure I got the 2nd layer of drywall with green glue compressed against the 1st using the 2x4’s in unfastened area beside air handler. :D:D:D
Drywall attached to studs with nuts and bolts in a tight spot worked out very well. :twisted: I used ¼’ galvanized lag bolts 5 “long, nuts and cut washers. I drilled from the other side through stud with a 5/16” auger bit. I used a ½” drill bit to make a counter sink hole, on the stud side, to sink the head of bolt into stud flush so that I can later add beef up drywall to stud. This corner stud will be a weak link/ small triple leaf that needs beefing. I put some caulk in the hole, drove bolt through with a hammer (couldn’t push it by hand) and then used washer and nut on the drywall side. See pics below.
Pic 005 shows bolt in stud but I didn’t wipe all the excess caulk away.
Pic 017 shows a few nuts. The distance between my air handle and the wall is 4”. Distance between plywood box below air handler and wall is at the back bottom corner 1 ½”, if you can see the 2x4 in pic below that’s the 1 ½” measurement.
Pic 013 shows a close up of the drywall nut.
Bottom line I could get 1 ¼” drywall screws in with a stubby screw driver in a 5” (or so) space. Getting 2” drywall screws in with 4” clearance is impossible.
One more thing to figure out… at the bottom of wall where I still have one 2x4 jammed, I can’t get my hand down there to even get a nut on a bolt. I’ve not drilled holes yet. I have 2 places left where I want to fasten the bottom plate to dry wall. I’ve not done any research yet but the only fastener I can imagine that would do this job would be inserted from the stud side, “umbrella out” once through and pull back/tighten. It would have to be 5” long. OR I leave as is and hope the Green Glue holds out over the years like an adhesive or regular construction glue would.
I should get the 3rd layer of drywall up on the short wall tomorrow, completing drywall on garage side. I’ll get my practice mud and taping these walls for painting… then I can put my garage back together. 8)Question/concern
Today I took the edge of my patio slab to dump. Removing the end pieces from wall footers it was way too easy.
Edge of patio slab was not attached to wall footer with rebar. See pic 003 below. This leads me to believe the entire patio slab is not connected with rebar to any of the 3 patio concrete block walls. I’m now concerned about my parts of inner leaf walls weight pushing down on this slab. Inner leaf walls sitting on garage slab and on new footer should be fine. The new footer will be attached via rebar to patio slab. This would be 7’ of my 15’ long walls sitting on old patio slab. Short walls of room, both about 9’ will sit on what I think is “good” concrete (garage slab and new footer). Summary ( for weight estimate) of “planned” inner leaf is a 15’ long, 9’ wide room, 2x4 frame walls, 2 layers of 5/8” drywall on walls, RC13 fluffy fiberglass in studs, AND inner leaf ceiling with 2x6 joists bearing on the 15’ long 2x4 frame walls, 2 layers 5/8” drywall and RC30 fluffy fiberglass.
Am I over concerned about this????… I’m realizing as I type I got to do some research on slabs. :roll:
I’m guessing I might be alright as is BUT after I’ve removed part of this slab so easily, I’m thinking about what Sharward previously mentioned… remove all the patio slab which will take care of this potential problem and will also take care of my level problem. This would be another delay, redraw and submit for revision AND at this point I don’t want to discuss it with architect Lenny, if I take it all out I just want to tell him to do it… no discussion. Not to mention I could have rented the concrete saw once, not twice. :evil:
Hopefully I'll go as is/current plan. :mrgreen:
Marc :twisted:
Hey Marc,
Congrats on the bolts doing the trick as you had planned. :)
Perhaps jamming a piece of pressure-treated lumber as a wedge the between the bottom edge of the drywall and the air handler pedestal would suffice down there. I know you were aiming to keep the pedestal and the wall isolated from each other, but they're both sitting on the same slab and attached to the same (house) wall -- so I don't know how much flanking vibration you're really avoiding by going to these great lengths... :roll:
As far as the slab goes, I wish I had known (perhaps I missed it previously) that you expected your slab to be joined to the foundation with rebar. I would have told you that I didn't share that expectation at all! :(
Whew... :roll: ...I just don't know what to advise you here. At this point your plan calls for building structural walls on a non-structural slab. In fact, you've already built a couple of those walls.
Marc, please carefully read (or reread) my "Mason Industries' FSN Floating Floor Concrete Slab Test Data" thread, which I started at the climax of my "to float or not to float" confusion. See what Rod says about not assuming anything about a garage floor. That is the thread that essentially convinced me that my best course of action would be removing my garage slab in the area of my room and pour a new slab.
I'm not saying you need to do that, but........ it might come down to that if you're looking for the best outcome.
--Keith :mrgreen:
That line sounds kinda funny taken out of context...
Yup that’s the way I meant it… I got a kinda dry sense of humor.
Keith,
Perhaps jamming a piece of pressure-treated lumber as a wedge the between the bottom edge of the drywall and the air handler pedestal would suffice down there. I know you were aiming to keep the pedestal and the wall isolated from each other, but they're both sitting on the same slab and attached to the same (house) wall -- so I don't know how much flanking vibration you're really avoiding by going to these great lengths...
Yup I think you’re right. Seeking perfection in this less than perfect spot may be impossible. I’ll eventually remove that 2x4 (which is PT) in order to insert backer Rod and Caulk around the perimeter, cut the 2x4 same length as plywood box, re insert pt 2X4 and let it live there. 8)
As far as the slab goes, I wish I had known (perhaps I missed it previously) that you expected your slab to be joined to the foundation with rebar. I would have told you that I didn't share that expectation at all!
Well that goes back to Lenny, he said the patio slab should be connected to the wall footers, patio slab was built same as garage slab… somehow foolishly I still want to believe a few words that came out of his mouth. :oops:
Why the $%&^ did I let a ^&(* $%^ I)&*% &*&%$# I())__ *(&&^%^& architect lead me down this path.... Septic and Habitable Code requirements... but why the $%&^ did this ^&(* $%^ I)&*% &*&%$# I())__ *(&&^%^& architect even completey screw up multiple times a drawing for a simple storage room, and as I realize now completely sell me on his service with nothing more then blown smoke.
Oh well... I'm the boss, this is my project, I've got to walk the path I've allowed.
Whew...I just don't know what to advise you here. At this point your plan calls for building structural walls on a non-structural slab. In fact, you've already built a couple of those walls.
Correction, (and plese correct me if I'm wrong but) the walls I’ve already built are non-structural, non- load bearing, interior, partition walls, only thing strange about them is that they have 2 and 3 layers of drywall on them. My two exterior walls I’ve yet to build are non-structural (or maybe non load bearing is a better term), nothing will bear on them however they have been designed to meet wind sheer (or I hope) of 125mph wind gusts for 3 seconds. One will sit on new footer and the other wall (with door cutting across patio) secured to other new wall (on new footer) at corner, concrete block wall, ceiling and existing patio slab is also suppose to meet wind sheer. They are non-load bearing with exception they’ll have extra weight of beef up drywall.
Keith, I just got to mention California codes are different then most states because of seismic conditions, Florida and others have wind sheer on exterior walls. We got to remember that when talking about interior/partition walls; structural is not always a word that belongs.
Marc, please carefully read (or reread)
OK reread and still confused in regards to my situation.
I think I’m going to draw this up, add some numbers together, make another post and PM Rod asking for a review/opinion.
Marc
OK,
Question of the day, do I take out the rest of patio slab beneath studio or leave it build as planned with only a new footer on the exterior edge?
Weight summary of my inner leaf walls and ceiling:
Lumber = 750 pounds
2 layers 5/8” drywall all around = 2400 pounds
Inner leaf frame weight will be well over 3,500 pounds when adding in caulk, drywall screws, mud, wall insulation, interior acoustic panels and flooring.
The total length of all 4 inner leaf walls is about 48 feet. Of this 14’ or so will be bearing on old patio slab 4” thick, which I know is not attached to existing walls. That’s about 30% of the total weight of inner frame or just over 1000 pounds, bearing on 14’ of bottom plates 3 1/2"s wide. SO that's 1000 pounds on 4 sq ft... 250 pounds per square foot.... 20 pounds per square inch.
I'm feeling better with these numbers to look at, however I'm still hesitant.
I drew up a quick diagram below.
Marc
Sorry, I've been crazy busy lately (latest event: a 10 p.m. to 4 a.m. database server move! :shock:)
guitardad72 wrote:
sharward wrote:
As far as the slab goes, I wish I had known (perhaps I missed it previously) that you expected your slab to be joined to the foundation with rebar. I would have told you that I didn't share that expectation at all!
Well that goes back to Lenny, he said the patio slab should be connected to the wall footers, patio slab was built same as garage slab… somehow foolishly I still want to believe a few words that came out of his mouth. :oops:
Why the $%&^ did I let a ^&(* $%^ I)&*% &*&%$# I())__ *(&&^%^& architect lead me down this path.... Septic and Habitable Code requirements... but why the $%&^ did this ^&(* $%^ I)&*% &*&%$# I())__ *(&&^%^& architect even completey screw up multiple times a drawing for a simple storage room, and as I realize now completely sell me on his service with nothing more then blown smoke.
I know I've said it before, but it bears repeating -- you deserve a better outcome and process than this! It's a real bummer that your architect is such a loser. :evil:
guitardad72 wrote:
sharward wrote:
Whew...I just don't know what to advise you here. At this point your plan calls for building structural walls on a non-structural slab. In fact, you've already built a couple of those walls.
Correction, (and plese correct me if I'm wrong but) the walls I’ve already built are non-structural, non- load bearing, interior, partition walls, only thing strange about them is that they have 2 and 3 layers of drywall on them. My two exterior walls I’ve yet to build are non-structural (or maybe non load bearing is a better term), nothing will bear on them however they have been designed to meet wind sheer (or I hope) of 125mph wind gusts for 3 seconds. One will sit on new footer and the other wall (with door cutting across patio) secured to other new wall (on new footer) at corner, concrete block wall, ceiling and existing patio slab is also suppose to meet wind sheer. They are non-load bearing with exception they’ll have extra weight of beef up drywall.
Keith, I just got to mention California codes are different then most states because of seismic conditions, Florida and others have wind sheer on exterior walls. We got to remember that when talking about interior/partition walls; structural is not always a word that belongs.
All great points, Marc. If there's anything I've learned about building codes, I've learned there is so much to know about building codes that I don't know! :lol:
But this is worth pondering... Why do buildings have structural slabs, if all they really need are structural footings around their perimeter and under load bearing walls? Wouldn't it maybe be cheaper to make the floors inside a house inferior, like garage slabs? :roll: The point I'm making is that garage floors are inferior to structural slabs, and the reason they are so because they're cheaper and the builders can get away with it. That's the name of the game, after all -- overbuilding = overcosting = less profit.
Now, it is possible that the "inferiority" of your garage slab is acceptable for the walls you're building. But how do we know this?:roll:
guitardad72 wrote:
I think I’m going to draw this up, add some numbers together, make another post and PM Rod asking for a review/opinion.
I think that's wise. I tend to be more skilled at asking questions than answering them -- and I've certainly been known to confuse and befuddle now and then! :lol:;-)
OK, Rod -- tell us how it really is, and I'm fully prepared for being made a fool if necessary! ;-)
--Keith :mrgreen: