Do I also need a gap behind the superchunks like i have with the wall panels?The gap behind the side panels isn't critical: it just helps to extend the range a little lower. Some folks say that the gap should be the same as the thickness of the insulation, but there's no theoretical support for that, as far as I'm aware. Any gap is good, so just make it as big as you can afford, in terms of space.
Small Home Drum Studio
Originally posted at johnlsayers.com, topic 17803.
No, that isn't necessary. - Stuart -Do I also need a gap behind the superchunks like i have with the wall panels?
Hi guys, it's taken a while but i've finished the next draft of my studio design. If you guys could take a look and let me know what you think I would appreciate your feedback.
It's not very pretty but hopefully sound wise it'll do the job :) let me know what you think and i'll make the necessary modifications
You can view the sketchup model here
Thanks
Thant looks much better.
A couple of questions:
1) What is the layer called "Covering" in your model? Is that some type of acoustic cloth?
2) What is the plan for the ceiling? It looks just drywall in the model, but you'll really need to make the entire ceiling absorptive (or most of it), and also hang a hard-backed cloud, to help deal with the modal issues.
Overall, there's probably too much high frequency absorption in there, so I would cover the front face of the bass traps plastic to help deal with that, and also perhaps make part of one of the side walls into a slot wall.
But overall you seem to be on the right track.
- Stuart -
It's just a breathable fabric i've been using to cover my absorption material. The fabric i have been using until now is Calico. Is that ok?1) What is the layer called "Covering" in your model? Is that some type of acoustic cloth?
The entire ceiling currently has a 4" layer of absorption with a 3" air gap above that. I've got to try and work out how to hang the hard-backed cloud to deal with the modal issues but i'm currently looking into it2) What is the plan for the ceiling? It looks just drywall in the model, but you'll really need to make the entire ceiling absorptive (or most of it), and also hang a hard-backed cloud, to help deal with the modal issues.
I was going to ask you about covering with plastic but then forgot about it. What kind of thickness or plastic are we talking? Do you have any examples of a slot wall I could look at? I've seen an example is one of John's sketchup models but not sure of the building method or materials Thanks Stuart that's really helpfulOverall, there's probably too much high frequency absorption in there, so I would cover the front face of the bass traps plastic to help deal with that, and also perhaps make part of one of the side walls into a slot wall.
OK, good. I wasn't sure, as it looks like drywall on the SketchUp model.It's just a breathable fabric i've been using to cover my absorption material.
Sounds great!The entire ceiling currently has a 4" layer of absorption with a 3" air gap above that.
Basically just a wooden frame with thick MDF, OSB or plywood on top, and some more insulation below, hung on chains attached to your ceiling joists.I've got to try and work out how to hang the hard-backed cloud to deal with the modal issues but i'm currently looking into it
Depends on the frequencies that you need to reflect, but 6 mill plastic should be fine for most applications.I was going to ask you about covering with plastic but then forgot about it. What kind of thickness or plastic are we talking?
There are many examples on the forum itself, in the threads of people who have built their studios already. The basic concept is just wooden slats attacked to some type of frame, or even to the studs directly, with insulation behind. The cavity behind the slats MUST be sealed air-tight, all around, or it won't work. The dimensions and spacing of the slats controls the tuning. - Stuart -Do you have any examples of a slot wall I could look at? I've seen an example is one of John's sketchup models but not sure of the building method or materials
Wow! 6mm, ok so we're talking more plastic boards rather than a thin layer of plastic film/wrapDepends on the frequencies that you need to reflect, but 6 mill plastic should be fine for most applications.
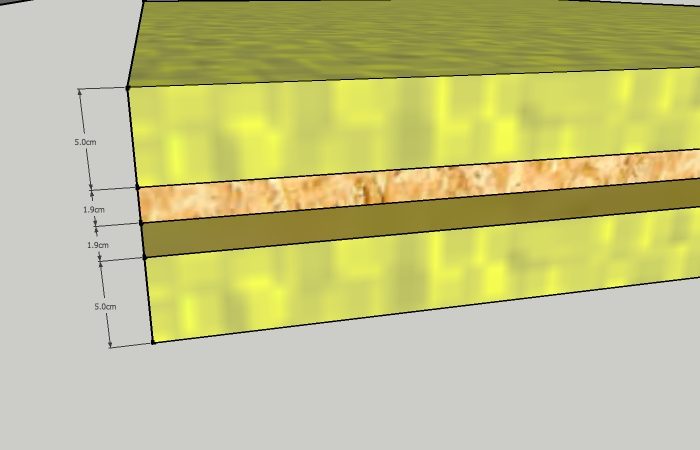
Ok, I can't hang it from the ceiling joists because of the insulation i already have on the ceiling, Should be able to do it from the wall though which is the way I hung insulation up before I had the ceiling done, It'll just need some thicker wire rope than the stuff I used previously. I've attached a sketch of the cloud, I've put 2" of insulation top and bottom. Do you think that will be enough? I've also done a 19mm layer of MDF glued and screwed to a 19mm layer of plywood. Does it matter which way round the MDF and Plywood layers go? As in plywood on top and MDF below or MDF on top with Plywood belowBasically just a wooden frame with thick MDF, OSB or plywood on top, and some more insulation below, hung on chains attached to your ceiling joists.
Uhhh, no, not exactly!! I said "6 mil", not "6 millimeters". That's a rather different thing!!! :) A "mil" is 1/000th of an inch, so 6 mil is 0.006 inches, or 0.1524 millimeters thick. 6 mil plastic is what is generally used as vapor barrier in houses: http://www.homedepot.com/webapp/catalog ... tools_listWow! 6mm, ok so we're talking more plastic boards rather than a thin layer of plastic film/wrap
I doubt that you'll be able to hang it from the walls. It will be HEAVY. Even assuming it is only 4 square meters (2m x 2m), at 19mm thick (3/4") that's about 65 kg of MDF, just for the backing panel, without considering the framing, insulation and hardware. We are talking over 70 kg here! Well over 150 pounds. It needs to be hung securely, on suitable chains, from the joists. And the above assumes just one layer of 19mm MDF, Add another layer, and you basically double the weight... So your mounting hardware needs to be substantial: With six chains, each one is carrying a load of about 15 kg, so you need chains and hooks that can handle at least double that. That's a lot of mass up there, hanging right over your head, so please do make sure you attach it firmly and safely!Ok, I can't hang it from the ceiling joists because of the insulation i already have on the ceiling, Should be able to do it from the wall though which is the way I hung insulation up before I had the ceiling done,
There's no difference, no. Either way is fine.I've also done a 19mm layer of MDF glued and screwed to a 19mm layer of plywood. Does it matter which way round the MDF and Plywood layers go? As in plywood on top and MDF below or MDF on top with Plywood below
More would be better, but there are also limits on your room height, and the panel does need to be angled, so it might not be feasible to make the insulation thicker. But if you can, then I would leave it 2" on top and make it 4" underneath. But if you can't go more, then 2" on each side is OK. You are probably also OK with just one layer of MDF; without the plywood, if you are tight on space and structural support. You didn't show the frame in your model: 1x6 framing around the edges would work well. You can staple the final fabric cover to that. You only need to cover the bottom, of course, but the wrap the cloth around the sides and staple it to the top edge of the 1x6's, where it won't be seen. In this case, you also do want to put some very thin plastic between the cloth and the insulation, to prevent the fine fibers from filtering down all over your equipment over time. That stuff is not good for faders, potentiometers, switches, keyboards, .... - Stuart -I've attached a sketch of the cloud, I've put 2" of insulation top and bottom. Do you think that will be enough?
Haha ok, that makes more sense, I was a bit surprised that it would be that thick. Turns out it was me being a bit thick not the plastic :)Uhhh, no, not exactly!! I said "6 mil", not "6 millimeters". That's a rather different thing!!! :) 6 mil plastic is what is generally used as vapor barrier in houses
Ok, i'll have to try and get to the joists through the insulation that's currently up there then, and somehow modify the frames covering the insulation to allow the chains though. My ceiling insulation isn't currently covered in plastic. should I cover it with plastic too while I have the covers down?I doubt that you'll be able to hang it from the walls. It will be HEAVY. Even assuming it is only 4 square meters (2m x 2m), at 19mm thick (3/4") that's about 65 kg of MDF, just for the backing panel, without considering the framing, insulation and hardware. We are talking over 70 kg here! Well over 150 pounds. It needs to be hung securely, on suitable chains, from the joists. And the above assumes just one layer of 19mm MDF, Add another layer, and you basically double the weight... So your mounting hardware needs to be substantial: With six chains, each one is carrying a load of about 15 kg, so you need chains and hooks that can handle at least double that. That's a lot of mass up there, hanging right over your head, so please do make sure you attach it firmly and safely!
What angle should I go for? Thanks...the panel does need to be angled
Yes, I would do that: over time, some of the fine fibers in the insulation come lose an fall out, so they will slowly drift down and cover all your gear with this fine abrasive "dust". That is not much good for your electronic gear! It messes up faders, potentiometers, and switches, and gums up fans and filters.... The plastic keeps it in place, as well as helping with the highs. HOWEVER! For the ceiling cloud and ceiling insulation, use very thin plastic, not 6 mil. Use the type that they sell as painter's drop cloth, for covering furniture and floors while they paint. It is very thin, more like a film than actual plastic. That stuff does not block the mids and high mids, which is good: that's what the cloud is there for! To treat the mids and high mids.My ceiling insulation isn't currently covered in plastic. should I cover it with plastic too while I have the covers down?
12° or more should be fine. That will also eliminate flutter echo, if that happens to be a problem,. But if you can't manage to make 12° (if that would make it too low) then just angle it as much as you can. - Stuart -What angle should I go for?
Hi Stuart, This is the most recent sketchup model with the cloud added. You can download it from here
I went for an 11 degree angle on the cloud in the end which gives me 1.8meters of head room. I think that should be enough but I may take the angle down to 10 degrees to give me a little more.
The size of the cloud is 1.5 x 1.5 meters. Do you think that will be enough?
I've also mounted it as close to the ceiling insulation as possible. Is that ok, or does it need to be a certain hight?
I now need to work out how i'm going to do the slot wall. I had a look around the Forum and found this article
I assume we're looking to create a broadband absorber rather than tuning it to a specific frequency?
The bit that I would like to know more about is how to make it air tight. This may be a silly question but how air tight does it need to be and how would I go about making the framing air tight for instance?
Thanks for all your help so far stewart
That looks fine!The size of the cloud is 1.5 x 1.5 meters. Do you think that will be enough?
No specific height is necessary. It's fine to mount it like that.I've also mounted it as close to the ceiling insulation as possible. Is that ok, or does it need to be a certain hight?
Yup! John wrote that... :)I now need to work out how i'm going to do the slot wall. I had a look around the Forum and found this article
Right!I assume we're looking to create a broadband absorber rather than tuning it to a specific frequency?
Make it as big as you can, and seal around the edges of the cavity at the back using acoustic caulk, or even common bathroom/kitchen caulk. Get the type that remains flexible and rubbery permanently, even after it sets. Just seal everything where the framing meets the wall behind, and the ceiling above, and the floor below, and at the sides. - Stuart -The bit that I would like to know more about is how to make it air tight. This may be a silly question but how air tight does it need to be and how would I go about making the framing air tight for instance?
Presumably using acoustic caulk will be permanent though and will damage the floor and ceiling if removed later? I need the whole to treatment of my room to be fairly reversible once I move. Filling holes is fine but i don't really want to re-plaster the ceiling or redo the floor if it gets damaged.Make it as big as you can, and seal around the edges of the cavity at the back using acoustic caulk, or even common bathroom/kitchen caulk. Get the type that remains flexible and rubbery permanently, even after it sets. Just seal everything where the framing meets the wall behind, and the ceiling above, and the floor below, and at the sides.
Then just put a hard back on the slotwall module, and seal that!
- Stuart -
Ok, good idea, hadn't thought of that. Would I still need to use the acoustic caulk or will screw and glue be enough to attach the backing to the frame? This is the new sketchup model with the slot wall added. You can download it here I've done the slats 50mm width x 19mm depth and spaced them 5mm, 10mm 15mm and 20mm. According to the helmholtz excel calculator that should give me a range of 343 - 608Hz. Do you think that's a big enough range?Then just put a hard back on the slotwall module, and seal that!
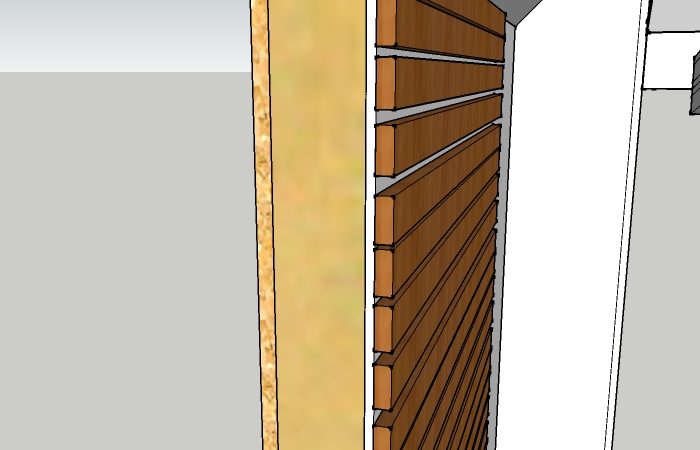
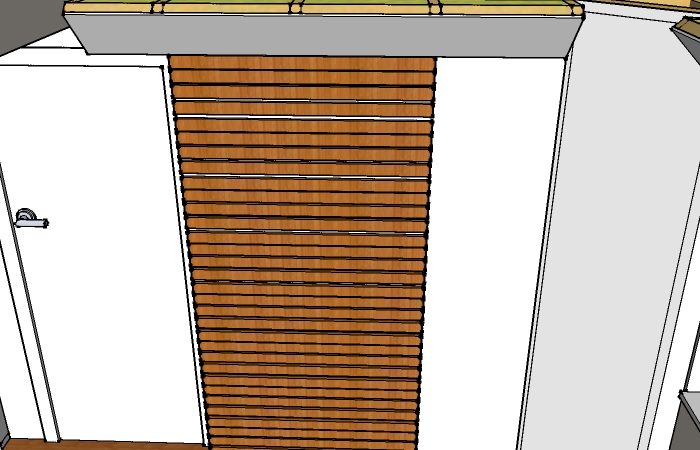
That might work, but I would rather go with John's "standard" dimensions, that give you good broadband coverage. It's a proven design that works. Your slats seem a little small to me, and perhaps a bit too regular. It might end up also working as a binary diffuser, and the regular sequence would cause strong lobing patterns, I suspect. I'm not certain about that, and I don't have time right now to calculate, but it would be easier to go with John's design, as it is known to work.I've done the slats 50mm width x 19mm depth and spaced them 5mm, 10mm 15mm and 20mm. According to the helmholtz excel calculator that should give me a range of 343 - 608Hz. Do you think that's a big enough range?
Caulk everything! Glue might work, but caulk is much better. - Stuart -Would I still need to use the acoustic caulk or will screw and glue be enough to attach the backing to the frame?
Sorry Stuart, I might be being a bit blind but I've looked around the forum and through John's Recording manual and can't seem to find the dimensions anywhere. Is this the dimensions you were talking about?That might work, but I would rather go with John's "standard" dimensions, that give you good broadband coverage. It's a proven design that works. Your slats seem a little small to me, and perhaps a bit too regular. It might end up also working as a binary diffuser, and the regular sequence would cause strong lobing patterns, I suspect. I'm not certain about that, and I don't have time right now to calculate, but it would be easier to go with John's design, as it is known to work.
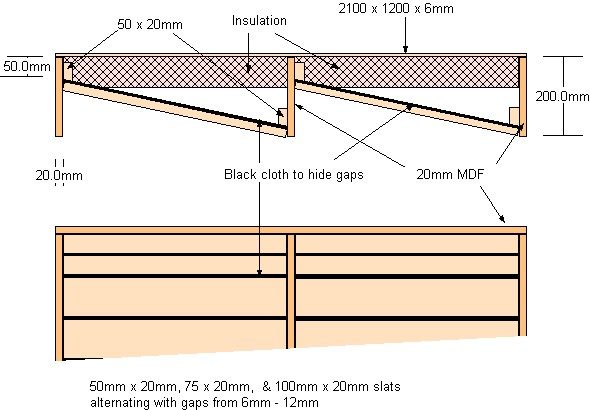
Those are the ones, yes. A slot wall acts more as an overall broadband absorber, with both reflection and diffusion, so it does a lot of things at once. Although you can "tune" the individual slots, they work together more as a broadband device rather than as single, individual resonators. It acts more like a perforated panel then individual resonators. If you want it to act individually, you can do that too: you just need to add internal partitions along the middle of each slat, to seal of separate cavities for each slot. Without those, it acts "sort of" like a perf panel and "sort of" like individual resonators.Is this the dimensions you were talking about?
You can do it either way: angling just makes it cover a broader range of frequencies. - Stuart -Also I see on a lot of John's designs he angles the Framing. Do I need to do that too, or should I just leave it flat as it is currently?
Ok great, just one last question about the dimensions though. When it says "gaps from 6-12mm" what exactly is it suggesting? Pick one dimensions, say 6mm and use that for every gap, or just randomly vary the gaps. Or does it mean start at 6mm for the first gap and then 7mm for the second, 8mm for the forth etc? Thanks StuartThose are the ones, yes.Is this the dimensions you were talking about?
The answer is: "Yes". :) :!: :shock: :roll: It really depends on what you are trying to accomplish. A slot wall is actually a complicated device that can do many things at once, but they all depend on each other, so it is a trade-off of one thing against the others. As a very rough rule, if the total size of all the gaps is small as compared to the total frontal surface of all the slats (less than around 5%-10%), then the wall acts more like a bunch of Helmholtz resonators, and is also very reflective across most of the spectrum, with practically no diffusion at all. On the other hand, if that percentage is very large (say 50% or so), then it acts very much like a pure absorber, with little reflection, no Helmholtz action at all, and some diffusion. In this case, the diffusion depends on the sizes and spacing of the slats. So does the reflectivity: slats will reflect sound waves whose wavelength is small, as compared to the size of the slat (height), diffract waves of comparable dimensions, and do nothing to waves that are larger. So if you vary the slat size and positions, you can sort of control how each part of the wall reflects, and how it absorbs. If you did a wall with 1cm slats spaced 1cm apart, that would be 50% perforation, but it would not be very reflective except at very high frequencies (above about 4kHz), but would be pretty good at diffusing, and also at absorbing. On the other hand, if you did the wall with 50cm slats and 50cm gaps, that would also be 50% perforation, well that would reflect frequencies above 700 Hz very well, (even down to 350 Hz it would still be good) but be less absorptive and less diffusive. On the other-other-OTHER hand, if you took those same 50cm slats and narrowed the gaps down to 2cm (= 4% perforation), it would start acting much more like a large Helmholtz resonator. If the cavity depth was 5cm and the slats were 1.5cm thick, then it would be tuned to absorb at about 360 Hz. It would not be very effective at that frequency, but it would show good signs of absorbing around there: And it would also be a lot more reflective, and a lot less diffusive. If you were then to angle all the slats a bit, so the cavity depth is at 7cm at one end of the slats and 4cm at the other, then you flatten the Q: it becomes more broadband, absorbing from about 300 Hz to 400 Hz, but much less effective at any give frequency within that band. So it's a juggling game! You decide what you want to do, then figure out how to do that by varying the slat and slot dimensions, and the cavity depth. Then comes the question of the gap and slat sequence: If I recall correctly, Rod Gervais likes to keep the gap sizes all the same sometimes, for aesthetics, and vary the size of the slats. Or you could keep the slat sizes all the same and vary the gaps. Or both, which is what John does, usually. And that leads to another question: If you vary either the gap size, or the slat size, then should you do that randomly, or in a sequence? Here again, the answer is "Yes". You can do it either way. If you vary it in a sequence (like Glenn does), then that can have some benefits. But if you don't do it right, you can end up with lobes of diffusion at strange angles and low frequencies. Not a good idea. Varying randomly is a possibility too, provided that you really do use a random sequence, not a pattern! And finally, you might want to position certain size slats or gaps at certain heights to do certain things with certain frequencies. For example, you might well decide that you want to tune to lower frequencies up near the ceiling and down near the floor, to assist with mid-low absorption, or you might decide that you need small slats with larger gaps in the middle of the wall (vertically) for better high frequency absorption. So there just isn't any simple answer to your question! You could decide to vary the gaps as 12mm, 11mm, 10mm, 9mm, 8mm, 7mm, 6mm, as you go down the wall, and use four 50mm, slats followed by three 75mm slats followed by two 100mm slats, then reverse the sequence and repeat. That would give you a wall that is slightly more reflective of highs in the middle, while absorbing more highs at the top and bottom and more mid-lows on the middle. On the other hand, if you did a sequence of gaps going the other way 6, 7, 8, 9, 10, 11, 12, and a sequence of slats going from larger to smaller, then you'd get the opposite effect: More low frequency absorption and high frequency reflection at the top, with better high frequency absorption and also diffusion further down. And if you made the entire wall of 50mm slats with 12mm gaps, then it would not act much like a Helmholtz resonator any more, as the perforation percentage is too high, at nearly 20%: it would act more like a general absorber and also a diffuser (with serious lobing problems, due to the repeated pattern!). So that's about as good an answer as I can give! Sorry I can't be more specific: it's just the nature of the beast. Slotwalls are complicated, but powerful, useful acoustic devices. - Stuart -When it says "gaps from 6-12mm" what exactly is it suggesting? Pick one dimensions, say 6mm and use that for every gap, or just randomly vary the gaps. Or does it mean start at 6mm for the first gap and then 7mm for the second, 8mm for the forth etc?
Thanks Stuart that's been really helpful. Having had a think about it the main problem is that I don't really know what I want to accomplish. I need to improve the low mid range since the snare sounds horrible at the moment but also could do with improving the highs to help with the cymbals. Would it be a good idea to make all the changes to the rest of the room but not put on the slats. Then do another test and recording in the room and decide what to do at that point? Or would you suggest just deciding before starting on the construction?It really depends on what you are trying to accomplish. So it's a juggling game! You decide what you want to do, then figure out how to do that by varying the slat and slot dimensions, and the cavity depth. Sorry I can't be more specific: it's just the nature of the beast. Slotwalls are complicated, but powerful, useful acoustic devices.
That's what I would do, for sure. All those wonderful prediction tools can give you results claiming to be accurate down to 0.1 Hz, and half a decibel, but reality is rather different! The way a room actually performs can vary significantly from prediction. Even small changes in construction can add up: slightly bowed studs, a wall slightly off plumb, or angled at a fraction of a degree, a slightly uneven floor, slight sag in the ceiling, etc. Even the simple fact of putting you in the room with a chair, desk, speaker, mic, and equipment, changes the response of the room. So you have to measure the actual response after the room is built. That's a must. And of the response does match the prediction perfectly, then rush out and buy a handful of lottery tickets, because your incredible good luck won't last much longer! :) What you should do is measure the room response as soon as the inner shell is complete, BEFORE you put any type of treatment in at all. Just the bare walls, desk, chair and enough equipment to do the test. That will be your baseline test, against which you compare all subsequent tests for each round of treatment. For that first test, place the mic exactly were your head will be while mixing, and then measure that position in the room very, very carefully, since you MUST get the mic back to the precise specific spot, accurate to within a couple of mm, for every subsequent test. If you don't get the mic to the same place every time, then the tests cannot be compared. They are all valid, but for different mic position. So for sure, build the room first, test it with zero treatment, then put in the basic treatment and test again ("basic" meaning bass traps, first reflection points, and cloud). Based on the results of that, you can see what has improved, what has gotten worse, and what issues you need to address. Then you can decide on how to use the slot walls. That's the smart way of doing it. Incremental treatment, checking each step of the way. - Stuart -Would it be a good idea to make all the changes to the rest of the room but not put on the slats. Then do another test and recording in the room and decide what to do at that point?
Ok Thanks, In that case I'll get on with the build as soon as i've worked out all the final little details and worked out all the materials i'll need. ThanksSo for sure, build the room first, test it with zero treatment, then put in the basic treatment and test again ("basic" meaning bass traps, first reflection points, and cloud). Based on the results of that, you can see what has improved, what has gotten worse, and what issues you need to address. Then you can decide on how to use the slot walls.
Hi, I'm currently trying to finalise all the details ready to start my build towards the end of April. I'm currently looking into what absorption material to go for. As i'm sure you're aware we can't get Owens Corning 703 here in the UK. I've been told that Rockwool RW3 is a similar product and looking at the coefficients that seems to be the case. However I would be grateful if you could confirm this with me.
I got this data from this page
Thanks
It is similar but not as good, as can be seen from those numbers. Especially in low frequencies. It seems to be too dense (heavy) for good low frequency absorption.
What other alternatives are available where you live? Can you get Isover stuff, for example?
- Stuart -