I was really trying to stick with the 38% on this as I didn't want to get pushed to far back in the room,
That's good, but there's no reason to go overboard with 38%. It isn't written in stone. It is often referred to as a "rule" but maybe "rule of thumb" would be more appropriate. Just a general guideline, a point of reference, a good place to start from. You won't be arrested by the 38% Police if you happen to end up at 41% or 35%, or something else. 38% is just the theoretical point at which the modal effects are minimum, but it doesn't change much if you move a few points forwards or backwards.
Also, don't forget that the sofffits themselves change the room geometry, and push the acoustic front wall backward into the room. so your 38% also moves backwards with that.
Maybe try bringing those speakers a bit closer together, and adjusting the toe-in angle outwards a bit.
- Stuart -
cheers Stuart :D
I went back in there today to run over couple of the points that RJ brought up abut doing some sweeps and listening for holes. None were apparent, although when I was playing a drum track and paying close attention to the panning, it did seem like the overheads had lost a bit of correlation.
I then moved everything in to an equilateral position as suggested and played the same track. The correlation was lot better and the center of the mix was more definite. I've got to say I quite enjoyed listening to the 'wider' mix, although as a day to day working proposition i think you're both right and i'll tighten it up to an equilateral spacing.
At the moment that put's the focal point at 45% room length. I could probably get that down to around 41% with a bit more tweaking, but I probably wont get much lower than that. Does 45% sound like it's getting to far out?
cheers Stuart :D
I went back in there today to run over couple of the points that RJ brought up abut doing some sweeps and listening for holes. None were apparent, although when I was playing a drum track and paying close attention to the panning, it did seem like the overheads had lost a bit of correlation.
I then moved everything in to an equilateral position as suggested and played the same track. The correlation was lot better and the center of the mix was more definite. I've got to say I quite enjoyed listening to the 'wider' mix, although as a day to day working proposition i think you're both right and i'll tighten it up to an equilateral spacing.
At the moment that put's the focal point at 45% room length. I could probably get that down to around 41% with a bit more tweaking, but I probably wont get much lower than that. Does 45% sound like it's getting to far out?
Hi Stevev,
Hey ... glad you ran some testing for your own self ... this way you hear for yourself !
To relay what positioning I have with my monitors [currently]:
A diagram would possibly be easier to convey, but I'll try to verbally describe it ... wish me luck :)
We've always heard that speakers should be in an equilateral triangle, with the tweeters aimed at the listener's ear [or back of the head]. My experience, working large scale consoles was that much of the time was spent leaning into this 'focus'.
Now in the DAW world, there is little need to stretch 2 or 3 feet to reach trims or EQ's ... and another [as suggested by Gullfo - and others] was to toe out the monitors so that the 'focus' was anywhere from 6" to 24" deeper into the room.
In other words ... 1st establish your equilateral setup. Once in position, keeping the same distance between the monitors, toe them OUT so that the 'point of focus' is behind the listeners head.
Currently, I have mine focused 16 inches behind the original equilateral point.
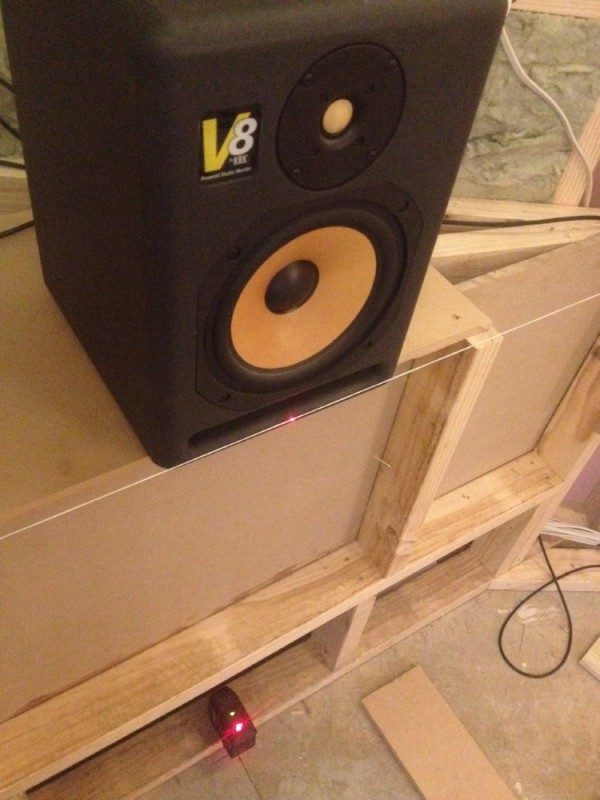
I used a microphone stand with white paper wrapped around the tubing, with a 'plumb bob' hanging to the floor. On top of my monitor, I centered a squared Laser that I positioned aligned to the center point of the tweeter squared to the cabinet. The laser beam could then be aimed at the center of the mic stand positioned at the exact distance.
Both monitors where aligned this way.
I learned long ago just how difficult it turned out, to critical place an object in a real 3-dimensional space, that were centered at an exact distance apart, precisely aimed, AND symmetrically placed within the wall boundaries.
I also printed out a HUGE protractor template that could be taped to the floor, along with other tape markers positioned on the floor, combined with the laser, allowed me to do this much more accurately. [Oh yeah ... I THOUGHT I had done good with a tape measurer, string, and a protractor] :shock: However, the laser [which I had from the construction phase] proved to be invaluable. It again came in handy when I replaced my isolation gummy gels under the monitors. I could pinpoint the aim rather easily. It will also make experimenting with different focal points much easier and predictable.
Some may say that I may be going too far in this alignment process ... but ... when the room and the treatment yield such a level of sonic 'Control', the criticalness of being able to [basically] 'Time Align' your monitors and minimize phase aberrations will influence every sonic decision that will be made. So yeah ... I think it worth the extra effort.
Sorry for the long winded post ... hope something in there is useful :)
Sorry for the long winded post ... hope something in there is useful :)
I'm all for the long winded post RJ :Dmonitor angle.jpgJust so I'm understanding you correctly about the focal point here: Your monitors and your ears/head are forming an equilateral triangle with the monitors as far as distance is concerned, but the monitors are actually aimed to 'intersect' 16 inches behind you. Effectively making an isosceles triangle between the monitors and the focal point (although probably not much of an isosceles triangle) Have I got that right?
I'll also be using the laser trick for lining up the monitor position. The unit I have for construction work will shoot square and plumb to within 5mm at 30meters distance, so I should be able to get them lined up pretty spot on. Glad to hear someone else has taken the alignment process down to the last millimeter as well :wink:
glad we're on the same page there RJ :D
I'll be pretty busy for the next week or so, but after that it'll be back in to the build. really looking forward to having this baby up and running as there's already work waiting for it to be completed :shock:
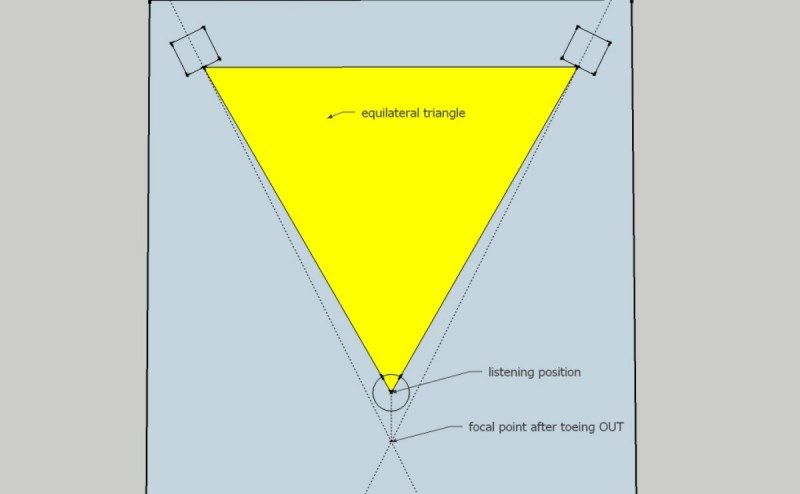
I know that's just a rough diagram, not to scale, etc., but there are two rather important points that need clarifying.
1) Those speakers are too far into the corners. They should be something more like 30% to 40% of the room width. (There is an "exact" percentage somewhere that is supposed to the "perfect" position, but I can't find it off hand: But take it with a grain of salt anyway: it is like the famous "38% rule").
You could fix that on the diagram by making the rectangle that represents the room a bit wider.
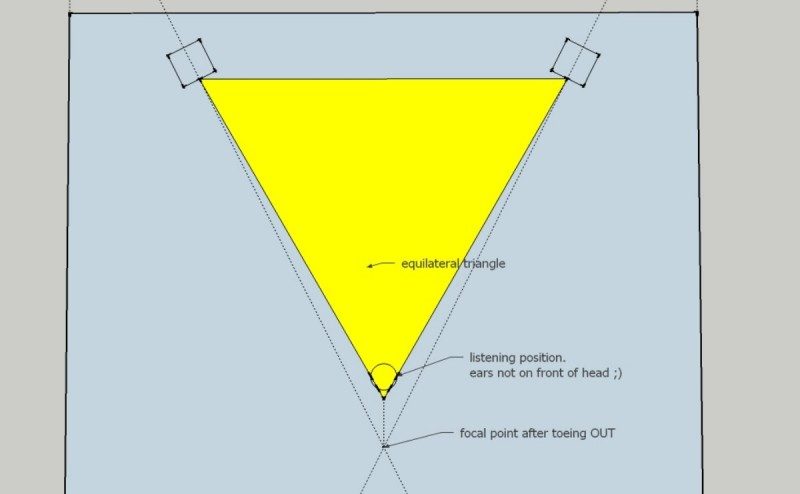
2) The yellow triangle is incorrect, except for people who have their ears positioned in their eye-sockets.. :) Since most people have their ears poking out the sides of their heads, that's where the speakers should be aimed. Thus, even for the "standard" equilateral triangle, the intersect point will be a few inches behind the head, not inside the head. That's a very common incorrect representation, found all over the internet and even seen in some supposedly expert magazines and books, so don't feel bad about it! :)
In other words, the second triangle (not the yellow one) is correct for the NORMAL representation of speaker geometry with a 60° intersect, so the "wider" geometry that RJ is talking about would be another triangle where the acoustic axes run a couple of inches outside of the ears, and meet even further back behind the head.
So you could fix that diagram by moving the circle-head forward until the edges of the yellow triangle are tangential to the circle.
Just thought that needed clarification.
- Stuart -
Stuart, your attention to detail is to be respected :Dmonitor angle.jpgdoes this look more like it?
Soundman2020 wrote:
Those speakers are too far into the corners. They should be something more like 30% to 40% of the room width. (There is an "exact" percentage somewhere that is supposed to the "perfect" position, but I can't find it off hand: But take it with a grain of salt anyway: it is like the famous "38% rule").
Even though that first diagram was a rough drawing, I'm still glad you brought up this point. I've done a fair bit of reading through this site and through others and I don't believe i've come across this information before.
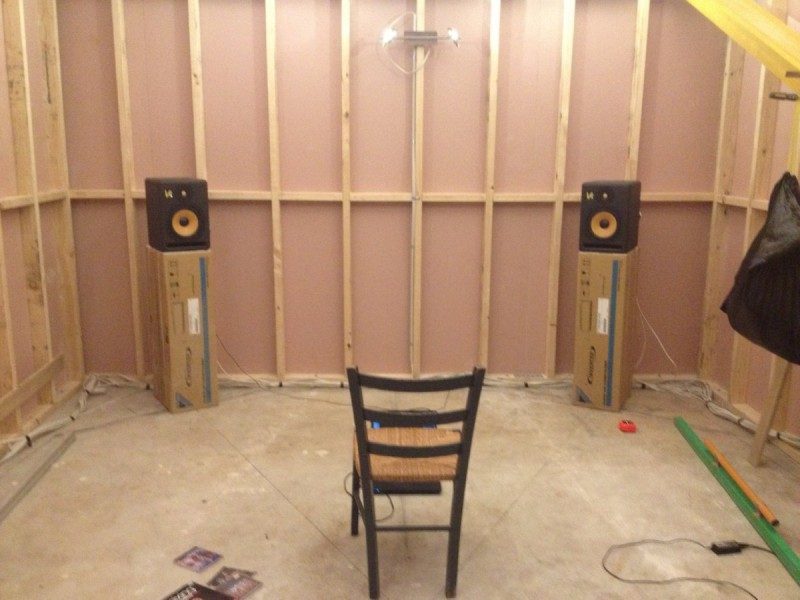
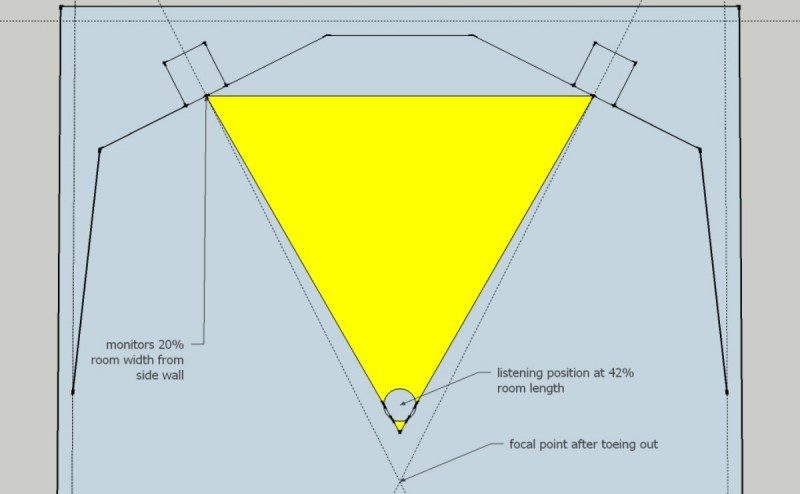
monitors 60 degree photo.jpgmonitor position 20% room width and equlateral.jpgthe photo above and the diagram is my actual room to scale as I have it marked out at the moment. The front and center of the monitors end up about 900mm from the side wall, and the equilateral triangle is about 2400mm per side. Putting the listening position at about 42% room length.
Image not preserved: monitor position 30% room width and equlateral.jpg
If i were to change the monitor distance from the side wall to 30% of the room width I end up with something that looks like this, wth the equilateral triangle at around 1650mm per side. Listening position also ends up around 30% of the room length.
the room is 4200mm wide and 5800mm long by the way. Any thoughts on which is the better of the two setup's?
Stuart, your attention to detail is to be respected
My wife calls that skill "nit-picking", and believe me, I don't get much respect for it! :)
does this look more like it?
Yup!
OK, I found the number: supposedly the "best" position is 27.7% of room width. Or 29%. Or 32%. depending on who you believe... :)
Personally, I'd split the difference and call it 28%.
But please do not take that as a "written in stone" rule that must be complied with, and don't go nuts trying to finesse the location of your speakers down to the nearest thou!!! Like the infamous "38% rule" it should just be taken as a guideline. Start there and play around as needed to improve things.
- Stuart -
Personally, I'd split the difference and call it 28%
I'm around 20% at the moment, so if I bring them in closer I wouldn't be surprised if that brings the listening position to around 38% as well. Hopefully i'll get a chance to mark that out in the room and have a listen before too long.
whilst there is a bit of down time on the build to attend to other things like my 'day-job', I thought I'd do a bit of research on window construction for between the live/control rooms.
So far I have this:
glass density is around 3 times plasterboard. my plasterboard is 32mm thick, so I need glass at least 10.7mm thick. So lets say 11mm or 12mm.
As there is no insulation between the window cavity, the cavity space needs to be at least 1.4 times that of the walls.
The glass panes do not need to be angled to each other.
Each pane needs to be sealed air-tight.
I've got a couple of questions about some other details.
One, do the panes need to be a different thickness?
Two, if a different thickness is required then how much of difference is needed?
You seem to be on the right track with those points. Just a couple of additional tid-bits to add:
As there is no insulation between the window cavity, the cavity space needs to be at least 1.4 times that of the walls.
Or you could make the glass a bit thicker, to add more mass, which would also help. It might not be that easy to make the air gap bigger, depending on the how the wall is built, so increasing the glass mass is another option for compensating for the lack of insulation. Also, there will be SOME insulation: around the edges of the glass, and that does actually have an effect, so the "1.4 rule" is probably a bit of overkill.
The glass panes do not need to be angled to each other.
Correct. At least, they don't need to be angled for acoustic reasons, but you still might need to put a slight angle on to reduce lighting glare, or to design the lighting very carefully such that glare is not a problem.
One, do the panes need to be a different thickness?
It helps, yes, if can, since it means the coincidence dips on the two sides will be at different frequencies. It isn't life-or-death though, so if you can't do that, then just make them both as thick as you can afford.
Two, if a different thickness is required then how much of difference is needed?
Whatever is available in your area! For example, you have figured that you need at least 11mm glass theoretically, so if you find that you can get 12.5 mm and 15mmm that would be excellent, or so would two of 12.5, or maybe even one of 11 and one of 13, but it would not be worth it to go with one of 14 and one of 14.5, for example. The greater the difference in thickness, the better it will be, but also the more expensive it will be. So just look at what is available at a good price in your area, and get the two thickest ones you can afford that are close to your calculations.
- Stuart -
Thanks for the input there Stuart, much appreciated as always :D
Soundman2020 wrote:
It might not be that easy to make the air gap bigger, depending on the how the wall is built....
The cavity is 220mm and the walls are both inside-out construction on 90mm studs. I'll be able to hang the panes on the inside (room-side) of both walls which gives me a 400mm air gap. Hopefully that means i'll be able to use an 11mm or 12mm glass to keep the cost down a bit :shock:
well, so much for getting the studio finished by the end of 2012 :roll:
Ive got to say though, a stint in hospital at the end of december with Quinsy (severe 'throat-closing' tonsilitis) didn't help!
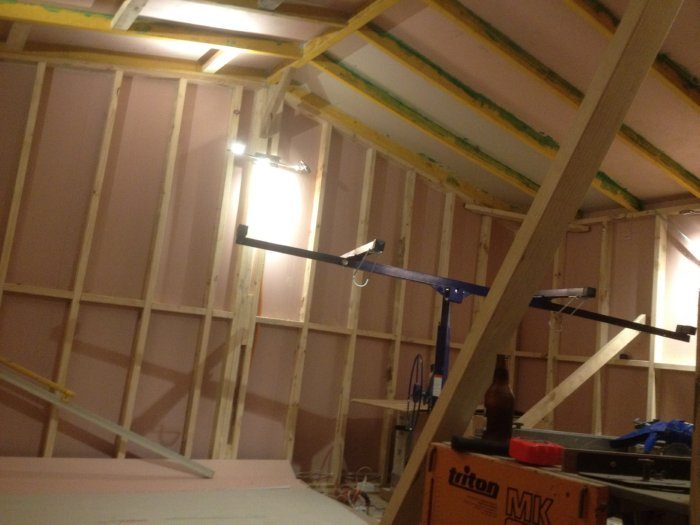
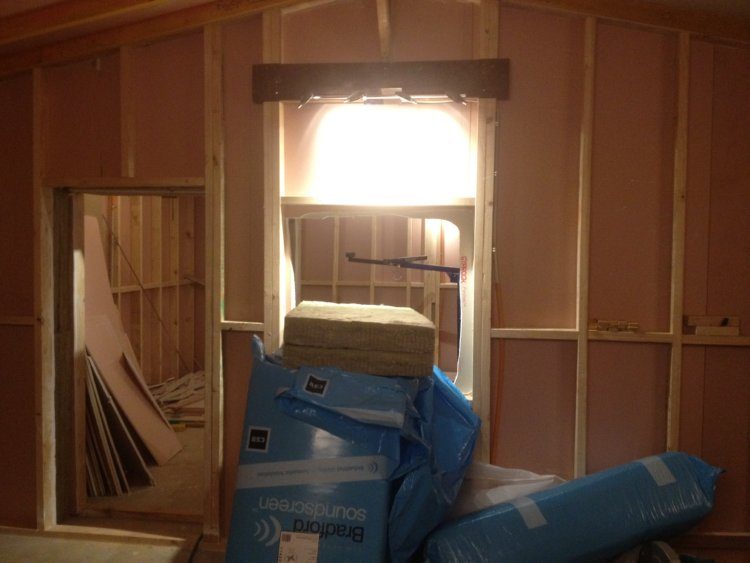
Managed to get back into it in the last few days which means i've finally hung the last of the plaster board!!! that's right, all internal ceilings and walls are done. I can tell you I'm not sorry to pack the panel lifter away, that's for sure.
now on to internal doors and windows, which i'm feeling confident about in terms of research and planning.
Thanks to all who have put forward their advice and ideas about the build in 2012, and with any luck it'll be completed in 2013. (if it isn't I'll fly you all over here so you can beat me with a big stick!!)
that's right, all internal ceilings and walls are done.
Cool! And congratulations: That's a major milestone completed. So now the REAL work starts.... :)
But there's a saying around this forum: "Pics, or it didn't happen". In other words, to be believed that you did it, you have to post some photos of what you did, and how it looks! :)
(if it isn't I'll fly you all over here so you can beat me with a big stick!!)
Wow! Great! It's been more than 30 years since I was in Aussie last, so I'm looking forward to it! :) (And I promise I'll only beat gently... :lol: )
- Stuart -
funny you should say that Stuart, because a lot of people who see where we're up to say 'oh WOW, so you're nearly done!'....and I say 'OHHHH, NOOOOO, that's the easy bit done (i:e planning, excavation, concrete, brick work, framing, insulation, plaster) now I've gotta make it sound good!!!'
so here's a couple of pics of where it's at right now.....
IMG_1332.jpgIMG_1336.jpgall the pics look kind of the same no matter where I shoot them from as both rooms are the same size, but none the less, you can see ceilings and walls all completed. there is still some sealing work to do, but I need to move all the tools and extra materials to the other room so I can do this.
looks like I won't be able to get back to the build in a meaningful way for a few weeks as I have a load of work to do. But the positive is that we're still going forward 8)
internal doors.jpgfinally got some time to get back in to the build after a while!!!
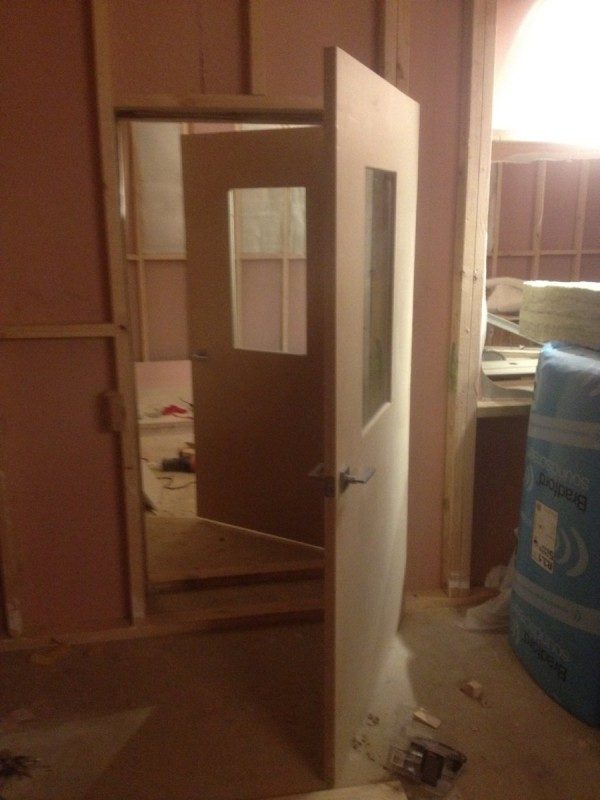
internal doors are in ( no seals yet ), comprised of a 32mm MDF sandwich with 10.5mm glass. surface density ends up at around 24kg/m which is equal to the walls, so i'm feeling good about that:)
Doors look good! But just a quick comment on one aspect: you have used ordinary door latch sets, which penetrate all the way through the door, and that is a potential weak point. Basically, that's a big hole with just a thin bit of metal over each end, which certainly doesn't add up to 24 kg/m3. The best method for keeping doors closed is to use an automatic door closer, which controls the speed of the door so that it cannot slam, and also then applies pressure on the seals once the door is closed, to ensure that you get good airtight seals. Done like that, you don't need things that go through the door, like normal latch sets, and instead you can just use surface mounted handles, with no door penetrations at all.
- Stuart -
ahhh, yeah, didn't think about that :oops:
looking for a positive on having the standard latch is that the unit's are quite bulky, and the internal structure of the handle does cover the entire penetration. I'd have to take a look but there's probably a minimum of 5mm of steel covering the hole at any one point.
One thing this does remind me of though, is that i haven't sealed around where the mechanism penetrates the door. I'll put that on the 'to do' list for tomorrow.
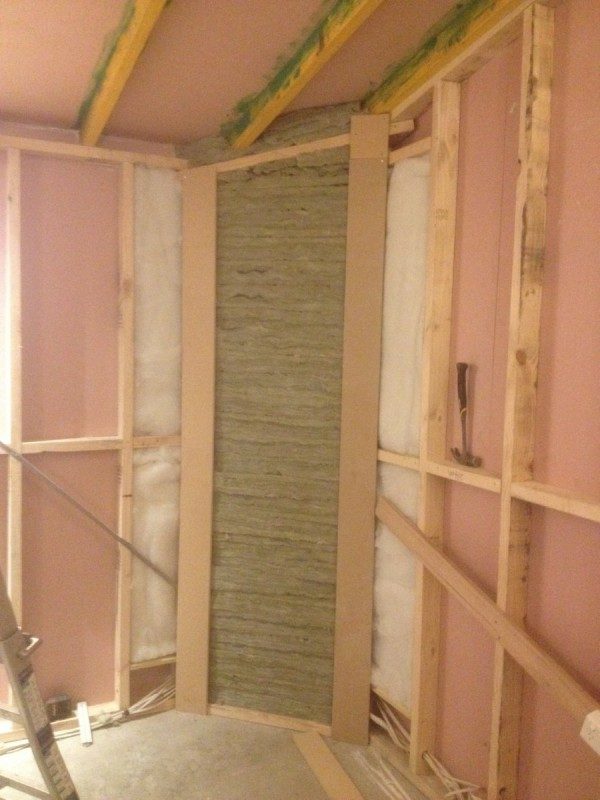
super chunk.jpgsuper-chunking for the live room begins. I'm putting a plastic cover over the front to retain high's and help hold in any stray fibers from the glass-wool.
yep, i've been busy building bits of studio over the past week, that's for sure!
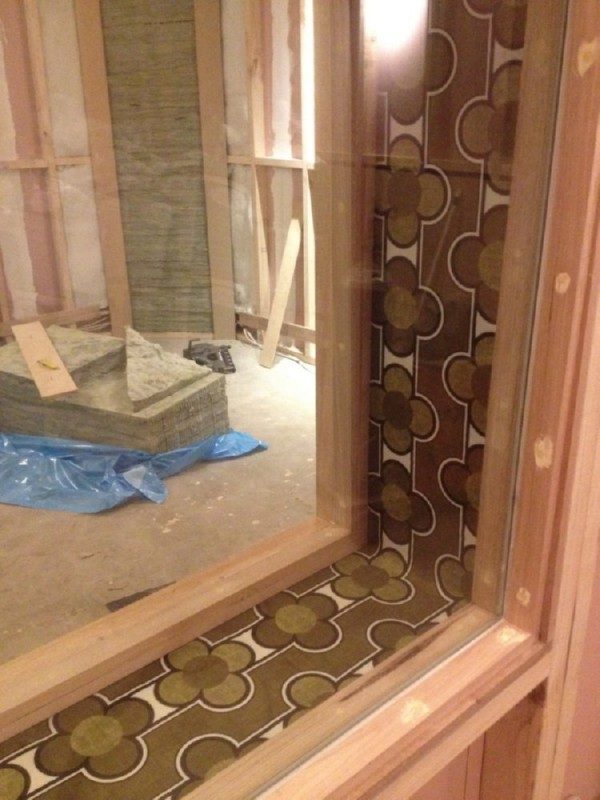
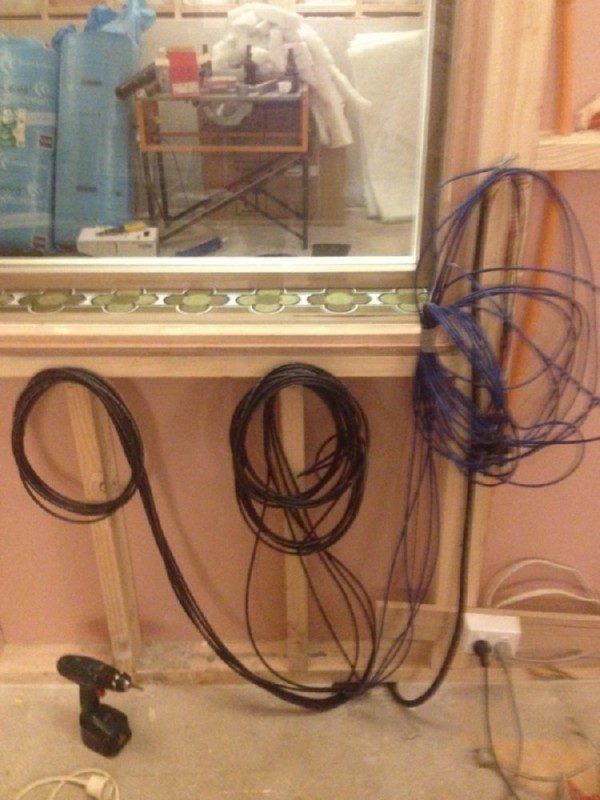
window.jpgthe window is in as per Rod's design from his book. Still a little bit of sanding on the outside to finish it up. Keeping sealant away from the fabric trim when installing the window stops etc, took a huge amount of concentration and care but I got there :Dcable.jpgCable has gone in between rooms. 11 individual mic cables, a 12 core snake, and 4 cat-5's. I can't think of anything else that would need to go in, but I still haven't sealed it up yet in case someone says "oh, did you put a thingy-majig connection through"
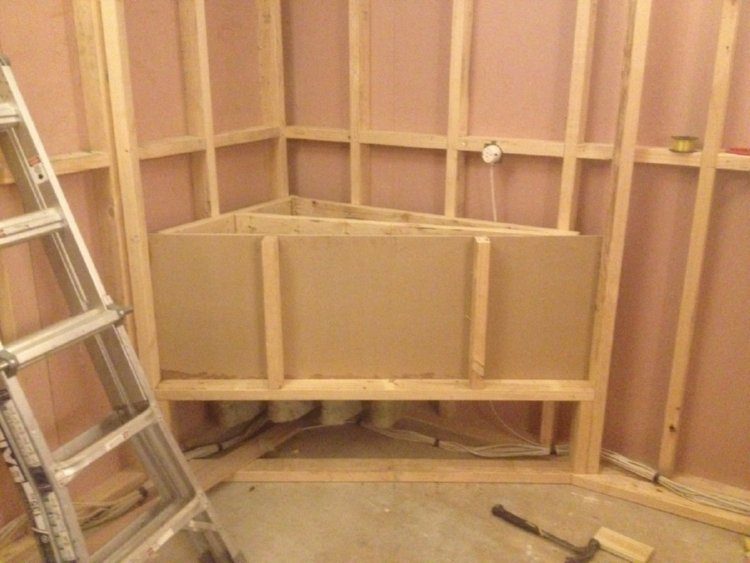
soffit.jpgSoffit construction is under way. I spent a good few hours going back over what I already learnt from this site and Rod's book before grabbing a nail gun. It's nice to see the control room taking a bit more shape.
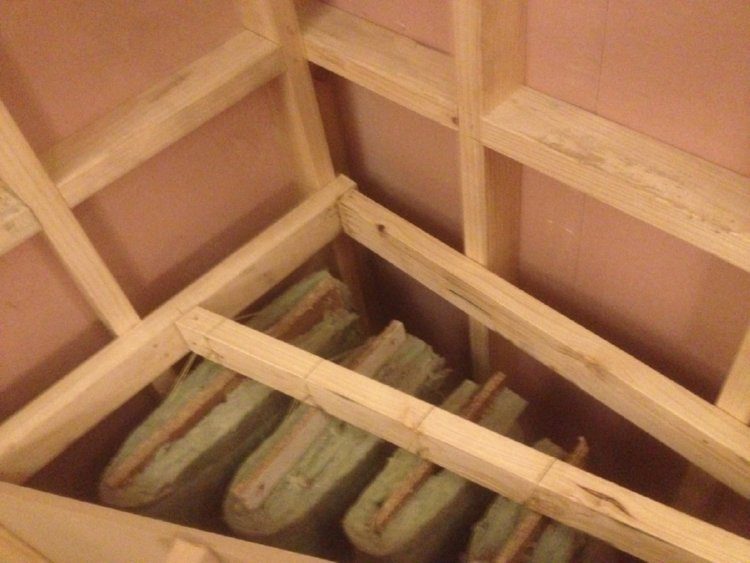
bass hangers.jpgBass hangers in the bottem as per John's design which is what the whole unit will be based on when done.
Phew, I'm in need of a beer or seven after the last few days 8)
the L.G.M (laser guided monitor) 8)
I can't get the monitor's lined up any better than this. focal point is about 20cm behind the listening position which has ended up around 38% room length. Monitors are at about 22% room width from the walls. Acoustic axis of the monitors ends up at about 1200mm from the finished floor height, give or take. I've allowed a bit of play as the control room floor will probably be a 20mm thick bluestone tile.
lasers.jpg
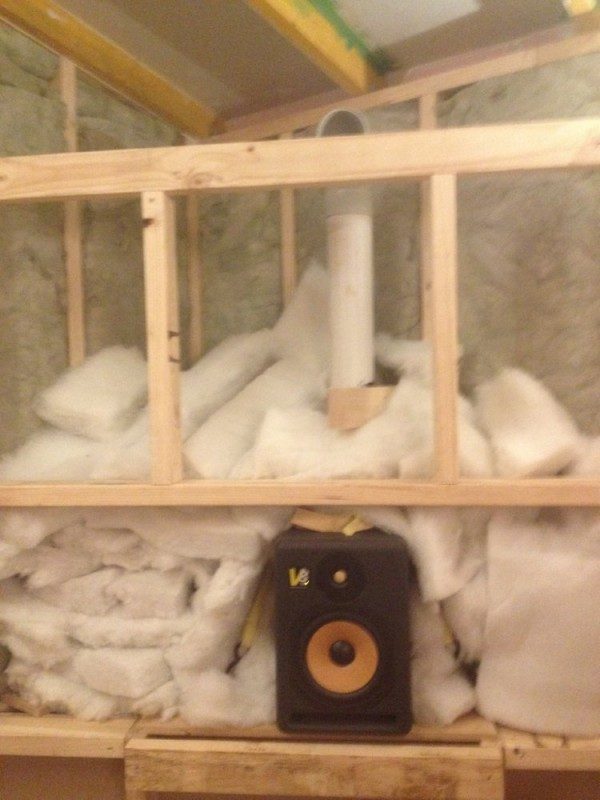
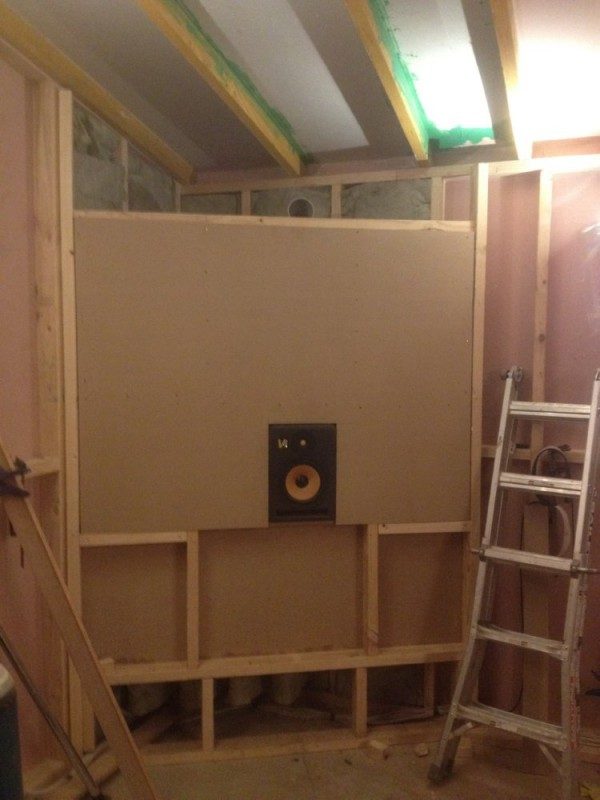
For monitor mounting i've gone with the cable tie down method and pads underneath. very solid! Loosely filled with insulation and all wiring in conduit. The pipe is 100mm which vents from the back of the monitors and has a feed from where the bass hangers are underneath. I let this one run for a while with signal and it's nice to feel warm air coming out the top :Dsoffit insulation.jpg
here's the backing for the soffit mount. 16mm mdf. I'm not sure of the final finish for the soffit front. Either MDF, plaster or ply. still thinking about the aesthetics of the room for that one. I'm also going to angle the top section a little to help with first reflections from the ceiling.
soffit backing.jpg
I've had some time to put in the treatment for the control room lately. I've used the Australian OC 703 equivelant which is a product from Fletcher Insulation called FI 32. They produce it under licence from Owens Corning.
Treatment so far:
Entire ceiling is covered in a 100mm layer of Fi 32 with no air gap behind it.
First reflection points on the walls are covered in 100mm FI 32 with a 90mm air gap behind.
The rest of the walls to the back of the room are covered in 100mm FI 32 with no air gap behind.
The entire back wall is covered with 200mm FI 32 with a 90mm air gap behind.
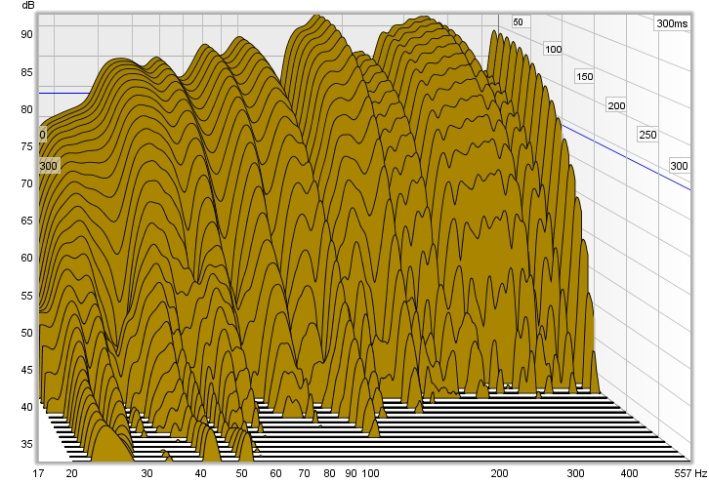
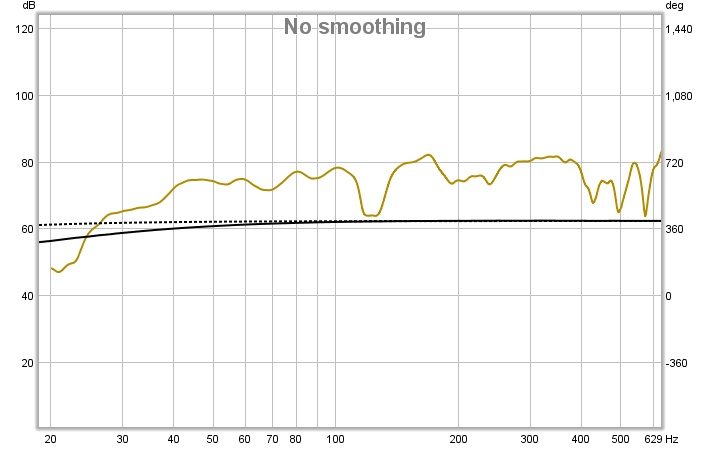
There's no super chunks in the back corners at the moment and I'm wondering if that would help with the bottem end resonance?
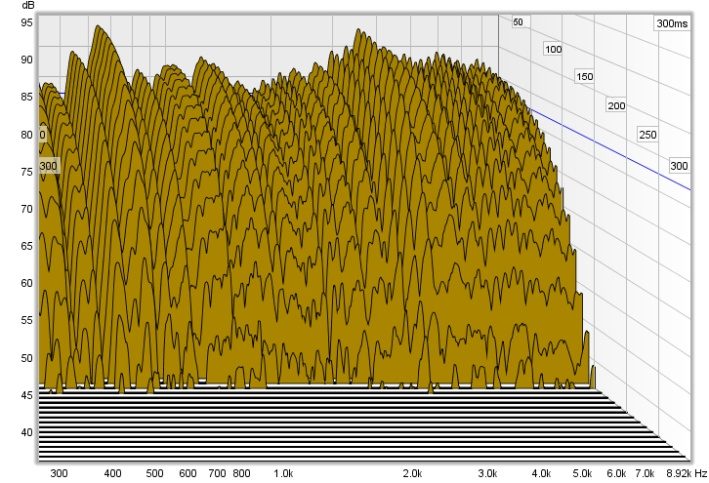
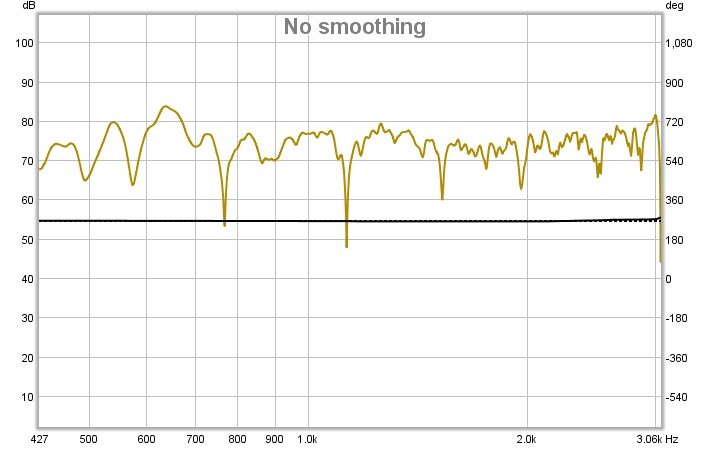
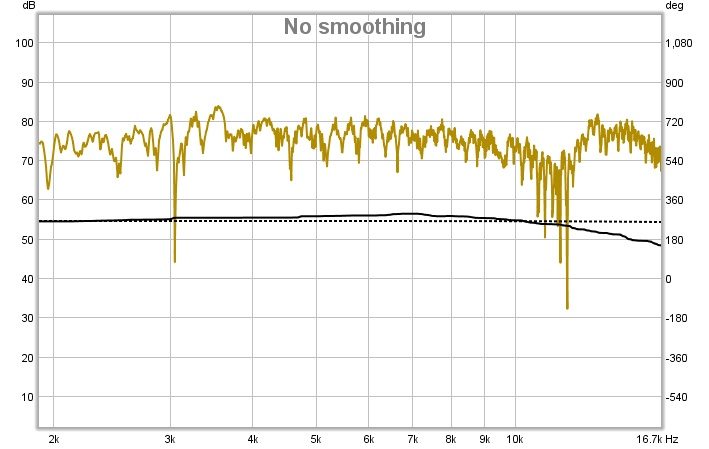
I'm not experienced at all with REW, so any insight as to how these figures are looking would be greatly appreciated. Let me know if there's any other details from REW that would be helpful if there isn't enough info in the following pics.
I should also add that there isn't any treatment on the front wall between the soffits as I'm waiting for the A/C installation which will be in that position.
waterfall 20-500hz.jpgwaterfall 300-9k.jpgeq pic 30-500hz.jpgeq pic 500-2k.jpgeq pic 2k-18k.jpg