I like the idea of integrating the flexibility for alternating treatments in the walls, but I wouldn't bother alternating the inside-out and normal panel construction - just makes the construction more complicated. Using inside-out for the entire wall construction will give maximum flexibility. If you want to have a few more reflective sections, then you are free to panel that section with anything from metal to plywood, vinyl to homosote, as you see fit to exactly tailor the treatment at that spot to your wish (you could even incorporate panel traps or limp membrane traps). The same fabric would cover it all if desired so the differing treatments are hardly visible.
I notice you have no cross members planned between your studs (forget what they are properly called), I assume they will be added.
If you want to have a few more reflective sections, then you are free to panel that section with anything from metal to plywood, vinyl to homosote, as you see fit to exactly tailor the treatment at that spot to your wish
yep, that's a solid point there Brian. I was thinking it would make the construction more difficult as well. In your experience of inside-out construction, does having just a plain cloth cover over an empty 'inside-out' stud cavity reduce the top end at all?
and yep, there are 'noggins' (cross-members) in all the walls. I was drawing more for speed rather than accuracy to get the idea across:)
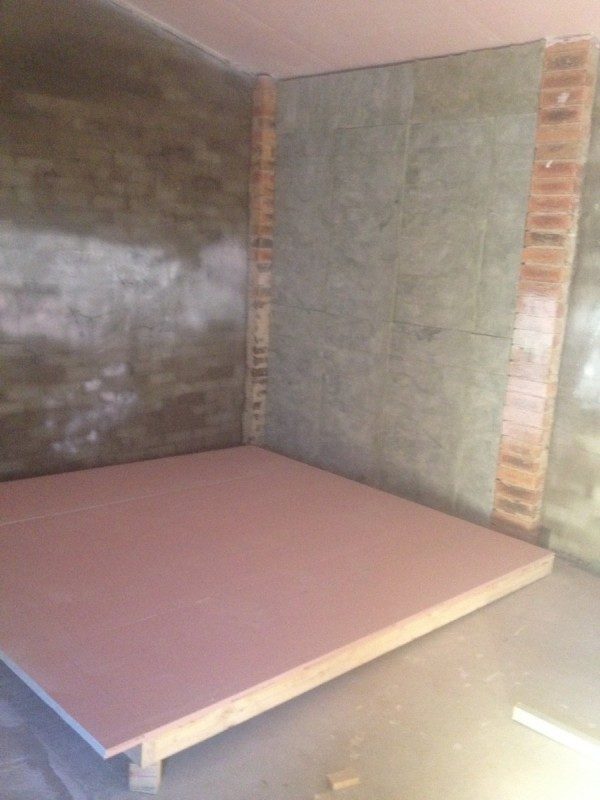
internal wall start.jpghere's the beggining of the live room construction. It's a good feeling to be finally getting some of the actual room built, but this is where work has to stop for a bit, as my main landscaping/earthmoving buisness needs me back on the tools. (not to mention going on a sneaky fishing trip :mrgreen: )
I'm going full inside-out constuction and as Brian pointed out, it'll give the most flexibility for the room. So ignore that half-half pic a few posts back :oops:
has anyone got any ideas on lifting these sections of wall in to place? two blokes could probably do it but I wonder if anyone has any smarter ideas than just using pure grunt to get them vertical.
In my own build, I filled every cavity with rockwool, some I gave an extra top layer of 18mm rigid fiberglass a couple have a 10mm homosote panel facing (this was more to provide a pinboard function) and particularly cavities (and the cloud) in the ceiling have a layer of plastic foil. I was concerned that the highs would be sucked out too early; the plastic foil treatments coupled with the slat walls left and right have this well under control.
I wouldn't think an empty cavity would be such a good idea as this could encourage resonation or a bass buildup at that point. My studio is a bit more critical as it is quite small so I went for total absorption using facings (or not) of different materials for control. It seems to have paid off, and mixes translate exceptionally well.
As for raising the walls, Brute force is really all you have at your disposal unfortunately. Stuart once introduced me to wall jacks, but they really aren't practical in a confined space. In my own situation I had not even enough room to get 2 or 3 people in a position where they could even hope to lift a wall section, so I built my wall sections in the upright position braced against toppling, then moved them into place with a car jack (on wheels) while my son ensured they didn't tip. Went fast and easy.
I've asked a few builder and carpenter friends who say the same thing as you Brian. Either lift the walls with a few people, or prop them up vertical and manuver them in to place when they're done. I like the idea of the car jack on wheels, and probably the easiest option if there's only two people.
The other option is to use a duct lifter, but they're reasonably expensive to buy and hiring one wouldn't be cost effective for the amount of time I would need it.
a calibrated galaxy cm 140 arrived today and i've done some testing. all 'C' weighted slow.
60hz sine - 115db inside, 66db outside, 63db above the roof and 71db at the door.
averaging 48db TL.
70hz sine - 115db inside, 63db outside, 60db above the roof and 63db at the door.
avg 53db TL.
80hz sine - 118db inside, 68db outside, 68db above the roof and 69db at the door.
avg 49db TL.
90hz sine - 120db inside, 65db outside, 80db above the roof and 68db at the door.
avg 49db TL.
Drum track - 115db-118db inside, 64db outside, 67db above the roof and 68db at the door.
avg 48db TL.
Now I'm no acoustician, and all these measurments will invariably have real-world errors in them, but what i'm getting from those figures is this: Two sheets of 16mm gyprock, on resilient mounts, with green glue, gives around the same TL as a rendered brick wall. I'd have to say this is reasonably correct as the level difference i was hearing between outside and above the building matches the figures. The 90hz sine was audibly louder above the roof and perhaps the roof cavity is resonating at this frequency.
The door construction and seals are performing nearly as well as the walls.
With an overall average of 49-50db TL for the building at the moment, I'd be hoping to get over 60 and possibly to 65 once the internal walls and ceilings (2 layers 16mm with an insulated 150mm cavity) are built. 65db being the target so I can have a drummer hammering away and not be annoying the neighbours :)
So i'm feeeling good about the results vs the time and $'s that have gone in so far. Now its time to go fishing for a few days 8)
Just for clarification, The frames were indeed built laid down on the floor, then raised up to position. As each section was completed, it was moved about a meter from the wall and braced. Then the plasterboard was added. Finally blocks were firmly screwed to a couple of studs to facilitate lifting with the jack, and then lifted an inch or so and moved slowly first at one end then the other, back and forth between ends the section was "walked" into place. The two layers of fermacel on the frame was calculated to weigh nearly a quarter ton!
If it helps here is a link to my project. http://www.johnlsayers.com/phpBB2/viewtopic.php?f=1&t=15635&start=60
Cheers Brian, I appreciate the run-down on the wall construction and the link. I think i'll end up doing something similar with my walls, as the wall-jacks that Stuart suggested look too big for the room i'm working in, which I think, is the same problem you had.
I've made the 30th dec a firm date for completion. I think that's enough time, but........
One of my clients used a system where he laid down the bottom plate on rubber and attached to the floor in place - he then lifted the wall frames directly onto the bottom plates.
cheers
john
That sounds like a very rational and practical construction technique. I don't see how it would facilitate raising the framing section in fact I should think it would make it a touch more complicated due to the extra height of the sole plate, but definitely do-able.
Thanks for having a look at the build and for the wall advice John. As I've got eight walls to put up I'll try different ways with the first few and see what suits best for my situation. I'm getting the feeling it's a bit 'six of one, half a doz of the other' if I'm doing it maually. hmmmm....maybe a duct lifter isn't such a bad idea :wink:
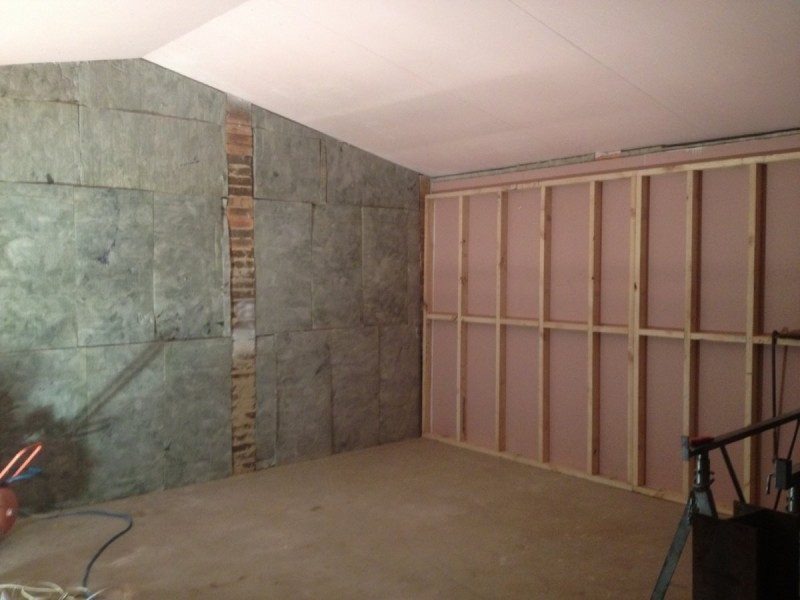
wall 1.jpgso the first wall for the live room is up. I'm finding a 4wd hi-lift jack, and some steel props are working really well for lifting. I'm working by myself on this, so the ratcheting jack works really well as it enables me to lift to a certain height, then place the props and re-position the jack. Once it's above shoulder height it's a reasonably easy push to vertical.
three walls for the live room up, with the frame for the fourth, middle wall being built tomorrow. I'm keen to see what sort of TL i'm going to end up with, as I can gaurantee that these are some heavy walls.
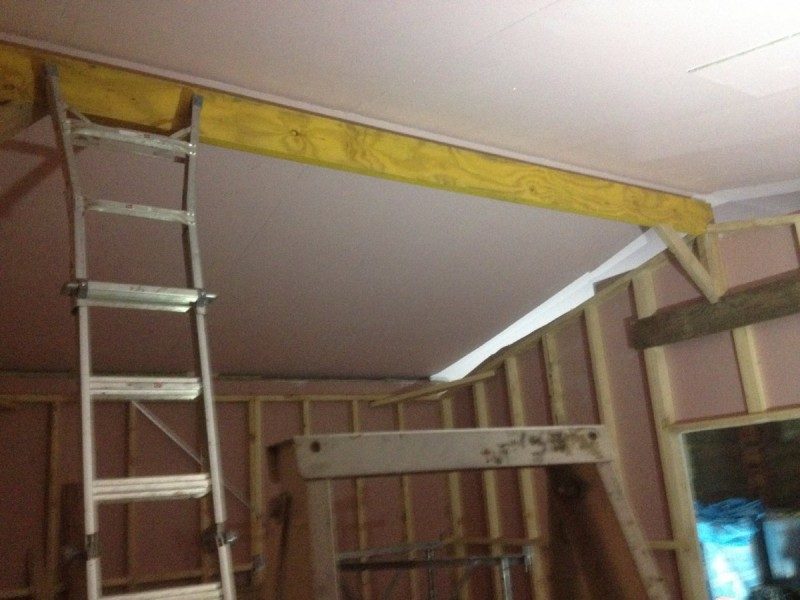
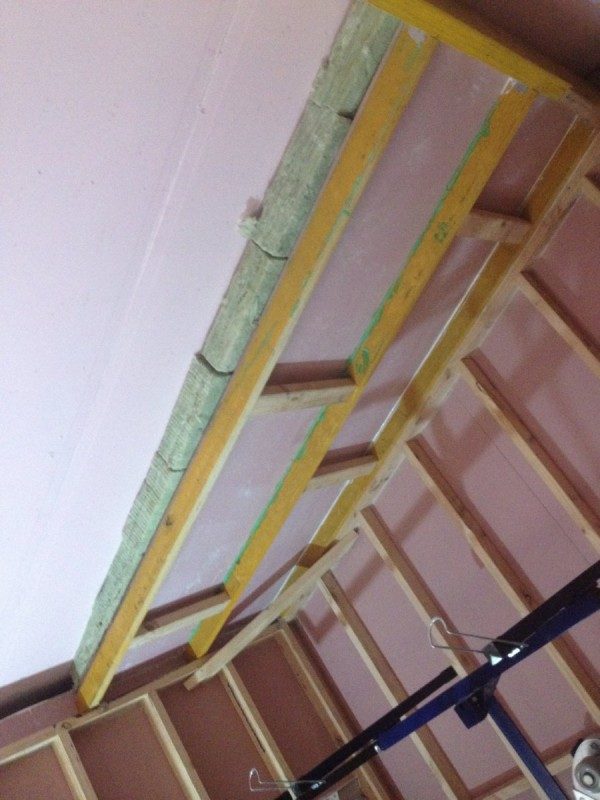
live room ridge.jpgthe fouth wall and ridge beam for the live room are in, and yes, it's a heavy lift for a one man operation! 200x65 laminated beam at 4.2m. You can see the window cavity in the bottem right corner.
The live room is close to being complete (isolation wise) which means i'll be moving on to the control room reasonably soon. The control room will be the same construction as the live room regarding isolation, ie: inside out construction, 2 layers of 16mm gyprock. I wanted to start throwing around some ideas for the finished layout for the control room so I've got a plan ready when it comes to treatment.
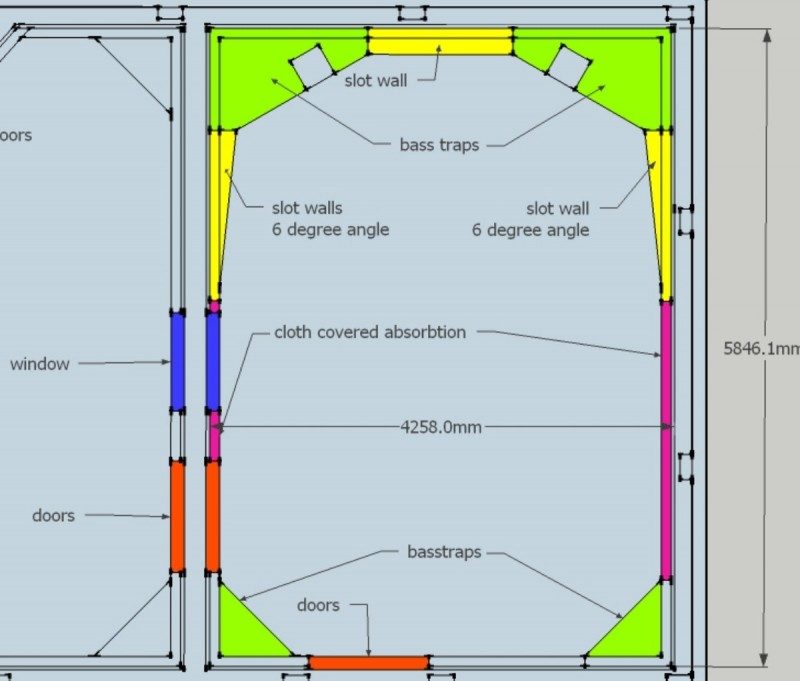
Here's a plan of what I'm thinking at the moment.
control room acoustic plan.jpgIt's basically a mix of the control room plans from John's 'Garage studio one and two' , but tweaked to fit the dimensions of my room. The floor is concrete and the ceiling will be completely soft as well. Monitors are KRK V8's, and will be soffit mounted using's John's SAE soffit mount plan.
I'm having trouble figuring out what to do with the back wall. Should it be absorbtion and cloth faced, or a slot resonator, or something enitely different? As always, any other advice and ideas on the layout are welcome :D
Are you trying to do an RFZ design? If so, you seem to be confusing your speaker soffits for bass traps. The shape looks right, but the construction looks wrong.
If you are doing RFZ, then the rear walls should be thick absorption, spaced away from the wall if possible, and maybe even angled forwards, if you like the look of that.
The rest looks good to me.
- Stuart -
Thanks for the tip on the rear wall there Stuart, and yes I am going for an RFZ design. The monitors will be soffit mounted as per John's design in the manual.
In John's plan for 'garage studio one' (which is 95% what mine is based on) he has the monitors in what looks like a soffit and labelled 'bass trap', hence me doing the same. Am I reading his plan wrong at all in that one?
In John's plan for 'garage studio one' (which is 95% what mine is based on) he has the monitors in what looks like a soffit and labelled 'bass trap', hence me doing the same. Am I reading his plan wrong at all in that one?
Naah, you got it right: John has a special design for his soffits, where he incorporates a hanger-based bass trap into the lower section of the soffit. You can do both, but it has to be done carefully. Search the forum, or look at his famous Recording Manual, and you'll find the basic design for that.
- Stuart -
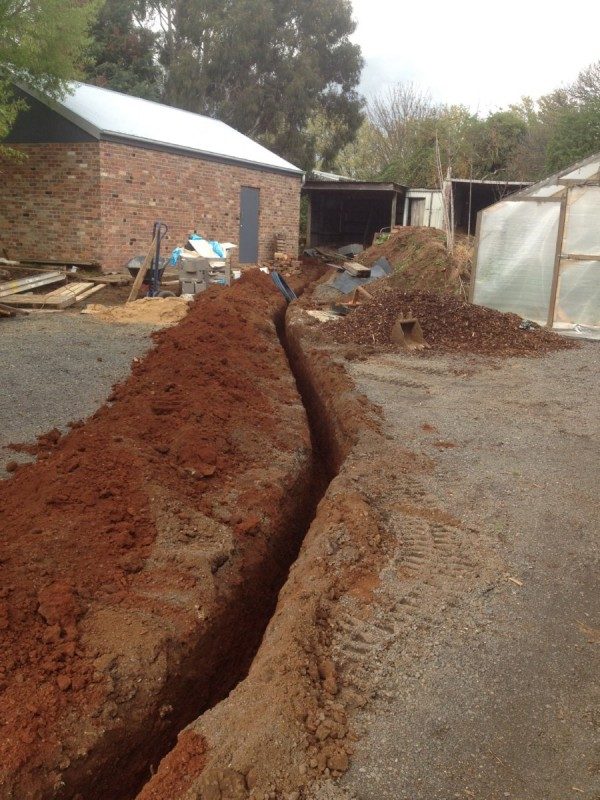
trench.jpgthis is about half of the power trench for the studio. It's amazingly helpful to be able to loan a mini-excavator for this part of the job. even though the digging is reasonably easy around here, it still took me a good 4-5 hrs to put in the 50meters of trench.
electrician is lined up to start in a couple of weeks, so i'm furiously trying to get the walls up for the control room to be ready for powering up.
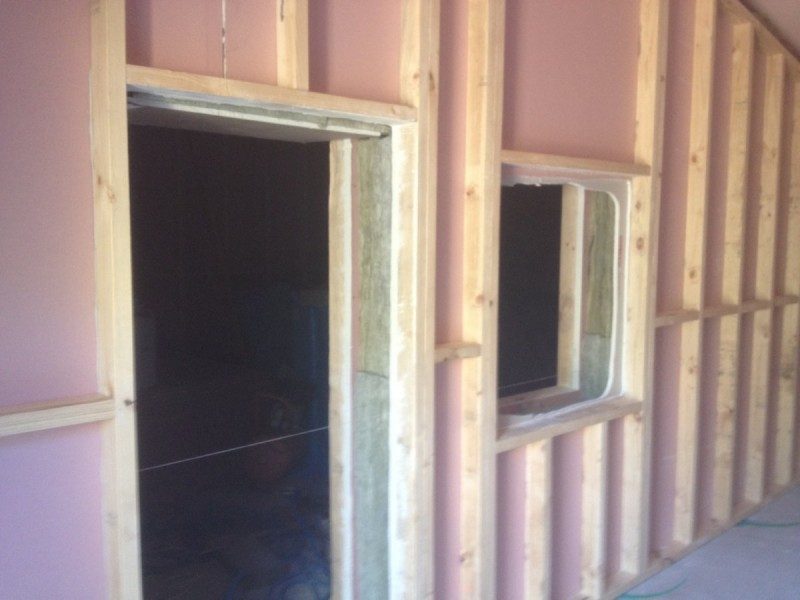
middle wall.jpgthe control room side of the middle wall went up today. 220mm air gap between the leaves and filled with insulation. It's a nice feeling as it's the first bit that actually looks like a recording studio, with the big air gap and wide doorway and window 8)
The last wall for the control room should go up tomorrow and will just about deplete my stock of acoustic sealant. 24 tubes of the 828ml (28oz) green-glue sealant. looks like i'll have to order another case to get the ceiling's done.
The last wall for the contol room is also the bare minimum I need to have done for the electrician to wire up. He's booked in to start the 2nd Nov, so it looks like i'll have some time up my sleeve and maybe be able to get some ceiling done as well.
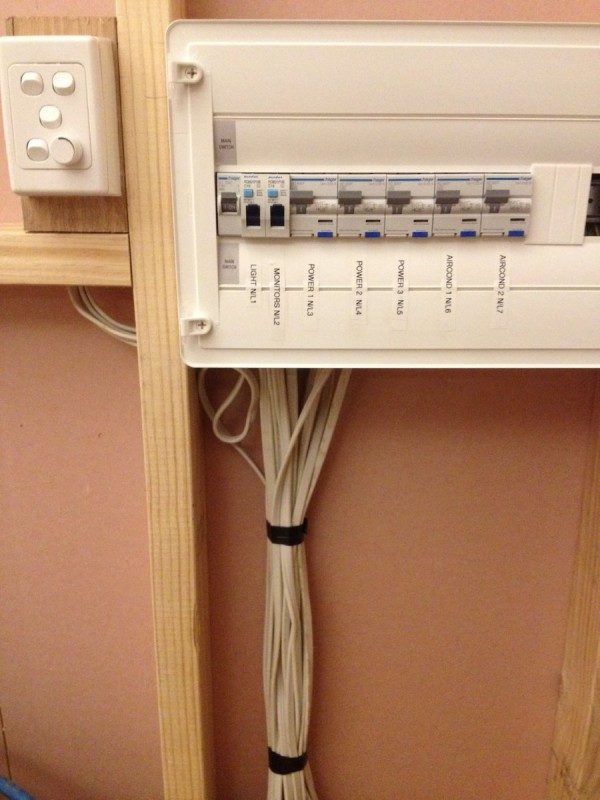
wiring connections.jpgall wired up and everything went nice and smoothly 8) . The system is also star grounded. The electrician didn't think it was 100% necessary but was still happy to do it as this is the one and only chance we'll get. His thought's were that the Australian earthing system is adequate enough to prevent ground loops. I know next to nothing about electical wiring, but maybe John or someone else could shed some light on the Australian earthing system and whether it's necessary to star-ground here.
Amongst other things, Dave the electrician also came up with the idea of being able to power up the monitors from the ganged switch which incorporates the lights as well. Brilliant idea which means they're ready to soffit mount without any mucking around. It really pays to get a sparky who is interested in studio work and I'm incredibly grateful for his expertise :D
Image not preserved: lighting.jpg
All the lighting is LED and the live room is dimmable.
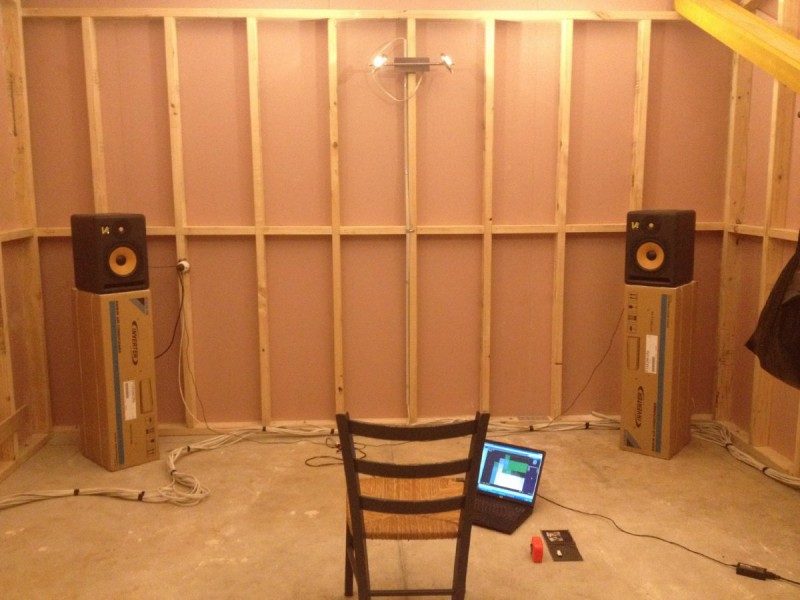
monitor position.jpg
Time to take the control room for a test drive even though it's not completed. Mostly I wanted to try out the wider angle for the monitor placement. I've ended up with around an 80 degree spread to get myself at 38% of the room length and the monitors in a good position for soffit mounting.
I've never listened to a mix with as wide a soundstage as that, but i've got to say, I'm very happy with it. I spent quite a few hours listening to old mixes I'd done as well as some other CD's and it sounds really nice. Looking forward to getting in there once it's all fitted out.
Next thing is to get the air-cons fitted and finish the internal ceilings. Then time for some REW testing and room treatment.
Been following your build progress ... and it's looking good.
You mention 'ganging' monitors and lighting :shock:
It has always been recommended to keep audio 'power' separate from things like lighting, computers, microwaves, HVAC, etc. The amount of 'trash' these things return to the electrical is something you'd not want in any of your audio power.
Adding to this ... 'dimmer switches' :shock::shock::shock:
These are notorious for causing havoc in most anything audio !
Maybe the 'electrical' Guru's will specify the details ... for the moment, I'd keep your wiring option open till this gets looked at.
As to monitor spread and positioning ... something to be mindful of:
The further the spread, with the required toe'ing in, will come at a price ! A narrowing of the 'sweet spot'. It may sound spansive at the exact center seating position ... but other areas can quickly be hearing mostly off axis. It becomes difficult to move left or right to make adjustments without the sound-field and response changing.
If you get too wide, a producer or musician sitting to your side will not hear what you hear at the center point. Things also become quite different as you move further back into the room.
This may coincide to a reason that most control rooms are preferred to have monitors shot down the long wall. You can 'overspread' the monitors to the point where you end up going against that.
You should also check a 'mono panning sweep' where you slowly sweep a signal left to right and listen to the positioning and the acoustical LEVEL as you sweep. You can spread to far as to have a 'hole' in the middle.
The 60 degree equilateral is a good guide line ... probably more so than thinking the 38% as a rule.
Of course ... if mixes translate without surprise to the outside world ... that is good. But I would also watch how the panning translates with YOUR actual work. No doubt the wide spread makes commercial recordings an experience, but how you adapt your panning is more important.
Sorry for raising all the cautions and warnings. Just suggesting that you experiment with placement and angles to find the best fit for your working environment.
Sincerely.
It has always been recommended to keep audio 'power' separate from things like lighting, computers, microwaves, HVAC, etc. The amount of 'trash' these things return to the electrical is something you'd not want in any of your audio power.
The monitor's do indeed have a seperate power circuit of thier own. The 'ganged' switch which has the lighting in it is a unit which has 5 switches in it that are all completely independant, but encased in the space of a single surface-mount box. There is no electrical connection between any of the ligthing and the monitors or their respective earths.
As for dimmers....it's nice and easy to get access to the dimmer switch, so if it causes any interference it'll be going out the door!
RJHollins wrote:
The 60 degree equilateral is a good guide line ... probably more so than thinking the 38% as a rule.
I was really trying to stick with the 38% on this as I didn't want to get pushed to far back in the room, or worse, to the middle. Perhaps a bit more testing with monitor placement is required here and i'll try a mono panning sweep tomorrow and see what results I get. Thanks for the advice RJ, much appreciated:)