looking at two layers of 16mm with green glue for the middle leaf (which i'm doing now), and then two layers of 16mm without green glue for the internal rooms. 100-150mm gap filled with 24k/g m glasswool.
thanks for the tip on the perimeter sealing and resilient mounts for the middle leaf Stuart, I think thats made a considerable difference to this stage of the isolation.
Dog + Bear Studio build
Originally posted at johnlsayers.com, topic 17575.
Looks like you should be getting some very good isolation by the time it is all finished.
One question: Did you do those measurements with "A" weighting, or "C" weighting?
- Stuart -
C weighting, slow. It's an I-phone app from studiosixdigital. I've calibrated it against a meter used by a very experienced recording/mastering engineer. I'd expect some deviation in response given that it's not a dedicated device, but having used it at various gig's and sessions i'd have to say it's reasonably accurate.
Any thought's on what might be a better option for dedicated SPL meter?
Unfortunately, while the app might be great, the same cannot be said for the iPhone itself. That's a cheap little directional mic, plus a cheap little low quality pre-amp, plus a cheap little low resolution digitizer circuit. It was never meant for accurately capturing the full spectrum of low and mid frequency sounds: it was just mean to be a telephone. Proper sound level meters have good quality omni mics, good pre-amps, and good digitizers, specifically designed for the purpose of doing nothing else but measuring sound levels. When you think that even a cheap Behringer measurement mic costs upwards of US$ 70, you realize that there's no way the US$ 2.00 (guessing!) mic in an iPhone can give accurate readings. That's probably why those numbers look so suspect. I don't doubt that you are getting good isolation from what you have done so far, but those numbers do not look like what you'd expect, if measured properly. I honestly doubt that the mic and circuit on an iPhone can even measure anything at all about 60 Hz tones: It's hard enough to do that accurately in fully equipped acoustic test laboratory, with professional equipment costing tens of thousands of dollars. A couple of months back I did some acoustic analysis for a church in a city a few hundred miles north of here, and the Pastor also brought out his iPhone with an app, to compare against what I was using: not even close. Not even in the same ball park in the low end. His readings were off by well over 10 dB, and all over the place, as compared to what I was getting on two different systems, that agreed with each other to within about 3 dB. I would never use a cell phone with an app for any kind of serious acoustic measurements. There is one company I heard of that makes a mic and pre-amp that can be connected to an iPhone, and used with their app for good acoustic work, but the cost of that is way more than the cost of a simple dedicated meter.It's an I-phone app from ...
Take a look on e-bay and Amazon: you can find good new ones with the basic features for around US$ 100 and upwards. Nice ones with fancy features are around US$ 500, and real top-end ones are in the thousands of dollars, but you don't need anything that fancy. Just a little hand-held one that meets the standards and has both "A" and "C" weighting, with fast and slow response, should be good. Don't go for the very cheap "toy" ones that are appearing out of China lately, for US$ 15 to US$ 50: those are no better than an iPhone, and some aren't even that good! Get an Extech, Pyle, Phonic, Quest, Mastech, or even a good Radio Shack meter, or something like that. You can often find used ones for around US$ 75, give or take. It would be interesting to compare those iPhone readings against the readings from a proper well calibrated meter. - Stuart -Any thought's on what might be a better option for dedicated SPL meter?
Just a following along question ! Does it [not] matter which of the 2 leafs that the green glue is applied ?!? Just trying to better understand how this is being approached. For my build, the green glue between layers was applied on the inside leaf of the control room ... with the 'thinking' that the most sonic energy would eminate from the control room and the GG on the inner walls/ceiling would dissapate that higher intensity. Just asking questions to better understand. ... back to 'background watching' :)looking at two layers of 16mm with green glue for the middle leaf (which i'm doing now), and then two layers of 16mm without green glue for the internal rooms. 100-150mm gap filled with 24k/g m glasswool. thanks for the tip on the perimeter sealing and resilient mounts for the middle leaf Stuart, I think thats made a considerable difference to this stage of the isolation.
hey RJ, thanks for stopping by :D.
Here's the long aswer as far as I understand it.....I've got a single skin brick building with a tin roof. The tin roof is obviously very light on in the mass department, and nigh impossible to hermetically seal. So the theory is to put a 'middle leaf' on the bottem chord of the trusses, mounted on resilient mounts, and seal this against the brick work which will create my air-tight shell.
The GG is going in between the two layers of 16mm drywall for the middle leaf to try and give it the highest trasmission loss as possible without having to hang more than two layers of drywall, which would put a lot of extra weight on the truss assembly. I'm not exactly sure how it compares with a brickwall in TL terms, but i'm hoping it's at least close.
If I were to use GG on the ceiling for the internal rooms (two layers 16mm also) I would also have to use it on all the walls (two layers 16mm) to make the whole internal structure perform to the same level. That's a whole heap more GG (around 3 times as much).
The short answer.....Beefing up the middle leaf with GG is an attempt to compensate for not having built a heavy enough roof to start with :oops: . But as you build, so you learn.
Stuart might have a more straight forward way of describing this concept, but I hope I've made some sense.
So here's the floor plan i'm looking to use.
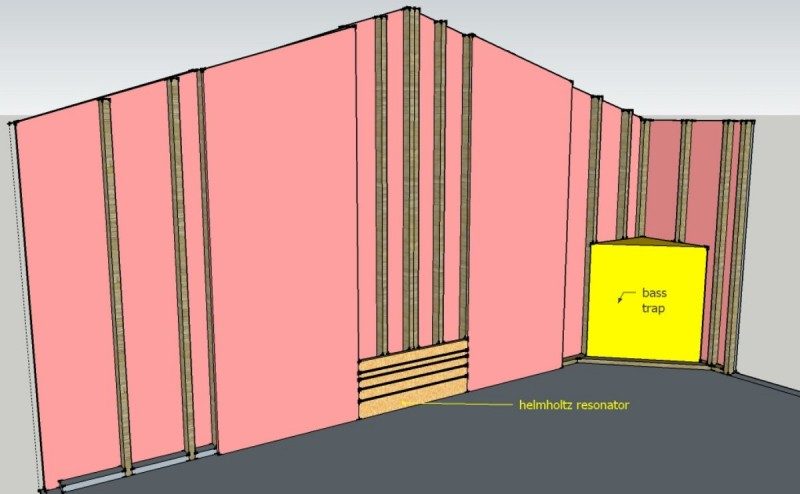
I've only drawn in bass traps for the rooms to keep the drawing simple at this stage. Inside-out construction for the walls and ceilings as suggested by John, so there'll be plenty of room for acoustic treatment once i've done some analysis of the finished rooms.
HVAC for both rooms will be handled by Daikins new whizz-bang AC's that also do air exchange. One for each room.
Treatment for the back wall of the control room will be tricky as the entry/exit door is there. Possibly a removable section for the back of the door that can be moved whe not mixing.
green gluing in progress.
and a calibrated galaxy cm140 is getting shipped to me in the next couple of weeks. Hopefully that will yield some more solid results on the TL and also be used for REW analysis when the time comes.
Unfortunately i'll only have the iphone spl results to go on till then, by which time the GG and 2nd layer of gyprock will be on. Any comparison between TL for different stages of the build will therefore be a bit biased unless the galaxy agrees with the iphone 100%, which sounds doubtful :roll:
halfway through the second layer of gyprock and green glue. sealing the perimeter and sheet joins as I go. I'm really impressed by the quality of the green glue acoustic caulk, not that i've got experience with any other acoustic caulk, but it certainly stays elastic and rubbery when it dries.
sore shoulders, but progress is being made :D
Hey there, Steve. Just one word: Brick. I see bricks. With mortar in between (not very well laid, either). Don't forget to SEAL that entire wall, to ensure that you get good isolation! Brick and mortar are both porous, to a certain extent, meaning air can penetrate. So they do need to be sealed, especially considering the "quality" of that brick-laying job.
- Stuart -
sealed as in 'rendered' or sealed as in 'painted' Stuart? (or sealed as in 'some other kind of sealed')
thanks for the tip.
Paint is fine. Any good quality masonry sealant will work, and some of the IRC documents even suggest plain old latex. The idea is just to seal the porous surface, so air (and therefore sound) cannot penetrate.
Of course, if you really wanted to you could render it, with a nice thick layer of plaster / stucco / mortar / whatever you happen to call it, and that would have the added benefit of increasing the mass of the wall, and ensuring that all those gaps in the bricks and mortar really are closed up. But that would add expense and delays that you might not have budgeted for. As long as the entire surface is carefully sealed, that's all you really need.
:) That's why posting photos and comments on what you are doing is so important! It gives you several extra pairs of eyes, looking over your shoulder and hopefully spotting things that can be improved. I wish everyone would post photos regularly, like you are doing! :thu: - Stuart -thanks for the tip.
Ahhh, expense and delays. There's rarely a building/construction project of any description that I know of, or have been involved in, that doesn't encounter some amount of expense and delays :roll: But at the end of day, like I said in my first post: "I’m hoping I can get it constructed for $20-$25K (not inc gear) but I won’t set that as a hard limit as I’d rather have a better sounding room than a cheap one." I'll most likely go for a render with a bonding agent like Bond-crete and some plasticizer to really get it to squeeze into any gaps and stick. It makes sense to really seal the brick up nice and tight while i've got the oppurtunity, as this is the one and only time i'll be able to access the walls before the rest of the build. So it looks like the good ship 'Dog & Bear' is moving on to an unschedueld, but necessary stop, at the rendering port after a couple of days of 'finishing-the-second-layer-of-gyprock-and-green-glue' is complete :DOf course, if you really wanted to you could render it, with a nice thick layer of plaster / stucco / mortar / whatever you happen to call it, and that would have the added benefit of increasing the mass of the wall, and ensuring that all those gaps in the bricks and mortar really are closed up. But that would add expense and delays that you might not have budgeted for. As long as the entire surface is carefully sealed, that's all you really need.
Smart move! Very smart. :) Hope your ship and crew have a nice "vacation" in the render port! It seems to be a very popular destination, too! Vacations in that port have been known to extend a bit beyond the originally planned stay... :) - Stuart -I'll most likely go for a render with a bonding agent like Bond-crete and some plasticizer to really get it to squeeze into any gaps and stick. It makes sense to really seal the brick up nice and tight while i've got the oppurtunity, as this is the one and only time i'll be able to access the walls before the rest of the build.
cheers Stuart :D
i'm calling in the troops given the amount of rendering to be done. Hopefully the old 'beer-and-BBQ' option will get a few takers for a fun-filled afternoon of rendering madness. most of them are muso's who'll probably be happy to trade some rendering hours for rec time once we're done :wink:
on another note, the second layer of gyprock is up for the middle leaf, and i'm not sorry to see the end of it. screwing in ceiling plaster is pretty tough on the neck!!!
here's the ceiling detail for the internal rooms. Basically John's design from the manual, but with thicker insulation in the cavity. Walls will be a similar inside out contruction.
rendering begins, and it's actually a resonably swift process. sponge finished to make sure any small holes are sealed over.
there's a 20mm-30mm cavity between the brick and the slab rebate at the bottem which is hard to see in this photo. It'll be filled with concrete and then the small amounts of brickwork at the bottem that haven't been rendered will be seen to.
so we're about 90% rendered and the rest is getting done tomorrow. Now it might just be my imagination, but I'd have to say that the room has a lot more natural reverb as the rendering progresses. The green glue curing might have something to do with it as well.
Looking good! The better sound might have something to do with the better sealed surface and the increased mass, too, as well as the GG on the ceiling. Have you done any isolation testing, to see how much you are getting now that the outer leaf is done? From the way it looks, you should be getting something quite reasonable already.
- Stuart -
I'd still be using an I-phone app for testing at the moment Stuart. I'm waiting on a calibrated meter (galaxy cm 140) to arrive. Hopefully won't be too long. Looking forward to posting up some more definite results :D
Using my own calibrated meters (ie: ears) it sounds like there's a significant amount of TL going on.
Kind of gives you an indication that a fair amount of sound was in fact leaking through the walls beforehand. :wink:
Like your work up to now :D
cheers Brian and thanks for checking out the build :D
I'm actually quite amazed at the difference the rendering has made now it's 100% done. There must have been quite a serious amount of air passing through that brick-work. I didn't think it would be such an audible difference, but the sound internally has gone from a bit echoey to 'full blown reverb chamber' 8)
....and another tip of the hat to Stuart for the advice on that amongst other things.
And now that you're imprisoning all this acoustic energy, you're going to have to deal with it - can be quite sobering.
But such experiences as the one you've had are great because it gives you near tangible evidence of what your dealing with as opposed to just following abstract ideas and procedures.
What I mean is, people tell you to do this and that and you're never really sure if this is really having any impact or is just part of the dogma of studio building, but now you have personal experience which helps you apprehend the significance of what you're doing.
well said Brian. It's a nice 'milestone' to reach in the build where the acoustic properties of the room are tangibly starting to come into play. Up till now it's just been a REALLY expensive shed :shock:What I mean is, people tell you to do this and that and you're never really sure if this is really having any impact or is just part of the dogma of studio building, but now you have personal experience which helps you apprehend the significance of what you're doing.