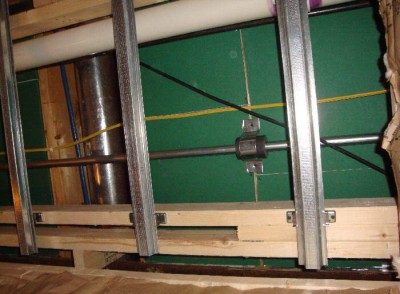
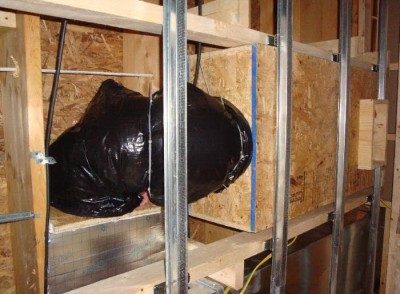
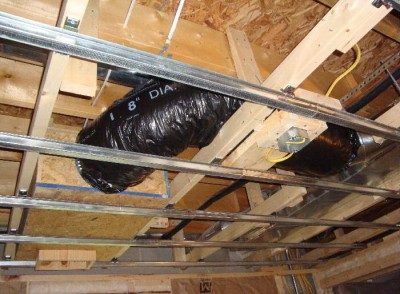
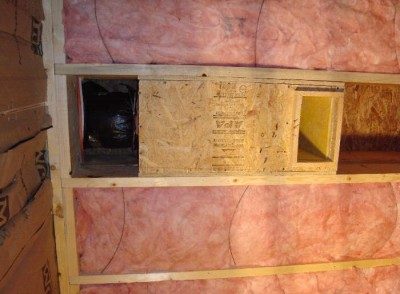
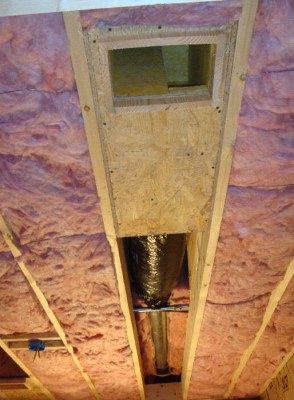
I put 1" OC703 wrapped in plastic inside to deaden the sound passing through the silencer.
:shock: Why did you warp it in plastic???? My guess is that will cost you a huge amount of absorption in the highs, which is where a lot of the noise in moving air lives anyway! You'll probably have to make your silencer MUCH longer now, to compensate for the reduced silencing...
- Stuart -
I noticed that the folks who make the flex duct with fiberglass insulation have that enclosed in plastic. I thought I'd copy that so that small fiberglass particles weren't flowing out of the duct for years, where people could breath them.
I could still take the assembly apart and remove the plastic, if you think that will hurt my sound reduction. I was worried about the fiberglass fibers blowing around.
If you are concerned about that, then a filter at the ends of the ducts would take care of all of that. Air filters are a good idea anyway.
In any event, according to Dow Corning, their 703.0 duct liner board already comes with a special treatment on the airflow side, called "BLT" ("Black Glass Tissue"), which bonds the fibers in place. Is that what you used?
I found these links, that might be useful:
http://www.epa.gov/iaq/schooldesign/hva ... Filtrationhttp://www.owenscorning.com/worldwide/a ... 4726dl.pdf
- Stuart -
I did spend the money on fluffy fiberglass, over $2500!
Ouch! But it will be worth it. And nobody ever said that building a studio would be cheap! Its kind of like the definition of a yacht that I once heard from a guy who owns one: "A yacht is small hole in the water, into which you throw money". Pretty much like a studio!
- Stuart -
Let me clarify. I do not have any duct liner board. It is just Owens Corning 703 rigid fiberglass, that is 1" thick. I put it inside my HVAC silencers. I wrapped it in thin, Hefty trash bag plastic, so the fibers would not become airborne.
Should I cut the plastic off, before it's too late?
Yeah, I would get rid of the plastic. The 703 by itself should work just fine as is.
If you look at other silencer build threads on the forum you'll see that almost everyone uses just plain 703. The just install filters at the ends of the ducts (and clean them every now and then!) if you are concerned about airborne fibers.
Rod gave some interesting input on this subject design concern :
viewtopic.php?p=70959#p70959
This one seems to speak directly to the back pressure potential created with installing a filter:
viewtopic.php?f=2&t=9761&start=0
This one should be stickified:
viewtopic.php?f=1&t=11542&start=0
This one seems to speak directly to the back pressure potential created with installing a filter:
Actually, it seems to be about a an issue with the poor design of a plenum, not really a filter.
What Rod said there about back pressure is: "Then there is this issue with back pressure created in the air supply duct that is trying to turn a 90 degree corner at the end of a duct run in a 1 1/2" space - which will cause tremendous buffeting at that point and a very large reduction in air flow........ ". There is no filter mentioned in that system. It looks like the issue there is the tight 90! bend, and the very thin air space in the plenum.
But point taken: I guess a filter could increase back pressure a bit, but I doubt it would be a problem, especially if you place it right at the outlet grill, where there is more cross sectional area. Of course, if you don't clean / replace the filters regularly, then you'd certainly have a back pressure problem, sooner or later!
In your defense, I did look for threads with this setup you talked about with the new and improved search routine.
I just could not locate any and didn't know if this idea had been blessed, so to speak.
Here are the latest pictures. I will have to rebuild my HVAC silencers without the plastic on the rigid fiberglass. I did finish the electrical wiring and electrical boxes for the lights. The insulation has begun. I did find out that Lowes sold me WAY too much insulation, and I was able to take most of it back and get a refund. :D
I finally can take a couple days off work to work on the studio project some.
Two comments:
1) Light boxes: So your lights are coming through your drywall? Don't forget to make up for the lost mass all around the box, and caulk everything very tight. And also be careful about overheating, since there will be no airflow past those lights at all. Maybe use LED lights or something similar in there that doesn't get hot.
2) Mic in the bathroom: Cool idea! Mini reverb chamber? "Live" iso booth? I hadn't thought of doing that, but it makes sense! I might "borrow" your idea, if you don't mind, and run mic cables all over the place, to unlikely locations around the house.... :) Thanks!
- Stuart -
Do I have options where my lights don't come through my drywall? Could I hang lights without a junction box above and just have an electrical wire coming through the drywall into the small metal box that is part of the light fixture?
Unfortunately, my ceilings are too low for clouds. I will have to treat the overhead first reflection points from the monitors. This will be have to be done very tight to the ceiling.
I spent most of the last two days building new silencers that are made out of 19/32" OSB, instead of the 7/16" OSB I was using. I also made the chambers longer and added another baffle layer. After reading some of the posts that Brien (xSpace) linked to, I wasn't happy with my first set of silencers. I will not wrap the 703 in plastic this time, as per Soundman2020's recomendation. The thicker OSB seems to be working much better and should hold in more sound.
In making the silencers, I have been glueing the boards and then screwing them together. I think that could be the name of my next album, "Screwed & Glued". :wink:
The contractors, John & Butch, have finished hanging drywall in the hallway outside the studio rooms. The 5/8" drywall for the studio rooms arrives Tuesday.
I posted a picture below of the ceiling lights I'm considering getting for the control room. They use GU10 halogen bulbs. I think there is also a GU10 LED bulb that could be bought for this fixture.
I live around a bunch of rednecks, so I had to modify the saying they used to make it more, shall we say, contemporary?
Screwed, glued and tattooed!
That's the way we like it ;)
Feel free to use that.
I worked on the studio Thursday, Friday, Saturday, and Sunday. I built new HVAC silencers and did some electrical wiring work. I'll post pictures Monday. But more importantly, the WVU Mountaineers are in the Final Four! It is my ultimate sports dream that WVU would win a national championship in football or basketball. GO EERS!
As I was rebuilding the new HVAC silencers this weekend, I realized that I didn't have enough 1" OC 703 rigid fiberglass. The closest place to get more was a 2 hour drive away and closed on the weekends. I had to get these done before Monday.
So after I paniced, I realized that I have loads of 2" 703. If I could just find a way to rip the 2" into two 1" pieces. After calling my Dad and brothers, my brother Brad had a sword that he sharpened and let me use. So I ripped a 2x8 into two 1" pieces and mounted them on a sheet of OSB on sawhorses. One of my daughters held the 703 down in the rig while I cut it with the sword. It was a little rough where it was cut, but it worked well. I put the cut piece on the glued side, where no fibers can get out.
After that, all 3 girls had to get their picture taken with the sword. 8)
So now I had enough rigid fiberglass to complete the silencers, which I did by Sunday night.
I can't believe I spent about 6 days building silencers! :x
John and Butch put the silencers in the ceiling and connected the ductwork. In the drum room, I cut shims to use between the joist and silencer, so the silencers could be screwed to the lower ceiling joist, but never touch the floor joist above or the floor above. I attached small pieces of wood to the silencers, to go through the two sheets of 5/8" drywall and attach the registers to. In the control room, those small wood pieces had to be longer, to go past the hat channel and the drywall.
They also put the ceiling insulation in the drum room.
They made an isolator for the conduit going to the electrcial panel, and did some beef up where the air returns only have some thin cardboard between the basement and the air return register on the first floor.
In general, I did not do any "beef up" of the floor above the studio though. I may replace the flooring up there over the next few years. If I do, I'll add green glue and a layer of OSB to the floor above, before I put down the new floor.
John- Check out the pictures on page 3. They are lined with 1" OC 703. Thanks.
I ran out to Radio Shack last night and bought some headphone extension cables to run to the three other rooms in the basement that I ran mic cables to. I forgot that if I want to record in those rooms, I'm gonna need headphones! :?
Before you insulate, go over the wires with a fine tooth comb to make sure you've got everything. I have Cat5, BNC and multi-core stuff going everywhere and it comes in handy when you least expect it. Remember that you can always run line level through your mic snake and put a headphone amp in the live room. I use Cat5 for the Hearback system.
Two layers with GG is just enough barely for drums. Go three layers if you can afford it and the frame can hold it. I made MDF boxes around all outlets and switches. They work just fine.
-ashley