I live a rural West Virginia, USA. Since I'm not in a city, there is no code inspection or enforcement. I have been reading this site for a few years. I have learned a lot, with a lot more to learn. I have donated to this site. I enjoy coming here to read about everyone's studio builds. I have read Rod's book a few times. I have read a couple other books on home studio design/build, also.
I was going to build above the garage, but after learning how difficult it would be to isolate sound, I moved my plans to the basement. Local contractors, John Childers & Butch Hardy, have offered to help me start my studio build.
I write and record Rock, Pop, and Punk (briancottrill.com). Sort of like Bob Dylan to the Clash, range of styles. I like to record live drums and guitar amps. I started with 4 track cassette in college, them moved to 8 track analog tape, then 16 track ADATs, and now I have a Pro Tools LE setup with a Digi003 interface with a Mackie 800R (for extra preamps).
Speakers: JBL 4412, KRK Rokit 5, Tannoy Proto J, (I may buy Mackie HR824 mkII's for this studio)
Mics: AKG C414, Groove Tubes AM51's, Rode NT1, Sennheiser MD421's, Neumann BCM705, Shure SM57's, SM58, Audix D6, others.
Guitars: Fender American Telecaster; Gibson Les Paul Standard, Martin J40, Gibson J45, Fender Hot Rod Precision bass, Charvel Surfcaster bass, Fender Mustang bass, Yamaha AES1500, Gibson Les Paul Special 1960 reissue, Aria Pro II F mandolin
Drums: Pearl Vision VSX
Keyboards: M-Audio Axiom 61; Yamaha S30; Yamaha upright piano (upstairs in living room)
Amps: 1970 Fender Vibrolux, Sunn T50C; Fender BXR bass amp; Epiphone Valve Special
I will occassionally play loud when live acoustic drums or guitars are being tracked through real amps. My neighbors live far enough away that I won't really bother them. I mostly want to be able to record and not drive the rest of my family crazy from the noise.
I have three daughters (9, 11, 14) who play music and sing also.
I plan on having these layers in the construction... outside, concrete block, air gap, 2x4 stud wall w/ pink fiberglass insulation, 5/8" drywall, green glue, 5/8" drywall, inside room. I plan on leaving the room rectangular, in case I would need to sell my house, then the basement wouldn't look too bizzare. I may build spaker soffits in the control room, if I can do it as sort of an "add-on" to the finished rectangular room, that could be torn down without too much trouble.
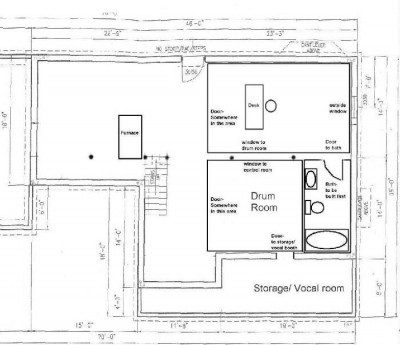
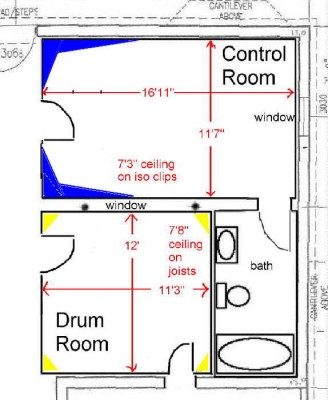
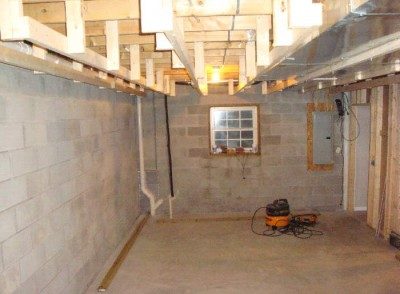
I measured exactly the space I am starting with. In the Control Room, there is 19' max by 13'.
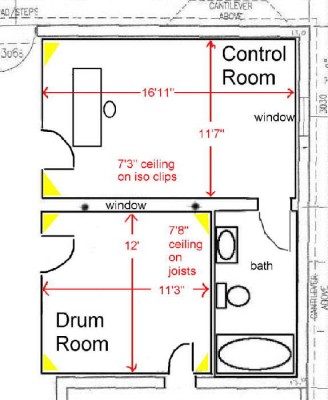
If I subtract for a studwall with 2 sheets of 5/8 drywall (~4.75") and an air gap (2") by the block outer wall and then subtract the second stud wall with 2 sheets of 5/8 drywall (~4.75"), then I'm left with about 18'x12' for the control room floor.
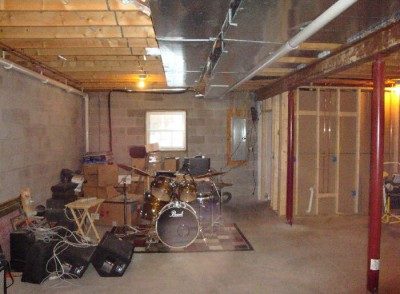
I have 7'8" to work with from floor to the bottom of the HVAC main ducts.
For the Control Room ceiling, I'll extend the joists down to the level of the ducts, to make a level ceiling in the control room to have symmetry. Then add Iso clips, hat channel, and drywall, adding Green Glue and another sheet of drywall. The final ceiling would be about 7'3".
So I have a 18'x12'x7'3" room inside the drywall. If I check this with ModeCalc (from realtraps.com), it looks OK. There is one doubling of 188Hz. I could shorten the 18' length by up to 2', if it could help with modes. I will change the dimensions to 16'11"x11'7"x7'3" to get a 1:1.60:2.33 (which is one of the preferred ratios to have).
If I line up the control room wall against the hallway to be in a line with the drum room, I'm left with an 11'3" wall inside the drywall for the Drum Room. My Drum Room ceiling is 8'6" to the floor joist above. If I subtract an air gap, a 2x8 joist, and two sheets of 5/8" drywall, I have 7'8" height left inside the drywall. So there is room for independant 2x8 ceiling joists for the Drum Room. They will not touch the floor joists above them.
So my drum room is 11'3"x12'x7'8" inside the drywall.
I'm excited about finally starting this, after 5 years of waiting and planning. I would prefer to do all of the work myself, but I'm too busy at my job until November.
I have already bought a van load of 703 4'x2'x2" fiberglass panels. I just ordered Green Glue, Whisper Clips, putty packs, acoustic caulk, and hat channel.
I still need to set the locations of the doors between the hallway and the control room and the drum room.
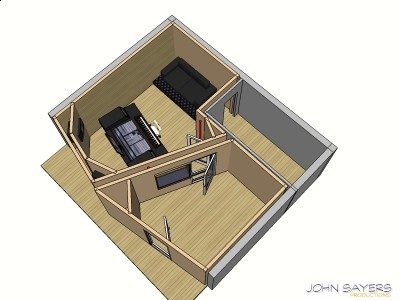
John- Thanks for the sketchup! I have spent many hours with sketchup, only to come away with very crude drawings that were not accurate.
My wife and I had agreed that we didn't want the basement rooms to be shaped weird, in case we ever need to sell our house. Also, our parents are all 65 to 80 years old, and we may need to have them live with us and take care of them at some point. With the layout I have now, I'd only have to remove a window, and I'd have a normal bedroom, living room, and bath.
I do love your professional drawings and designs! I'm hoping I can treat the rooms with all the rigid fiberglass I bought and still get good sounds, even though they are rectangular shaped.
Can I add the speaker soffits you show as an add on to the finished wall in the control room? Would it help my control room to add the soffits and angled walls I have pictured here?
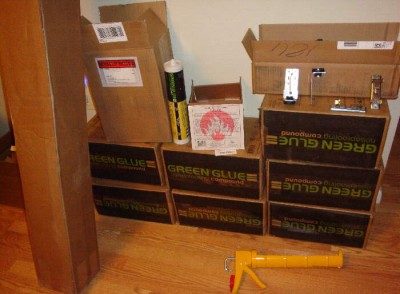
It's an exciting day when the soundproofing materials arrive. I ordered them from the Sound Isolation Store. Their prices seem decent. They give you a discount based on your total order. They shipped the products quickly (3 days).
Item Qty Subtotal
Case of Green Glue Noiseproofing Compound 7 $ 1,155.00
WhisperClip (Green Glue Noiseproofing Clip) 54 $ 243.00
Individual Tube of SilenSeal (Green Glue Noiseproofing Sealant) 7 $ 49.00
Putty Pads For Electrical Outlets (Pack of Five Pads) 4 $ 80.00
Furring Hat Channel 6' x 2 1/2" 27 $ 81.00
RSIC-DC04 Sway Brace 10 $ 60.00
Subtotal $ 1,668.00
Discount -$ 105.49
Shipping & Handling $ 162.70
Grand Total $ 1,725.21
I bought the 29oz. caulking gun on amazon.com for about $7 and $10 shipping.
I drove to Pittsburgh (about a 2 hour drive each way) back on 12/31/07 to Geo. V. Hamilton [removed] and bought my rigid fiberglass (703). I bought 60 2'x4'x2" panels for $360 plus $25.20 tax. It completely filled up my Chrysler Minivan with all the seats removed. It's been sitting in my basement for over two years.
I'm planning on building HVAC silencers similar to Jester's Gleeman Studios.
I'm calculating the lumber I need to sart framing. I may buy it in the next few days.
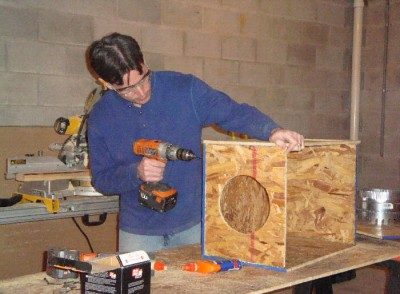
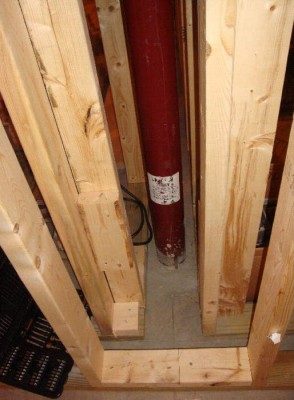
I built the first HVAC silencer and put it in place to see if it fits. It looks like it will work well. I still need to get some duct liner or 1" OC 703 to deaden the sound passing through the silencer. I calculated that there is about 50 square inches of cross sectional area passing through an 8" round duct (A=3.14*R^2). So, I made sure that I had at least 50 square inches of cross sectional area everywhere in the box, and at every turn.
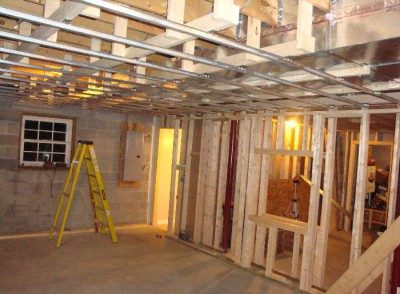
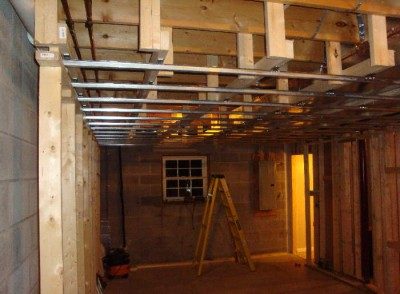
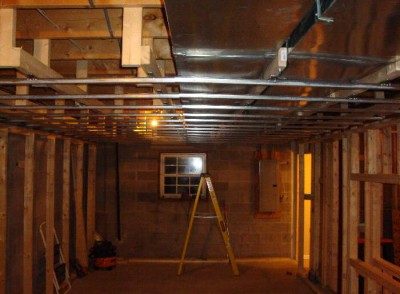
It was a challenge on how to attach the ceiling joist (if you can call it that) in the control room that runs in between the main HVAC ducts. The contractors had to attach a metal channel and put long threaded rods through that to attach the joist to. The rest of the joists were just nailed to a short 2x4 that attaches to the floor joist above it. I tested the strength of these and hung off of them. They are very strong. Much stronger than what will be needed to hold two sheets of drywall. :)
After those joists were done, the Green Glue Noisproofing clips were attached and the hat channel was run through that. We ran short on the iso clips and I had to order some more. I originally used the greengluecompany.com website diagram that shows studs 16" on center with hat channel 24" on center. When I realized I was stuck with 24" OC joists, I called the Green Glue Company and asked them if I could use 24" OC ceiling joists. They said, "sure, but place the hat channel 16" apart instead of 24" OC." Somehow in the conversion, I messed up and didn't order enough clips. :(
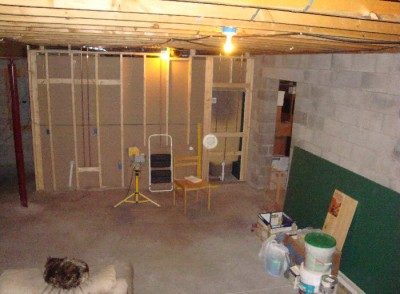
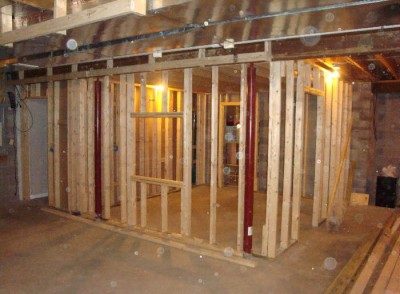
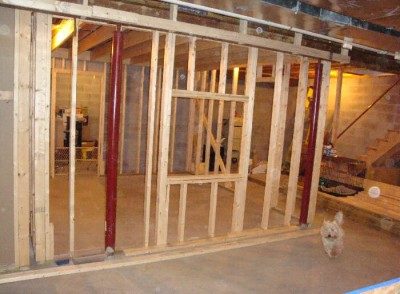
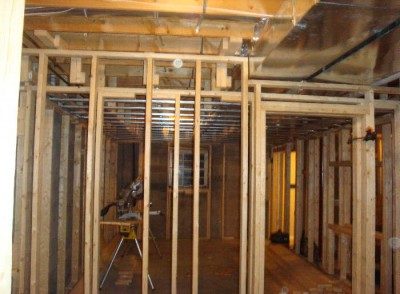
The stud walls were started in the control room.
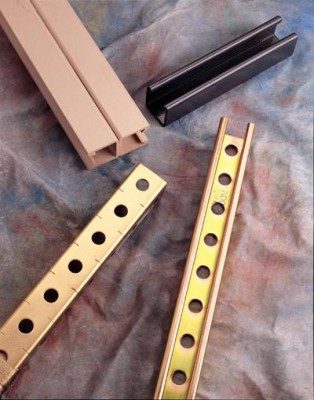
"The contractors had to attach a metal channel and put long threaded rods through that to attach the joist to."
Unistrut :)
Wow Brit, that is a technical feat indeed what you guys have done here. I guess if I had any questions it would be what are the plans for fire blocking from the top of wall to ceiling access area?
Again, wow, this is good looking work in the attempt to make a basement recording environment!
Brien
I didn't call it unistrut, because the unistrut I'm used to seeing is like the picture below. This stuff may be unistrut, but it is "L" shaped, instead of "U" shaped, with holes in it.
I'll post the firestop detail later.
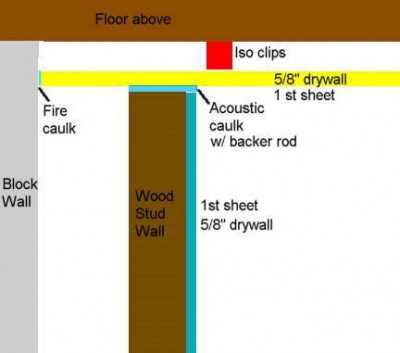
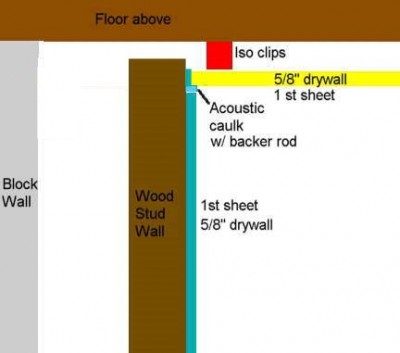
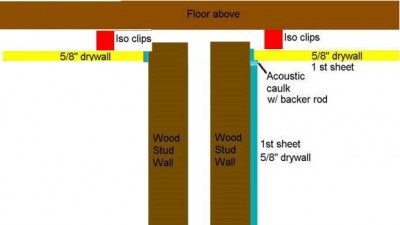
I saw the firestop detail below in the past on greengluecompany.com. They used to have a diagram similar to this on their website. But I can't find it now. I left a gap below the hat channel for the firestop.
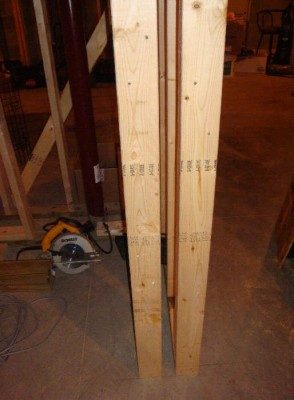
The final two stud walls were put around the control room.
Can anyone please comment which gives better isolation...
1. Putty pads over electrical outlet boxes, OR
2. Building a 2x4 box completly around (3 sides of) electrical outlet boxes and sealing with acoustical caulk
????????????????????????
The only reason a 2X4 box will not be as good as a putty pad is that the back of the box is often the sheet rock.
So you have to consider the weak spots.
The putty pads installed on all sides of an electrical box have the contiguous mass required to stop sound.
The final two stud walls were put around the control room.
Can anyone please comment which gives better isolation...
1. Putty pads over electrical outlet boxes, OR
2. Building a 2x4 box completly around (3 sides of) electrical outlet boxes and sealing with acoustical caulk
????????????????????????
Building a 2x4 box completely around (3 sides of) electrical outlet boxes and sealing with acoustical caulk
I saw the firestop detail below in the past on greengluecompany.com. They used to have a diagram similar to this on their website. But I can't find it now. I left a gap below the hat channel for the firestop.
I'd build it like this:
detail.jpgand between both rooms
detail_1.jpg
That is the way I did mine, with the 2X sides and the back with enough mass to control leakage. It cost's less considering the material is most likely available, but does require the ability to use a circular saw and a caulk gun:)
Thanks for the heads up.
John, Brien, and Lilith- Thanks for your help.
I bought putty pads, but i could easily build the boxes with 2x4s and not use the putty pads. I could re-sell them, if I don't use them. I'll post pictures this weekend.
I did find some heavy duty electrical boxes that have no pre-cut knockout holes in them. They have knock outs. But they are sealed closed.
I started mounting the outlets and light switches and building the boxes around them. I about destroyed the first 2x4, and then realized I couldn't use 12 penny nails. So I got my brad nailer and things went better. I did shoot a couple nails that came flying out the side. These nail guns are dangerous! :shock: God must have protected me from myself, and all of my fingers are still intact.
I used inch board (3/4") to make a frame around my snake. When I was shooting nails and mounting the box I made to surround the snake, I accidentally shot a nail that would have gone straight in the main cable bundle of the snake, but the manufacturer had a protective metal sleeve where the snake comes out of the box that protected it. :roll: The snake will allow me to plug in mic's in the drum room, and connect them to my preamps in the control room.
All of the electrical boxes and snake box stick 1.25" out in anticipation of two sheets of 5/8" drywall going on later.
The contractors have gone to Bristol to see the race this weekend. So I'll try to squeeze in as much work as I can on the HVAC silencers and electrical work, when I'm not working this weekend.
John- I'm changing my build to the design you posted in your picture.
If I'm using 2 sheets of 5/8" drywall with green glue in between, should I spend the money to put fluffy fiberglass insulation between interior walls (between the control room and drum room), and between the studio ceiling and the floor joists above?
I will certainly put fluffy fiberglass insulation in between the studs of the outside walls.
I didn't see it and you didn't mention, so, what have you or will you attache to the backs of these boxes to close up that hole? You can almost caulk sheetrock in place if it is small enough, but attaching it directly to the back of the box might be easier, and then caulk it.
Looking good.
That ethic will cost me a lotta $$$ in insulation! :(
I have small 2x4 blocks on the back of the outlet boxes. I put acoustic caulk around the openings.
I finished the first HVAC silencer, and started the 2nd one. I put 1" OC703 wrapped in plastic inside to deaden the sound passing through the silencer. I'll upload pics later. The OC703 seems very easy to work with. It cuts nice and easy. :)
Thanks again John & Brien!
That ethic will cost me a lotta $$$ in insulation! :(
It will cost you an awful lot more in isolation if you don't!
Failing to put insulation in your wall cavity will cost you in the region of 10 to 15 dB of transmission loss. In other words, your wall will only work half as well, or WORSE in stopping sound from getting through.... Put another way: at least twice as much sound will get through 8subkjectively), so things will be twice as loud (subjectively), and probably louder.
That sounds like a really "expensive" loss to me!
For maximum isolation, the entire cavity should be filled with mineral wool or fiberglass insulation, but at the very least you want it 4 inches thick in there. Any less, and you are throwing away a really good wall by not investing a few more dollars in it: Leave out the insulation, and you leave out the entire purpose of the wall: blocking sound as well as possible.
- Stuart -
PS: John, I'm sure God has a great sense of humor, and probably had a laugh at your sacrilegious joke! :)