Then I threw up some paint and stained all the interior doors.
That's why our parents taught us not to eat paint. ;)
Great thread by the way!
Did you manage to de-fog the windows?
But when the paint looks like cappuccino how can you resist? :wink:
I pulled out the inner panes of the windows but still need to caulk and re-install them. However, I'm not sure I'll be able to keep them fog free. Moisture will always be trapped between my two panes and that moisture will condense and evaporate. My HVAC contractor said he did some work for a guy who built an interior pool that had two panes of glass with a space in between (similar to mine) going to the exterior. Moisture and fog was a major problem for him - to solve it he ended up circulating air between the panes through tubing that ran from window to window driven by an air pump. :cry:
If you put a lot of desiccant in between the panes it should keep the moisture in check.
I'd buy a tub of silica crystal cat litter.
dry it in the oven at 300 for half hour or more to make sure its 100% dry
put it in a nice pouch and in between the panes.
As long as the space between the panes is air tight i think this should keep the air dry and condensation under control.
"for a guy who built an interior pool that had two panes of glass with a space in between (similar to mine) going to the exterior."
I imagine this is where the similarity ends to yours. Water all by itself changes everything so you have to consider not only the idea that it is in a contained environment, but you have to consider the enclosure(the environment) what kind of temperatures it can produce in a 12 hour cycle and what kind of ability does the environment have to extract this change and or alleviate the changes if required.
Consider a hot day, and a body of water enclosed in a building. When you start to sweat...how much is you and how much is from this enclosure? And add the body of water and the exchange can get pretty fluid, over a short period of weeks and days peeling paint of of interior walls, rotting the outside of the structure, depending on what it is.
The fact alone that water is in the room, always in the air, it is just a different overall situation, completely different in most aspects.
Certainly the silica pouches in between frames is the best answer available, but the in room swimming pool can have leak issues that have nothing to do with what you have designed and built.
Just my ideas on that, so thanks for bringing it up.
......trouble in studio build paradise.......
I ordered 14 ball-catch assemblies on eBay for a couple bucks each (locally they were $10 a piece)!
I had planned to put at least 2 on each door that didn't have a typical handle/latch ( one door at each entry/exit had to have a lock on it and thus a typical handle).
I put two on the main entrance door and I am not happy with they're ability to latch the door tight against the weatherstripping. First of all I need to point out that I had VERY large gaps at some points on the two exit doors between the jam/stop and door. This might have been because the jams were just standard pine and were exposed to the elements for quite some time after being installed (a couple months I think). I'm quite sure that they warped at least a bit.
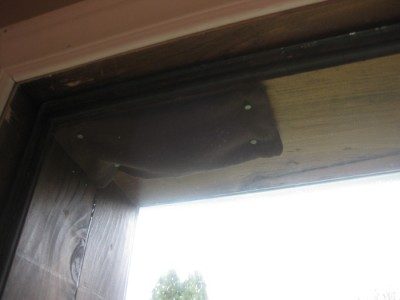
Because of this I had to use two different types of seals on the jams (two different thickness) as the pic shows. And because of this the door requires a pretty good amount of force to keep it pressed tight against the weatherstripping. The doors with the standard handle and lock (and hole through the door) work great - I was able to get a nice tight seal on both of them, but these ball catches just don't seem up for the job. I think even if I added a third it wouldn't make a difference.
I'm seriously considering boring a hole in these two doors and installing a standard handle and latch.... :shock: But before I do that I'm going to try to add a wedge along the stop portion of the jam underneath the weatherstripping in the places that aren't sealing (sort of as pictured).
By the way - the latches are aligned properly although it did take some time for me to get them that way. :roll:
Having to use the two types of seals and wedging the the jam/stop like this really feels very unprofessional - and that has me really frustrated!
I did some sound testing and measurement and based on that I actually think I would be happy with the results if both doors had holes bored through them. I stuff the door handle cavity as full with insulation as I can while still allowing the handle to function properly.
on a happier note - I've got some flooring installed! I bought some 12mm (1/2") laminate flooring that I'm quite happy with.
The underlay was a 'premium' product that also served as a vapor barrier and sound/impact absorber. Seemed pretty good....
Cutting the angled pieces for the edges was a bit tricky at first until I got the hang of it. Other than that, installing this flooring is super easy since it just clicks together and 'floats' - no glue or nails.
The pic of the finished product doesn't look so hot due to all the dust and the glare but it is going to look fantastic when its all cleaned up.
Hmm, I'm having a similar problem at the moment.
My lower jam is about 1.5mm out on the hinge side which makes the opposite bottom corner not touch the seals by 1.5mm!! Very frustrating!
What I've done is add a 6kg magnetic latch top and bottom. (cupboard style) It also took a long time to get the distance just right.
I stupidly "no more nails" the jams down? Is it possible to remowe yours and start again?
In it's closed postion re-fit the new straight jams to a perfect fit.
Hmm, I'm having a similar problem at the moment.
My lower jam is about 1.5mm out on the hinge side which makes the opposite bottom corner not touch the seals by 1.5mm!! Very frustrating!
What I've done is add a 6kg magnetic latch top and bottom. (cupboard style) It also took a long time to get the distance just right.
I stupidly "no more nails" the jams down? Is it possible to remowe yours and start again?
Hey Lilith - I checked out your thread but didn't see a mention of the magnetic latch there. Would you possibly be able to snap a picture or two showing what you did?
We have a store here called Lee Valley that is really great for obscure latches and whatnot. They have some magnetic catches like I think you might be talking about. Maybe I should try one or two out....
I used screws in my jams and then filled them with wood filler. You can see the wood filler in the pics - I thought because it was specified as 'stainable' that the spots would be less noticeable. But I actually like the way it makes it look somewhat aged/rustic.
lilith_envy wrote:
Is the flooring meant to have a gap between each run?
Looks like you could get it a little tighter.
sorry just a thought
no apologies! I like thoughts. :) The boards have a beveled edge. Its supposed to make it look more like genuine wood. The seams are also particularly visible just now since they're full of dust.
Hi,
I've been a bit slack with the updates in my post.
About 2 weeks behind in photos,
Here's a similar one from a google search.
they come in 3, 4 and 6kg pull loads. So I assume adding two will increase that. As mentioned in other threads there are building code requirements as to how heavy the pull load can be. (wheel chair access stuff)
If you can remove the jams and start again, I think you'll be happier :D
HVAC contractor was out to get the mini-split unit and two air handler units in.
When they were putting the mini-split in it was mentioned that there are two ways to mount them - by leveling a slab on the ground or attaching brackets to the building. Apparently they've had trouble in the past with the slab mounting where everything shifts out of level and coolant leaks can occur. So they were planning on bracket mounting into the cinder block of the exterior.
I was distracted the day they were here - my 8 month old niece was having open heart surgery and I wasn't giving my full attention to the install. I didn't think at all about structure-borne noise until after they'd left! I've got to get some sort of rubber between the unit and the brackets.
The interior air handler units are also a little louder than I expected. They have 4 settings - high, medium, low and quiet. But my changing the setting didn't seem to make any difference. I haven't had a lot of time to play around with it though as my electrician came out shortly after and cut power to the unit in order to do his thing.
I unfortunately didn't really think through the fact that I was positioning a wall sconce light right where the air handler unit was going in the live room :roll::oops: Aw well.
So my electrician got the new panel installed and all the studio wiring hooked up to it. I had to work alongside him to get the insulation, vapor barrier and drywall up once we agreed on how the cables should penetrate the wall and enter the panel for a surface mount install. As you can see, I rushed the cut of the final layer of drywall and made it too small. I stuffed some backer rod in the gap will get some tape and mud on it today - hopefully I can still get a clean finish :roll: We had to leave the lower portion open to fish through the new run from the house at a later visit.
We also decided that we would increase the service coming to the house from 100 amps to 200 and installed a 65 amp run to the studio (the prior existing 30 amp run now powers the mini-split). That will give me plenty of juice for home and studio :D
He'll be back to hook up the 65 amp run from the house, install the grounding plate and connect up all the isolated grounds. That 65 amp cable is pretty hefty - about 3/4 in. diameter.
The receptacle outlets he installed are orange :shock: - which I've learned is to label them as isolated ground. I didn't say anything as I just wanted him to get the work done (and he was out on a Saturday to fit me in) but I may very well replace those myself later. I've seen online that there are white receptacles that just have a small orange triangle on them - that would be much better! And I'm hoping for the newer flat face type as well.
Image not preserved: isolated_ground_recepticle.jpg
Ok - update:
I wasn't planning on using Green Glue but decided that isolation from my neighbors is worthy investment. I got two cases at $15.97 Cdn each - picked up locally from a distributor in Mississauga (about a 40 minute drive each way).
You got my hopes up on the price. I read 15.97 per case and thought that's pretty cheap. But 15.97 per tube that's a little crazy.
Ok - update:
I wasn't planning on using Green Glue but decided that isolation from my neighbors is worthy investment. I got two cases at $15.97 Cdn each - picked up locally from a distributor in Mississauga (about a 40 minute drive each way).
You got my hopes up on the price. I read 15.97 per case and thought that's pretty cheap. But 15.97 per tube that's a little crazy.
Yeah sorry - I didn't word that very well. Yes, $15.97 per tube is crazy and I may not have really needed it, but in the grand scheme of things $400 to make sure I got the best isolation I could from my immediate neighbor was determined to be a worthwhile expense.
I posted a while back that I'd probably be around $25 000 all said and done. My wife and I did a final tally about a week ago and its actually at $30 000. In my very first post I stated a $20 000 max budget (although I always expected to be over that - just don't tell my wife :wink: ). So 50% over budget........that's about right eh?
I confirmed today that the silica crystal idea is working perfectly!
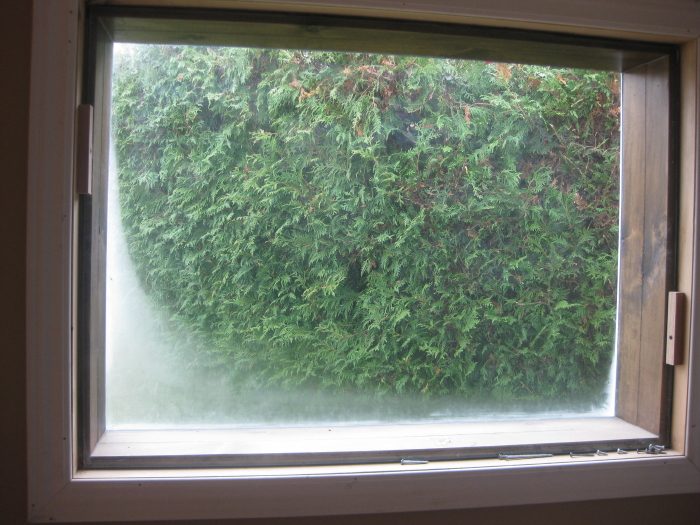
My wife sewed together a pouch and we filled it with a bunch of crystals (probably more than necessary), put them in the window and sealed it up air tight. I also put the other window together but without any crystals (although it wasn't quite air tight).
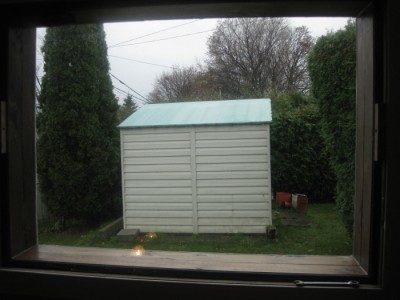
Today was rainy and humid and when I went out to the studio my experiment proved the effectiveness of the idea (pics). Awesome!
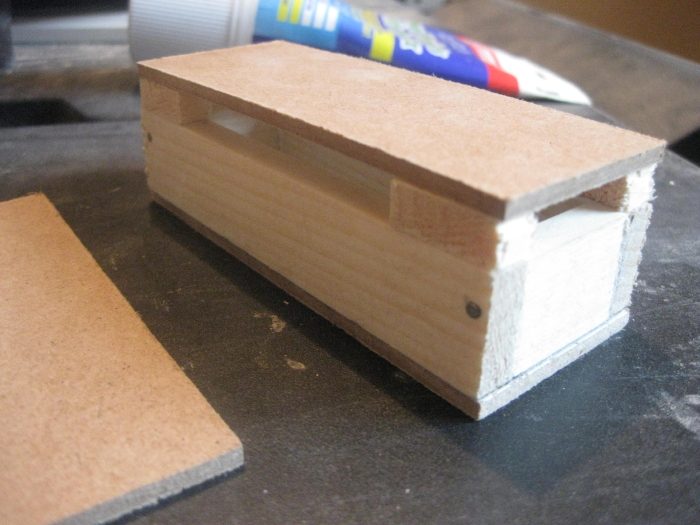
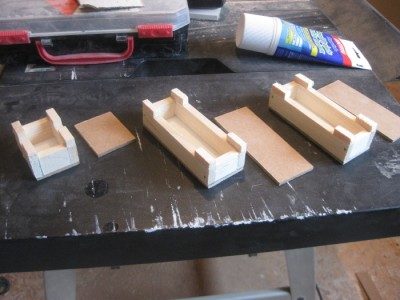
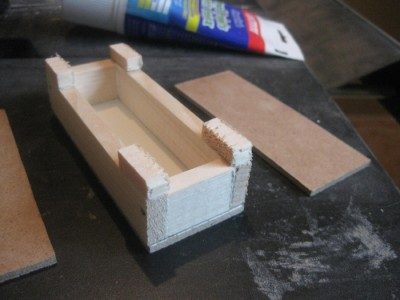
But I decided almost immediately that I didn't really like the way a loose bag would look inside the window (nothing to do with my wife's incredible sewing skills and her gracious willingness to help). So I decided to build some tiny boxes that would hold the crystals and hopefully provide a cleaner look.
They're pictured below. The idea is that I'll wrap the whole thing in fabric so it will look like a solid box from top to bottom. I did two larger ones for the exterior windows and a small one for the CR-LR window.
Oh yeah - I didn't dry these out in the oven beforehand like you suggested.
I was actually planning on just using different crystals for the final install since I've got a whole bag of em!
I made a decision to try standard door handles/latches on a couple doors. The CR to closet doorway has only a single door design. Sound transmission on this doorway is a low priority - or atleast, I knew I'd get enough isolation even with a standard door handle and latch.
I also decided to put a standard handle and latch on the second door of the CR to exterior doorway (a double door design). One door in this doorway already had a standard handle in order to include a keyed lockset for security. This doorway is my primary entrance to the studio and faces our house (not the neighbor) so sound transmission here is not as big a priority as on the back entrance which leads into the LR and is closer to my neighbor (and will also be where the louder noises will be made :) ).
My intention was to put the new handles/latches in place and then do some testing to determine exactly what isolation I was getting. My plan was also to stuff the hollow center of the handle with insulation - as much as I could stuff in there to try to create a 'mass' while still allowing the mechanism to work properly.
My testing was done with a couple reference monitors and an 8" subwoofer placed about 3 feet from the door. All of the seals were totally air tight.
On the single door from CR to closet I was reading 22dB of reduction while using both A and C weighting. On C weighting I was reading 100dB with the door open and 78dB closed.
The double door was a little more difficult to get accurate readings on because it goes to the exterior (which obviously has noises of its own). The daytime exterior noise level with no cars going by was reading about 62dB on average using C weighting (too low to read on A weighting).
I set my 'noise' levels to 100dB C weighting with doors open and was reading 70dB with both doors closed. However, with A weighting I was reading 93dB with doors open and 56, 57dB with doors closed. So 30dB reduction with C weighting and 36dB with A weighting.
Its worth noting that the holes in the doors (handles) are not directly across from each other as the doors are hinged on different sides of the framing.
I'm still processing what it all means but it definitely makes me want to find a way to latch the other doors in the studio tightly without making a hole in them! I was really hoping for 40dB on the double doors. I just really am not optimistic about being able to do that at this point without using deadbolts (which I'd really rather not).
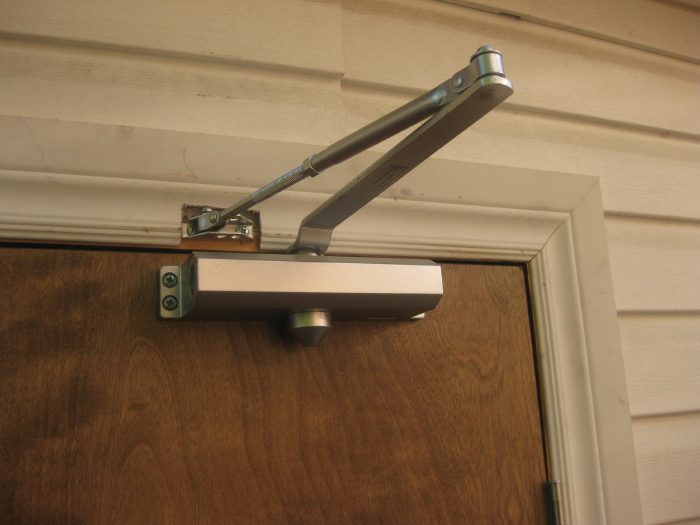
I've got one on the main entrance already but it doesn't close with enough force to create a tight seal (and it is a heavy duty commercial grade closer). I've also got one for the outer door on the rear entrance but haven't installed it yet.
With the two door design, once both doors have air tight seals on them you get some pretty strong resistance from the air trapped between them when closing. I could imagine a closer working really well with full magnetic seals (refrigerator style) but not with the more affordable option that I've gone with.
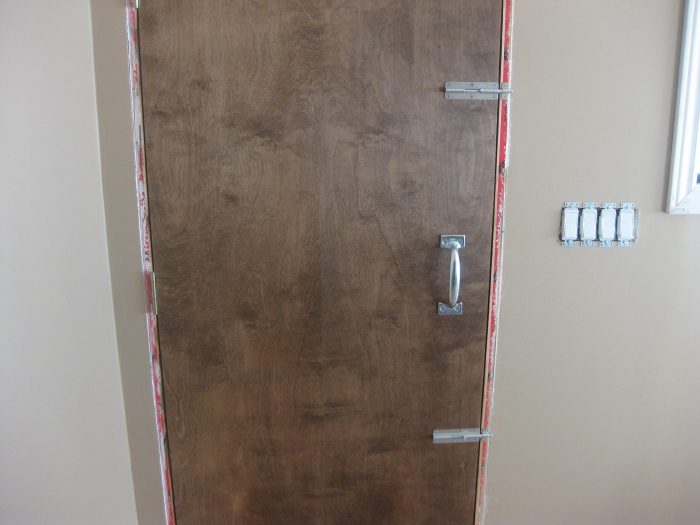
I actually put two sliding bolt latches on the inner rear entrance door. I was planning to do this for security reasons (because the door with the lock on it is on the outside and the hinges are exposed). These two bolt latches keep it closed nice and tight so I think that's all I'm going to do on that door. It's only going to be used occasionally.
Once I put the sliding bolt latches on I tested that double door to see how it would compare to the main entrance. I'm measuring 33dB of reduction on C weighting. An extra 3dB from having only one of the two doors with a handle hole through it.