Howdy all,
Last night I put together the first two panels for my bedroom studio based on Ethan's design for Mid-bass panels. One panel is 4/8 with 2" OC 703 in it and will be mounted on a wall. The second panel is 4x8 with 4" of OC 705 and will bridge a corner for bass trapping. Just wilt the two panels in the room there is a noticable positive difference in the "sound" of the room. I can't wait to get the rest of them done and installedn I took a bunch of photos so I thought I'd share for those like me who get a lot more from a photo. Choosing only 6 photos to tell the story was challenging.
Parts for one mid-bass panel:
(3) 1x4x8' Pine boards $ 5.96 (Home Depot)
(2) 2'x4'x2" Pwens Corning 703 panels $ 27.70 (SPI Dallas)
~3yds of tan burlap @$1.48/yd $ 4.44 (walmart)
small pieces of 2x2 wood $ 0.00 (found in garage)
Staples, nails and screws $ 0.00 (also found in garage)
Total cost for mid bass panel $38.10
Total cost for corner bass trap panel (4 panels of OC705) $ 111.12
The only real difference between the thick & thin panels is the thich panel has two layers (4") of 705. Therefore the 2x2 blocks are not needed. Instead, I streched a couple of strips of burlap across the back to keep the pieces from falling out the back side.
Each frame took me about 30 minutes to complete. I used a hammer, hand saw, drill and a staple gun for tools.
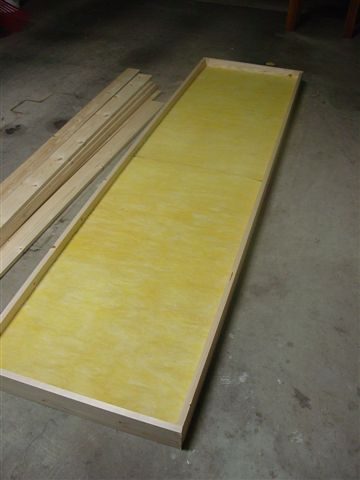
Photo 1 - The competed frame with the fiber panels inside. I actually just laid the 8 foot sections against the two pieces and trimmed the ends to fit and nailed them on with some finishing nails. I'll probably use screws for the next panels.
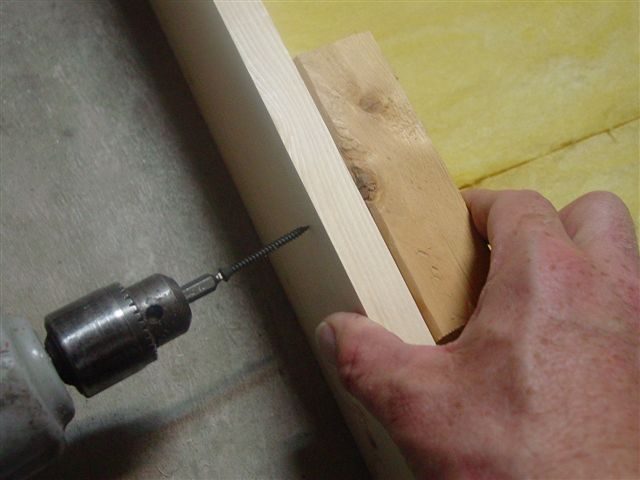
Photo 2 - After the frame was finished I attached the 2x2 blocks to keep the fiber from falling out the back. I used screws for this.
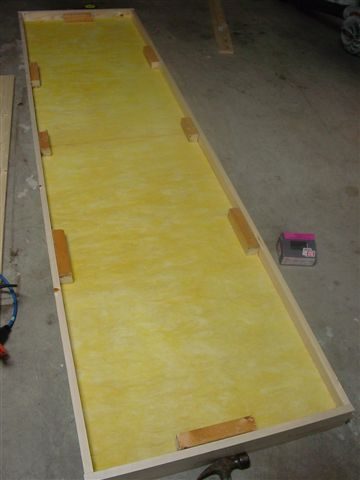
Photo 3 - Here is the frams with all the 2x2 blocks installed.
Photo 4 - After the blocks were installed, I turned the frame over to install the burlap.
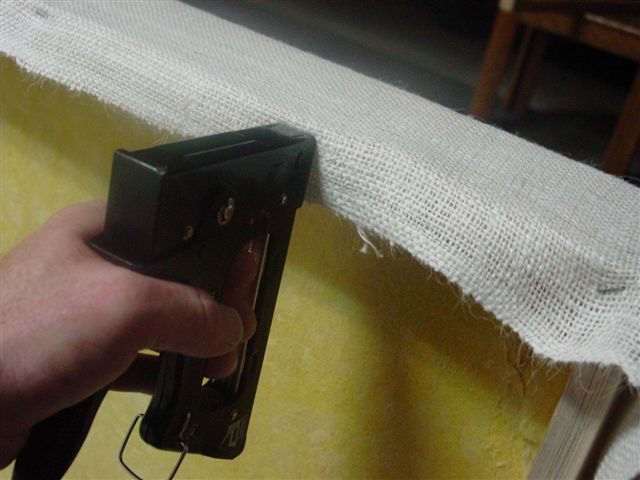
Photo 5 - Stapeling the burlap. The burlap came folded in half on a bolt. It was exactly wide enough to stretch around the frame width without trimming. The only cutting was the length.
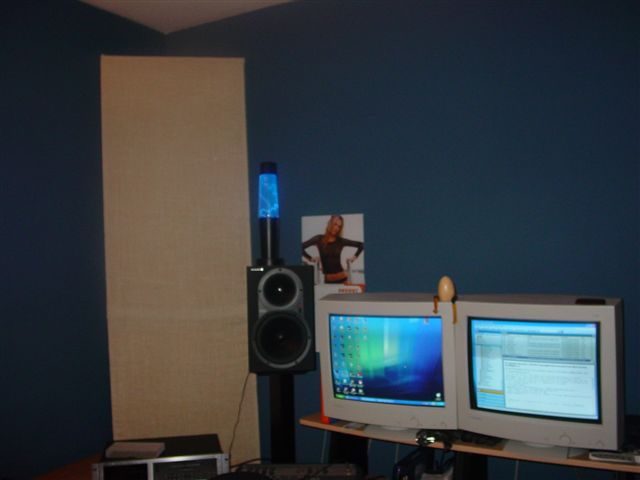
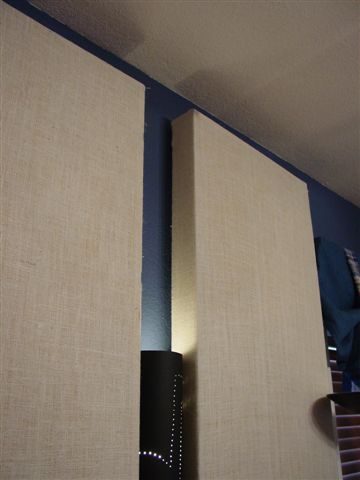
Photo 6 - Here is the corner panel in the studio. I have 9 foot high ceilings. The panel is simply resting on the floor bridging the corner. The midbass panels will be hung on the walls around the room and possibly a couple from the ceiling.
Enjoy :lol: ...db
Looks like a winner to me!
Nice to hear from a fellow North Texan!
Looks likeSPI Dallas is on my list of places to shop. I hear there is a place called Insulation Supply or General Insulation that also has good prices.
Keep up the Pics!
Tom
> does it make any sense to have a back, plywood or hoasote, on corner bass traps? <
You do not want a rigid back because that will reflect the waves and negate the benefit of an air space. Homasote is pretty flimsy, so that might be okay.
--Ethan
From the REFERENCE section, linked in the top thread in every forum -
http://www.johnlsayers.com/phpBB2/viewtopic.php?t=1742
If you're still concerned, lightly vacuum the backs of your DIY absorbers and cover with cloth... Steve
SURELY THESE PANELS WILL HELP A LOT.
MY QUESTION IS IF IT WILL WORK ON THE THOROUGH LOW/MID BAND, OR IF IT IS DESIGNED TO WORK ON A SPECIFC FREQUENCY, SAY 200Hz OR WHATEVER?
Souza, welcome; first, can you please turn off the CAPS lock on your keyboard? That's considere YELLING, and on some boards you will get treated really badly for doing that :cry:
The type absorbers shown in the pictures (and the location they were used at, a corner) are considered "broadband" absorbers - meaning that they will absorb EVERYTHING in a wide frequency range. Placed across a corner like that, they will work down to around 200 hZ, probably even a bit lower. They are NOT tuned to a specific frequency... Steve
I'm flattered that this post became a sticky. Just to be clear... (maybe I can find a few minutes to make a drawing). The panel shown being constructed in the photos has only one layer of 2" OC 703 with a 2" air gap between it and the wall it's mounted on. (I have hung them like big pictures). This panel is meant be a broadband absorber and I intend to have them hung on the flat walls of my 11' x 11' bedroom studio.
I cannot modify or tear up the bedroom walls as I intend to sell this house and I'm quite sure the new owner will probably want to use the room as a bedroom again so the panels are removable and I'll take them with me and probably incorporate them into my next studio.
The second panel I made the night I made the photos has two layers of 2" OC 705 which is actually about a half an inch thicker than the 2" wood frame. I covered the front with burlap in the same manner but I made three strips of burlap about a foot wide and stapled them across the back to hold the fiberglass in the frames. This is the panel you see in the corner and is intended to work as a broadband bass trap.
I intend to make several more panels. Three of them will be bass traps like the one in the corner but I will use faced 705 for the top layer (facing on the room facing side) Two of these will go in two of the three remaining corners (unfortunately the door into the room is in one of the corners), and the third will bridge the ceiling/wall corner above the wall you see in the photo.
All the rest of the panels will be the single layer 703 type and will be hung on the walls. One horizontally behind the speakers, two vertically on the back wall, one on the left wall and one on the right wall.
The screws I used were "Grip Rite" Trim Head Square Drive screws. Once you use Square drive screws you won't go back to Phillips Head.
I hope that covers it....
.db
Did you use anything to hold the fibreglass in place to keep it from falling toward the front?
I guess the fabric would... I was just thinking if they were ceiling mounted I wonder if I would need to attach the fibreglass inside to keep it from falling into the fabric?
Thanks!
Tom
Did you use anything to hold the fibreglass in place to keep it from falling toward the front?
I guess the fabric would... I was just thinking if they were ceiling mounted I wonder if I would need to attach the fibreglass inside to keep it from falling into the fabric?
The fiberglass is not that heavy. The fabric on the front easily holds it in place. These panels could very easily be hung horizontally from the ceiling. In fact, you would probably not need the 2x2 blocks as gravity would keep the fiberglass towards the front if they were hanging horizontally from the ceiling.
.db
I'm going to be building some panels very similar to these, thanks for the inspiration. I've read elsewhere that you should use faced 703/705 so that you don't deaden the room too much. Can anyone shed some light?
thanks
drew
Drew, this can work for corner traps where you may want more bass absorption and less mid-high absorption, but the FRK facing should NOT be used for first reflection points like "clouds" and side wall locations - otherwise, you can end up with phase cancellations/comb filtering at the mix position... Steve
How have people mounted these panels to the wall? I would like to avoid the toggle bolt idea keeping the wall useable if I ever take them down.
Hanging them like pictures would seem challenging as I have around 30 of these things to hang (2' by 4' panels) and getting them even and solid would seem impossible.
I thought of maybe using "L" type brackets on the insides of the 1" by 4" pine framing but that would mean I would have to put the frame up first, screw in the L brackets, then insert the 703...however I wanted to cover the panels like dbyboth with burlap making this also undoable.
Depot has some hanging alternatives but I want these things to be solid on the wall...not "haninging" so that they could possibly fall off easily...
I will also be "caddy-cornering" a bunch of 2by4 and 2by8 panels which I have no idea on how to attach the wall...
My plans are to run a piece of 1X3 wood as baseboard trim(possibly with a routed edge for looks) and one about the top of where the panels will hit, and then mount the panels with "L brackets" to the 1x3s.
I'm flattered that this post became a sticky. Just to be clear... (maybe I can find a few minutes to make a drawing). The panel shown being constructed in the photos has only one layer of 2" OC 703 with a 2" air gap between it and the wall it's mounted on. (I have hung them like big pictures). This panel is meant be a broadband absorber and I intend to have them hung on the flat walls of my 11' x 11' bedroom studio.
I cannot modify or tear up the bedroom walls as I intend to sell this house and I'm quite sure the new owner will probably want to use the room as a bedroom again so the panels are removable and I'll take them with me and probably incorporate them into my next studio.
The second panel I made the night I made the photos has two layers of 2" OC 705 which is actually about a half an inch thicker than the 2" wood frame. I covered the front with burlap in the same manner but I made three strips of burlap about a foot wide and stapled them across the back to hold the fiberglass in the frames. This is the panel you see in the corner and is intended to work as a broadband bass trap.
I intend to make several more panels. Three of them will be bass traps like the one in the corner but I will use faced 705 for the top layer (facing on the room facing side) Two of these will go in two of the three remaining corners (unfortunately the door into the room is in one of the corners), and the third will bridge the ceiling/wall corner above the wall you see in the photo.
All the rest of the panels will be the single layer 703 type and will be hung on the walls. One horizontally behind the speakers, two vertically on the back wall, one on the left wall and one on the right wall.
The screws I used were "Grip Rite" Trim Head Square Drive screws. Once you use Square drive screws you won't go back to Phillips Head.
I hope that covers it....
.db
It looks GREAT. I am in the process of fixing the acoustic problems in my own room, after getting your post + pics recommended twice (!) I decided to join the forum!
My question:
What do you put at the BACK of the traps. It's wood (MDF?) as frame.. the little wooden blacks for support (?) the thing material for the front.. but what do you use for the BACK?
I'd love to know... I'll be a regular. I'll post a bunch of pics tomorrow - I'd love to get the max result as well. I spent 400 so far and the only 2 things that REALLY worked well: hanging up curtains behind my monitors AND the self-built MDF filled with sand! speaker stands..
Left to do:
sidewalls
backwalls
I just bought a bunch of gear (and was about to buy more) that I probably do not need based on the pics I just saw and what more people have told me.
I'm flattered that this post became a sticky. Just to be clear... (maybe I can find a few minutes to make a drawing). The panel shown being constructed in the photos has only one layer of 2" OC 703 with a 2" air gap between it and the wall it's mounted on. (I have hung them like big pictures). This panel is meant be a broadband absorber and I intend to have them hung on the flat walls of my 11' x 11' bedroom studio.
I cannot modify or tear up the bedroom walls as I intend to sell this house and I'm quite sure the new owner will probably want to use the room as a bedroom again so the panels are removable and I'll take them with me and probably incorporate them into my next studio.
The second panel I made the night I made the photos has two layers of 2" OC 705 which is actually about a half an inch thicker than the 2" wood frame. I covered the front with burlap in the same manner but I made three strips of burlap about a foot wide and stapled them across the back to hold the fiberglass in the frames. This is the panel you see in the corner and is intended to work as a broadband bass trap.
I intend to make several more panels. Three of them will be bass traps like the one in the corner but I will use faced 705 for the top layer (facing on the room facing side) Two of these will go in two of the three remaining corners (unfortunately the door into the room is in one of the corners), and the third will bridge the ceiling/wall corner above the wall you see in the photo.
All the rest of the panels will be the single layer 703 type and will be hung on the walls. One horizontally behind the speakers, two vertically on the back wall, one on the left wall and one on the right wall.
The screws I used were "Grip Rite" Trim Head Square Drive screws. Once you use Square drive screws you won't go back to Phillips Head.
I hope that covers it....
.db
It looks GREAT. I am in the process of fixing the acoustic problems in my own room, after getting your post + pics recommended twice (!) I decided to join the forum!
My question:
What do you put at the BACK of the traps. It's wood (MDF?) as frame.. the little wooden blacks for support (?) the thing material for the front.. but what do you use for the BACK?
I'd love to know... I'll be a regular. I'll post a bunch of pics tomorrow - I'd love to get the max result as well. I spent 400 so far and the only 2 things that REALLY worked well: hanging up curtains behind my monitors AND the self-built MDF filled with sand! speaker stands..
Left to do:
sidewalls
backwalls
I just bought a bunch of gear (and was about to buy more) that I probably do not need based on the pics I just saw and what more people have told me.
OK now I see how u did the holding of the fiberglass.. looking pics - not reading. Tired it's 5:18am.. gotta get up at 8am... to work... to pay for these panels :D
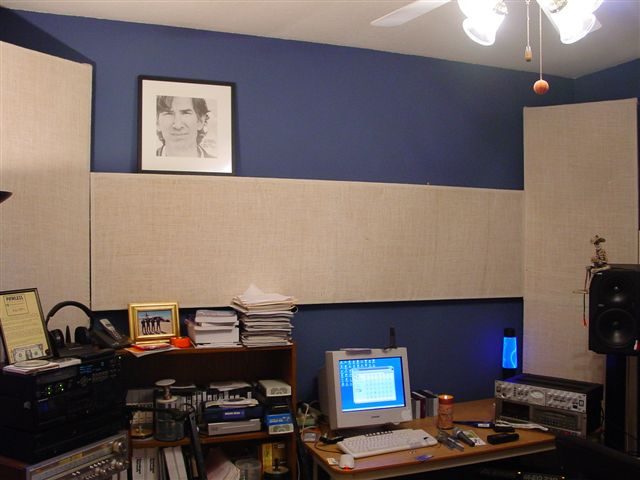
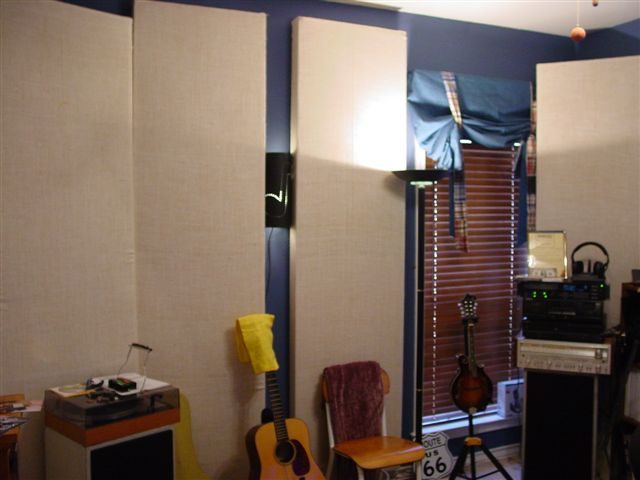
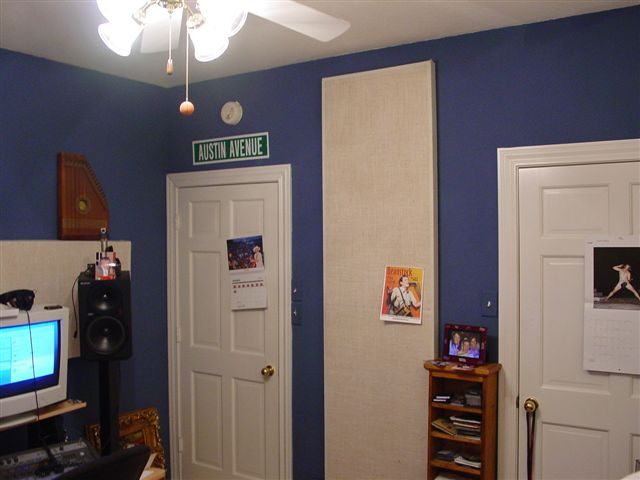
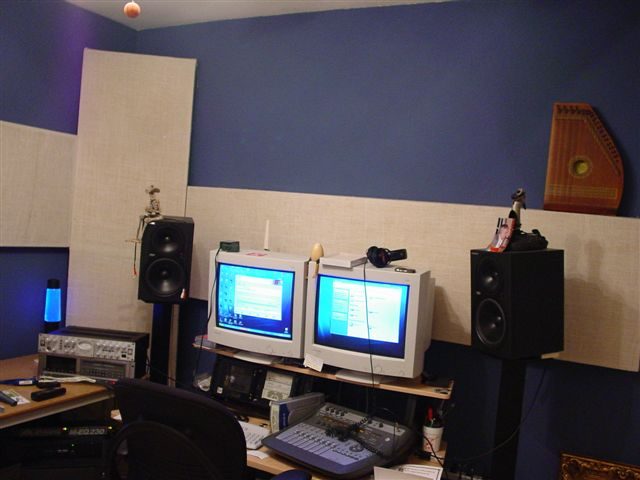
I finally got all the panels made and hung in my little bedroom studio. The difference is obvious and very positive. I may still put a couple of these panels on the ceiling but that's for another day. There are three types of panels in the photo:
4" with two layers of 2" OC705 in the corners
4" with one layer of OC703 spaced 2" off the wall. (most of the vertical panels)
3" with one layer of OC703 spaced about 1: off the wall. (Horizontal panel on side wall, and vertical panel between the doors).
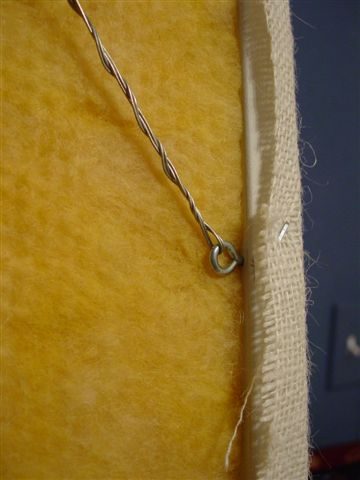
Vertical panels are hung like pictures with picture wire strung through eye hooks. The horizontal panels are just resting on nails nailed in the wall.
Enjoy....db