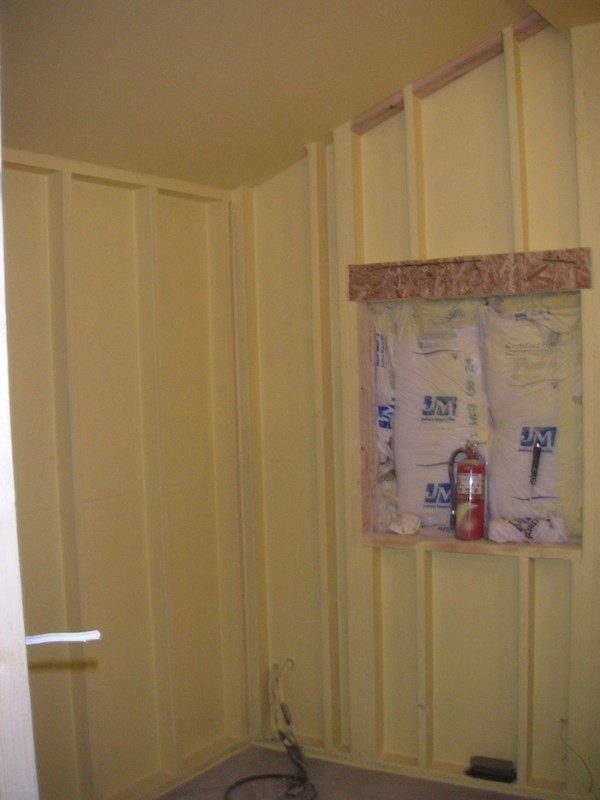
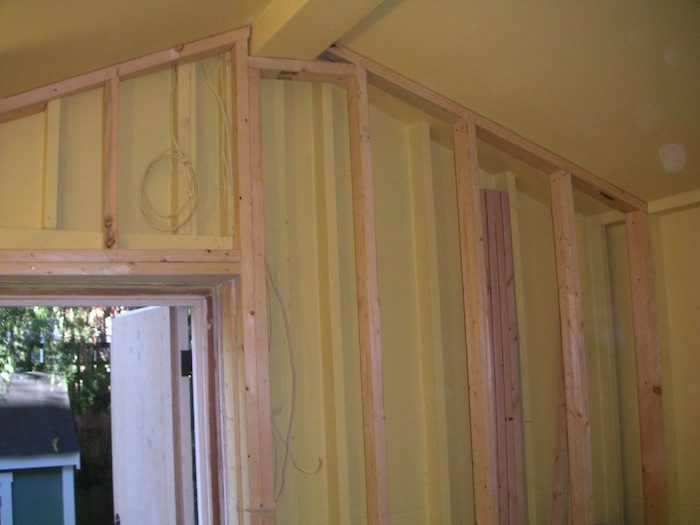
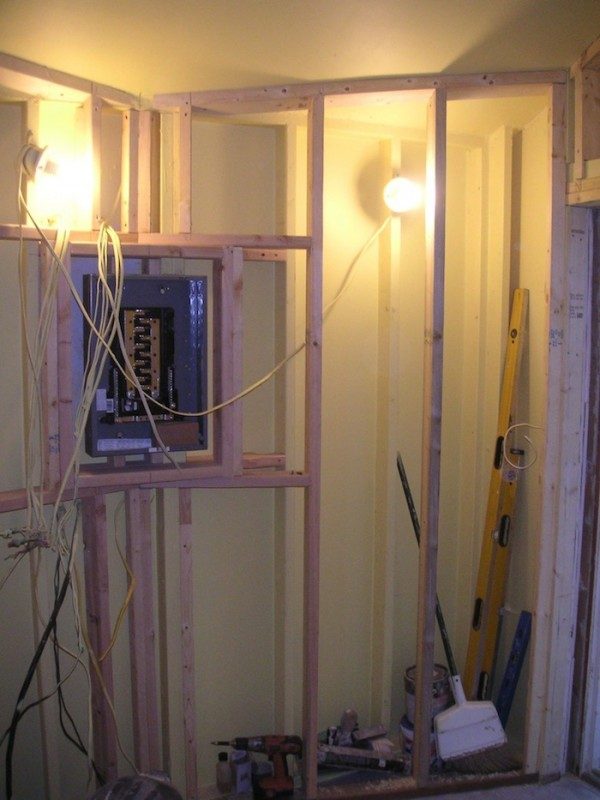
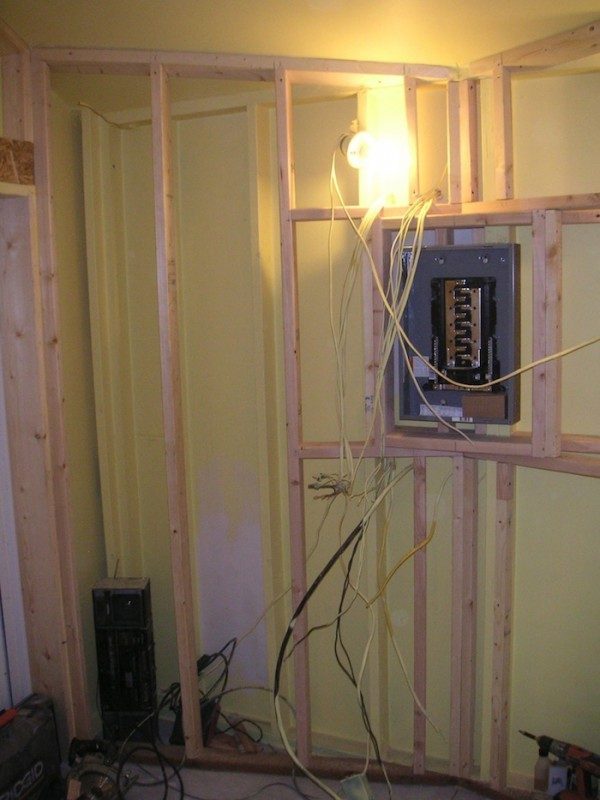
My long, one-car garage studio, construction phase

Started by Bigsby on 28 December 2010. 136 replies, 2010–2017. In the Library under Build diaries. Key posts in this thread.

Originally posted at johnlsayers.com, topic 15430.

I'm not sure quite how, but you seem to be confusing your isolation with your treatment. I can't quite put my thumb on what it is exactly, but that seems to be the issue. Just to clarify: 1) The vapor battier goes INSIDE the wall cavity, between the inner and outer leaf, and as Brien has explained, it goes on the warmer side of that cavity. So in climates that are mostly hot year-round, it would probably go up against the outer leaf, whereas in climates that are mostly cold year-round, it would go up against the inner-leaf, but in both cases it still goes inside the MSM wall cavity, between the inner-leaf and outer-leaf. So it will not be visible from inside the studio, once you have the walls up and are ready to start treating. 2) Isolation and treatment are two different things: isolation is the two-leaf wall around your room, with insulation in the gap, and the vapor barrier too, if you have one. Treatment comes afterwards: once the isolation shell is completely finished, THEN you install the acoustic treatment in the room, and that treatment might include slot walls, absorption, diffusion, etc. 3) Slot walls are treatment, not isolation. If you build your walls inside-out, then the drywall is on the "far" side of the studs (facing away from the room) which makes it easy to use the "near" side of the studs to attach the slats, leaving the stud bays as the cavity for the slot resonator, (do not confuse this with the cavity inside the wall! They are two different, unrelated cavities). 4) There cannot be any barrier right behind the slots. If you put plastic there, it will block the movement of air and the resonators will not work. And if you DID put plastic there, it would not be a vapor barrier anyway! It would be in totally the wrong place: vapor barriers go inside the isolation cavity, not inside the acoustic treatment.
The inner leaf is built inside-out, and my plan was to do my treatment (roxul) and then cover it with plastic for my vapor barrier, and then cloth and slats.
That would not be a vapor barrier. The vapor barrier goes on the OTHER side of the drywall, facing the MSM cavity, not the slot-resonator cavity.
But...unless I'm misunderstanding Brien's (Xspace's) multiple posts on this subject, the vapor barrier needs to be the inner-most layer of the construction, at least in my part of the world (Seattle).
Right. It needs to be the inner-most layer OF THE WALL CAVITY, just prior to the inner-leaf drywall.
If the vapor barrier is not the inner-most layer, the moisture from inside the room would be absorbed by my Roxul instead of hitting the vapor barrier first.
Correct. That's why you put that BETWEEN your drywall and the rockwool: to prevent the vapor that migrates through the drywall from getting to the insulation, where it could condense on the cold outer-leaf. There won't be any such condensation taking place inside the ROOM, if you have your insulation, vapor barrier and HVAC set up correctly, since all the air in the room, and the room surfaces, should be at similar temperatures and with good air-flow and de-humidification.
My plan with my inside-out walls was to cover the insulation with the vapor barrier,
Yes, but that is the insulation INSIDE THE MSM CAVITY, between the two leaves. That is NOT the insulation inside the slot-wall cavity, which is inside the room, not inside the wall.
Or perhaps I'm off-base on the placement of the vapor barrier(?)
Yup! :)
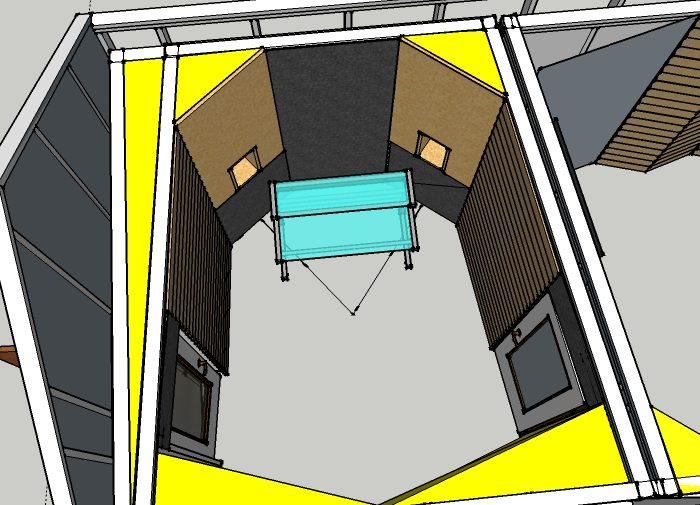
My main area of concern is the control room, where I'm planning to have Helmholtz resonators along both sides:
To me it looks like there is almost no air gap at all in the right hand control room wall (MSM isolation wall), to the live room. Both sides of that wall seem to be built inside-out, with just a tiny air gap (if any) between the actual drywall leaves, and no insulation in that tiny gap. That will not work very well for isolation. You should have at least 4" of air gap between the leaves in an MSM wall, and it must be filled with insulation. I'd suggest you should move the live room wall to the right a few inches, and add insulation between them. Also, since the left CR wall and the right CR wall have very different cavity depths in the slot walls, they will be tuned very differently, so the room will not respond the same on the left and the right. To fix that, you could build that wall inside-out as well, with drywall directly on the other side of those slot-wall studs. That would save you money, too, as you would not need a separate isolation wall on that side of the room. - Stuart -
Looking very nice! Not far to go, now... :)
This design is based on Stuart's suggestion for addressing my concerns about a flanking path between the inner and outer leaves. Here is the duct with the neoprene spanning the gap: ... I've had a 4 piece rock band in the live room and I'm amazed at how effective this silencer is! With my ear right up to the outer opening, I can hardly hear anything coming from the other side! Great to see how the ideas on this forum work in the real world.
:yahoo: Glad it is working! It's always nice to get direct feedback like this, showing that things actually do work in practice the way that theory predicts. Of course, building it properly, like you did, is a big part of why it works so well, too. Nice job! - Stuart -
Well, I have a bit of a pit in my stomach now. I hope you guys can help me out with all of this. Here's why I'm feeling sick: My inner leaf walls are already up, and there is no vapor barrier between the inner and outer leaves!! In all of my reading, I've always had the understanding that the vapor barrier is the last thing you put up, right up against the warm air. If I'm understanding you correctly, Stuart, you're saying that I should have attached the vapor barrier to the back side of the inner leaf drywall before I tipped the wall up into place. I don't have that option anymore, so I'm kind of freaking out. Perhaps part of the reason for my confusion is the fact that building walls inside-out is not an ordinary construction method. I know that normally, in a one-leaf building, the vapor barrier would go up after the insulation, right behind the drywall, but I guess I thought that since the drywall in my case is on the back side of the inner leaf, that the barrier wouldn't go there because the insulation (treatment) would be the first thing the warm air would hit, not the vapor barrier I understand all of what you said regarding the differences between treatment and isolation; I'm clear on that. It's the vapor barrier placement that I'm messed up on. Here's what Brien said regarding the vapor barrier in the shabbey road thread:
But to place the VDR in the middle of a double wall assembly is asking for trouble. I have to go back to my soft drink can analogy to perform this next magic trick. Kid gets an aluminum can soft drink out of the refrigerator. Within seconds of being outside of the cold environment, the can starts to sweat. Now you think this sweat is part of the can don't you? It isn't, it is condensation in the air, the warm air to the cold side of the can. Now take that analogy and place it on the inside of the middle of a wall assembly full of insulation and what happens? The gas that is condensation when moving from the warm side to the cold side will "hit" the solid plastic sheeting, and stick to it. When the house starts trying to dry out, the moisture will migrate back into the interior framed wall, but before it makes it inside it has to go through the insulation on this interior wall. And it cannot make it...it will diffuse on the insulation, wet the insulation and become a big problem and you will not know about it for months and months.
Not trying to make excuses, just trying to illustrate why I'm confused. So I guess I'm wondering what I can do about it now. Could I put up a barrier on the exposed drywall of the inner leaf before I install the treatment? I have the same situation in the live room, although the treatment is already up, with a thin layer of plastic over it. If I have to, I'll tear that out and put the barrier up against the drywall and studs and then put the rockwool back in. I just need to figure out a way to recover from this! Thank you for all your help! By the way, Stuart, regarding this comment:
To me it looks like there is almost no air gap at all in the right hand control room wall (MSM isolation wall), to the live room. Both sides of that wall seem to be built inside-out, with just a tiny air gap (if any) between the actual drywall leaves, and no insulation in that tiny gap. That will not work very well for isolation. You should have at least 4" of air gap between the leaves in an MSM wall, and it must be filled with insulation. I'd suggest you should move the live room wall to the right a few inches, and add insulation between them. Also, since the left CR wall and the right CR wall have very different cavity depths in the slot walls, they will be tuned very differently, so the room will not respond the same on the left and the right. To fix that, you could build that wall inside-out as well, with drywall directly on the other side of those slot-wall studs. That would save you money, too, as you would not need a separate isolation wall on that side of the room.
The adjacent wall for the live room is actually not built inside-out, so there is about 5" of gap between the leaves of the CR and the LR. The left side of the CR is designed the way it is at John's suggestion in order to utilize the added area on the left for bass trapping. In this way, it's similar to Simone's design for his control room.
The adjacent wall for the live room is actually not built inside-out, so there is about 5" of gap between the leaves of the CR and the LR.
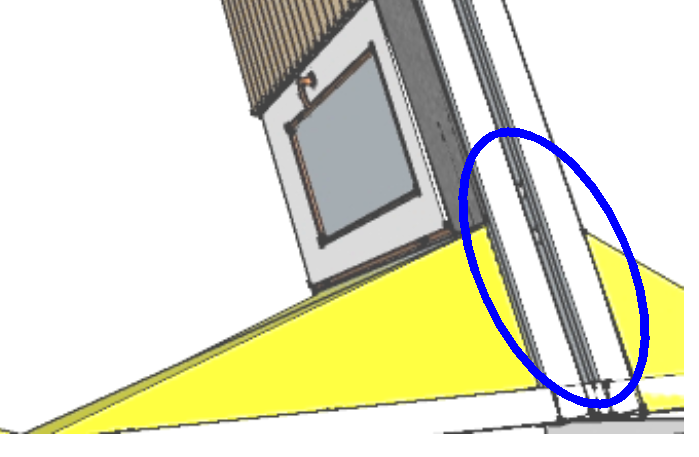
Maybe it's just the angle that the image is taken, but to me it sure looks like there is drywall on there, in the cavity:
Image not preserved: vapor-barrier-01.png
It also looks like the framing goes right through, connecting across the gap, and there doesn't seem to be any drywall on the live-room side of that leaf. But like I say, maybe that's just the angle. Please post your actual SketchUp model, so we can take a closer look.
you're saying that I should have attached the vapor barrier to the back side of the inner leaf drywall before I tipped the wall up into place.
That's the way I understand it. Brien is the expert on vapor barriers, but that's the way I see it.
I thought that since the drywall in my case is on the back side of the inner leaf, that the barrier wouldn't go there because the insulation (treatment) would be the first thing the warm air would hit, not the vapor barrier
Just want to clarify something here: you DO have insulation in the MSM cavity too, right? That cavity must have BOTH insulation AND ALSO the vapor barrier. I, not talking about the insulation that is part of the treatment inside the room, but rather the insulation that must be in the wall cavity. You need that for both thermal and acoustic reasons. How much insulation do you have in there, and how did you attach it? Building a wall inside-out does one thing only: it moves the studs to the other side of the drywall. It does not change anything else about the normal building procedure, or the need for insulation, vapor barriers, or anything else.
But to place the VDR in the middle of a double wall assembly is asking for trouble
Exactly, since that was what was being proposed in that thread! The OP was thinking about putting his vapor barrier in the MIDDLE of the cavity, instead of against either the inner-leaf or the outer-leaf. In other words, he was planning to install it with air on both sides...
Now take that analogy and place it on the inside of the middle of a wall assembly full of insulation and what happens?
Emphasis mine. Brien is saying that the middle of the cavity is the wrong place to put it: it must go up against one of the two leaves, never in the middle.
So I guess I'm wondering what I can do about it now.
I'm really not sure what you can do, but I suspect that, given where you live, you need a vapor barrier in the correct place. I'm hoping Brien sees this thread and can shed more light on it.
Could I put up a barrier on the exposed drywall of the inner leaf before I install the treatment?
I hope you can do that, but I suspect that you can't. I suspect that the barrier needs to go inside the wall cavity, between the insulation and the drywall. I hope I'm wrong about that! I'm not trying to rub it in and make you feel even worse, but just pointing this out for future reference: this is the reason why it is a good idea to update your build thread regularly, showing exactly what you are doing at each step, so errors like this can be caught in time. It's always good to have many pairs of eyes "looking over your shoulder" as you build: the other eyes might see things that you didn't notice. - Stuart -
Bigsby wrote:
Well, I have a bit of a pit in my stomach now. I hope you guys can help me out with all of this. Here's why I'm feeling sick: My inner leaf walls are already up, and there is no vapor barrier between the inner and outer leaves!! In all of my reading, I've always had the understanding that the vapor barrier is the last thing you put up, right up against the warm air.
True that does seem to be a conflict. The bigger issue is that you have to take the Perm rating of the materials involved in the construction into account to decide if you even NEED a VB. And with decidedly accurate HVAC usually this can alter if one (VB) is needed or no. If we use the cold can out of the refrigerator analogy then we might get different results. With an accurately designed HVAC system then the assembly should dry out to the interior right? Installing the VB to the interior is never going to work on an inside out wall. The alternative of placing the VB in the middle of the assembly, essentially on the back side of the hard boundary which will illicit questions that need answers but seems the most likely placement. The goal is simple. Anything (if a VB is required) on the interior side of the thermal envelope based on the perm ratings of the materials used, will be beyond (inside) the VB for the interior to handle, usually the HVAC. Anything from the backside of the VB to the exterior is dependent on the natural drying process to keep the structure healthy.
Thanks for the reply, Brien! I'm not sure about perm ratings, but I can describe for you the construction as it currently exists: Outer leaf: cedar siding, 7# siding paper, one layer of 5/8 densglas sheathing, the original 1x8 sheathing, which I caulked and filled, and then one "beef-up" layer of 5/8 drywall between the studs. There is r-13 fluffy, unfaced insulation that fills the gap between the inner and outer leaves. Inner leaf: two layers of 5/8 drywall with green glue between. Roxul safe 'n sound used for treatment between the studs. The roof leaves are a bit different, as I created scissors trusses in place in order to get more ceiling height, and I needed to have proper ventilation for the roof. It is a three leaf system, which I couldn't avoid. Outer roof leaves: composition roofing, 30# felt, osb. Then r-19 insulation between the scissors trusses with two layers of 5/8 drywall Inner roof leaf: r-19 insulation with 2 layers of 5/8 drywall with green glue between. The inner roof leaf is not framed inside out. I have a Fantech fan at my inlet, no fan at the outlet. The air moves quite well through the room using static pressure. I will have a 9,000 btu mini split as well. The entire studio is roughly 260 square feet, with a vaulted ceiling that goes from about 8 feet to about 10 feet. Does this info give you a feel for the perm rating? Thank you so much for your help!
Another quick question: what about painting the interior of the inner leaf, framing and all, with a vapor barrier paint? Glidden has a product called vapor barrier primer sealer that has a perm rating of .6, which seems as good as plastic. Does this sound like a viable solution?
Actually that is a dangerous marketing term :) Consider if the user already has an actual vapor barrier on the back/cavity side of the wall and then applies this primer to the interior side, what you create is a double vapor barrier. You have effectively built a "lock" that vapor can not get out of but can get inside of since gas moves with the ease of any pressure available. So if you have an existing VB on the cavity side of your wall do not use this primer, please.
Yeah, I see your point, Brien. This product could definitely be dangerous for someone painting their wall who doesn't know if they already have a VB! But in my case, there is no vapor barrier anywhere in either leaf structure, and my perm rating, as far as I understand it, is very high (ie: very permeable) with two layers of 5/8 drywall with green glue between on my inner leaf. So in my case, don't you think using this vapor barrier paint (all seams/joints/cracks of framing and drywall of inner leaf caulked before application) over the entire inside-out wall, framing and all, could be a good solution to my problem? After paint, I would then treat the room per my original plan, but without plastic over the rock wool. So the inner leaf would be as follows: drywall/exposed framing, then VB paint, then rock wool, then cloth, and in some areas, slats as well. What do you think? As always, thank you so much for your invaluable advice! Mark
Your paint should be in the class of "vapor retarder". A vapor barrier, a true Class 1 barrier is indeed aluminum which is why I use the aluminum can reference. Your perm rating is the total rating of ALL the materials from the last piece on the outside to the last piece on the inside of the structure, it is not simply whatever is on the inside or whatever is on the outside. Poly Plastic is a Class 2 barrier but has much the same properties as in the permeability of the material and is cheaper than aluminum, so that is why we use it. These are the properties of a vapor barrier. Now a retarder is different. It does not stop nor should it stop the migration of condensation but allows the passage...and that passage has to be allowed. If you have a VB on the backside of your sheetrock which means the plastic is attached directly to the stud face then if gas does get into the sheetrock and HITS the poly plastic BARRIER then it HAS to have a path back out. So if you place a true barrier, even though .06 is not true as is this paint perm rating, on the back side then it cannot get out. And gas as with sound you cannot think in linear terms, it does not move in a straight line but will find the path of least resistance. All it requires is pressure and there is always pressure either externally or internally. In your case, I would forget about the requirement for a vapor barrier. Where it should be placed if needed, you no longer have access to. Move along and make certain you have good HVAC return air.
Hi Brien-- Sorry if I'm beating a dead horse here; I'm just trying to understand this. Are you saying that I should not apply the vapor-retarding paint to the room side of the inner leaf because if any moisture gets between the leaves (either from outside the building or from any potential flaw in my vapor retardant paint job) it will not be able to dry to the inside because the paint is blocking it from doing so? And it is better for me to let it dry to the inside than seal it off from the interior moisture and let it dry through the outer leaf, depending on the natural drying process to keep the structure healthy? Just to reiterate, this is my entire wall composition: Outer leaf: cedar siding, 15# siding paper (6 perms), one layer of 5/8 densglas sheathing (17 perms), the original 1x8 sheathing which I caulked and filled (?perms) then one "beef-up" layer of 5/8 drywall (50 perms?) between the studs. There is r-13 fluffy, unfaced insulation (?perms) that fills the gap between the inner and outer leaves. Inner leaf: two layers of 5/8 drywall with green glue between. Roxul safe 'n sound (116 perms) used for treatment between the studs. *the perm ratings that I was able to find were obtained from various tables I found on the Internet--how accurate they are, I can't say.... Forgive me for being slow on this--I know you've already tried to spell this out for me, but just so I'm clear: since I don't have access to the cavity side of my inner leaf, you're saying it would be counter-productive to paint the inside (room side) of it? There currently is no VB in either leaf. I guess I thought that the paint would help to keep the moisture from inside the room from getting through the drywall into the wall cavity. By the way, here's a link to the specs on the paint: http://duspec.com/DuSpec2/document/Docu ... tId=934445 The Dept. of Energy website (http://energy.gov/energysaver/articles/ ... -retarders) says that
"Vapor barrier" paints can be an effective option for existing homes in colder climates
I just keep coming back to this possibility as my only option other than tearing my inner leaf apart! But I suppose when they talk about "existing homes" they might be referring to ones whose outer leaf isn't sealed as much as mine is. One more point of clarification, because I'm not clear on the quote below:
If you have a VB on the backside of your sheetrock which means the plastic is attached directly to the stud face then if gas does get into the sheetrock and HITS the poly plastic BARRIER then it HAS to have a path back out. So if you place a true barrier, even though .06 is not true as is this paint perm rating, on the back side then it cannot get out. And gas as with sound you cannot think in linear terms, it does not move in a straight line but will find the path of least resistance. All it requires is pressure and there is always pressure either externally or internally.
The above quote seems to be referring to a wall built in the normal way, not inside out, with a VB behind the drywall. In this case, I completely understand that I would not want to add a VB paint to the inside, effectively sandwiching the drywall.
So if you place a true barrier, even though .06 is not true as is this paint perm rating, on the back side then it cannot get out.
In this last sentence, did you mean to say front side instead of back side? If so, that makes more sense to me, since I think of the front side as being the room side and the back side as the side facing the outer leaf. I hope I'm not being overly tedious--maybe there are others out there with the same questions I have. I'm just feeling like I've spent countless hours and a lot of money building something that is going to become a mold trap! Thank you! Mark
Ok, well, after obsessing over this vapor barrier issue for a few days and doing a bunch of homework, I've decided to move forward. I'm confident that I'll be okay as long as I make sure to have fresh air supply, stale air exhaust (which I do) and return air dehumidification (which I will). Thank you, Brien and Stuart for your input on this. Stuart, I'm realizing I left some of your questions about my build unanswered, so here you are..
Maybe it's just the angle that the image is taken, but to me it sure looks like there is drywall on there, in the cavity:
Yes, I can see why you would think that, Stuart, but there is only drywall for the CR leaf, which was built inside out (left side of the picture) in that cavity. The LR wall is actually the only wall in the LR that is not inside-out, in order to give me decent-sized spring between the LR and CR.
It also looks like the framing goes right through, connecting across the gap, and there doesn't seem to be any drywall on the live-room side of that leaf. But like I say, maybe that's just the angle. Please post your actual SketchUp model, so we can take a closer look.
leaf detail.png
leaf detail.png
There isn't any contact between the framing of the inner leaves for the CR and LR, nor is there any contact between the Framing of both those leaves and the outer leaf. However, the Sketchup artist (me) who created this image is sorely lacking in Sketchup skills, so that point is not entirely clear. Rest assured, there are no flanking paths, with the exception of the door jamb between the LR and CR. I Built that straight through following Rod's advice in his book.
Just want to clarify something here: you DO have insulation in the MSM cavity too, right? That cavity must have BOTH insulation AND ALSO the vapor barrier. I, not talking about the insulation that is part of the treatment inside the room, but rather the insulation that must be in the wall cavity. You need that for both thermal and acoustic reasons. How much insulation do you have in there, and how did you attach it?
Yes, there is insulation between the leaves, which is r-13 fiberglass. It is held in place by rows of string that are stapled across the studs, and it fills the cavity, gently touching the back side of the inner leaf drywall. I think that's it, for now. Time for more caulking.....
the Sketchup artist (me) who created this image is sorely lacking in Sketchup skills,
:D OK, that would explain it! It looks like you are good to carry on, then! :) - Stuart -
Sir, you want a typical interior primer and two finish coats of paint. You do not want a "vapor barrier" type paint, you want a "vapor retarder" type paint and that is ANY typical interior paint. Your want for a vapor barrier is over, the time for proper placement has come and gone. So do yourself a favor and get a typical interior primer and paint and let the HVAC do the business of protecting the structure.
Yep. Thanks, Brien, that's the plan.
Making slow progress, as usual. I primed and painted the CR for my vapor retarder per Brien's advice, and have built most of the framing for the treatments: slats and bass traps. Here's the view to the front right of the CR:
CR front right.jpg
CR front right.jpg
...And the front left of the CR. This will be filled with insulation, then cloth, then slats. I realize that this may affect my imaging in the low end, but I need all the absorption I can get in this small room!
CR top left.jpg
CR top left.jpg
Here's a couple views of the back wall, which will be super chunks:
CR rear left.jpg
CR rear left.jpg
CR rear right.jpg
CR rear right.jpg
As you can see, the ceiling is vaulted. I'm working on a plan for a hard-backed cloud that will extend from the front of the room to behind the listening position angled at around 15% from its low point at the front of the room. I'm about to start building the soffits, which will be angled at 38%, putting my ears at the listening position at 40% from the front of the room, which I'm hoping is close enough to the 38% ideal. My walls are splayed at 8%. I currently have Alesis M1 MkII monitors, and, although money is tight, I'm wondering if I should bite the bullet and buy something a bit better, before I complete the soffits. I realize I could replace them down the road, but I'm not really excited about re-doing all that work, creating new baffles, boxes, etc, not to mention the height might need to be different. My current monitors have no shelving compensation on them, although I could plug the ports on the front (Alesis suggests this for placement up against a wall--seems it could help for soffit placement as well). So, a couple questions: Do things look ok at this point? Any red flags I'm not seeing? Any suggestions for monitors would be appreciated. I'm really torn on this front. I just want to do the best I can with my monitoring--it might be a bit short-sighted to put so much into the build and then have monitors that don't cut it. I've considered anything from keeping what I have for now to getting JBL LSR2325p's, JBL LSR 4328's, on up to Adam a7x's, or Genelec 1031a's. One thought about the JBL LSR 4328's: while I'm going to treat this room as much as humanly possible, I suspect that I will still be fighting low end issues at the end. I know that doing the best I can on treatment is the first priority, but does anyone have opinions on the supposed "room correction" abilities of these speakers? I've read a lot of reviews; some glowing and some critical. I guess I'm considering them in the hopes that they could compensate a bit for some of the remaining low-end issues once I've done everything I can to treat the room. Bottom line: my plan is to run the REW software tests on the room before I do any treatment, and it seems I should settle my monitor decision before I start running tests (BTW, if I ended up with the JBL LSR 4328's I would not engage the compensation software until after I had done everything possible treatment-wise to the room). As always, thank you so much for any and all feedback! Mark
I'm about to start building the soffits, which will be angled at 38%,
38%? Or 38°? Two different things.... :)
putting my ears at the listening position at 40% from the front of the room, which I'm hoping is close enough to the 38% ideal.
That's fine. 38% isn't a "rule": just a good starting point.
I currently have Alesis M1 MkII monitors, and, although money is tight, I'm wondering if I should bite the bullet and buy something a bit better, before I complete the soffits. I realize I could replace them down the road, but I'm not really excited about re-doing all that work, creating new baffles, boxes, etc, not to mention the height might need to be different.
There are designs for soffits that allow you to replace the speaker at a later date, based on a removable "module" that the speaker sits in. If you make that big enough and position it low enough, then there's a lot of room for adjustment later. You only need to build a new module for each new speaker, and slide that into the soffit. It is a possibility, but it is also a lot of work, even so!
My current monitors have no shelving compensation on them, although I could plug the ports on the front (Alesis suggests this for placement up against a wall--seems it could help for soffit placement as well).
:shock: :? :roll: :!: hmmmm..... doesn't give you much adjustment, does it? What happens if you need 5 dB but your "sock in the hole" only gives you 3? Or 6?... :)
Do things look ok at this point? Any red flags I'm not seeing?
Do you have the final version of the SketchUp, with everything in place? If so, then please post it here.
Any suggestions for monitors would be appreciated. I'm really torn on this front. I just want to do the best I can with my monitoring--it might be a bit short-sighted to put so much into the build and then have monitors that don't cut it. I've considered anything from keeping what I have for now to getting JBL LSR2325p's, JBL LSR 4328's, on up to Adam a7x's, or Genelec 1031a's.
Personally, for me, that's a no-brainer: I'd go with the A7X's. I'm a big fan of Adam, and I love their ART technology: there's just nothing else that gives you the clarity and crispness of those highs. Their mid-range drivers are decent, middle-of-the-road, nothing special, but those tweeters make up for that, hands down. That would be my choice. Second on the list (for me) would be the Genelec's But don't take my word for it: go listen before you buy! Go find a show room someplace that has both of those, and listen to the same test samples (your own, that you know really well) on both sets in quick succession (hopefully with instant A/B switching), and choose the one that makes the most sense for you.
but does anyone have opinions on the supposed "room correction" abilities of these speakers?
I sure do have an opinion on those! Junk. Hype. Plain and simple. The issue is very easy to understand: the biggest problems in home studios are modal issues. Modal issues are TIME domain issues: they occur due to energy that is "stored" by the resonance of the room modes, and released again over a long period of time. "Room correction" is a FREQUENCY domain solution: it can do nothing at all about problems that occur in time. Think of it this way: If a room mode is excited by, for example, a low G on a bass guitar, then the energy at that frequency (98 hz) builds rapidly, and the room mode "rings". The bass player cuts off the note with his hand. The speaker stops moving. But the mode carries on ringing, for several hundreds of milliseconds... the speaker cone is dead still, not moving at all, but the sound is still bouncing around the room, decaying slowly. So I ask one simple question: what can the equalizer do to stop that ringing? The answer is clear. Zilch! Nada! Nothing! Zero! The speaker cone is not moving, so the equalizer has no sound to work with, and it can do nothing at all to damp that mode. The ONLY thing that will stop that mode, is acoustic damping. There is nothing at all that can be done electronically to "correct" a room. In fact, there is nothing that can be done acoustically to "correct" it either! The only thing that can "correct" a room, is a very large bulldozer!!! :) But at least acoustic treatment can damp the modal behavior, so that it is not too obnoxious. In a suitably treated room, that "ringing bass G" will be damped within a short enough period that it sounds natural and pleasing. Room EQ cannot do that. What EQ CAN do, is to compensate for deficiencies in the signal path and the speakers themselves. That is useful, if your speakers or amp are not up to much. And EQ can also "balance" the apparent levels in the room.... disguising the differences in frequency response due to modal response to a minor extent, as the very last resort, the final "tweak" of the room. But it can only do that for one single listening position in the room, and even then it does so at the expense of all other listening positions. So if you are the one and only person in the room, then it can help to "fake" an improvement for where you are sitting... but if there are other people in the room, they will now hear worse sound, more unbalanced, more modal, since they are not at the position being "corrected". So that's my take on "room correction": basically it's worthless. The only time I'd use it is in a room that has already been treated as well as possible, to do some minor tweaking of any remaining low-end issues, as well as to treat problems with the speaker themselves. And I would only do it for a room that isn't meant to have more than one person in it. Yeah, I know that the vendors of "room correction" devices tell you that you can take several measurements in the room, then average them, but that's garbage too: Think of it like this: there was an optimal solution for the mix position alone, but by taking more readings in other places, you are making the correction WORSE for the mix position. Why would you want to do that? :) Excuse the rant! :)
I guess I'm considering them in the hopes that they could compensate a bit for some of the remaining low-end issues once I've done everything I can to treat the room.
mmmmmmmmmmaybe.... But like I said above: ONLY for one single position in the room. But even so, I would not lock myself into a specific "room correction" speaker. Rather, I would use a general purpose digital equalizer, and adjust is as necessary. Or better still, let REW adjust it. I'm not sure if you are aware of this, but that actually is the original purpose of REW. The name stands for Room EQ Wizard, and its original purpose was to automatically analyze a room and adjust any typical digital equalizer. It grew from there to be the best acoustic analysis tool that I have seen, but it still has the basic functionality of doing that. It supports something like a dozen common equalizers, from several different manufacturers, and can either adjust them directly via Midi, if they have that capability, or it can list the needed adjustments for you to do manually. If I were going to do "room correction" (!), I would entrust the job to REW plus a good digital equalizer. Then I can simply update it if I ever do change the speakers, just by running REW again. That way I can buy any good quality speaker that I want, even if it does not include "room correction" capability. That makes the speakers less expensive for the same quality, or better quality for the same price... :) You only pay for the equalizer once like this, instead of paying for it again each time you buy new speakers....
Bottom line: my plan is to run the REW software tests on the room before I do any treatment,
Yes! Very smart move! As soon as the shell of the room is finished, set up your speakers and measurement mic, and do that important first "baseline" test. Then you have a reference against which you can test each stage of treatment, so see how it is doing and what is still left to do.
(BTW, if I ended up with the JBL LSR 4328's I would not engage the compensation software until after I had done everything possible treatment-wise to the room).
Or REW: REW actually predicts the outcome of the adjustments, and shows them to you on the waterfall plot! And it lets you add your own "tweaks" to that, also updating the predicted waterfall and frequency response graphs, so you can see if maybe you can do an even better job that it can! What's not to like about REW? Even the price is very likeable.... :) - Stuart - PS. Did I mention that I'm not a big fan of "room correction" devices? :)
Stuart, thank you so much for your reply--I can tell you're working overtime on this site (not to mention having a life), so I always really appreciate your feedback! A few answers.... Yes, I meant 38 degrees, not percent, for the soffit angles :oops: As far as the monitors go, I've decided that I do need to upgrade--I didn't need much convincing. My frontrunners right now are the Adam A7x's and the Sonodyne SM 100AK's. I've got quite a bit more research to do in order to decide (not to mention listening), but I really want to build my soffits around speakers that I have confidence in. The Adams have a great reputation, and I know that you, Stuart, are a big fan--I don't think I could go wrong if I went that route. Given their "trapezoidal" shape, the Sonodynes present some challenges for soffit-mounting, but the reviews I've read on them are quite impressive. If anyone here has them, I'd love to hear about it! You confirmed my suspicions about "room correction" technology--notice that I always use quotes when I use that term--I will cross that option off the list. I haven't downloaded REW yet, and as such, I didn't know about all it was capable of, just that I need to get it soon and start testing. And for the record, Stuart, I appreciate any of your "rants." :) Before I get to that point, I need to install my inner-leaf doors in the CR, as well as the window, which brings me to a question: I think I'd like to angle the glass on the CR side so that I will be able to see better into the LR. My thinking is that the lighting will usually be lower in the LR than in the CR. However, I'm concerned that that will mess with my symmetry for the CR, as the wall opposite the glass won't be angled down. Perhaps I should just install the glass straight and deal with any resulting (visual) reflections? Any thoughts on that? Here's a bird's eye view of the CR; the window isn't shown, but it will be located to the right, looking into the LR:
Control room vapor barrier.jpg
On a related note, I want to upload my final Sketchup file, but I've switched everything over to Apple since I started this, and I haven't been able to get my Housebuilder plug to work (hence the lack of a window in the picture above). I've been trying to figure out how to create the vaulted ceiling as well, but I'm just not that good at Sketchup. I'll keep working at it...
I think I'd like to angle the glass on the CR side so that I will be able to see better into the LR. My thinking is that the lighting will usually be lower in the LR than in the CR. However, I'm concerned that that will mess with my symmetry for the CR, as the wall opposite the glass won't be angled down
Do you mean angled vertically, or horizontally? In other words, tilted forwards so the top is out of line with the bottom, or angled sideways, so the left edge is out of line with the right edge? Either way is fine, if it will help with your sight lines. I'm not convinced there would be a symmetry issue either: The glass obviously should not be at the first reflection point, so it will probably be roughly alongside your head, which I think is far enough back that it won't make much difference at the mix position (unless the window is very large). I wouldn't be too worried about it. Worst case, if you build it and find that you do have issues, then you could hang something on the opposite wall at the same angle, to re-create the symmetry.
Perhaps I should just install the glass straight and deal with any resulting (visual) reflections? Any thoughts on that?
If you have to angle it, then go ahead and angle it, and we'll figure out a way to deal with any problems, if they arise.
but I've switched everything over to Apple
:ahh: :blah: :!: :shock: :roll: Well, that explains it all, doesn't it? Now we understand the source of you frustration!!! :) (Sorry, couldn't resist!)
I've been trying to figure out how to create the vaulted ceiling as well, but I'm just not that good at Sketchup.
You can use the "rotate" tool locked to the vertical plane, and rotate your joists and drywall to any angle you feel like. - Stuart -
Hi-- After your last Apple comment, Stuart, I became determined to get my Housebuilder plug to work! :) And I finally realized that I had unzipped the files in the wrong folder. Problem solved! So I'm going to take some time to edit my plan so that it accurately reflects things as they stand now. There really haven't been many changes since I started building, but I'm sure when it comes time to interpret REW results it will be important to show everything exactly as it is. As far as the window goes, my thought was to angle it on the vertical axis, so that it leans toward me from the top, but I'm not adamant about that. Anyway, once I have an updated plan, I'll post it.
I've made a bit of progress since my last post; getting close to being able to start testing the room! I built silencers for the control room: 2 layers of 5/8 OSB with Green Glue between:
Image not preserved: cr silencers no liner.jpg
Image not preserved: Control room silencer.jpg
And then installed them--below is a shot of the exhaust silencer which is installed in the space behind the left soffit which will also be stuffed with scraps of insulation:
Image not preserved: cr silencer installed.jpg
...and how it looks from the outside:
Image not preserved: CR Exhaust vent.jpg
I used the same method (suggested by Stuart) that I used earlier for the live room ducting between leaves to avoid flanking paths: 2x6 material rabbited out to accommodate 1/2 of neoprene "connector." This is a great solution for those of you who don't have room between your leaves to install a silencer:
Image not preserved: Duct.jpg
Image not preserved: duct with neoprene.jpg
I temporarily assembled the soffits for initial room testing. Once I've done my initial REW tests with no treatment in the room I will take them apart and install hangers, insulation, speaker venting, etc.
Image not preserved: Left Soffit.jpg
Image not preserved: soffit right.jpg
Image not preserved: soffits center.jpg
....which brings me to where I am right now...ordering glass today and trying to get organized for REW testing. A couple questions: 1. In the instructions for the REW software, they mention using an SPL meter to take the room measurements (using the output on the side). If this will be adequate, I'll go this route (I have the digital Radio Shack meter that a lot of people have). However, I was also thinking of getting the Behringer ECM 8000 measurement mic if that would be a lot better. I want to do this right, and the mic retails for only $60 U.S., but every penny counts at this point. Any thoughts on that? 2. I've just got the first layer of the soffit bezel installed, which is 3/4" particle board. On top of that, I'm planning to have 1/2" birch plywood that will follow the angled contours of my new ( :lol: ) Adam A7X's. Is it OK to do my initial test without the finished bezel layer in place? I'd rather do that a little further down the road, after this initial test with no treatment in the room. I've been working on a new Sketch Up file, with accurate, as-built dimensions. I am not very good at this program, but I will soon post the new file so that everyone can see the exact measurements as I begin REW testing. Thank you in advance for your feedback!! I still have a long way to go, but I'm starting to see a light at the end of the tunnel, which I'm hoping is not an oncoming train :)
they mention using an SPL meter to take the room measurements (using the output on the side). If this will be adequate, I'll go this route (I have the digital Radio Shack meter that a lot of people have). However, I was also thinking of getting the Behringer ECM 8000 measurement mic if that would be a lot better.
If your meter has a direct analog out from the mic, then that should work OK, but a good measurement mic is also a good option, plus it means you then have another mic to add to your arsenal! A measurement mic is a good omni mic anyway, with fairly flat response across most of the spectrum, so there are plenty of places you can use it for tracking! Personally, I would get one, but if money is tight, then the mic out from the SPL meter will work fine.
Is it OK to do my initial test without the finished bezel layer in place?
Yeah, that's fine. The initial test is just to get a general idea of how the room is behaving, mainly for modal issues but also for first reflections and RT60, and the final finish bevel is not going to make a huge difference to that. So go ahead without it, for the initial "baseline" test. One other thing: you might want to consider taking the rear panels off your A7Xs, and mount them in a more accessible place, so you can do the adjustments without having to take the speakers in and out all the time. That gets tired, real quick! You'll have to extend the wiring a bit to do that, and it most likely cancels your warranty, but personally I think it is a good move. Worth thinking about! - Stuart -
Wow--thanks for the quick reply, Stuart! I'll probably end up getting the mic...we'll see. At this point I just need to install my glass and start testing! Or more accurately, start trying to figure out how to start using the REW software :oops: Good point about the rear panel of the Adams, although that makes me a bit nervous. I might decide to put up with the hassle. If I decide to, there's no harm in placing a removable "frame" around the speakers to facilitate that, right? I think others have done that here, Jester for one. What I have in mind is just a removable section that surrounds the speaker that is the same thickness as the rest of the bezel. That way, I don't have to remove the entire bezel if I need to remove the speaker.
What I have in mind is just a removable section that surrounds the speaker that is the same thickness as the rest of the bezel. That way, I don't have to remove the entire bezel if I need to remove the speaker.
Right. Barefoot has a design somewhere here on the forum for doing that. - Stuart -
Thanks, Stuart--I think I'll do that, then. It will make removing the speakers and making adjustments to them easier, without removing the back panel. Mark