Thanks Ro,
much appreciated ! :thu:
I'm trying to make up for all the time lost between work and injuries, so I'm working on more than one thing at the time…. today I'm tackling the CR clouds framing, then it will be doors time, and then …. :blah: …. I'm aiming at finish it by the summer…. time will tell !
2) Also, can I use the 'weed control matting' (perhaps with fire retardant treatment sprayed onto it) for the "black" cloth under the slats?
I have used weed control matting for projects, and it can work since it has no weave to speak of, but is more designed to smother the plant. The issue I had with it was getting the right weed control cloth that would take the fire retardant spray and not deteriorate the weed control cloth.
Thanks for the advice and for sharing your experience Brien !
The reason why I asked in the first place was because I have a big roll of weed control matting lying around and wondered if I could recycle it :D
Since that I've got a bit of time before tackling the slats construction, in the meantime I might try to spray fire retardant onto a sample of it and see what happens…
Simo
2) Also, can I use the 'weed control matting' ... for the "black" cloth under the slats?
I'll repeat what I said before, because I don't think I explained it too well.
I would not use the weed control matting instead of black cloth behind the slats, for two major reasons:
1) It is basically plastic sheeting with tiny holes in it, and will therefore interfere with the operation of the slots. A slot wall is a Helmholtz resonator. It works because the "slug" of air trapped in the "neck" of the device, which is the slot itself (the gap between two adjacent slats) vibrates, moving in and out of the slot for a certain distance either side. That's why you see the "neck correction" or "effective depth correction" terms in slot resonator calculations: the slug moves in and out, BEYOND THE LIMITS OF THE SLAT, into the open air in front of and behind the slats. This area extends roughly 20% of the thickness of the slat. So, for example, if the slat is 30mm thick, then the neck effect extends for another 6mm, or 3mm each way. So the slug needs to move 3mm into the cavity, and it needs to find insulation there, to damp it! If you put "plastic sheeting with holes in it" in the way, then you are BLOCKING the movement of the slug, PREVENTING it from properly moving into the insulation. In other words, you prevent the resonator from resonating... Plastic sheeting is NOT like cloth in this aspect: cloth is open-cell and fibrous, similar to insulation, and therefore does not interfere with the movement of the air slug.
2) The entire purpose of the black cloth is aesthetic. It is there to hide the ugly insulation that is pressed up right against the slats. It is supposed to be matte black to block light from getting through. Maybe yours is different, but the weed matting that I have seen is rather shiny and reflective: It would not do what the black cloth is there for. You would be able to see it, as it reflects light.
So personally, I would NOT use that behind the slats, which is what your question asked originally. Where I WOULD use it, is BEHIND the black cloth on superchunks, some parts of ceiling clouds, and other absorbers. Since those are purely absorptive devices, not resonant, it doesn't matter if the matting blocks air movement partially, and that matting certainly would help to prevent the insulation fibers from filtering through the cloth, and also reflect some highs back into the room. In other words, for your superchunks, put some of that matting between black cloth and the insulation. But you still need the black cloth, since that matting stuff is shiny plastic.
- Stuart -
Yes, you will not use a *filter* on any *tuned* absorber, like Helmholz.
A (low-pass) filter is functional on broad-band absorbers; you can "tune" them a bit by reflecting mids/highs back into the room. Remember, you can never have enough low-end absorption but you *can* have to much mid/high absorption. It's because mids/highs are much more easy to absorb. If you're not carefull you'll un-balance the room.
Tuned absorbers, tho, are to absorb exactly *that* frq-range you tuned them for. Adding any filter will undo your precise tuning.
Right
I totally got it now ! :oops:NO MATTING OR ANY OTHER "FILTERING MATERIAL" UNDER THE HELMOLTZ RESONATORS !!
and now, after such explanation that ugly matting goes in the ground - where it belongs - "controlling" the weed ! :twisted:
No seriously, Thanks SO much Stuart and Ro for stopping me compromising lots of hard work just for saving few pennies
(I won't ask this thing ever again - promised !):oops:
GRAZIE ! :thu:
Simo
"1) It is basically plastic sheeting with tiny holes in it,"
Which is why I said what I did. Commercial grade weed control material is not plastic. It is listed as Spunbond Polyester.
But, in my defense, I had some and I tend to use what I have on hand if it meets the criteria for the application.
Hi all
I'm in the process of building the clouds for my studio.
They have hard backing (I'm planning a single layer of 18mm plywood), apart from the channel for the lights (with no insulation and not backing for ventilation obviously).
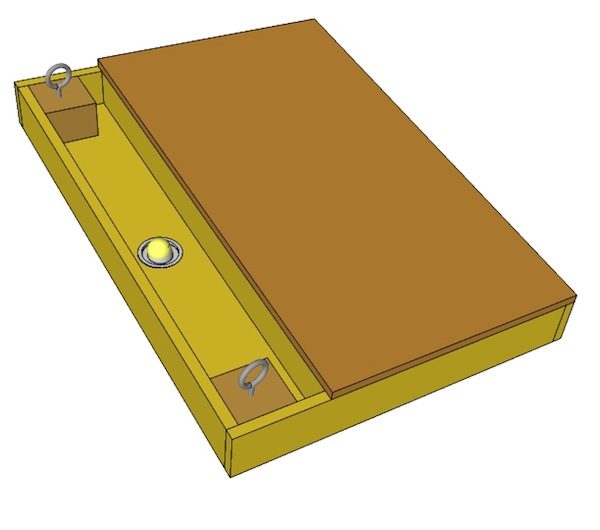
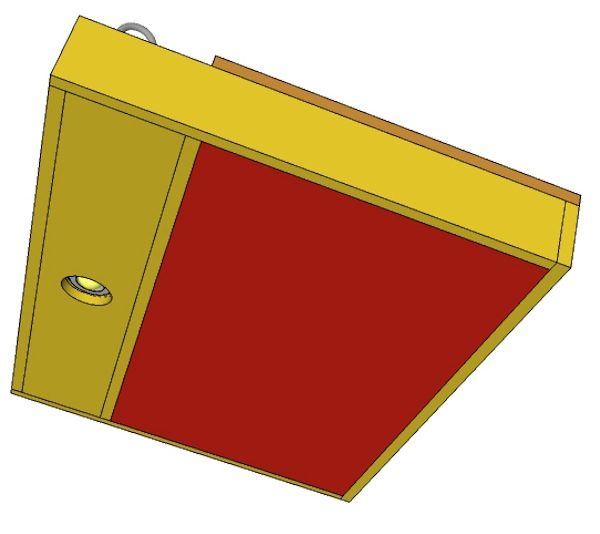
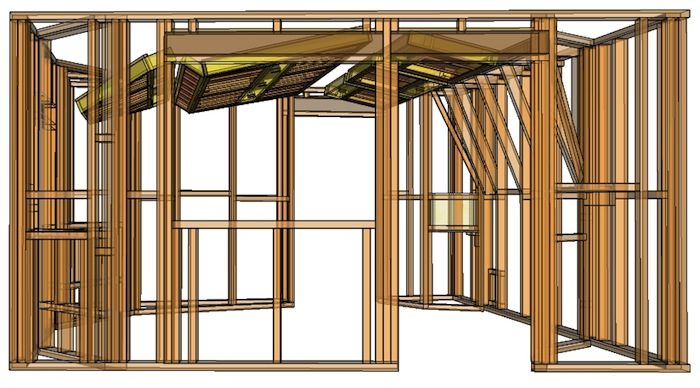
Here's a sketch of one of them, just to see it better:
cloud 1.jpg
Image not preserved: cloud 2.jpg
cloud 3.jpgThe question is:
Do I need FIRE-RATED down lights?
My electrician said that in the UK is not a requirement, especially in cases like mine where you have lots of air around them. It IS a requirement when spot lights are placed between floors (for instance on the ceiling of the ground floor…).
What do you think?
Can I get away with normal (non fire-rated) down lights for my clouds?
Many Thanks as usual
Ciao
SImo
Thanks for your explanation Brien !
I know all topics related to safety are (amongst other) specialties of yours, so your reply makes me feel better.... and - not last - save a bit of £££ (as the fire-rated ones are more than three times more expensive!) :yahoo:
Yes, there will be NO insulation touching the light can at all ! :thu:
Hi all !
Hope all is well !
…Update time… (part-1)
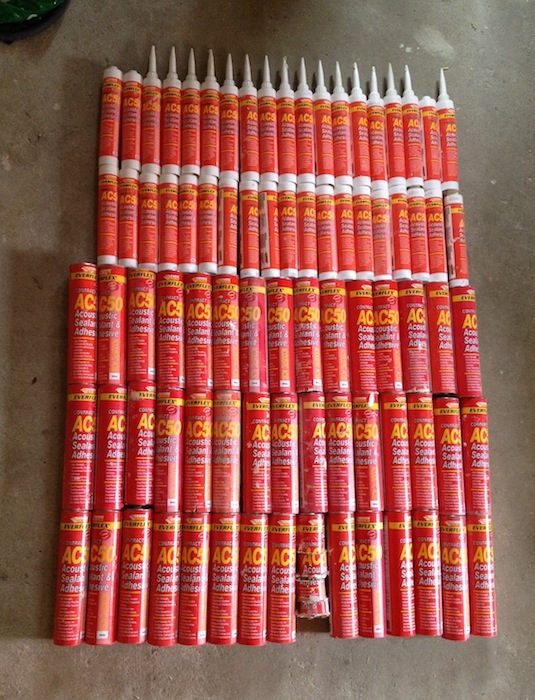
Let's start with a peculiar pic:
45 x 900ml + 38 x 380ml (~ 56 L) of caulk used so far !! :cry::evil:IMG_1959.jpg
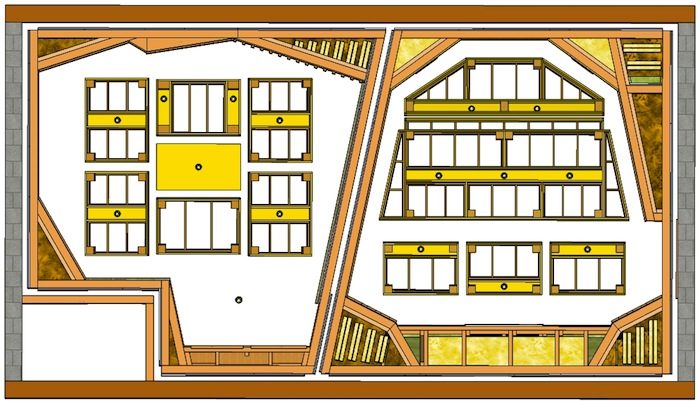
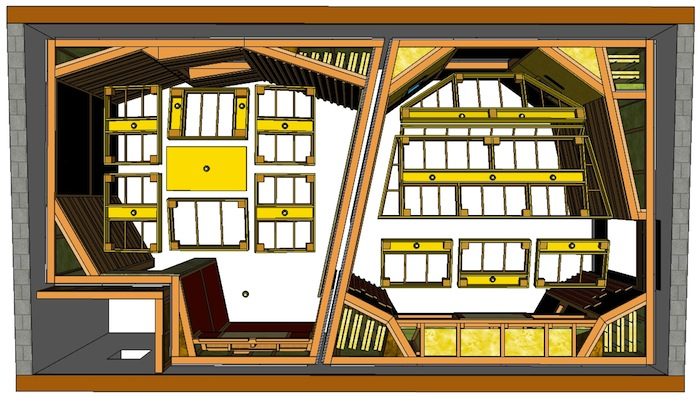
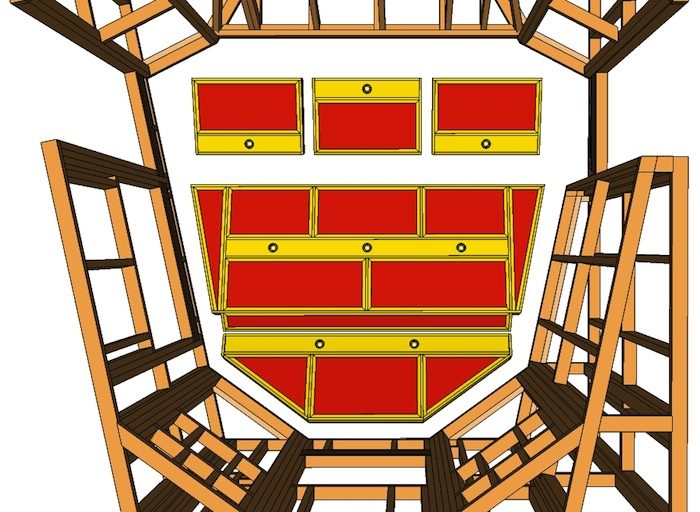
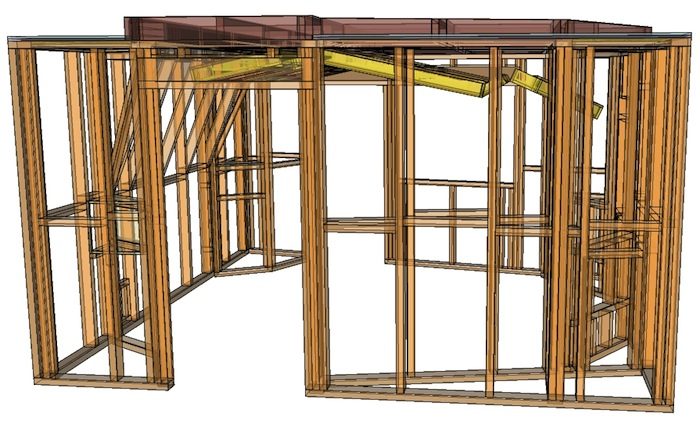
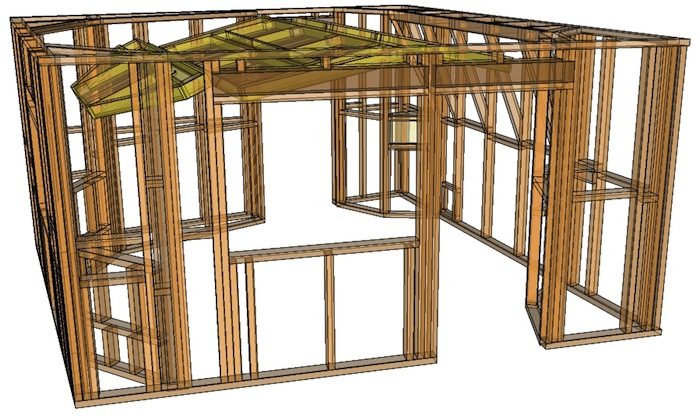
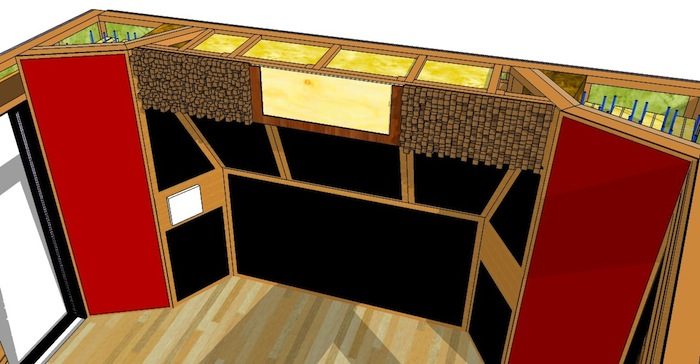
Here is the design for the Control room clouds :
above:
clouds1.jpgclouds2.jpgbelow:
clouds3.jpgright-hand side:
clouds4.jpgleft-hand side:
clouds5.jpgclouds6.jpg
… (part-2) ….
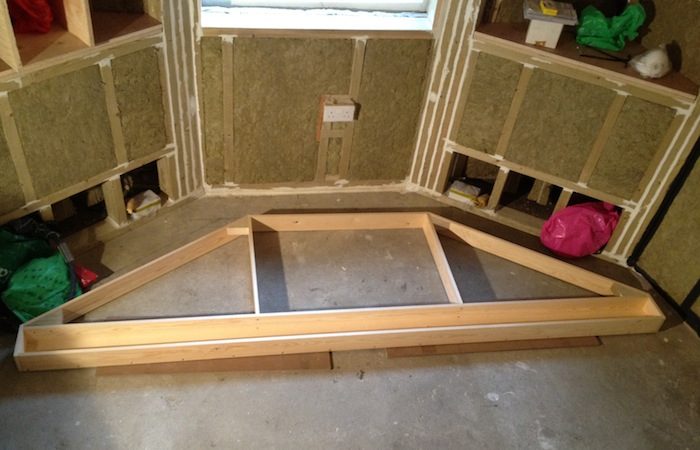
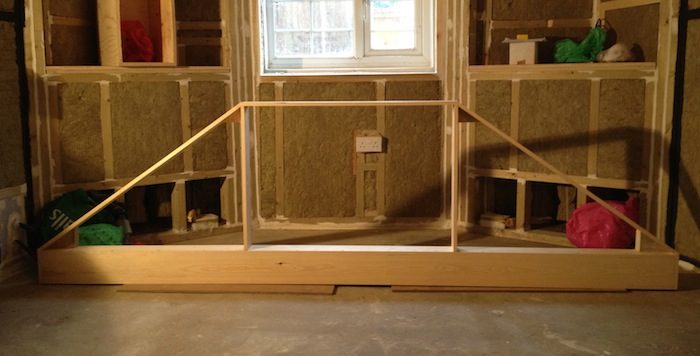
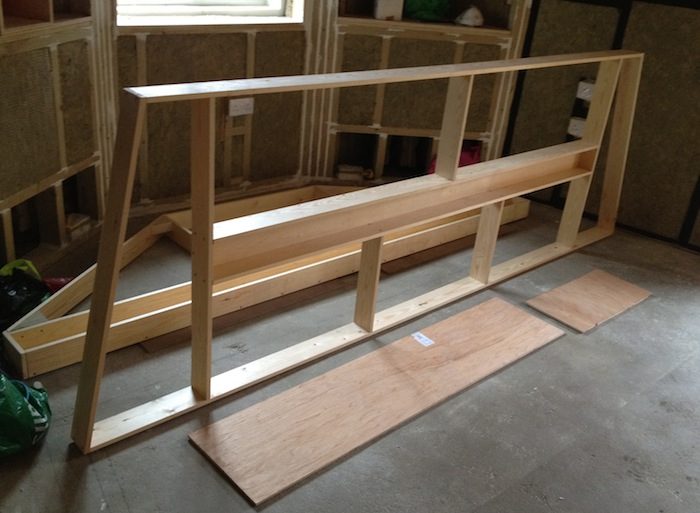
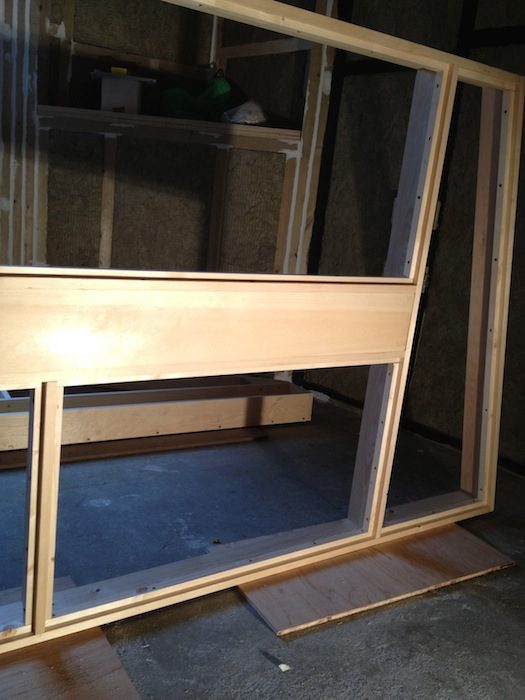
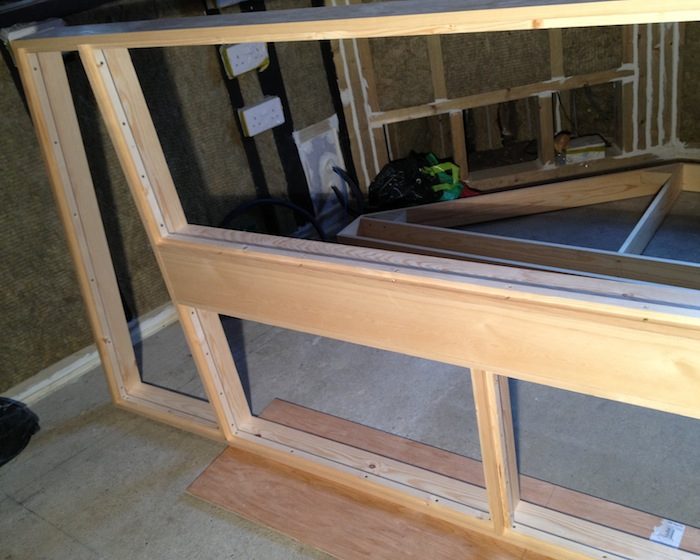
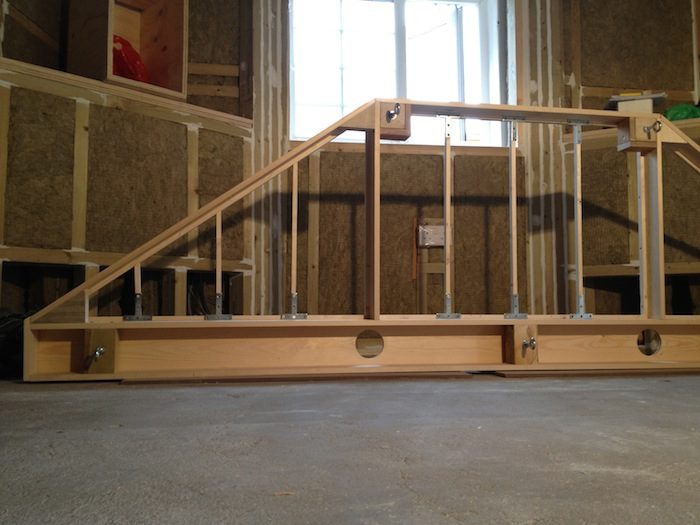
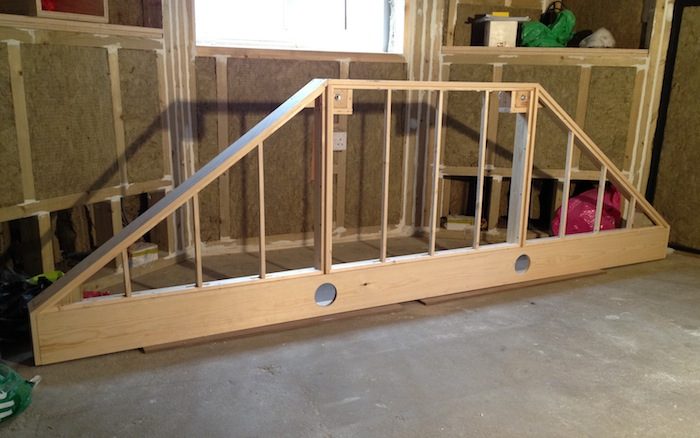
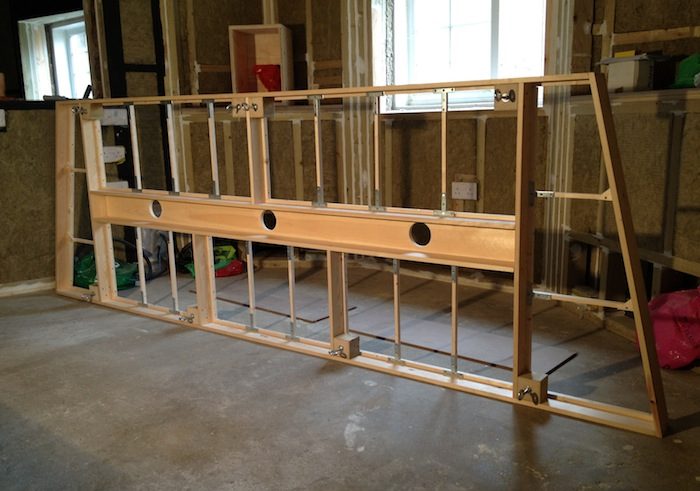
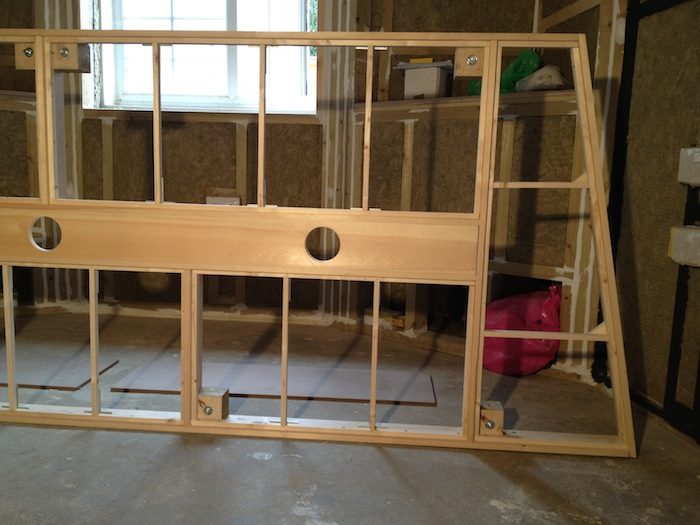
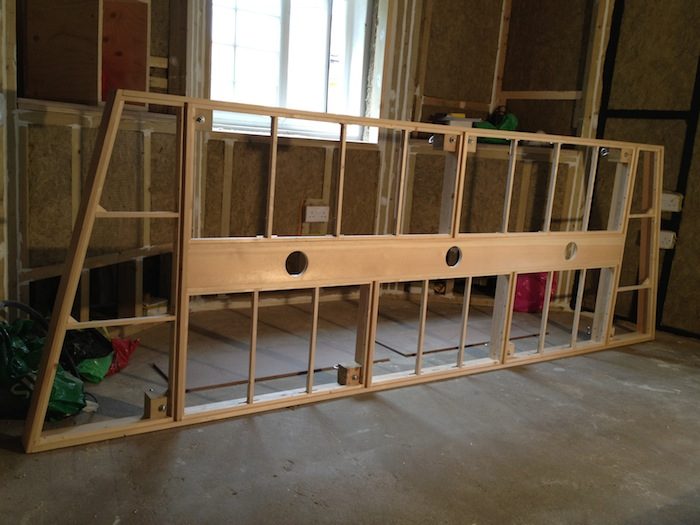
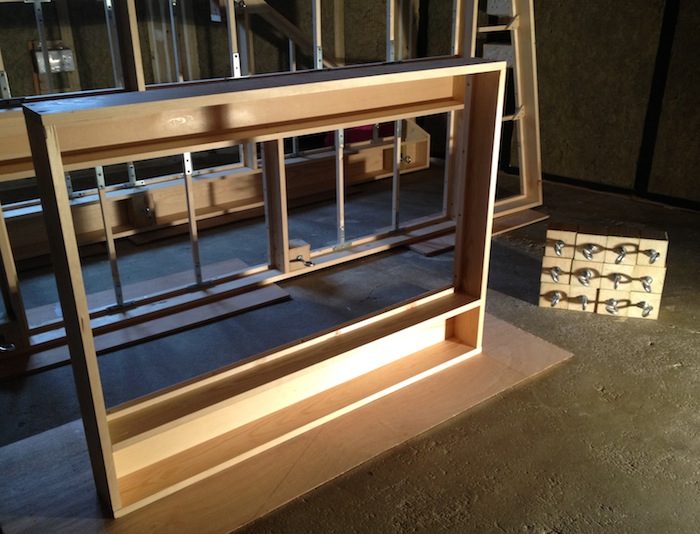
And here are some pics of the construction phase.
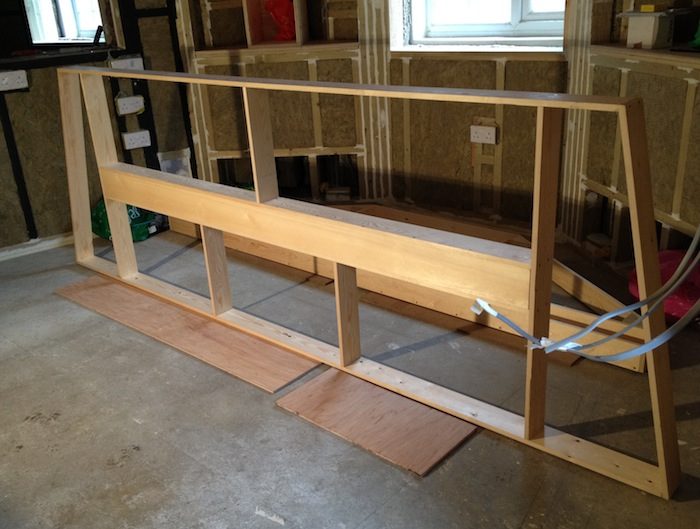
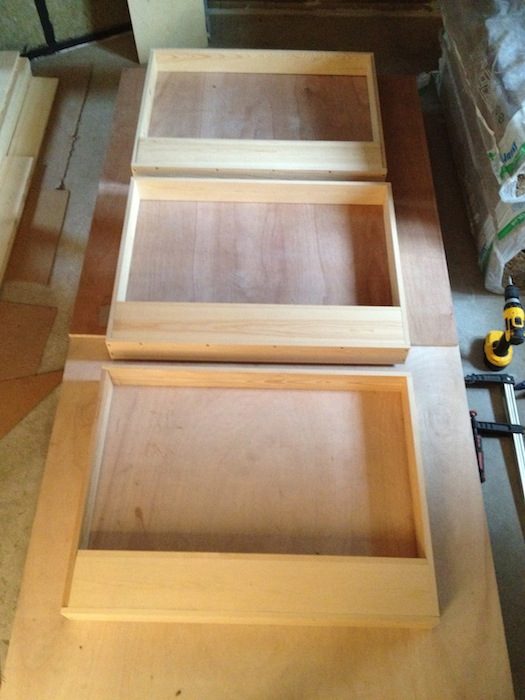
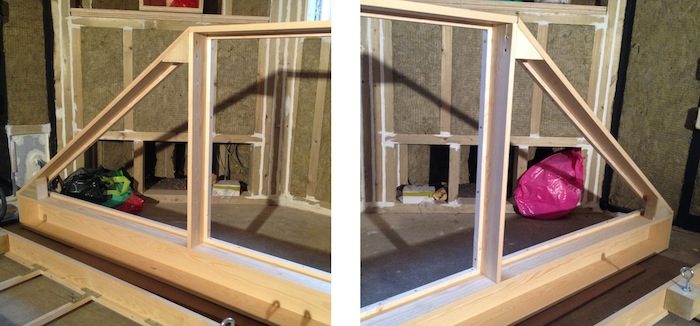
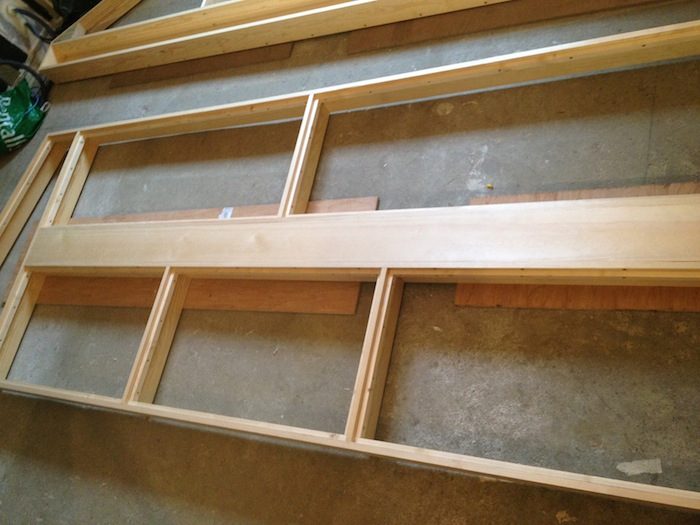
I used 19x100mm planed pine softwood for the structure, and 19x150mm for the strip where the down lights are.
That's the smaller section I could use to make the structure (before installing the 18 plywood backing - not done yet) as light as possible:
Front cloud:
IMG_1990.jpgIMG_1993.jpgCentre cloud:
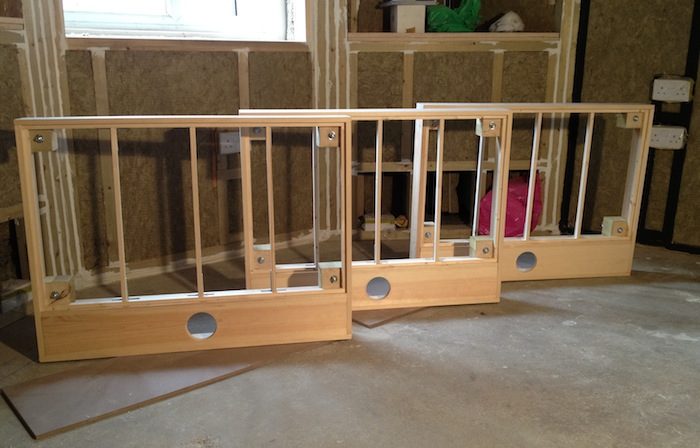
IMG_1998.jpgIMG_2002.jpgRear clouds
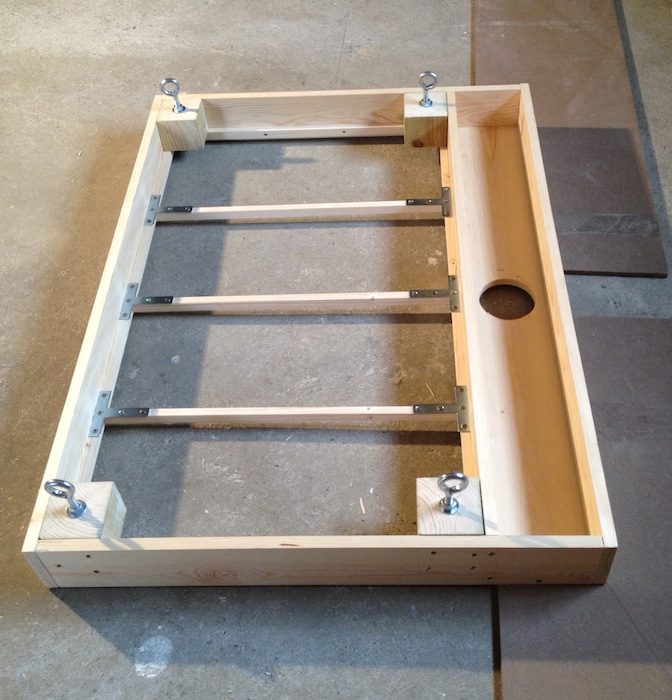
IMG_1986.jpgThen, I attached 15x18mm strips all around the internal perimeter of the cloud frame.
The cloth frames (not done yet) will be nailed to these strips:
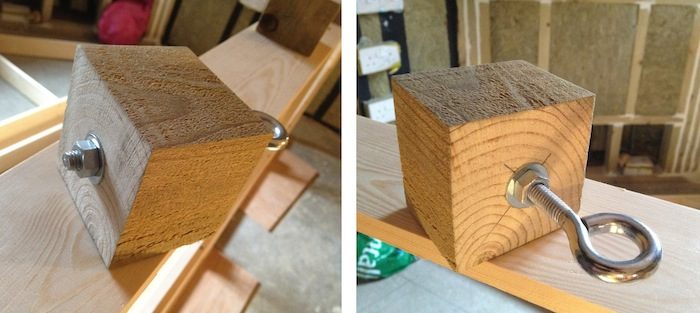
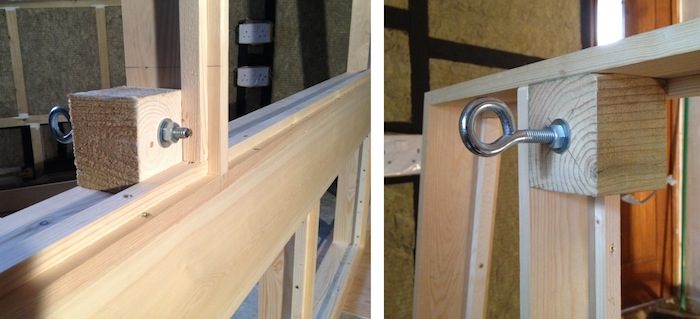
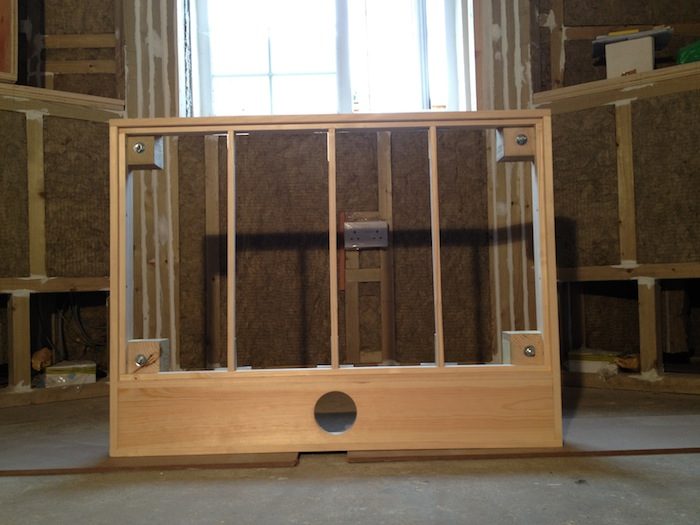
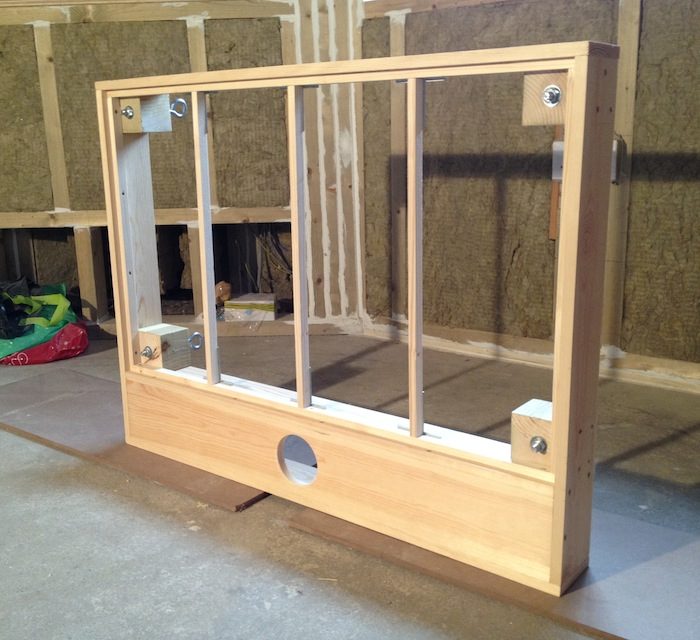
IMG_2034.jpgIMG_2015.jpgIMG_2017.jpgIMG_2018.jpgMounting blocks (80x80 timber, with 150mm x 10mm eye bolts with nuts and washers on both sides):
IMG_2024.jpgIMG_2022.jpg…. (end of part 2) ….
… (part-3) ….
I then used T brackets to place more strips from side to side to help holding the insulation in place, preventing it (I hope) from sagging over time.
Front cloud (back):
IMG_2090.jpgRear clouds (back):
IMG_2054.jpgIMG_2096.jpgRear clouds (front):
IMG_2091.jpgIMG_2094.jpgIMG_2095.jpg
That's all for now.
Happy Easter to you all !!
ciao
Simo
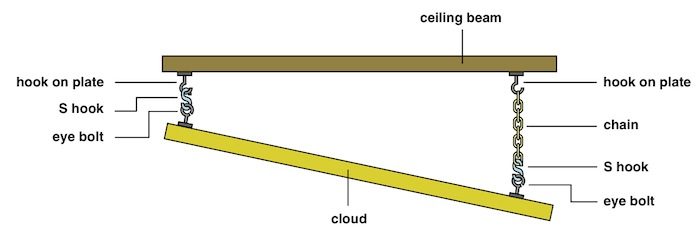
…and this is what I was planning to use to attach the cloud to the celing:
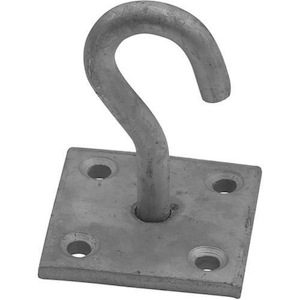
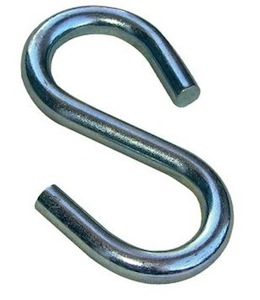
1) 50mm x 50mm galvanized Chain Hook on Plate, screwed to the ceiling beams:Hook on a Plate.jpg2) 10mm x 100mm S HookS Hook.jpgOn the rear of the cloud:
The S Hook will connect the eye bolt on the mounting blocks to the hook on plate on the ceiling beam
On the front of the cloud:
The S Hook will connect the eye bolt on the mounting blocks with a heavy duty chain, in turn connected to the hook on plate on the ceiling beam
Here's a sketch of the plan:
Cloud.jpgI think that this should be enough… but any comments / suggestions are as always very welcome !! :-)
Ciao
Simo
Just like to say your work and detailing is fantastic, and if ok when I build the cloud for my small control room
I would like to do something similar possibly if thats ok with you? :D
Your clouds are way better looking than the one I have just built for my tracking room :(
Thank you for your kind words Roguejackal. Much appreciated !
Of course it's ok ! :thu:
I think that the whole point of keep posting our progress here is exactly that, to learn from each other!
Everything I managed to build so far has mainly been possible thanks to all the info I gathered from this forum…. so it's a pleasure to be able to give my contribution to this process :-)
Your clouds are looking great, as the rest of your build ! I'm learning a lot from you
Hi Simo, have been watching you build from (not so) afar for a long while with absolute amazement. What an incredibly talented guy you are, and what a studio you will have!
I have however, been stealing your ideas right, left and centre for my smaller scale space... well they say emulation is the finest form of flattery!... so I hope you don't mind :oops: My project design is now up on the forum, so I'm desperately checking my messages every twenty minutes hoping for that elusive first opinion from the gods :wink: I think though, that you qualify for this accolade now by the looks of things! I'm hoping to follow your inspiration and maintain a diary for all to learn from too.
Anyway, I just want to take this opportunity to thank you so much for your diligence in sharing your progress, and in such superbly in such glorious detail: you are definitely one of life's givers, and deserve every success.
Humbly
Kevin
(Lincolnshire, UK)
Hi Kevin,
what can I say… Thank you so much for your very kind words, it means a lot to me, really ! ...and of course I don't mind at all you getting ideas ! :thu:
I know what you mean about desperately waiting for feedback… but I see Stuart has just noticed your thread…you couldn't find any better help, you are in great hands indeed !!
I wish you best of luck with your build !
Simo
Hi all
Here is a little idea I've been having for a while now, and wanted to see what you think...
(sorry for jumping from one topic to another, but I'm just trying to make up for all the time I've lost and get on with more than one thing at the same time)
Basically, I wouldn't mind the idea of having skyline diffusers at the rear of the CR. There - I admit it - I quite like the visual interest they add :-)
I know Stuart in particular is never keen in advising their use in small rooms (for good reasons !)… but I have a plan :idea: …. well at least I think I do :oops: … and would be great to have some feedback if possible.
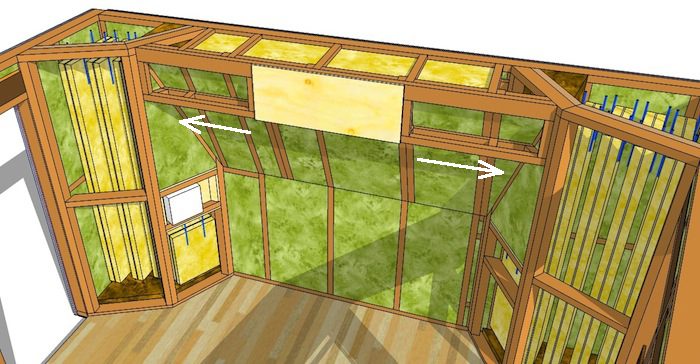
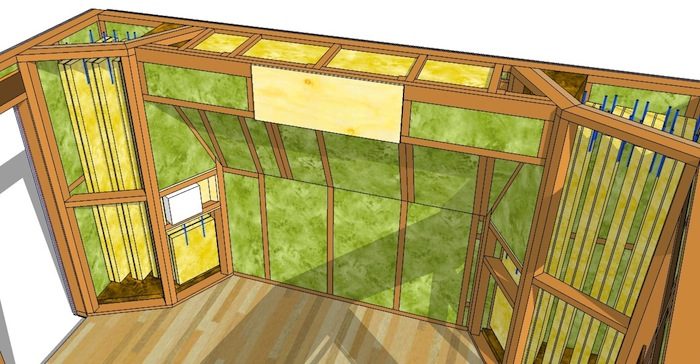
Right - the plot is to extend (on both sides) the frame I built for the air con unit, until it reaches the hangers trap framing
Simo plan_1.jpgfill the entire cavity with insulation (a la superchunk !)
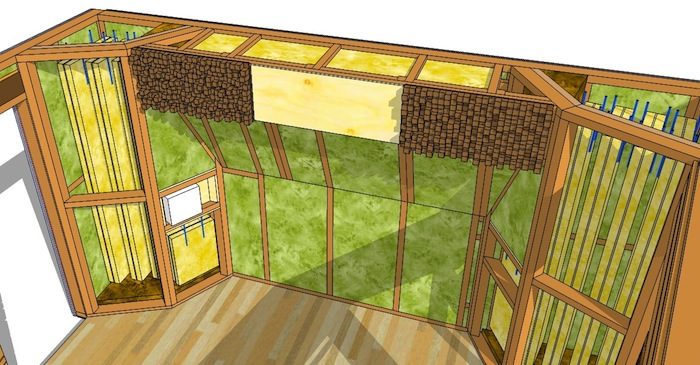
Simo plan_2.jpgand then position the skyline diffusers there (with screws or using a french cleat mounting method, in order to be able to remove them if I'll see that their contribution is not beneficial acoustically, thus leaving me with just more straight absorption... which I seem to understand is never a bad think :wink: ).
Simo plan_3.jpgSimo plan_4.jpg
The info I've collected and put together so far in my various journeys through the forum is that as a general rule:
numeric-based diffusers must be away from your ears a distance at least 3 times (others say 7 times!) the wavelength of the lower frequency they are tuned to.
(not forgetting that diffusers are also effective an octave below the lowest tuned frequency !).
This is to avoid the so called "lobbing" problem, corresponding in an uneven spread of reflected energy (in both space and time).
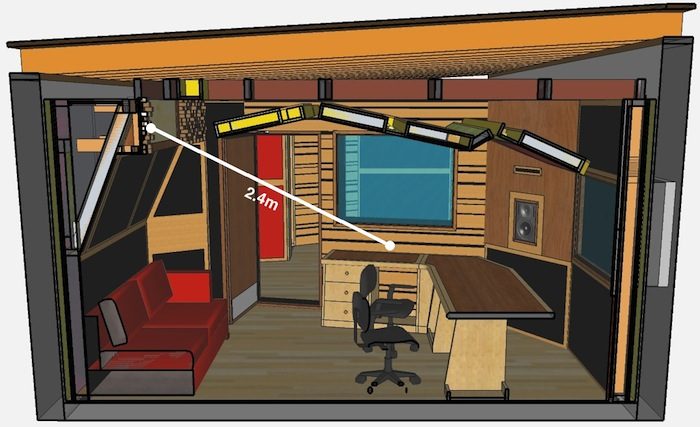
Now, in my control room the distance between the sitting spot and the frame where I was considering of placing the diffusers is around 2.4m.
Simo Studio section.jpgSo: 2.4m / 7 = 0.343 m => 34.3 cm
This means (always following the theory) that 34.3 cm is the wavelength of the lower frequency the diffuser should be tuned to.
Well, actually that happens to be precisely the wavelength of 1KHz:
from: " V = f λ " where: V(speed of sound (m/sec)), f (frequency (Hz), λ (wavelength)
λ = V / f = 343 / 1000 = 0.343 m => 34.3 cm
If the above is correct, it means (always in theory) that I should be ok by installing up there diffusers tuned @ 1KHz (or perhaps 2KHz to be safe?), without having an uneven spread of reflected energy ???
Anyone? …Stuart, are you there (please destroy me gently:-) ) ?
Thanks
Simo
Anyone? …Stuart, are you there (please destroy me gently
BAM! Consider yourself destroyed!!! :)
Actually, that looks fine to me, as far s distances are concerned, but I'm not so convinced they would be a lot of use up there. But I reckon it is worth trying!
Have you done the math on your room, to see how much absorption you need, and at what frequencies?
- Stuart -
Thanks Stuart !
I'm not totally convinced myself to be honest :oops: , but I might give it a go and see (with and without them) what Rew / FuzzMeasure will have to say. After that I can decide whether it would be better to mount them somewhere else in the live room instead, perhaps in the reflective face of a gobo.
hem… maths? … not yet :oops: …. lazy? scared of what I will see? …. possibly both!
But I do know I have to do it…so, as soon as I install the doors/windows, I will analyze it.
Congratulation on your 'admin' title:-) !! :thu:
Thanks! :oops: That was a totally unexpected honor that John bestowed on me! I had no idea until he sent me a message saying "check your status". I sure hope I'm up to the task...
- Stuart -
Personally, I think you have been up to the task for years, with your continuous dedication and support towards everyone of us with no exception !! Thanks again for that !
The sure thing is that NO one can deny that, thus I suppose John just decided to make official what was already happening :D !!