Realdoyle Build Thread

Started by realdoyle on 30 November 2009. 59 replies, 2009–2011. In the Library under Build diaries. Key posts in this thread.

Originally posted at johnlsayers.com, topic 13828.

realdoyle wrote:
Honestly I am starting to get frustrated with these comments pertaining to my lack of preparation. I completely acknowledge that I am not an expert in studio construction, I am not even a good handyman, or even great with math. I am a professional musician (college educated and trained) and that is my expertise. I tried to do the best research I could (for two months prior to starting any construction). I bought two books that got good reviews (including Gervais') and consulted a seemingly well-respected "studio construction professional" here in LA who charges $500 an hour for his consultation (one phone consult and one in person where I showed him my blueprints). Not only have a I have found my professional consultation advice to be conflicting to the "expert" advice I find on here but I flat out can't even find straight answers to the questions I do ask.
I feel your pain boss. It is difficult to build, as anyone with any amount of time in the field will tell you and it is difficult times 10 to do it for an acoustical environment...as anyone who has done it will also attest. I do not know what questions you have asked that have not been answered. I can say this. Rod Gervias is the author of a book that many say is a bible of sorts for doing this type of building. Madmax [xamdam] is a highly qualified construction technician in his own right and he is the GC[general contractor] of a high dollar and highly visible studio in North Carolina. Maybe the best that his part of the country will see. Building, as a rule, is not a simple thing that people talk about and then do. I have been in commercial and residential building for over thirty years and still have to ask questions and read up on things as they tend[ the things that are part of construction] change all the time. You can confuse terms easily in this business. As you are doing right now saying "vapor barrier". The house wrap is not a vapor "barrier". It is a retarder :) And there is a large difference between what the one does versus what the other does. Your retarder is fine, could be better, but it will work as is.
realdoyle wrote:
"...that people starting mentioning beefing up the outer layer."
Actually, you asked about it. I think we can all get on board that the addition of layers is a good idea supported by documentation. What would have been better, had you paid us the money rather then spending it outside of this forum, that the EXTERIOR of the structure needs the most or at least equal mass....contiguous or unbroken. Then there is the air space that suffers due to the addition of mass behind the exterior sheathing/siding. The air space is as important as the mass. You mentioned using RC. This is fine if this is what you want to do. But there are other ways that you could do this job that will get the isolation you require. Even a simple study on RC will reveal that the low frequency will suffer and this is not the part of your isolation that you want to have a leak in with drums. There are many trade-offs. This is why it is so important to begin with a firm foundation. Have you ever built a house? The details can, as a builder, cost you any profit if it exists these days. So as a D.I.Yer, to suggest that you can get an isolated acoustic environment constructed without any errors...without any technical ability on your behalf, is pie in the sky.
realdoyle wrote:
"His build is an 8 foot X 12 foot X 16 foot...at least one dimension is divisible by another." I already knew before I started that my 8ft ceilings were a multiple of the 16ft length and this is bad.
Not bad, just something to avoid in the early phases of development if at all possible. It can be overcome. Remember, this is just a small room in your backyard, not a multi-million dollar exercise in acoustics.
realdoyle wrote:
So far in this one post I've had 3 different solutions to my problem and all of them claim to be the best, considering the situation: 1) Add mass between the studs. (which Rod and xSpace endorse) 2) Tear down the siding and start over. (xSpace thinks would be a waste, considering) 3) Leave the siding and add more mass to the outside. (vapor barrier/mold issues???)
These are not three different items, but choices to different degrees.
realdoyle wrote:
realdoyle wrote:
"I think he should tear the whole thing down to the slab But there has to be a point where you learn the lessons that haste teachs and you move forward."
I honestly made a significant effort to be prepared for this project. I get the feeling you think I am trigger happy and can't wait to make my next error. :) In hindsight I don't know I how else I could've prepared. Even though my plans were not the best I made the effort to educate myself and get expert advice. How else could I have known it wasn't ready?
You have a few months in preparation. Many come here with this same notion. Personally, it is a disrespect to builders world wide in my point of view that people think they can D.I.Y. a building and not have any experience what-so-ever in building. It is, to me, the same as me thinking I can jump up on the stage at Carnegie Hall and play to a high caliber of execution on my musical instrument when I have only read a book or two about it and practiced for a few weeks. Understand what I am saying?
realdoyle wrote:
I am grateful for all of your advice. I truly am. But sometimes I think you forget that even though you see this as a black and white science, it is all too often painted in a lot of grey. I'm just trying to sort it all out and make the best of it all.
This should always be done in preparation, not in retrospect.
Hey xSpace, I appreciate the reply and I can completely respect your analogy for builders as compared musicians playing Carnegie Hall. My logical answer to that would be that it takes years of practice and experience playing lesser venues to successfully perform at Carnegie. Which in turn would mean years of practice building studios and experiencing what works and what doesn't. I can completely respect that and I meant no disrespect to professional builders by attempting this myself (though it's not as though I am selling my services as a building contractor). :D But with this analogy comes the conclusion that I should never attempt this unless I am willing to dedicate years to learning the proper skills, gain the experience, and study the science of acoustics. In some regards maybe that is true. But that can't really be the end of the story. Otherwise this forum wouldn't exist. I am all about being prepared and knowledgeable before spending a single dollar on anything. I honestly thought I had properly prepared my plans, at least enough to get me through the foundation and framing at which point I would focus on the next stage and make sure I was prepared before moving forward with that. I did not expect to screw this up so early in the process. :cry: Also, just to clarify, when I say "I" what I really mean is "they." I'm hiring out most of each phase of this to professionals in concrete, framing, electrical, HVAC, etc. I am doing my own caulking and probably drywall (I have some experience there). But I've read enough horror stories to know that you can't expect non-specialized professionals to know the details required in sound isolation and that's why I'm trying to learn as much as I can so I can communicate my needs to them effectively. In some regards I guess it's the blind leading the blind, ay? :? My comment about not getting my question answered wasn't clear. I didn't mean that I was ignored, what I meant was that I got 3 different "degrees of choices", as you put it, and I mistook them for contradicting solutions to my situation, with no clear answer. My expectations got in the way of my understanding. Sorry 'bout that. :oops: By the way, I finally found the answer to my installation question about installing it between the studs. After PM'ing a few people about their posts, I found they used a combination of screws into the back of the siding with 1x2 furring strips around the edges of the drywall (with backing rod and caulking between the edges). Thanks again for your patience and guidance. -Doyle
xaMdaM wrote:
Doyle, I hate to say it... but remove the siding and do the job right. You'll regret it in the long run if you don't. By failing to go back and put more mass on that exterior stud face, you can potentially end up with structural noise you can't go back and fix... e.g. IF the gypsum does not edaquately contact the surface of your siding, there is not enough material thickness in the siding to screw the gypsum to... to eliminate any mechanical buzzing/vibration.
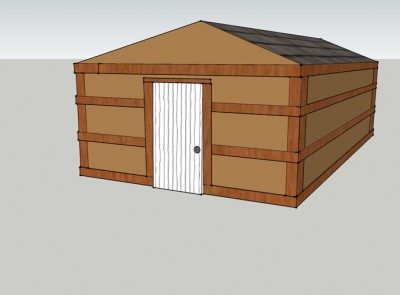
Hi xaMdam, Thank you for posting your experience with this. To prevent having to remove all of my siding, I wanted to ask you a follow up question regarding the structural vibrations that you are referring to: If I am picturing your statement correctly then your concern is that the drywall between the studs might vibrate against the back of the siding if not properly secured, is this right? If so, could a solution to this be a thick layer of acoustic caulk on the back of the drywall that goes against the siding? This layer of caulk could absorb the vibration noise and provide a barrier between the two surfaces rattling against each other. Or in addition to that, perhaps I could add a few more strips of 1/2" trim that could run parallel with the existing trim but positioned more in the middle of the outside wall and act almost like a backer board for the inner drywall to screw into. That would provide 1 1/8" of mass (1/2" of trim + 5/8" siding) for the drywall to anchor to. See attached 3D sketchup. I know this isn't the preferred method by any stretch but I'd still appreciate your opinion on this. Thank you, -Doyle
doyle_building_backing_trim.jpg
Doyle, What I did (and still do), as have many others I'm sure... is all through the building process, tap, pound, and generally beat on surfaces and assemblies; with a hammer, block of wood, your fist, foot, shoulder, or other blunt object. (My head in particular... MANY times... but that's another story altogether.) When you come across a vibration/buzz/rattle... address it RIGHT then. Stop the buzz and you eliminate issues with LF doing it after the fact, when it's impossible, or extremely costly to fix later. When I was adding the gypsum between the stud bays, I had a of them that rattled and buzzed a bit too much for my liking. So, I simply sank a screw in the panel to tighten it up. I didn't drive a bucket of screw in the panels.. just one or two to sock the layer down to ensure it would dampen sound as it reached the panel. You can use acoustic caulk, I guess... but, personally I wouldn't. If I was going to do anything like a caulk, I'd use Green Glue. HOWEVER, Green Glue is NOT a cheap option. "Acoustic caulk" is used primarily as a means to stop air flow... not as a damping agent. I suppose you could use PL200 or a similar construction adhesive, but again, construction adhesives become hard, like a nail/screw, but they tend to scare me from the aspect that they aren't as secure of a physical bond, and in my (albeit limited) experience, tend to fail to adhere after repeated heating and cooling cycles... as in long term temperature changes in an exterior wall cavity. GENERALLY, when you are putting mass assemblies together, you are trying to achieve one of two things... you are using smaller/thinner masses to become bonded to create a single additive mass, or you are bonding different masses in a way to allow part of the mass assembly to act as a damping layer. If your intention is to use the gypsum to act as a damping layer between the stud bays, then you want the gypsum to be as tight against the outer sheathing as possible, without a solid connection to the sheathing. This small air gap will allow the gypsum to vibrate, yet dampen the gypsum as it transmits energy to the next layer... which then allows the gypsum to dampen the next layer. Adding a bunch of screws to the gypsum to secure it to the sheathing will minimize this damping effect, as it will form a unified mass. Creating a unified mass isn't such a bad thing, in and of itself... it's really only a "bad" thing if you are dependent upon the layer to be a damping layer. By adding an additional damping agent, such as Green Glue, you will get a superior damping performance in the LF range... again, at a significant dollar cost. Since your walls are 2x4, you can probably only get away with adding 1 layer of gypsum to the stud cavities. Any more than that, and you are going to loose a significant amount of air cavity volume... which can then only be made up by increasing the air cavity, and therefor reducing the square footage of your rooms. However, if you are willing to forgo room volume in lieu of beefing up the exterior layer, I'd potentially use 2 layers of gypsum and use Green Glue between each layer of gypsum; gypsum, green glue, gypsum, green glue, housewrap, sheathing. I would NOT assume that this is a viable option without getting confirmation that this is indeed viable. This will at the very least add the additional cost of 6-8 cases of Green Glue to your budget... and at $250/bucket, you just added at least $500 to your budget, plus the cost ($50-ish) of a decent caulk gun. Again, this is what I was referring to about your $2500 budget getting shot to hell, real quick.
xaMdaM, Thank you for that detailed reply. Being a drummer I will totally take your advice on banging on my building whilst listening for unpleasant tones. This will be a like constructing a big drum! :) I definitely see your point about the budget. Getting the RSIC clips, hat channel, 8 tons of green glue and several layers of FR drywall will definitely exceed the $2500 I had set aside for this part of the project. Time to reconfig the budget. On another note, I'm trying to confirm the best order to do all of this. I talked to a studio contractor yesterday who said that I'd need to install the double-door last (after all the walls are completed). This does kind of make sense but I wanted to ask ya'll your thoughts. The way I'm thinking of it is in this order: 1) foundation/framing (completed) 2) drywall between studs to add mass to 1st leaf 3) electrical 4) HVAC 5) RSIC-1 clips/hat channel install 6) 3 layers of drywall with Green Glue between each layer 7) install double door entry last? Thank you, -Doyle
Doyle, My apologies for leavin' ya' hangin'. It's just been nuts here the last two weeks...
realdoyle wrote:
xaMdaM, On another note, I'm trying to confirm the best order to do all of this. I talked to a studio contractor yesterday who said that I'd need to install the double-door last (after all the walls are completed). This does kind of make sense but I wanted to ask ya'll your thoughts. The way I'm thinking of it is in this order: 1) foundation/framing (completed) 2) drywall between studs to add mass to 1st leaf 3) electrical 4) HVAC 5) RSIC-1 clips/hat channel install 6) 3 layers of drywall with Green Glue between each layer 7) install double door entry last?
I'm gonna go out on a bit of a limb here and tell you that whoever this "studio contractor" is... is leading you down a primrose path–at best, and a moron at the worst. Here's the real order, and the order for your inspections... -1) Permits 0) Foundation/Pre Slab Inspection 1) foundation construction 2) exterior framing and roof 3) drywall between studs to add mass to 1st leaf 4) framing of ALL interior walls & framing rough-in inspection 5) electrical & electrical rough-in 6) HVAC and HVAC rough-in 7) Insulation/penetration inspection 8) close up the walls a) RSIC-1 clips/hat channel install b) 3 layers of drywall with Green Glue between each layer 9) install double door entry 10) Final Electrical Inspection 11) Final HVAC Inspection 12) Trim/Finish work 13) Final Construction Inspection 14) Fire Marshal's inspection 15) Certificate of Occupancy issued 16) Low Voltage wiring 17) Acoustical treatments
Doyle, Are you going to have electricity installed into this room?
Sorry for the delayed reply. I was out of town for the holidays. xaMdaM, Thank you for that detailed reply. I am just not having very good luck with the "studio contractors" I am consulting. I've had 3 different people consult on this project and after posting their suggestion on this forum, I find that all 3 of them have given me suspect info. Frustrating. xSpace, Yes, I am going to have electricity installed to this room. I have had a few electricians come out and quote the job. I've literally been showing them the diagram and chapter from Rod's book and telling them that I'd like an isolated ground system. I plan on having 2 outlets on each wall, and either recessed lighting or a track lighting system (so I don't have to cut holes into my ceiling thereby reducing the isolation efforts). I just wish track lighting didn't look so bad. Why do you ask? Am I missing something? Thanks again for your help, -Doyle
I have a question about installing the double door entry. It is highly suggested that, in order of construction, I install the doors last after the electrical, hvac and drywall. However, after the rains here in LA, I had a real tough time keeping the water out of my building while still being able to work on it. Eventually I had to tarp the doorway closed until it stopped raining. My question: Would it be possible to install just the out side door now and then go back at the end and install the inner door, of the double door entry? If so, this would greatly protect all the work I've done on the inside from rain blowing in and ruining it all. Perhaps the outside door could be on a separate frame from the inner door? This would actually be beneficial later on when installing the inner door on it's own frame, right? They would be isolated parallel door frames, eliminating any direct flanking paths within the door construction. Of course, I'm sure I am missing something (that is why I am asking here first). I'd greatly appreciate your input on this idea and if it is not a good idea, then any other weather-proofing ideas would be welcome. Thank you, Doyle
No problem - put your outer door in - you've gotta seal from the rain. ;) the idea of adding them last is purely for the convenience of loading stuff in and out and not damaging them with scratches etc.
Thank you John. I'm having my door guy come frame/install the outside door next week. A dry work place is a happy work place. :) On another note... A general question about backing rod: If I were installing 3 layers of drywall with Green Glue would I caulk and use backing rod for each layer of drywall or would I just do one final caulking with backing rod after all 3 layers of drywall are up? I'm mainly thinking about the bottom of the walls where it meets the floor (I know the corners need to be interlocked and caulked at each joint). I'm trying to estimate how much and what size backing rod to buy. If I'm gonna buy a big spool I want to make sure I get the right stuff. Thanks again, -Doyle
Nevermind on this last question... I found my answer here: viewtopic.php?p=20003 Though I spent hours looking through forums trying to find an example of an hvac and fresh air system that would work for my single-room (with no attic space) studio. Even in the stickys "Shed to Studio" that build has an attic that they utilized. I had a previous post I did about this but I'm stuck: viewtopic.php?f=2&t=13821 I see little ideas that might work but nothing that really takes me through the process of building the silencers, installation, etc. Has anyone stumbled upon a good thread for this? Thanks, -Josh
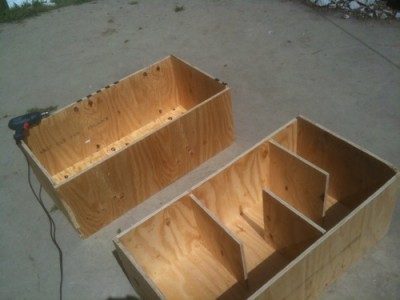
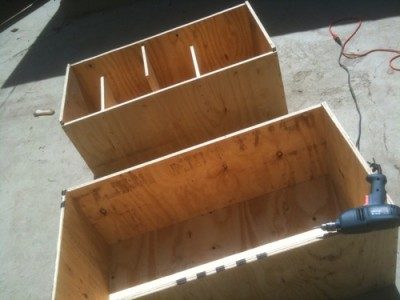
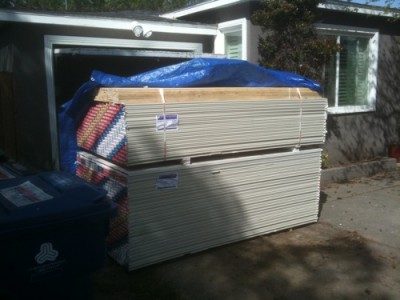
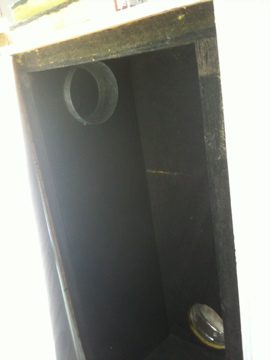
Hi all, So I took a little more time to research my build and then research some more. I'm finally starting to put nail to wood now. I built my silencer boxes and got my drywall shipment in. I'm going to put a Fantech FG6 inline fan http://www.iaqsource.com/product.php?p=fantech_fg6&product=137122&category=1252 inside the silencer box to bring in fresh air. I'ved talked to several HVAC guys and they say that i don't necessarily need an exhaust fan inside the other silencer box because the static pressure inside the studio will naturally exhaust itself through the other vent. Makes sense to me. I'll be lining the silencer boxes with 2" 703 and using an insulated flex duct to connect the inside vent to the silencer box on the outside of the building. The flexduct and vent on the inside of the studio will be 12" (twice as big as the 6" in fan diameter) to prevent air noise. As for the drywall, I have all my furring strips, acoustic caulking, green glue on the way, and just need to order my backing rod. Then I can start bulking up the 1st leaf of my build, put up strips of drywall between the studs, with green glue between drywall and backside of siding. The green glue layer should greatly help any rattling or buzzing sounds that xaMdaM had mentioned watching out for (though I'll still be tapping, banging, and listening every step of the way). Thank you all for your help!
Image.jpg
Image.jpg
Image 2.jpg
Image 2.jpg
Image 3.jpg
Image 3.jpg
Oh and I stumbled across this video showing the effectiveness of Green Glue. I thought you all might find it interesting. If they are telling the truth with the materials and the test really is legit, then it's pretty impressive. It's also interesting to see how green glue reacts 30 days after being applied. Still movable. Green Glue demonstration video: http://www.youtube.com/watch?v=LiUBxjFG53o
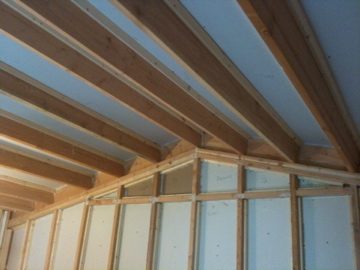
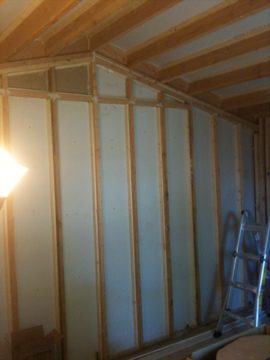
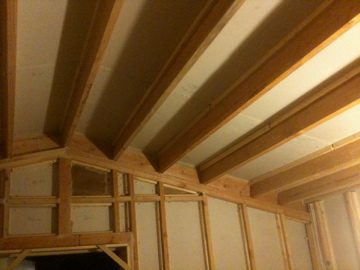
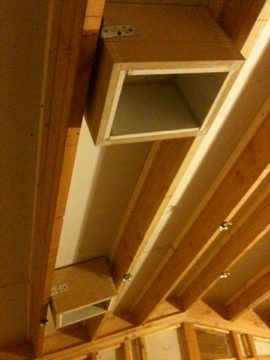
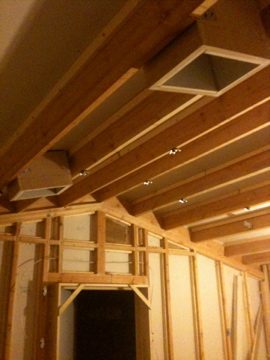
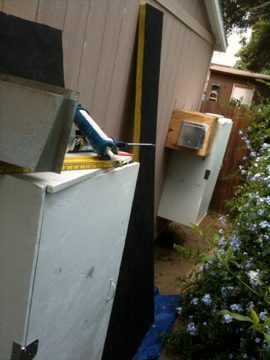
Howdy, I just wanted to update my build thread with some pics for y'all. I've had the electrician here and we are really starting to pick up steam on this project now. I followed xaMdaM's example and added a layer of drywall and Green Glue between all of my wall and ceiling studs (with backing rod, acoustic caulk and furring strips to keep them in place). I beat on all the walls, listening for and rattles or buzzes. There were a few that I had to give extra attention to. I just put up some recessed lighting isolation quiet boxes. The electrician will be coming tomorrow to wire them for the 6" Halo cans I got. I should have my first electrical inspection this week. I can't wait to fill in the 18" deep trench running through my back yard and start screwing in all the RSIC-1 clips and laying in the wall insulation. I also attached the ventilation silencer boxes to the back of the building today. I'm going tomorrow to get the ducting from a local sheet metal supply shop. I'll post pic of that soon. Long day... goodnight, -Doyle
IMG_0351.jpg
IMG_0351.jpg
IMG_0353.jpg
IMG_0353.jpg
IMG_0355.jpg
IMG_0355.jpg
IMG_0363.jpg
IMG_0363.jpg
IMG_0364.jpg
IMG_0364.jpg
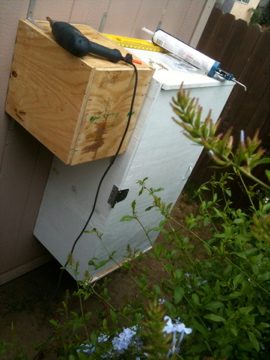
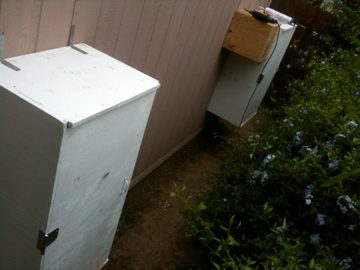
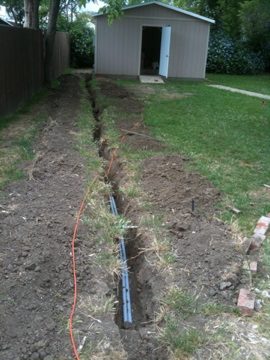
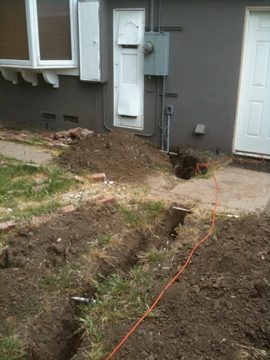
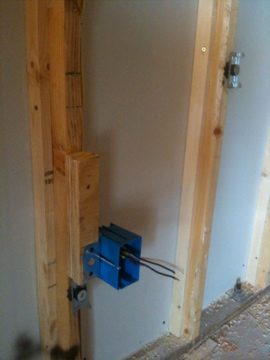
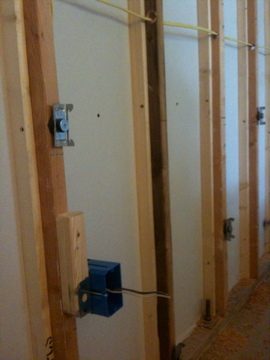
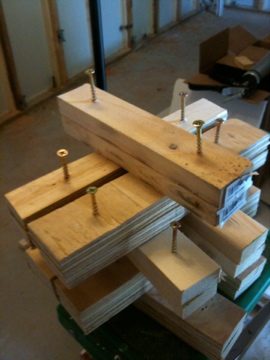
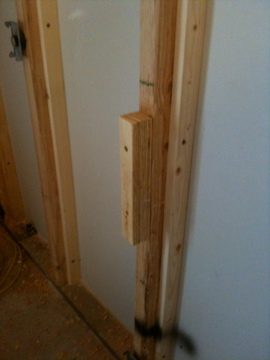
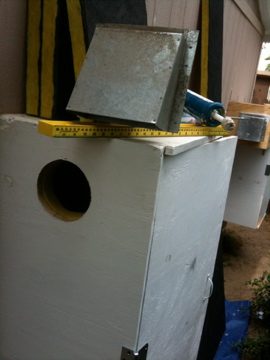
I had my final electrical inspection on Tuesday and I passed! Now I can put up the rest of my iso clips, put up the hat channel, put in the insulation, and start the daunting task up hanging drywall (3 layers thick with green glue between each layer). sigh. Some more pics of recent progress: - Me and my electrician came up with a solution to bring the electrical outlet boxes out from the stud enough to reach the outer layer of drywall. From the stud it is going to be about 3.5" to the face of the wall. I'm doing RSIC-1 clips, hat channel and 3 layers of drywall. The extension electrical boxes only extend about 2 inches. I used some left over pieces of wood furring strips and created some extra extension to the face of the stud and then attached the outlet box to that. - Got pics of the 18 inch deep trench they dug from my house to the back of my yard for the electrical and data line conduits. Special thanks to my dad for reminding me to lay data lines while the trench is still open. - I started attaching the ventilation silencer boxes to the back of my building. I took Rod's advice and moved the fan (that's going to bring fresh air in) outside of the silencer box. So the unfinished small wooden box holds the Fantech FG6 inline fan. I've already cut the 6" vent holes and wired it all up. The fan is super powerful and super quiet. I'll take more pics of this tomorrow to show it with the vents. I'll post more pics soon.
IMG_0365.jpg
IMG_0365.jpg
IMG_0366.jpg
IMG_0366.jpg
IMG_0367.jpg
IMG_0367.jpg
IMG_0370.jpg
IMG_0370.jpg
IMG_0371.jpg
IMG_0371.jpg
IMG_0372.jpg
IMG_0372.jpg
IMG_0358.jpg
IMG_0358.jpg
IMG_0359.jpg
IMG_0359.jpg
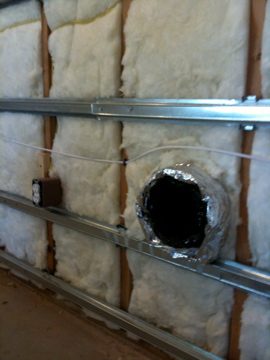
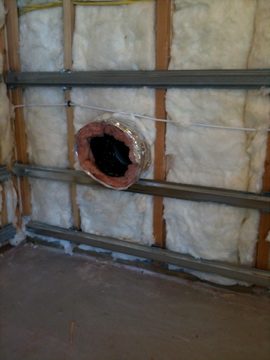
Here are some pics of me completing the "fresh air ventilation" system. To recap, my idea was to build my silencer boxes on the outside of the building and then attach a Fantech FG6 fan to blow in the fresh air. I've tested it and it is working great! Super quiet and is blowing a steady stream of air out the exhaust vent on the other side of the building. I used R-300 duct liner (2 inch) to line the inside of the silencer boxes. And since only one side of the r-300 is coated, I used DP1010 duct sealant on the "yellow" unfinished side to prevent any loose fibers from blowing into the studio. I love it when an idea comes together!
IMG_0343.jpg
IMG_0343.jpg
IMG_0346.jpg
IMG_0346.jpg
IMG_0345.jpg
IMG_0345.jpg
IMG_0296.jpg
IMG_0296.jpg
IMG_0302.jpg
IMG_0302.jpg
IMG_0297.jpg
IMG_0297.jpg
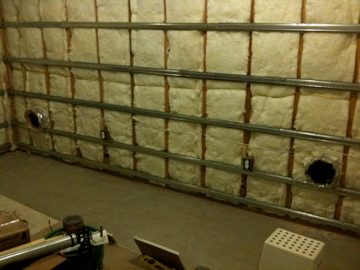
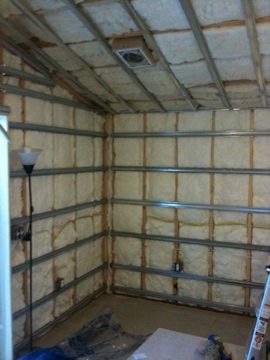
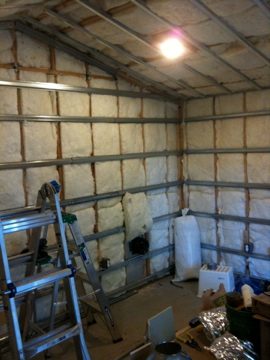
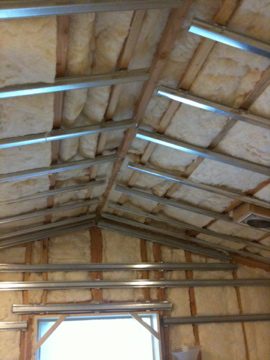
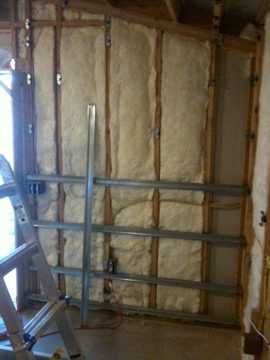
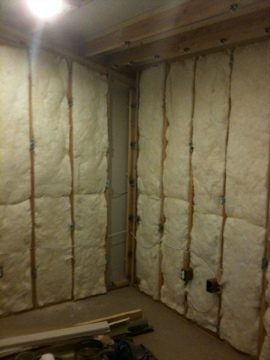
Here are some pics from the insulation stage. I put in r-13 unfaced in the walls and r-19 unfaced in the ceiling. At first I wasn't sure if I'd need the hat channel installed to hold the insulation in place (especially since my insulation did not have the kraft paper to staple to the studs). So I put in a few pieces of hat channel and then tried putting in the insulation. This was MUCH more difficult and I do not recommend going this route. I did the rest of the walls without hat channel and the insulation stayed in place just fine. On the ceiling I put in the first, last, and middle hat channel to support the insulation and that worked okay until I got the rest of the hat channel installed. I also have to say that I put in all of the wall insulation in one night and was not able to do the ceiling until a few days later. But when I went into the studio during the day it was still really warm and almost muggy. However, once I put in the ceiling insulation it stays cool at a cucumber in there! I was amazed at how drastic of a difference adding the ceiling insulation made to the daytime temperature in there. And remember it is June in Los Angeles, it gets pretty warm. I'm having my Mr. Slim mini-split a/c unit installed on Sunday. It's a 26 SEER, 9000 BTU unit (model: MSZFE09NA / MUZFE09NA). It qualifies for the government rebate so I'll get 30% back on the unit and installation. I do have to say that I am disappointed at the look of the indoor unit. For a name like "Mr. Slim" you'd think it would be not so block-y looking. It's not really slim at all. But at 26 SEER this thing should barely use any power, so that kinda makes up for the cubist design. I'll post pics of it soon.
IMG_0324.jpg
IMG_0324.jpg
IMG_0321.jpg
IMG_0321.jpg
IMG_0322.jpg
IMG_0322.jpg
IMG_0291.jpg
IMG_0291.jpg
IMG_0292.jpg
IMG_0292.jpg
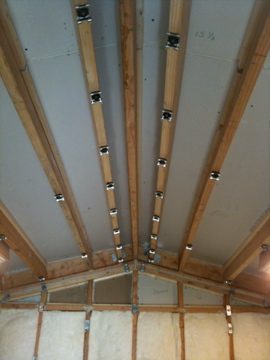
One other thing I wanted to share for anyone else that runs into this issue... I am installing the iso clips on the ceiling too, however I have a peaked/vaulted ceiling. This caused a problem when it came to putting the final clips on the center beam, at the peak. All of the the other beams face at an angle and therefore the clips angle too. But the center beam is at the top and is not angled, parallel with the floor. So when I try to put in the hat channel the angle was all wrong for the center beam. After talking to Eric at SoundIsolationStore.com (who by the way was a huge help and also had the best prices), Eric suggested putting up two additional beams, one on each side of the center, and putting the clips on those. Bypassing the center beam altogether. This was kinda of a pain to do but it worked out well and I was able to get the hat channel installed for the ceiling. If anyone else is building from scratch, just remember to put those extra beams up before finishing the roof. :)
IMG_0305.jpg
IMG_0305.jpg
Great Build! My build is a sticky http://johnlsayers.com/phpBB2/viewtopic.php?f=2&t=8205 I'm extremely happy with my studio, and it's bringing me extra $$$ a few nights a week. BUT. . . my question is about your exhaust setup. I have a WAY smaller vocal booth that i'm trying to deal with AFTER it was built :( I have a plan to get some fresh air from a neighboring room in the booth, and get some old sweaty hot air OUT. I noticed you said you only need a fan for the fresh air in, and the static pressure gets the hot air out. I have Rod's book, but is there any other threads you recall to help me out before i start building something? My booth is like around 4 x 6 x 8, it's small. I'm sure i only need a small/slow fan. . . i don't want too much so it's loud, but obviously need enough to move some air.
Hi Mike, I just checked out your thread. Beautiful work. You did a lot with not much space. I'm impressed. So to answer your question... yes, I just put one fan blowing fresh air in through a silencer box on the outside of the building and then on the other side I just put another silencer box with no fan. It works great. I bought the Fantech FG6 and it totally works for my 12x16 room. If anything it works too well. I might put an attenuator on it and run it a big slower, which is something you could consider. Or just buy a smaller fan. :) From the looks of your plans on the first page, it looks like you have a circuit breaker room next to your vocal booth. Perhaps you could build two silencer boxes that will fit in the circuit break room and bring fresh/stale air in and out through those? As far as other threads, no I never really found anyone else that did what I did in terms of putting the silencer boxes outside with a separate box for the intake fan. I did reference a lot of the threads on here about how to actually build the silencer boxes. Also I had another thread of my own where I addressed my HVAC ventilation plans: viewtopic.php?f=2&t=13821&start=15 Hopefully that helps some. Let me know if i misunderstood your question or your design. -Doyle
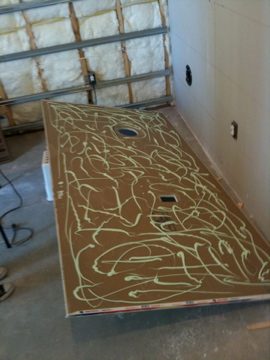
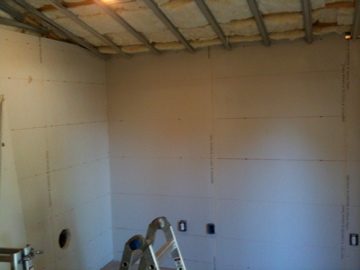
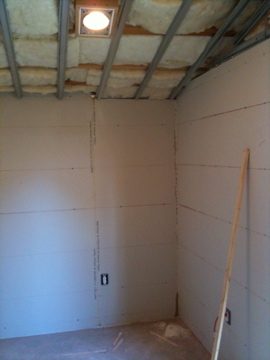
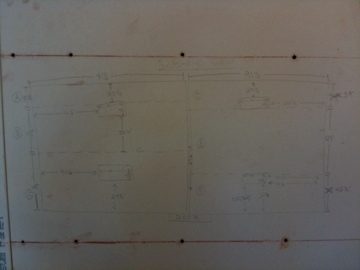
Here are some pics of drywalling the walls. 3 layers of drywall with 2 tubes of green glue between each. Nothing exciting to see here but it's all part of the build. :)
IMG_0367.jpg
IMG_0367.jpg
IMG_0374.jpg
IMG_0374.jpg
IMG_0375.jpg
IMG_0375.jpg
Image not preserved: IMG_0382.jpg
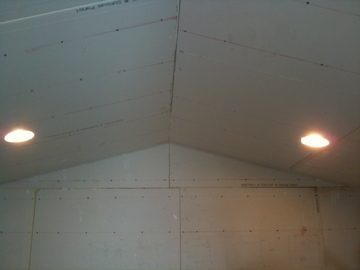
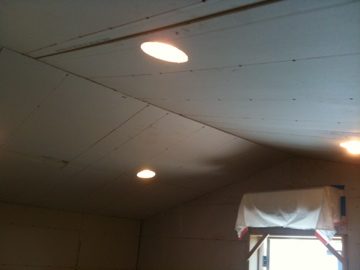
Here are some pics of the ceiling drywalling. Everything went well except for one side of the ceiling had two pieces that came together with out any nearby hat channel. So the sag between sheets is obvious in that shot. I had to do extra mudding to smooth that out. Ended up okay though.
IMG_0389.jpg
IMG_0389.jpg
IMG_0425.jpg
IMG_0425.jpg
IMG_0426.jpg
IMG_0426.jpg