Well, I'm finally here!
After a rush (24hrs) to finalise the design, get the conduit down for the LV wiring and demolish a 100 year old shed, I finally have the beginnings of my studio.
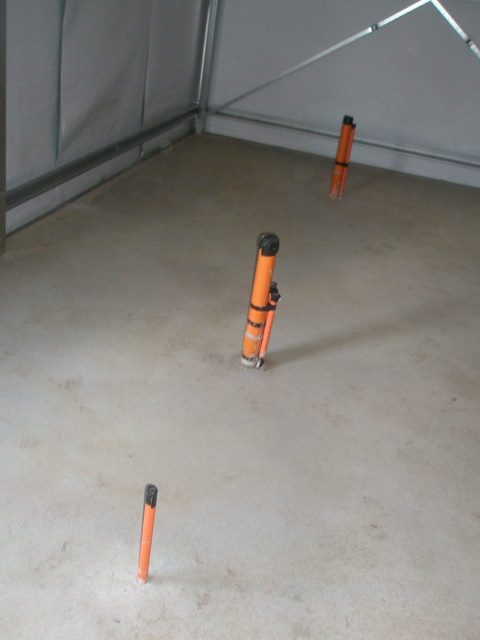
Concrete Slab is set.
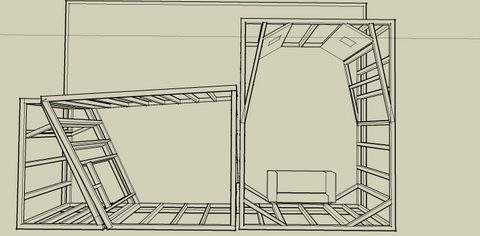
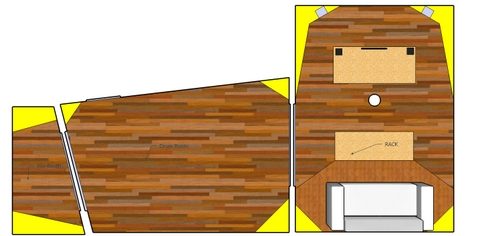
Design: 3 room studio- control room, drum/amp room and medium
size vox booth
Aim: Multi purpose studio for bands, vox overs, film sound tracks, video editing and song writing.
Gear:DAW protools, Mac G5
budget: I have just spent$12000 on the slab and outer shell and figure each room will cost me between $3000-6000. I will be building each room in stages as the money replenishes.
1st the control room.....
I'm using an older room ratio 1 1.24 1.54
Which equates too 3m ceiling, 3.84m w and 4.62m length.
I will "soffit mount" a set of home made passive speakers with a pair of Fostex and yorkville nearfields.
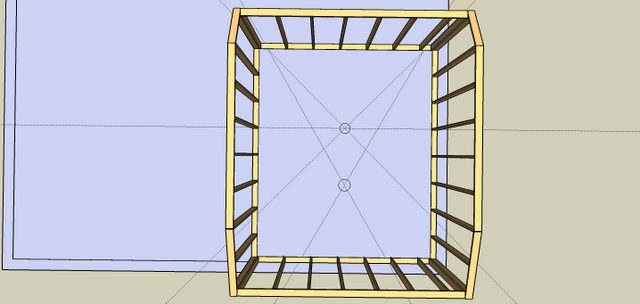
My wall beams will be at 600mm spacing with the ceiling joist identical so the weight of the ceiling will sit evenly on each wall beam.
For the ceiling I'm using a product called Hyspan which is simply multiple ply boards glued together vertically. You can get a far greater span with these over other timbers.
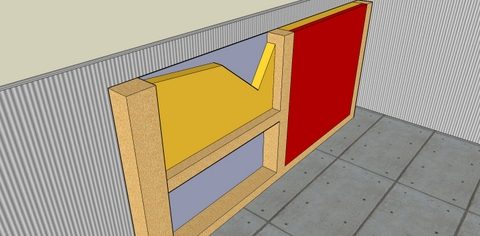
Walls will be the inside out design pictured.
I have finally found rigid fiberglass! at home hardware. Looks like it's been sitting there for about 8 years but I'm getting a good price on it.
The front and back of the room willl start at 2.6m height, angling up for a metre or so then platueing at 3.1m in the middle. I'm still working on this design.
Hi again,
The position/angle of the soffit is not working for me. The attached pic shows a 90dec soffit or a 60 dec, but the 60 dec will place the listening position will back in the room.
The 90 is perfect at the control desk but may cause some issues at the couch?
PS the dotted line shows the 38% from front mark.
I decided to go with 90 dec soffits.
I do 80% of my mixing with near or med fields anyway.
The outer frame is meant to be going up today, but it is pouring rain.
Not sure if the "crew" will be as willing to get wet as I am.
Being Melbourne the weather could change at any minute :cry:
Picof finished slab with LV and 249v Conduit.
The concrete guys didn't do the best job as far a smooth level finsh.
I will see how much this affects the framing in about a month.
Oh yeah i missed a step!
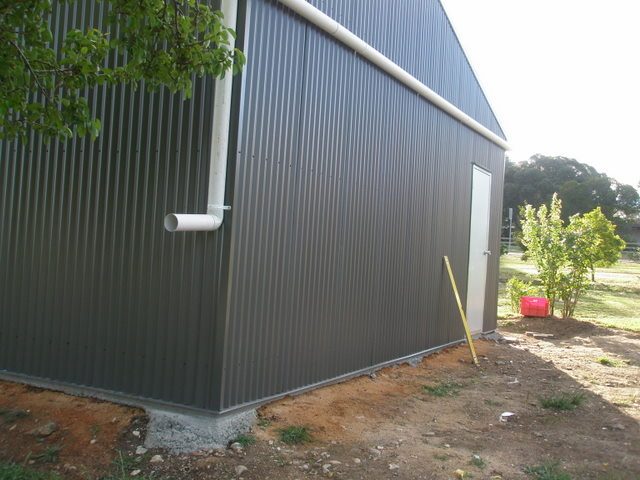
The outer frame is finished YAY!
Now this is not counted as a leaf as it is not airtight. But it is fully lined and insulated.
I am very happy with the sound attenuation. The street and wind noise almost halves when you walk in side.
G'day Lilith,
Your shed is looking good!
My shed, that will have a practice room built in it, has the frame up and is of a similar construction.
What did you use for lining and insulation against the corrugated iron?
Are you going to add mass to the inside of your external wall and use it as your outside leaf?
If so, then will you also add some bracing to provide rigidity?
Thanks,
Bert (who has now made his first post)
Bert- I don't think I can afford to line the steel frame but if I did I wouldn't need any bracing. This thing is so solid.
Under the roof I used 50mm sislation, designed for metal roofs to stop rain noise.
The walls I used incredibly thick builders paper. Only for heat.
Still going to deaden the walls with more 50m sislation.
Which brings me to my next question-
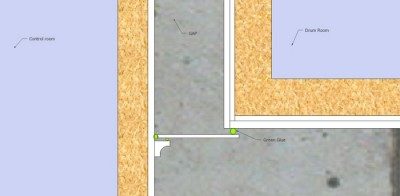
Is the any acceptable way to join two seperate leaves/frame??
Because neighbours are not an issue- I will not have an outer leaf. It is simply 3 free standing rooms.
But I don't want to have visable gaps between each room, as dust, cats and small or drunk people will only find there way in there.
I posted the question a few months ago titled " The GAP"
Any ideas- GG'd plasterboard with no screws? Glued carpet? A free standing screen?
lil
I don't know if that would work: the "glue" part of "green glue" is just a name. It isn't really meant to be used as glue. Plus, even if it did work, it looks like you are creating a seal in part of your "air". I have no idea what that would do acoustically, but it might not be beneficial...
How about if you just stretch some acoustic fabric across the gap, staple it place, and cover the staples with molding?
Hi Lil,
Just make it so the top piece of plasterboard covers the gap, to within 5-10mm. Use standard jointing tape to cover the corner, and remaining gap. This will not be a major path for sound to travel from one frame to the other, and will have a nice "finished" appearance...
There should be a guide on how to "mud and tape" corners (and all things plastering), maybe on the CSR site?
Hope this helps,
Geoff
Thanks guys,
Both sound like good plans.
Soundman- It won't upset the "air" as I will only cover the gap up above head height.
Ta!
More pics coming soon
I think I've been a bit scared to start such a big project so I'm taking baby steps.
Here's my 1st attempt at a cloud. I will us it in the control room as a test then move it above the drum kit.
Building a "Mark II" final version for the control.
Rather curious about that first photo, Lilith!!!! Chickens? Are they going to be part of the cloud too? :)
What's the coefficient of absorption for feather-filled bass traps, anyway? :)
(And I'm seriously wondering about the purpose of that axe right behind the birds.... Gulp! )
- Stuart -
PS. The cloud frame looks pretty neat, too! :)
So just a quick update-
After checking in with Sideshow and the details of his build, I have confirmed most details.
Here is the final wall construction for the control room.
The massive 120mm pine frame arrived the other day, I just need a free weekend!
Also a quick question?
I'm really liking the whole exposed beam idea in the drum room.
But I'm only doing a single wall construction so would this plan work?
either using sound board (corning 203) or fluffy insulation squashed inbetween the ceiling plasterboard and a additional plaster paqnel between the rafters?
dunno what you plan is but the picture, atleast, shows a 3-leaf.
Besides that, don't squash the wool. And yes it will work (add more mass than your drawing if possible) but you can do without the wool. Just add a few boards of mass to the existing ceiling.
It will not be as good as a second ceiling or closed up beams but it sure does make it LOOK way cooler! I'm planning on doing exactly the same, leave the beams exposed on purpose to make the room look cooler than it already is :)
IF isolation is a factor you can always add another ceiling later on.
Thanks Ro,
it's not a 3 leaf, that lower beam is just the top plate. Bad drawing sorry!
But that bring up a good point, I might not rest the ceiling on the the top plate but attach it flush with the walls.
What size beams are you going with for the ceiling?
Hi all,
I’ve been plodding along the best I can and here's an update.
I received the 120x 35 timber, 16mm firestop and I bought a case of “Fuller” fire sound sealant. $9.50 for a 450ml punters tube or $6 for a 650ml sausage !! So I obviously went with the sausage. Though the gun was a little expensive.
I began framing the short walls- 3720x2298 and 3720x2700 @ 600 centre (24oc)
Lifted them up into place to check size and square-ness! I’m really happy with how solid the 120mm is. Laid what I’m going to call the “hidden” frame back down (not accessible to plasterboard whilst standing) and began plastering. I’ve never done this before and won’t say that I did a very neat job but I hoping that will get better with each go. Tried to raise the wall again but wholly cow it got heavy fast!
Caulk all joins and frames.
Pics......