Awesome Geoff!!! There is such a great feeling when the glass finally goes in! You are doing a great job, and heading into the final turn before the home stretch! Keep it going!
Thanks guys!!
James, you and your son have done a great job, too. You must be so proud! - of the studio, I mean, haha
Lou, I'm still referring back to your build as I go. Fantastic job, and documentation!
Next on the list is the floor finish; hanging CR and booth doors; and mud and taping the last bits of plaster (drywall) that I've been putting off...
Thanks again,
Geoff
Hello again,
A bit has happened since the last update:
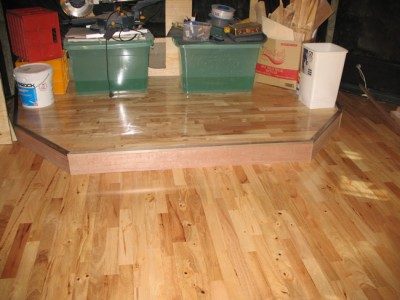
New floor... This is "Hevea" veneer faced "3 strip" floating floor style flooring, glued down. This species is quite soft, marks easily, but was the cheapest one! :D. All up, feels great to walk on, quite solid. Some "hollows" in the concrete needed 3mm of rubber sheet to make level.
So the floor consists of:
>15mm Hevea flooring
>SikaBond® T55 Timber Flooring Adhesive
>7mm MDF
>5mm Regupol recycled rubber underlay
>concrete
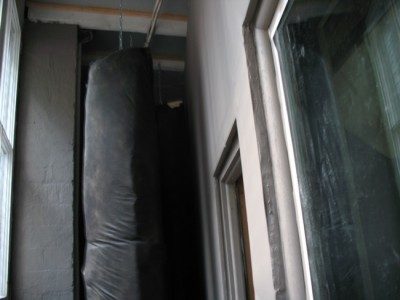
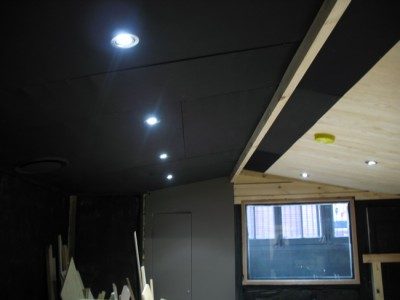
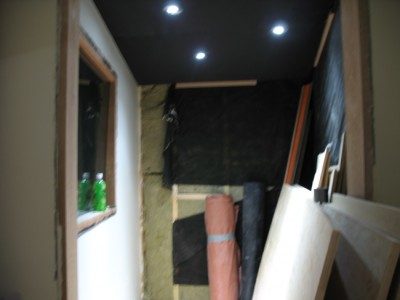
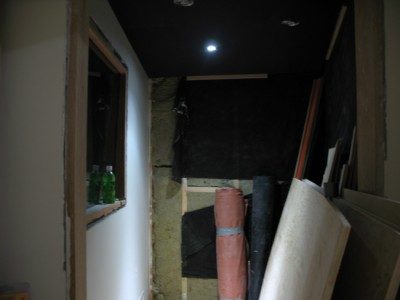
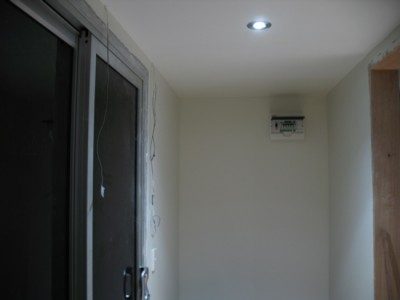
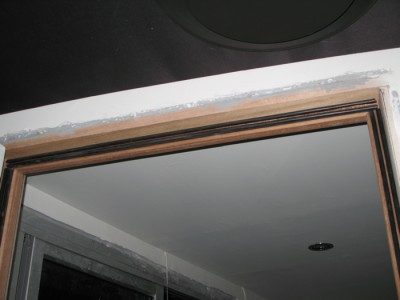
Booth and CR doors framed up, and fantastic new "commercial grade" sliding aluminium/glass(6mm) main entry door installed; Plaster/drywalled areas almost ready to paint :evil: .
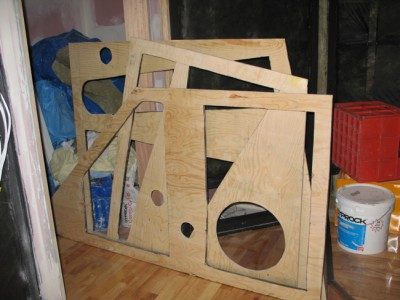
Also pictured are some frames for the fabric screens, cut from plywood, to fit the odd shaped parts of the ceiling. The round holes are for downlights, and ventilation ducts. Just have to visit Lou's build again before I start putting fabric on them...
Now I just wish my electrician would answer his phone!!! (He's still alive - I've seen his van around :lol: )
More to come, soon! Thanks guys,
GeoffFloor and couch riser.jpg
Thanks for the comment, Brien - so long ago!
Yes, the flooring was unpleasant - especially the glue, and the mineral turpentine required for clean-up.
Anyway, this week I got lights and power(!)
Separate meter for the studio. (Separate from the other offices etc.)
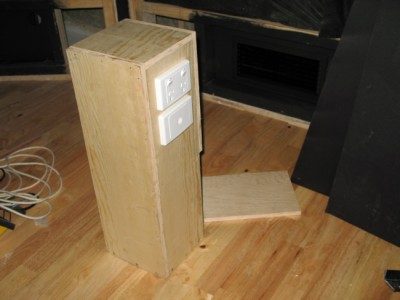
Sub-board in entry area (pictured below) with separate circuits for lights, utilities, and gear.
Power points star grounded.
Smoke detectors
LED lighting: 240v(mains) "GU10" type 10W (output?) with 3x "cool white" LED's per bulb.
Lights on gang-switches in various configurations.
I'm quite happy with the LED's - was a bit worried that they wouldn't be bright enough... Pretty sure I can read manuals etc. with ease, though they (the lights :wink: ) could possibly be fatiguing... too "artificial" perhaps?
Anyway, the advantages are many: very low heat (the holder gets hot to touch, but not enough to burn, or give me a tan like halogens - and my false ceilings are pretty low, too...)
Low energy usage.
Long bulb life - so hopefully the price of bulbs will have come down by the time these need replacing!!!
I took the "lights" shots without flash... so, a bit blurry in places.
Thanks for reading!
Geoff
Window area traps.jpgPower phone outlets.jpgMain room lighting.jpgbooth 3 LEDs.jpgbooth one LED.jpgEntry area w sub board.jpg
Hey all,
It's been a couple of months, so...
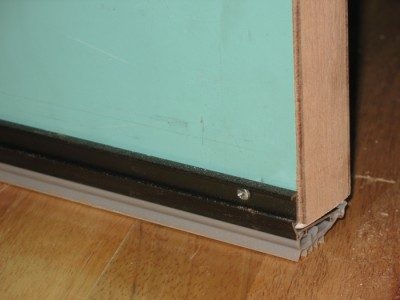
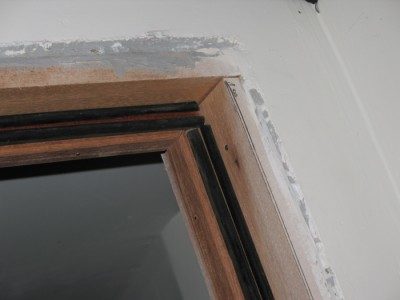
Here are some pics of my doors and seals. The seals are "p section" rubber, and weather seals from the hardware store under the doors. They seem to work nicely, with the entry area acting as an airlock. I hope to start making roomtune/TL measurements soon, with a Radioshack analogue meter and Room EQ Wizard.
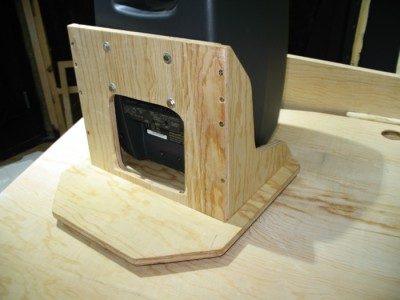
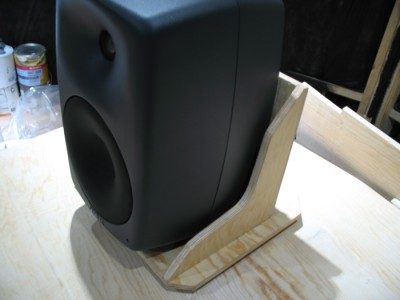
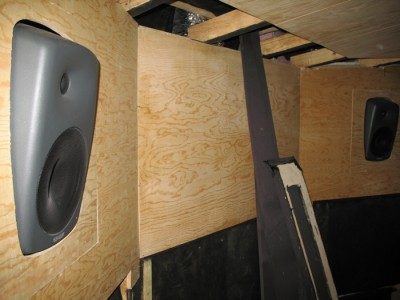
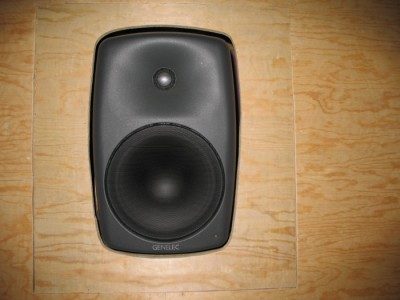
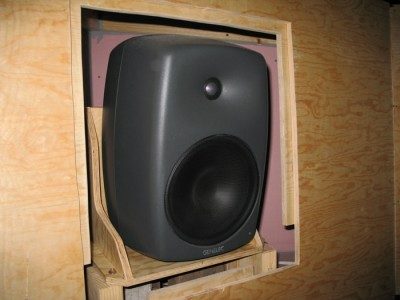
And my Genelec 8050A monitors... These are the monitors I ended up with (found a used pair for a good price) and can't wait to get them fired up (they sound great in my living room :wink: ).
I'm mounting them high, and tilted downward 9 degrees, to avoid the halfway between floor and ceiling. (Sketchup was great for working out the angle).
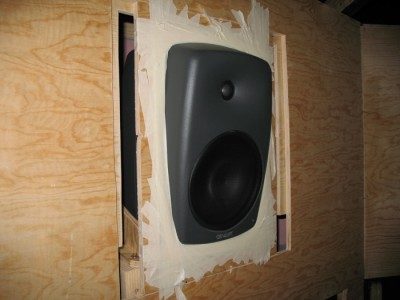
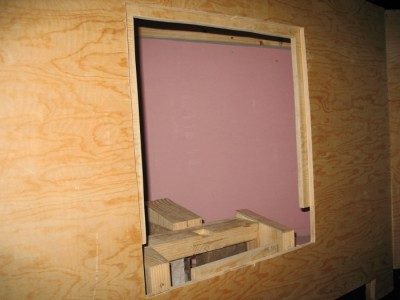
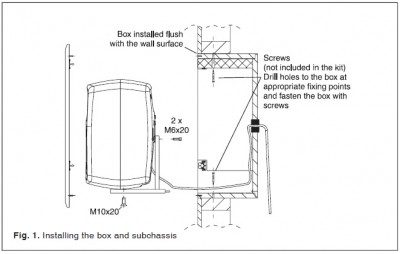
The pictures should show how I'm getting them "flush"... There will be a rubber seal between the monitors and front finish, with maple trim to cover that and my rather shaky jig-sawing.
I've built a desk and 2 equipment racks - pictures of those when they are again visible beneath the tools and junk.
Enjoy, and thanks for making this a sticky, too, John! I should post more updates...
Geoff
Genelec mount rear.jpgGenelec mount front.jpgDoor weather seal.jpgDoor seal.jpgDoor seal 1.jpg
Howdy, Geoff!
Great updated, keep on sharing.
Now, I'm not the monitor-flushing expert but I think you'd better tilt the whole panel 9decr to make them really "flush" with those great Genelecs. And how about the mass of the panels, how thick is it anyway?
Love to hear your ideas and/or design :)
(or did I already miss that.. :) )
Now, I'm not the monitor-flushing expert but I think you'd better tilt the whole panel 9decr to make them really "flush" with those great Genelecs. And how about the mass of the panels, how thick is it anyway?
Exactly right, Ro. Unfortunately, I didn't consider monitor height before building everything else :oops: . Now, there is no space in front [a window and door opening] or behind [monitors and air ducts] to tilt the front. Maybe in my next studio... (that is a sick kind of joke!! :lol: ). Hope others can learn from that at least.
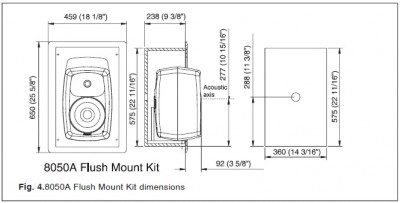
Anyway, the Genelec "flush mount kits" have the monitors protruding quite far (and are $500 each BTW!).
I did fire up the Genelecs after posting (couldn't resist!). Those front panels - 15mm plywood with some plasterboard pieces screwed, plus GG on the back - moved a bit with all the bass... is that normal? They are not connected except through the floor...
Had a listen outside the studio too, with monitors at a rather uncomfortable volume. There was some LF leakage from an air relief duct, and at the back wall, too. Generally happy with the results. Some more scientific tests to come...
Geoff
15mm plywood ain't a whole lotta mass... sure they will resonate on lower frequencies. And, yes, that might be a problem. Resonating panels make, humming/buzzing, noise. You want the critical frequency as low as possible. That means; stiff mass. Stiffness plays a role at lower frequencies. Concrete flushpanels, hello stu!, would be cool. I'd add some more mass to the already build panels. Perhaps some GB or MDF. How much noise does it make anyway....
I'd add some more mass to the already build panels. Perhaps some GB or MDF. How much noise does it make anyway....
That's a good idea, Ro. They didn't vibrate noticably with the monitors on, but they sound a bit like a drum if I "thump" them with the side of my fist. I have some plasterboard left-overs that I can use...
A couple of comments/suggestions:
It's not a matter of the speaker sticking out from the panel (which is what Genelec recommends anyway), but rather a matter that your speaker axis is not perpendicular to the panel.
I don't see why you could not tilt the entire panel to match the tilt of the speaker. From your photos it seems that there is plenty of room to do that. Just tilt the top forward by 9°. You seem to have room to do that.
I'm not 100% certain, but I suspect that your panel will not be totally effective at doing what you want it to do, since the way you built it means that it is not actually an infinite baffle, like it should be. In order to approximate an infinite baffle, the panel should be parallel to the front face of the speaker, and therefor perpendicular to the acoustic axis of the speaker. In your case, this isn't so. Your acoustic axis is offset by nine degrees (it looks like more than 9° from your photos, but that might be an optical illusion). I'm not exactly sure what effect that will have, since I don't recall ever reading any research done on non-perpendicular baffles, nor have I ever seen any successful studio with speakers mounted the way yours are. But I reckon whatever effect it does have will not be good, as different parts of any given sound wave will strike the panel at different times and distances, instead of all parts of the wave hitting it at the same time and same distance from the acoustic center. I suspect that this difference in timing and location will probably "steer" the wave reflection in some fashion, so that it does not propagate straight, and it wouldn't surprise me if that effect were to vary with frequency. I suspect that different tones would propagate in different directions, and do different things.
I don't have the time to sit down and figure it all out, but gut feeling tells me that a flush mount panel that is not perpendicular to the acoustic axis of the speaker, is not a good idea and will do strange things to your speaker acoustics. Maybe the effect is negligible, and maybe it is severe. I don't know. I hope André is around to comment on that: he will know for sure, and can tell you if your design will work or not. However, the fact that no successful studios that I'm aware of seem to be using your design tells me that there is something wrong with it.
The other thing that I do know for sure is that Ro is absolutely right: 15 mm of plywood is not massive enough or stiff enough to make for a good baffle. You need more mass, more stiffness, and more density if you want it to be a really good approximation of an infinite baffle. Concrete, thick steel, thick aluminium, HDF, thick glass, brick, and things like that will work well for flush mount baffle panels. Plywood will work too, if you make it thick enough, but 15 mm isn't that much. I think I'd double up on that if I were you, to get as much mass and stiffness in there as possible.
- Stuart -
I don't see why you could not tilt the entire panel to match the tilt of the speaker. From your photos it seems that there is plenty of room to do that. Just tilt the top forward by 9°. You seem to have room to do that.
it's not as simple as it looks Stuart.
8050_soffit_1.jpg8050_soffit_2.jpgGenelec don't appear to be using anything greater than 15mm (3/4") plywood in their drawings.
A couple of comments/suggestions:
It's not a matter of the speaker sticking out from the panel (which is what Genelec recommends anyway), but rather a matter that your speaker axis is not perpendicular to the panel.
I don't see why you could not tilt the entire panel to match the tilt of the speaker. From your photos it seems that there is plenty of room to do that. Just tilt the top forward by 9°. You seem to have room to do that.
- Stuart -
Good points Stuart. John is referring to the door directly left and the window to the booth at the right. Maybe if I tilt a large part of the panel (which would mean bringing the monitors forward too), then it would be a better continuation of the baffle... Will have another play in Sketchup.
Aah, what do they know about building speakers anyway :p
Haha. At least my homemade Genelec mounts look a bit stronger than theirs :)
On the question of my ...un-infinite baffle, I was thinking of another option - to just have cloth panels at the front, with plenty of absorption behind, and let the Genelecs do their thing...
Still, I'll try to tilt part of the front panels in Sketchup and post a picture of that. Many thanks for the suggestions and feedback so far!
Geoff
On the question of my ...un-infinite baffle, I was thinking of another option - to just have cloth panels at the front, with plenty of absorption behind, and let the Genelecs do their thing...
Hey Geoff.
But if you did that, then it would be a "zero baffle", not an "infinite baffle"! :)
In other words, it would not be a baffle at all. The idea behind an infinite baffle is to force the speaker to radiate into half-space, by preventing low frequency waves from "wrapping around" behind the speaker where they muddy up your bass response. By "low frequency" I mean any frequency whose wavelength is larger than the dimensions of the speaker's own baffle (front panel). In the case of the Genelecs, they aren't very large to start with, so a substantial part of your lows and mids can potentially wrap around behind and mess up your acoustics, and screw with your stereo imaging. Sure, Genelecs are specifically designed to minimize those effects (part of the concept of the rounded shape, IIRC), but it is still there. Since the company itself makes and promotes its flush mount kits, obviously they think that correct flush mounting is important to get the best performance out of their monitors. And "correct flush mounting" implies a large, flat, stiff, massive surface surrounding the speaker as an extension of the speaker's own baffle. Not a soft fluffy surface!
Surrounding the speaker with cloth and soft fluffy stuff is the exact opposite of what a baffle is intended to do. That will absorb some small fraction of the waves that wrap around behind, but selectively at the wrong frequencies. Absorption works best at high frequencies, where waves don't "wrap" very well anyway (since they are more directional). In order for it to work at low frequencies, it needs to be very thick. Even then, it is still the opposite of an infinite baffle, and does not work like one at all. The baffle forces all of the "wrap around" sound back into the room (which tightens up your low end and improves imaging), whereas absorption does not do that: it merely absorbs different frequencies by different amounts.
Don't get me wrong: just putting your speakers on massive decoupled stands with absorption on the walls behind them certainly is an option, and many people do that. But that's not the same as infinite baffle mounting. You'd be trying to combine the two totally different concepts into one by doing what you described above. I have no idea how it would work, acoustically, but I do know that it wouldn't be a soffit mount, and it wouldn't be an infinite baffle.
My suggestion (and take that for whatever you think it is worth! :) ) would be to stick with the concept of the flush mount infinite baffle, since you already have it mostly done, and just try to angle those panels as much as you can to get them more perpendicular to the acoustic axis. As someone else mentioned, you'd probably need to slide the speakers forwards a bit (towards the room), in order to maintain the correct depth of the speaker sticking out of the baffle, but that shouldn't be too hard to do (famous last words!).
Just my $ 0.02.
- Stuart -
Don't get me wrong: just putting your speakers on massive decoupled stands with absorption on the walls behind them certainly is an option, and many people do that. But that's not the same as infinite baffle mounting. You'd be trying to combine the two totally different concepts into one by doing what you described above. I have no idea how it would work, acoustically, but I do know that it wouldn't be a soffit mount, and it wouldn't be an infinite baffle.
My suggestion (and take that for whatever you think it is worth! :) ) would be to stick with the concept of the flush mount infinite baffle, since you already have it mostly done, and just try to angle those panels as much as you can to get them more perpendicular to the acoustic axis. As someone else mentioned, you'd probably need to slide the speakers forwards a bit (towards the room), in order to maintain the correct depth of the speaker sticking out of the baffle, but that shouldn't be too hard to do (famous last words!).
Yes Stuart, that last idea was to simply abandon the infinite baffle concept and just have them as if they were sitting on stands at the front of the room with absorption behind; with cloth panel surrounds to keep that "look".
But you're right, I'm most of the way there, and getting kinda used to cutting plywood in all sorts of whacky shapes :lol: so I'll give that a go (though, in Sketchup first :wink: ).
Geoff
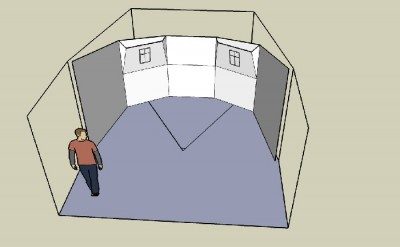
So I'm thinking something like this...
Not ideal, but more "flush" now.
Doesn't obstruct the door to the left of the monitors, or the window to the right.
Leaves the "ports" above the front finish as they are.
(The cross on the front of the monitors represents the acoustic axis as specified by Genelec.)
Let me know your thoughts, guys! Many thanks,
Geoff