Sounds like a good plan to me. The fiber-cement board is probably about double the density of drywall or plywood, so that's great. As long as you seal it well, that will work.
You could even build out the rest of the wall to the same level with thinner fiber-cement board, laid flat on the wall, then add new siding over all of it, to get it looking neat. That would help for your isolation, too.
That's good. It helps solve the issue around the electrical area at least.
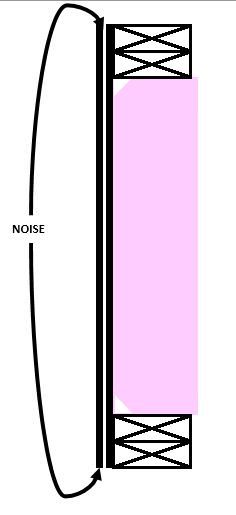
I have thought about just cladding the entire studio end of the building in a layer of siding in order to add mass, rather than working from inside. It's one of the options described in the GS thread. However, since there is no wrap or barrier on the building now, I would probably want to put Tyvek or something over the existing siding & then another layer of siding. But if I do that, sealing any air gaps between layers will be difficult because it will require sealant on both sides of the wrap (which would negate effectiveness of the wrap). So I could end up with a situation where noise gets in from the top & bottom:
Recovered from web.archive.org — originally hosted at https://i.imgur.com/JuDWJJR.jpgIn any case, I would still caulk all the stud bays and sill plates from inside -- so it will be airtight. I just don't know if the extra layer of mass on the exterior could be sealed effectively.
The patch over the electrical area technically would suffer from the same problem but on a smaller scale. I will have to see what the inside of the current patch looks like (about 2'x3' as pictured a few posts ago) once removed. It's just nailed & caulked on there.
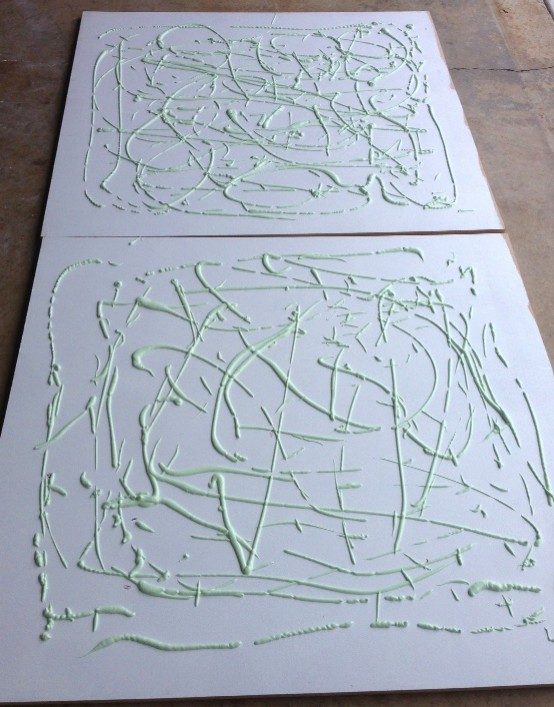
OK beefing up: The procedure is fairly simple: you just cut panels of some type of "mass", often drywall, to fit in between the studs of your outer-leaf, caulk around the edges, then hold them in place with cleats, nailed sideways into the studs. On your GS thread I saw you are concerned about moisture, and that's a valid concern. One option would be to use Green Glue between your existing outer-leaf and your beef-up panels. That would seal them joint fully air tight so no moisture would be able to get in, thus no condensation, and would also have acoustic benefits. Of course, it ain't cheap!
But I really can't see you having a problem, assuming that your garage is built properly, with a breathable moisture barrier on the outside (eg, Tyvek), and proper attention to water flow. The caulk seals the edges of the beef-up panels in place, and the cleats keep them held up tight against the existing leaf, so I don't see much opportunity for moisture to form in between. As long as you do your vapor barrier as required by local code, you should be fine.
I have the example from Rod's book, which makes perfect sense for an interior wall. But as mentioned in the GS thread, there is no barrier on the building currently. Just a single layer of siding, nothing else (other than the insulation and drywall which I am removing). This is probably code for this area since the building was built as a detached garage, not a living space.
The green glue sounds like a possibility. I assume the idea would be to eliminate any voids between layers? I'm not 100% sure but I think if the interior is warm and the exterior is cold, there would still be condensation potentially - on the interior face of the drywall, which would be touching the insulation. A GS user from Europe suggested it was common practice there to include a layer of foil placed between siding and drywall as a moisture barrier but gave no specifics. I would assume plastic could work there as well, or even Tyvek. But I really don't know -- and it would complicate the process of sealing the edges.
In the GS thread, I referenced another thread where someone had applied the beef-up with disastrous results. His OSB mass layers got wet & disintegrated inside the wall, weakening the siding and causing it bow outwards. He had to replace it all! I PMed him for details on how he resolved this but have not heard back.
My understanding is that I "should" be OK given that I apply a suitable vapor barrier at some point -- which would be the inner leaf. I don't have the design for that worked out and it will likely be some time before that gets built. I'm just trying to prepare by getting the outer leaf ready - and the insulation replaced before winter comes.
Just to reiterate, my main concern is not with rain penetration but with vapor condensation -- something that feels a bit like black magic to me. I've read a few articles where it seems like this rarely gets done correctly, even on modern buildings. So I find it easy to overthink. Easier when I consider my outer leaf will be permanently inaccessible once finished.
I'd love find someone local to consult with about this (purely the construction aspects, not the soundproofing). But siding, roofing & HVAC guys tend to work within the tight constraints of conventional construction. I want someone who really knows what they're talking about, not a best guess, which I have no shortage of myself. I'm not sure what other tradesperson I could ask about this.
OK, time for some updates. And another shout out to Stuart. It's getting pretty frustrating. Even a reply saying you are really really really busy right now but will have time in *** to continue working with me would be a start. The last time we had a two person discussion about this it was MARCH. The best face I can put on this is that my emails are going to spam or your PMs are still broken but it's getting harder to believe that.
So... I've been pushing ahead, working on the outer shell & trying to simplify by removing some windows.
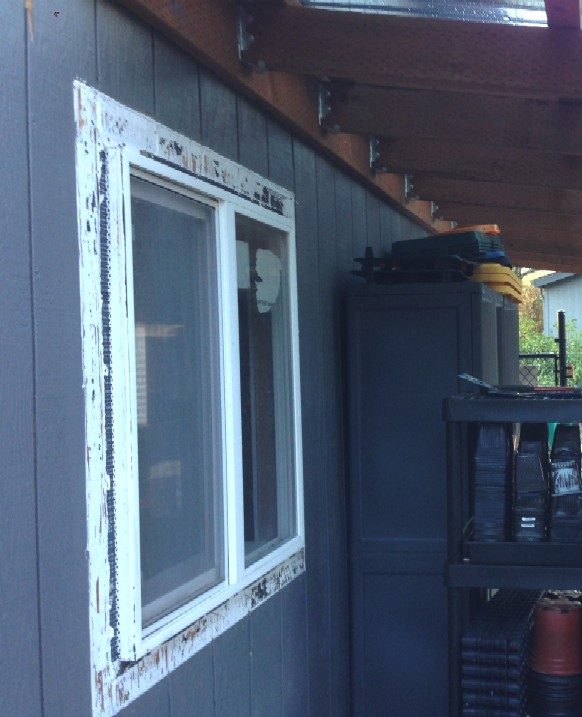
Here is one of the side windows with trim removed. I also built the lean-to shed in my "spare" time.
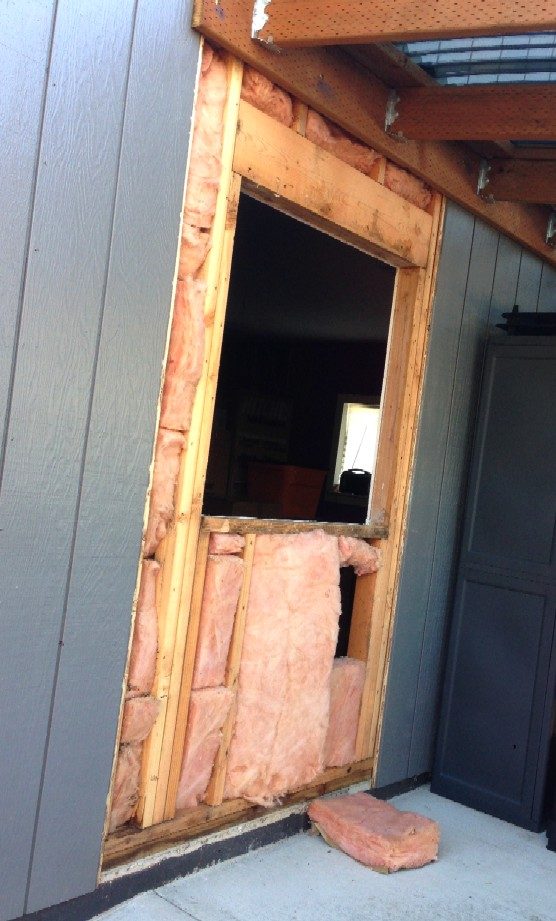
Recovered from web.archive.org — originally hosted at https://i.imgur.com/oIyG1Yp.jpgWindow out. All I had to do, framing wise, was add a couple 2x4s in line with the existing studs. I used pocket screws for better strength. In framing overall I prefer to use nails but when space is tight or the only way to fasten is with toe nailing, I prefer pocket screws. I never got the hang of toe nailing.
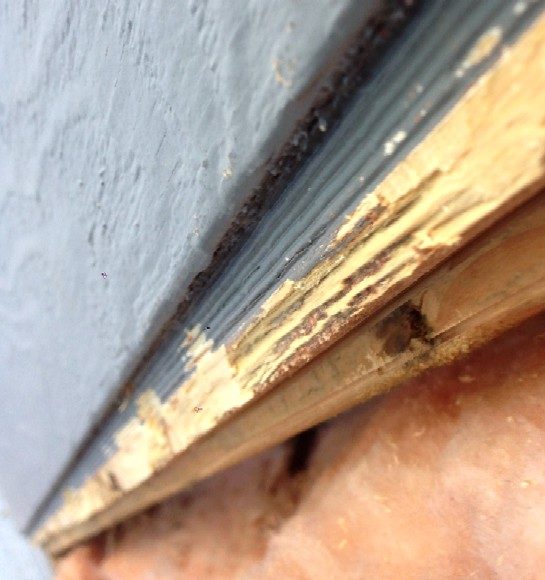
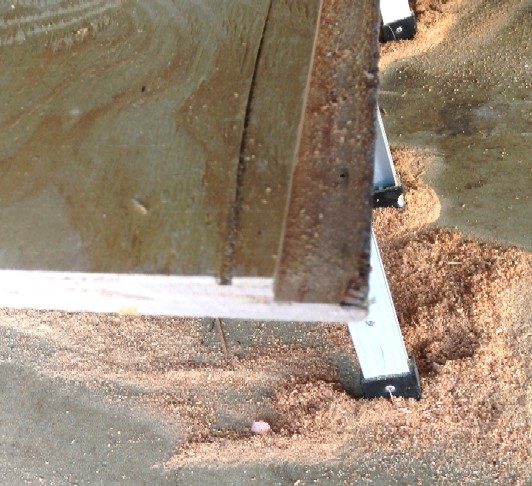
Recovered from web.archive.org — originally hosted at https://i.imgur.com/nuUXgF8.jpgRemoving this kind of siding can be tricky because it overlaps in 4' sheets. So it's hard not to remove one piece without destroying another. Plus you may end up removing 2 whole sheets when you only needed, maybe 4'. I got around this by cutting the siding about an 1/2" away from the grooves. Then I chipped the top layer of siding away and smoothed it out. This allows a custom piece of siding to lay over the gap, kind of like a hat. This way, you can make any size hole (8 inches at a time -- that's the distance between grooves). This was a bit of a pain but it wasn't all that bad compared to possibly removing way more siding than I needed to.
Here's an example of the existing siding. I did this on both sides. Normally I would have gone to the top but in this case, I had to work with the ledger board so I had cut the siding up there before putting the ledger board up.
Recovered from web.archive.org — originally hosted at https://i.imgur.com/sGlVOE3.jpgHere is the new siding. I used a router to make the lip about 1" on both sides. Again I think of it like a hat that lays over the old siding.
Recovered from web.archive.org — originally hosted at https://i.imgur.com/4dv2jsI.jpgThe overlap gets caulked and of course I will be caulking all this from the inside as well. The only other tricky part was getting the nails to go through studs. I don't know how siding people do this all day every day. Even after placing lines on the siding to tell me where the studs were, I still missed some.
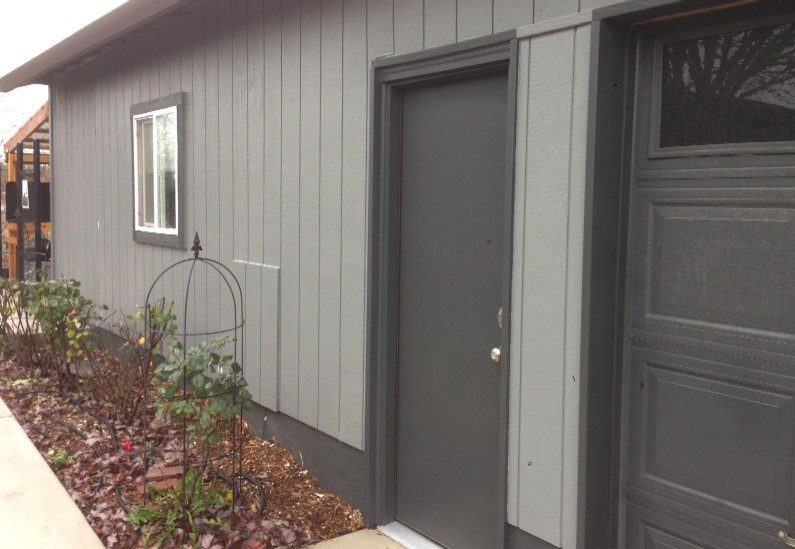
At this point I have removed two windows and a door from the room. Here you can see the old door is gone (down at the end). I shortened the garage door by 4 feet, then framed and added a new door next to it. This will be the only entrance to the building other than the lift door. The studio shell begins about halfway between the door and that patch of siding.
Recovered from web.archive.org — originally hosted at https://i.imgur.com/t8upvFl.jpgI guess it's been a really productive year. Though it still feels like I will never actually make music in here.
For those keeping up, I mentioned a few posts back that I wasn't sure what to do about the electrical panel (which is right near that patch of siding). I'm thinking I may have a way to move it to the outside of the studio, which would be great! The alternative was to build a narrow "super door" on the inner shell, just for access. While this can be done to code, it will be expensive and make it more difficult to treat the room. I also have about 6 holes in the frame where romex is passing through to the garage. Plus the ground wire is leaving a big air gap in the siding. It would be best if I could remove most of that and seal the holes. Though I plan to do most of the wiring it will still require an electrician to move the panel and reconnect the mains and ground. Electricians don't come cheap in this area. Or even come, half the time. More on this soon, I hope.
The last post was basically how I spent my summer and fall. Now I am finally working on the beef-up of the exterior. In my earlier post I was experiencing a lot of doubt about using drywall without sheathing or wrap. I had referenced a Gearslutz thread in which someone used several layers of OSB in their wall, only to have it rot a few years later. I never got more detail from him, which was unsettling. After a lot of reading & sending emails to the likes of Owens-Corning and Tyvek (which didn't help much), I finally came across a post by Rod explaining how vapor & condensation works in this context -- I feel pretty confident that it will be OK. Once the siding is caulked from the inside there should be no water intrusion. I found some gaps by the sill plate (near that ground wire I mentioned previously) and the siding was a little dark around there -- not from water but from moisture I'm sure. I've since nailed the siding down better and caulked it well. I still need to figure out what to do with the ground wire.
The point being that I think once everything is sealed and there is insulation up, then an air gap, then another wall with insulation AND a vapor barrier, there should be a really good sized thermal break between the warm side and the cold side. Plus, as I understand it, drywall and plywood are pretty good at passing any vapor that should present itself, rather than trapping it. I hope I'm right.
So here is a pic of the beef-up, in progress.
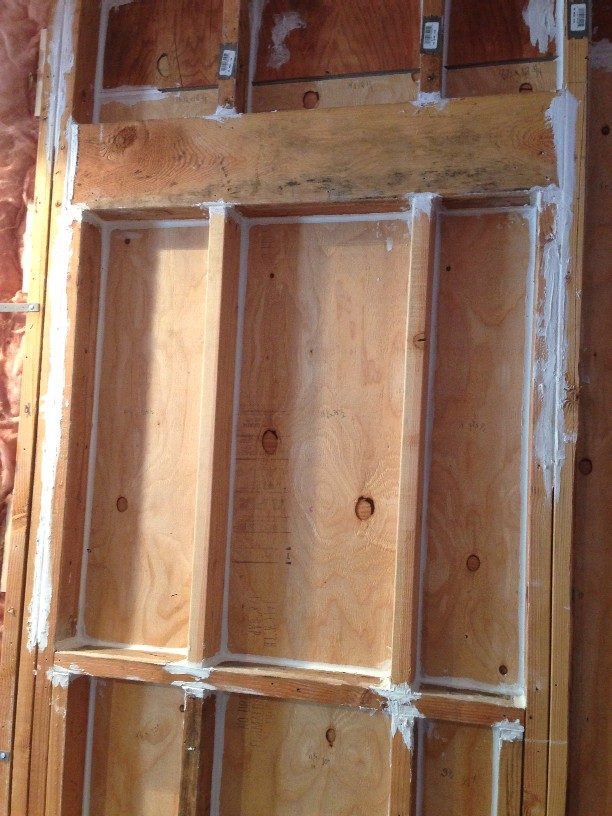
Recovered from web.archive.org — originally hosted at https://i.imgur.com/BAhOe9d.jpgOne thing that troubles me is the use of cleats. I've been reusing the old drywall and, so far, due to pieces not being perfectly square & straight, I end up with gaps around the drywall between 1/8" and 1/2". I have a variety of backer rod sizes so that shouldn't be a problem. I'm using liberal amounts of SC-175 to caulk the edges.
I've been using scrap blocks of 1x wood (AFTER the caulk) to keep the drywall tight against the wall. But I'm not using full length pieces that cover all edges. I'm confident the drywall is secure but I'm thinking there isn't much mass around the perimeter. It's just a thin layer of caulk.
Is this a valid concern? Or is the point really to stiffen the wall to limit flexing and also make it completely airtight?
Any suggestions on this would be appreciated. I'm planning on doing more of this today. If it is wise to cover the perimeter with cleats, it would stand to reason that (yet) another round of caulking would be needed as well -- to bond the mass of the cleats to the mass of the drywall. This seems like overkill to me & Rod never went to that level of detail. It's really easy to overthink this because I've learned rule #1 with soundproofing is that what sounds like a good idea may be a bad idea -- and things that seem unimportant can be crucial.
The last post was basically how I spent my summer and fall. Now I am finally working on the beef-up of the exterior.
Good work!
I've been using scrap blocks of 1x wood (AFTER the caulk) to keep the drywall tight against the wall. But I'm not using full length pieces that cover all edges. I'm confident the drywall is secure but I'm thinking there isn't much mass around the perimeter. It's just a thin layer of caulk.
Typically, I think people put up cleats to press the drywall firmly against the material behind it. Then they will caulk the entire perimeter excluding the cleat areas. Then, after the caulk cures, they move the cleats to an already caulked area and then apply caulk to the areas the cleats originally were. This ensures that the drywall is pressed firmly against the other material.
Also, regarding your comment about "just a thin layer of caulk" -- caulk has ~ twice the surface density that drywall has. This means that if you are using 1/2" drywall, you need to do your best to ensure you've applied at least 1/4" bead of caulk. Using backer rod to fill the first half of the void depth will then allow you to fill the rest with caulk and maintain your surface density. Personally, unless the gap is quite large, I avoid using backer rod because it is expensive and takes a very long time and a lot of effort to install.
Greg
Thanks for the reply. So if what you're saying is true, I should be OK. It stands to reason because, if the cleats were meant to add mass, they really would have to cover 100% of the perimeter and probably be caulked as well.
So far, I've found that once I get the rod installed, the drywall stays in place by itself. I can caulk the whole thing & work it in, then just press the cleats in tight and nail them in. I put a temporary shim on the bottom and then rod/caulk that the next day.
I think what I need to do is just lay the caulk on really thick so I can get that bead (I'm using 5/8" drywall so 1/4"+ at least). I had a few gaps that were too big for 1/2" rod, so I used 5/8" It made the rod stick out more than normal, which made the bead thinner. I went back and laid another bead over the top so hopefully I'm good.
I've always understood the rod serves two purposes. One, to allow the caulk bead to take on an hourglass shape so that it holds up longer with minimal shrinking or cracking. It also keeps you from using too much caulk. I would need about 2x the amount of caulk if I didn't use rod. So I'd have a bit more mass but more risk of cracking due to the frame expanding and contracting.
I can get 350' of 3/8" rod at my local big box for $27. That's $.08 per foot.
I can get a 12 pack of SC-175 for $78, or $6.50 per tube. I can make a tube last roughly 1.5 stud bays, or about 25'. $.26 per foot. It would be closer to $.50 per foot if I didn't use rod. That's how it works out for me at least.
It also keeps you from using too much caulk. I would need about 2x the amount of caulk if I didn't use rod. So I'd have a bit more mass but more risk of cracking due to the frame expanding and contracting.
Right. There's no harm in using too much caulk, as long as you use the type that does not shrink at all, and does not crack. The issue, as you say, is cost. Caulk is about twice the density of drywall, so as long as your caulk is at least half the thickness of the drywall, you still have the same surface density across the entire leaf.
- Stuart -
Time for another update, or, how I spent my Spring...
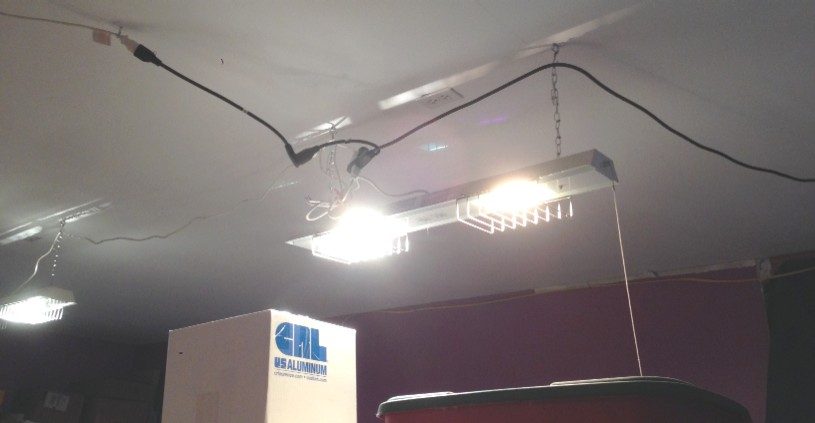
Not very dramatic but this is a pic after finally cutting the lighting circuit in the room. I ran extension cords to all the lights in the room and wired up a temporary box in the corner on another circuit. Later this year I'll be removing those receptacles, patching the holes and adding another layer of drywall to this ceiling (which is the outer leaf).
Recovered from web.archive.org — originally hosted at https://i.imgur.com/p0u0H8L.jpgFor the most part, it's been about the beefing up -- a very slow process. This one of the removed windows, after being framed in with new siding and caulking underway. The window and doors take so much longer due to the extra pieces of drywall needing to go in smaller spaces.
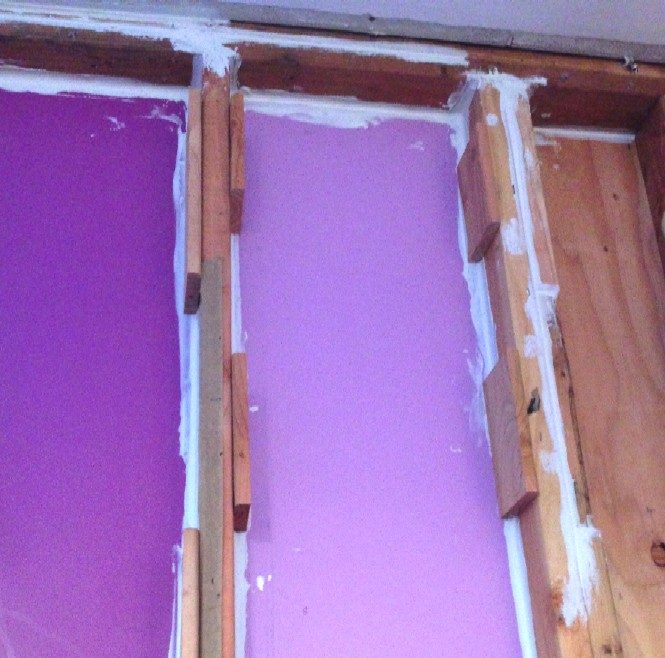
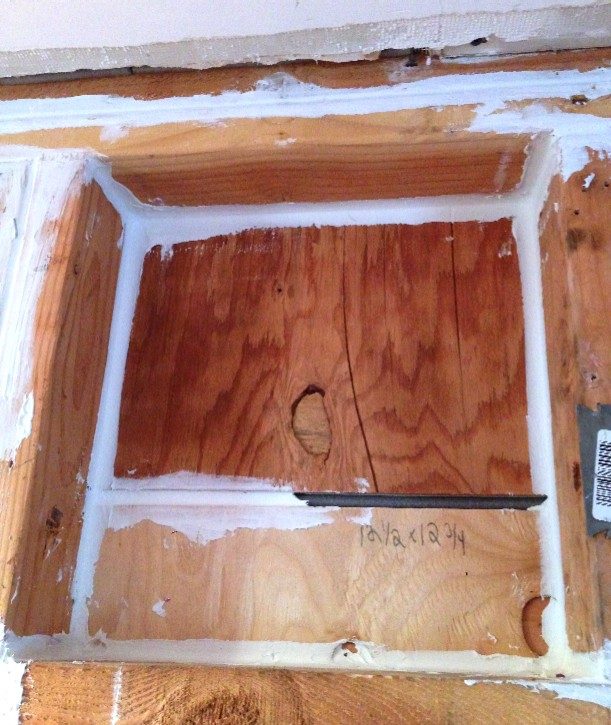
Recovered from web.archive.org — originally hosted at https://i.imgur.com/Hp94Ds2.jpgHere's an example of an area above one of the removed windows. This is after removing the drywall & insulation, then cleaning up the space and caulking the framing. Here you can see the new piece of siding butting up to the old one. I also recently discovered it helps to write the dimensions in each space so I don't have to keep re-measuring. I just measure exactly & then remove 1/4" from each edge.
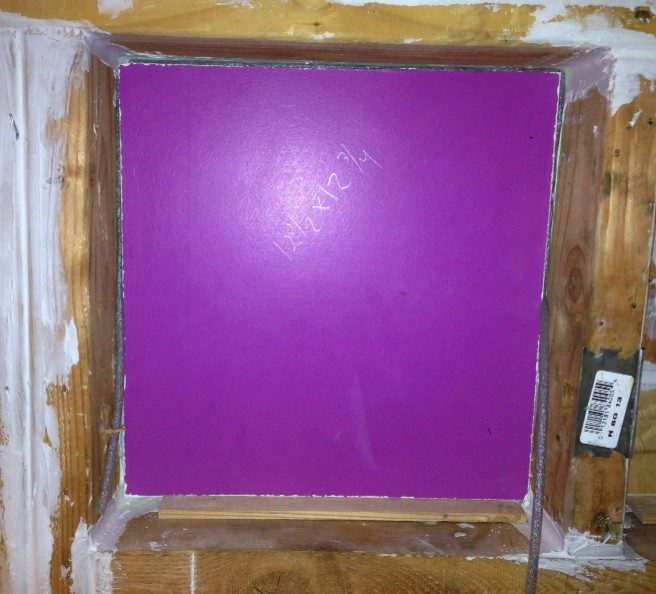
Recovered from web.archive.org — originally hosted at https://i.imgur.com/6qC2pL9.jpgNow with the drywall and some backer rod.
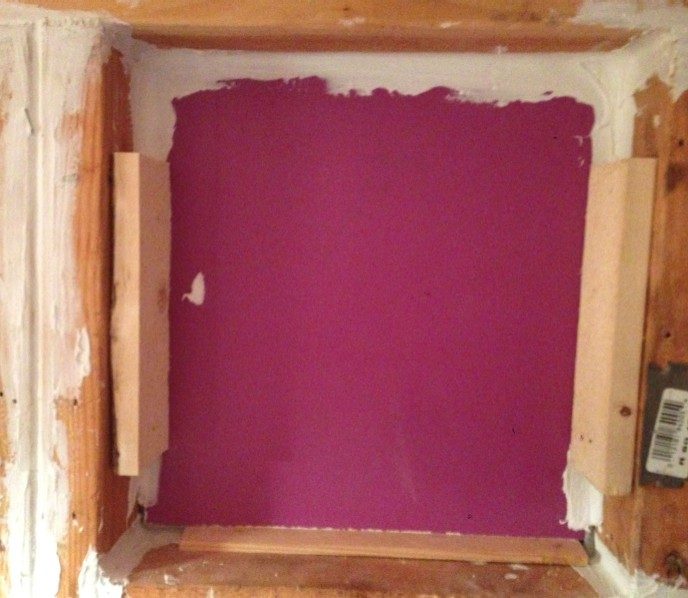
Recovered from web.archive.org — originally hosted at https://i.imgur.com/a8xJKoA.jpgCaulked in place with the cleats. There is still a spacer on the bottom. I typically come back the next day to fill those in.
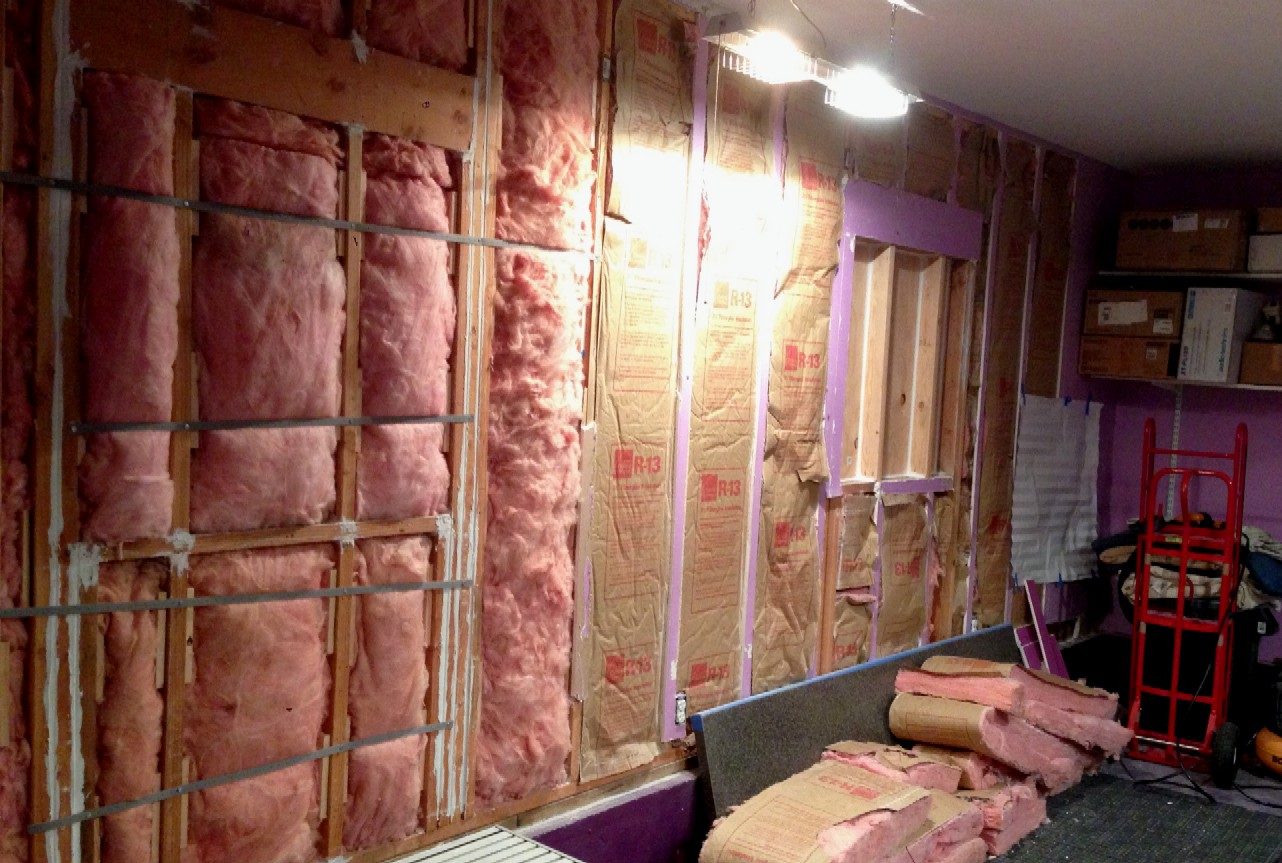
Recovered from web.archive.org — originally hosted at https://i.imgur.com/NFEG5oP.jpgHere's an entire wall in various states of progress. I added strapping to hold up the insulation. Not sure if I mentioned this but all the paper has been removed since I will have a proper vapor barrier on the inner leaf.
Recovered from web.archive.org — originally hosted at https://i.imgur.com/Ta21YpF.jpgAt this point I'm about 60% done with the wall beefup...
More to come...
Good work! The beef up and boxing in outer leaf crap is a nightmare. It feels like I'm never going to finish. You're right about all of the little pieces you need to add to ensure your surface density is consistent everywhere. Thanks for sharing the pictures!
Greg
You're right, it does seem to take forever. The inner leaf build seems like it will never happen, but maybe it doesn't take as long.
Here are a few more updates.
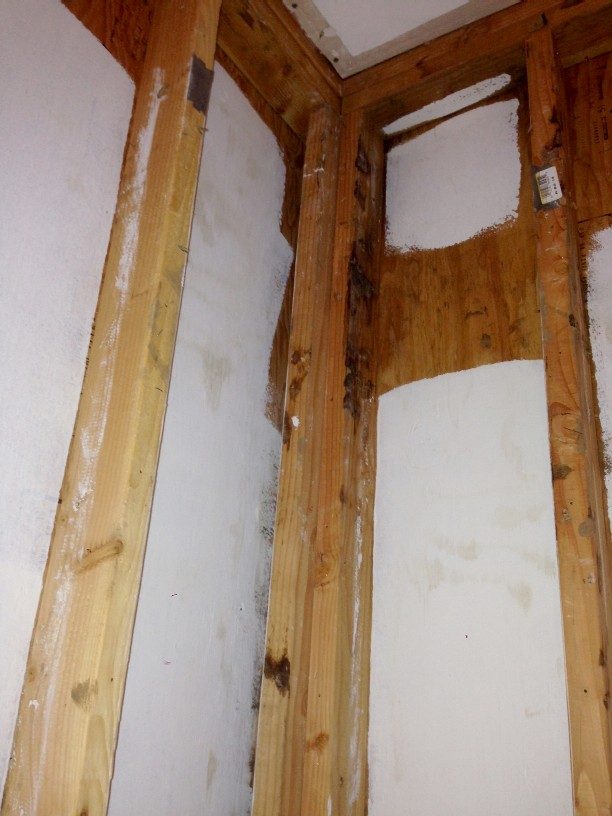
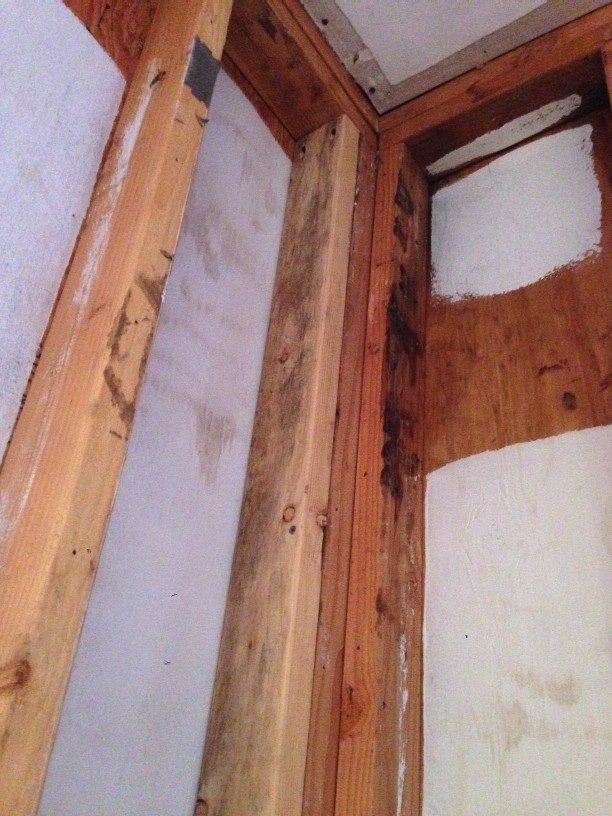
One other detail on the beefup -- When I got to the back wall, I noticed some moisture damage and/or mold. I think it is due to a couple factors. One is from old paint on the exterior. The other from loose nails in the siding and general gaps, mainly at the bottom. The building has since been painted and of course I will be caulking everything from the inside. So hopefully this won't be coming back. The wood itself feels solid & the drywall was fine. I put some Kilz primer over the discoloration -- it's supposed to help kill any leftover mold or mildew. This pic shows that, along with a corner that proved to be difficult. I think it's what framers call a California Corner -- which uses less wood. It's kind of hard to see but if you look at the top plate where the studs meet you can see there is about a 2" void running down the entire wall. There was no way I was going to get caulk inside that gap.
Recovered from web.archive.org — originally hosted at https://i.imgur.com/qzPLw2i.jpgThe solution was to just fill the gap with insulation & cover it with a 2x4, then caulk it. So there's a tiny 3rd leaf situation in this corner, don't tell anyone...
Recovered from web.archive.org — originally hosted at https://i.imgur.com/5kcAcon.jpg
Some other things happened beyond the beefup...
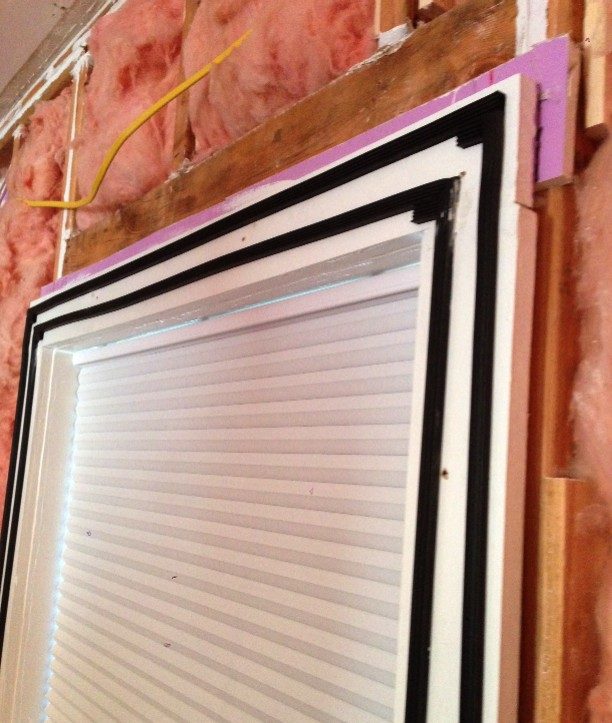
Here is a window plug made from one layer of 3/4" MDF and one layer of OSB I had laying around. It weighs significantly more than the existing beefed up wall. I used green glue between the layers after priming for better adhesion. Mainly I just didn't want the GG to soak into the OSB & possibly de-laminate it.
Recovered from web.archive.org — originally hosted at https://i.imgur.com/AjtgsAq.jpgHere's one of the windows. I stripped it down to the frame, got everything caulked so I knew it was sealed, then built up the surface so I'd have something to press against. I don't expect I'll ever take this out unless the window gets broken.
Then I used some marine grade weather stripping to make the seal. This is EPDM rubber which I think makes a really good seal. But... I didn't realize until later that it's really hard to glue together. So I had to buy some special super glue to seal the corners together and make it airtight. I put an extra square in each corner for reinforcement. The plug is attached with a series of screws around the perimeter (between the seals). I plan on doing the other window the same way.
Recovered from web.archive.org — originally hosted at https://i.imgur.com/LSjklC3.jpgJust FYI, for the inner leaf, I plan to have two plugs & will open them once in a while to check on moisture between the walls with a meter. I don't expect any but since I have a non-standard exterior (no house wrap or sheathing), I just want to have something in place to check. If I have a slight problem I can run a fan into one window and out the other once in a while. If I have a big problem I may have to consider adding house wrap and another layer of siding, which I really hope is not necessary.
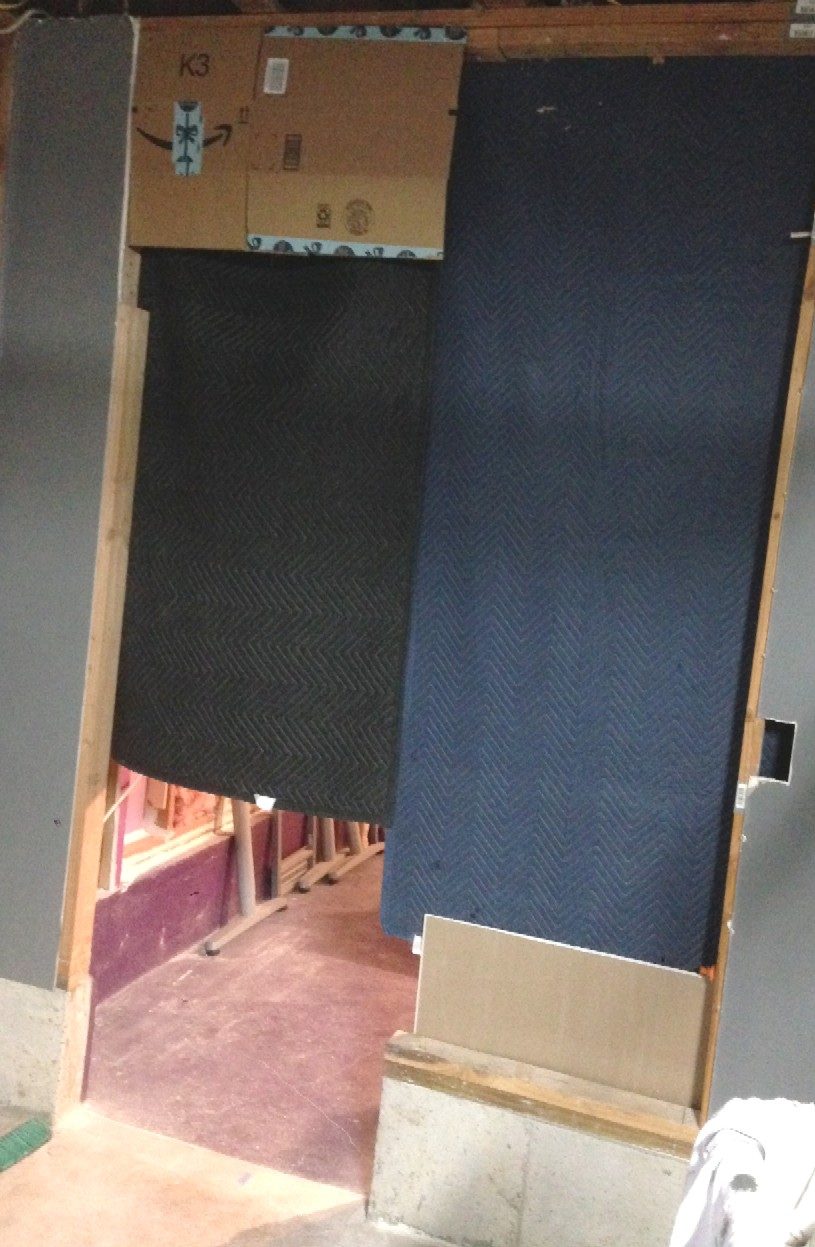
The door. I decided to move the door away from the corner for two reasons. One, to make room in the corner for acoustic treatment. The corners are most important and I wanted to maintain symmetry in the room. The other is to make room for the electrical panel I'm trying to move outside the studio. More on that in a bit.
Here's the doorway looking into the studio with framing removed. I had a guy come out with a concrete cutter to remove that piece of stem wall.
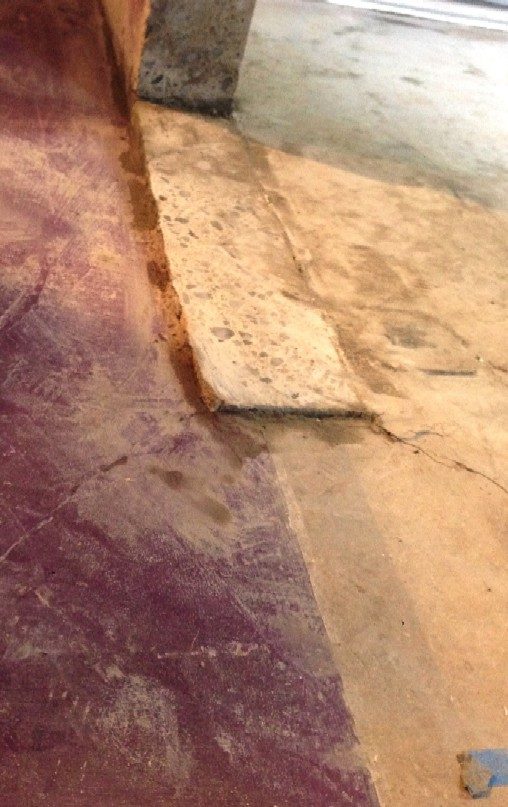
Recovered from web.archive.org — originally hosted at https://i.imgur.com/5AjQb9c.jpgOne might expect that the concrete between the two sides of the wall was perfectly level, but that person would be wrong. So now I have this situation, where it's pretty much flush on the right, but not on the left:
Recovered from web.archive.org — originally hosted at https://i.imgur.com/lOrhu22.jpgAfter some research, what I plan to do is use a chipping hammer to get rid of this concrete, then something like Quikcrete to create a level surface for a door threshold. Kind of a pain but what isn't?
Last but not least, the panel. I finally found an electrician who seemed to understand what I want to do and won't charge me an arm and a leg to do it. Just an arm.
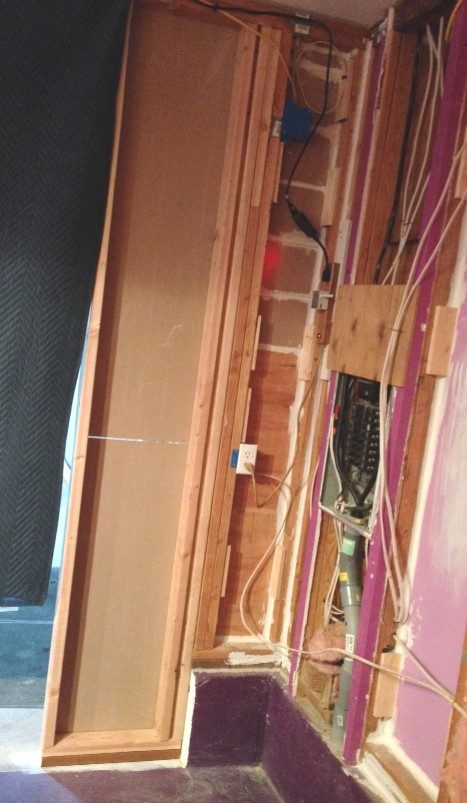
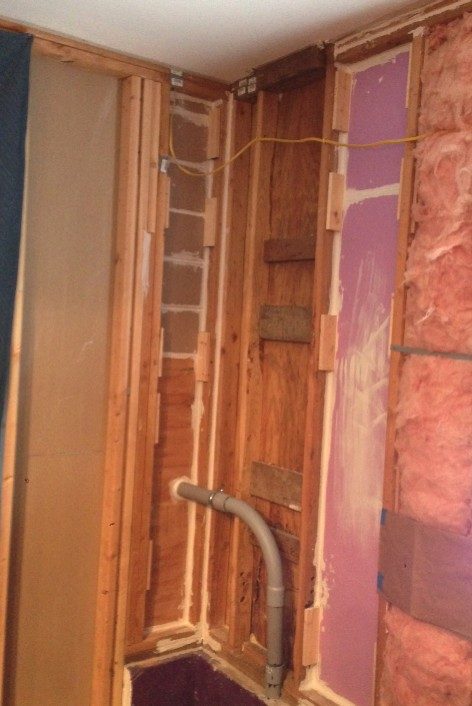
So here is the existing panel on the inside of the studio. It's kind of a rat's nest with the drywall removed and my temporary wiring. You can also see the new bit of wall I put up as part of the door move.
Recovered from web.archive.org — originally hosted at https://i.imgur.com/gQ11YXv.jpgThe feeder cables come up through the foundation in that conduit. They are only so long and can't be extended. So we're planning to re-route the conduit directly into the other corner. I got a new panel which will be inverted and installed on the other side of the wall. It will be lower to accommodate the feeder. My main concern is how well I'll be able to get some mass into the conduit to maintain isolation. Worst case I might have to build a little MDF box around the conduit once this is done. We'll also be running a new ground from the new panel through the wall. So I'll finally be able to access this corner and seal it all up!
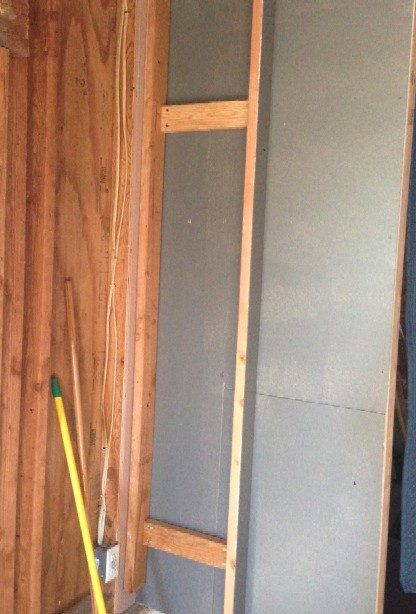
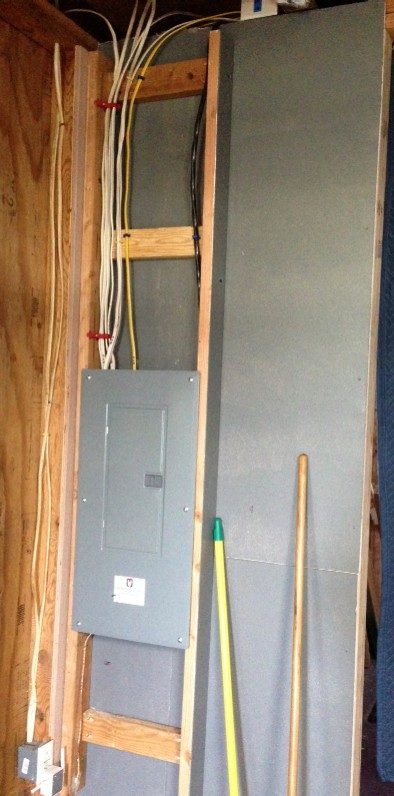
Here is the other side of the wall. I built a fake "stud bay" to make room for the new panel and wiring. I still need to remove the bottom piece of drywall so I can make alterations to this wall. Why? Because I still don't have the exact dimensions necessary for the new door. I'm still working on the design. The door guy I spoke too has proven to be flaky like just about everyone else out here. I may have to build the door frame from scratch.
Recovered from web.archive.org — originally hosted at https://i.imgur.com/Zye0CKA.jpgFor this summer I'm hoping to finish the wall beefup and door, at least. I'd also like to get a basic HVAC system (baffles and fresh air to be retrofitted later) because it gets hot in here! That's all for now...
Good work! Are you windows maintaining the surface density of your leaves?
Sealing up your conduit: you could build boxes like you said, but stuffing insulation down the conduit and using a crap load of caulk in them should do the trick (as long as the caulk is below the concrete).
Greg
Good work! Are you windows maintaining the surface density of your leaves?
Yes, each plug is more dense than the surrounding wall will be. I feel pretty good about the seals except for possibly the bottom edge. I may need to wedge something in there to hold it tight.
Sealing up your conduit: you could build boxes like you said, but stuffing insulation down the conduit and using a crap load of caulk in them should do the trick (as long as the caulk is below the concrete).
I'm not too worried about the foundation side. It disappears into the concrete and then goes underground. So there's no chance of sound getting in from that side. I'm more concerned about the other side, the one going through the wall. I'll send a pic of what I did in the next post.
Great news, I finally got the panel moved! This was a bigger deal than it should have been. But I'm stoked that I can finally beef up this corner of the room and don't have to make special arrangements for an extra door, not to mention the difficulty in placing bass traps here.
This is the wall, all cleaned up. The conduit should not interfere with the inner leaf wall once it goes up. Other than beefing up, I just need to fill the holes in the top plate used to pass wiring through. I will keep a few in order to wire up the studio and there is one circuit (visible) running to the outside of the building. But those holes can be caulked easily.
Recovered from web.archive.org — originally hosted at https://i.imgur.com/v4mFDqV.jpgHere is the new panel on the other side of the wall. I'll do another post on how I sealed up the conduit. I'm not 100% sure it was enough but we'll see. I also got a new & modern ground out of the deal. Two bonded rods instead of one!
Recovered from web.archive.org — originally hosted at https://i.imgur.com/SJOiUSC.jpg
It depends on whether I effectively sealed the output side or not. I need to take the panel cover off and take a pic so you guys can weigh in. I beefed up that part of the wall with 3/4" siding so it's a little more sturdy and dense than the rest. Mainly so it makes the "tunnel" a little longer for that big hole. So with the outside of the hole caulked and the inside filled with putty, not to mention 3 dense pieces of cable, it should be pretty well sealed.
Again on the inlet side the conduit is separated by concrete from the outside world, then it goes underground. So as long as both ends are sealed, a box should not be necessary.
OK, Stuart. Last attempt. I haven't heard from you since April 25th. Remember I'm that guy who you did this to last year? The guy who asked for his down payment back and instead agreed to give you another chance to deliver something tangible?
Please get back to me. This is beyond ridiculous.