Help with Planning & Building of my Recording Studio

Started by Studio45 on 3 February 2016. 144 replies, 2016–2022. In the Library under Build diaries. Key posts in this thread.

Originally posted at johnlsayers.com, topic 20384.

I apologize for not wording it properly. I should have used wall instead of leaf...I keep thinking they're the same but I understand that the leaf is only a surface. I should have said the inside of the outer wall.
I think we use the term leaf kind of loosely around here. I personally use the term to refer to the wall assembly as a whole. The way I see it, the "leaf" consists of the framing and the sheathing.
If I understand correctly the vapor barrier has to be in contact with the inner leaf (for either single or double wall construction) correct?
This is weird to word, but I think you get it. Let me try and word it this way: For a wall that is at the perimeter of a home you need the vapour barrier tight up against the cold side of the drywall that is inside of the home. :-| For inside out ceilings, that also applies to your ceiling skeleton lumber.
So if I end up building my slopped ceilings or walls normally (not inside out), then my vapor barrier would need to be on the studs inside the room and the double drywall (inner leaf) would go directly over it right?
Correct.
Im curious though...wouldn't building say an inside out room be harder to heat that inner leaf? I only say this because the inner leaf would be "hidden" under/behind the insulation.
Sure the sheathing won't be as warm as if it were exposed directly to the super warm room, but I think the difference on both sides of the vapour barrier is what makes it work.
I won't lie...finding out all of this really sucks haha. Just when I thought things were going smoothly... :( Oh well....part of the adventure I guess lol This basically means I need to remove all the enermax panels in that room.
There is a reason one of the few smilies on the forum is :horse: Let me put it this way though -- aren't you glad you learned this now before you built your room and had to tear it all down because of mold?!!
Ok, so all this has me thinking what this means for my HVAC ducts. The original plan was to run everything in between the inner and outer walls. Does this change anything the fact that the ducts will be behind the vapor barrier? I was planning on having all ducts surrounded in roxull insulation so I suppose the colder area in between the walls wouldn't be that bad if the ducts are insulated on the outside.
The entire cavity between your outer leaf sheathing an your inner leaf sheathing (where your ducts run) should be filled with insulation. This insulation will keep your duct work insulated from the brutal Ontario cold! That's what matters.
Got it! The vapor barrier would still need to be directly against the insulation right? no air gaps anywhere?
Ideally.
I have a few questions regarding how to properly calculate the density of my outer leaf (referring to Fc=c[(m1+m2)/(m1m2d]^.5) My outer wall composition of the roof is: Asphalt Shingles (2 layers) -> 1//2" OSB Sheathing -> 18" open roof truss. Question is do I include the Asphalt Shingle as part of the density of my outer leaf? or is the OSB the only material surface I should use? I'm wondering the same about my outer walls. The composition is 3/4" Pine Board & Batten siding -> 1x3 furring strip -> House Wrap -> 1/2" OSB Sheathing -> 2x6 stud wall. Do I just use the sheathing or the pine siding should be part of it?
Since the shingles and siding have gaps and aren't completely fixed to the sheathing, I personally wouldn't count it in your leaf surface density.
I really hope to be able to pay it forward someday!
Francis, I have learned so much on this forum. Of course as you learn something, it typically opens up more curiosity and then you have more questions. There are some great books out there such as this one that is very well written: http://www.roletech.net/books/HandbookAcoustics.pdf I'd suggest reading it and others in your spare time and then try to be active on the forum helping people when you can. There are always new users that have questions you can answer. I feel that you are far along on your studio design journey and are more than capable of helping others on here. Having more contributing forum members is a great help for guys like Stuart and I that try to assist people every day! Greg
Thanks for the quick response Greg!
Since the shingles and siding have gaps and aren't completely fixed to the sheathing, I personally wouldn't count it in your leaf surface density.
Thanks! I've calculated everything and I guess I'm somewhat happy with the results...sort of. Assuming that I'm only using the OSB as the density of my walls and roof here are my MSM calculations for each individual composition: Ceilings (Inside Out): 16Hz Composition: Shingles (2 layers) -> OSB 5/8" -> 18" roof-truss -> 33" gap -> vapor-barrier -> double 5/8" drywall) -> 2x6 inner wall rafter (insulated) Side-Ceilings/Wall (Inside Out): 26Hz Composition: Shingles (2 layers) -> OSB 5/8" -> 18" roof-truss -> 2" gap -> vapor-barrier -> double 5/8" drywall) -> 2x6 inner wall rafter (insulated) Front/Back Walls Exterior Walls (Normal): 30hz Composition: OSB 5/8" -> 2x6" stud wall -> 4" gap -> 2x6 stud wall -> vapor-barrier -> double 5/8" drywall) Interior Walls Between CR and LR (Inside Out in CR only): 22hz Composition: 2x6" stud wall -> double 5/8" drywall -> vapor-barrier -> 11" gap -> 2x6 stud wall -> vapor-barrier -> double 5/8" drywall) As you can see @ 30hz the Front and Back Exterior Walls of the room is my limit in terms of isolation. While I was hoping for better numbers I suppose that's good enough since I already know that my floor is the worst of the worst. Speaking of the floor, it's just a basic non-MSM 2 leaf wooden floor. [1/2" drywall -> 14" open-joist (spray foam insulation) -> 5/8" AdvanTech OSB Sheathing). I wondering I should be doing the same calculations? Can I still use the same formula for this type of floor structure? I've mentioned before that the plan for my floor is to build a damped deck style of floor in both rooms. 1-2" rigid insulation -> 3/4" MDF -> GG -> 3/4" OSB -> 3/4" Hardwood or Laminated
The entire cavity between your outer leaf sheathing an your inner leaf sheathing (where your ducts run) should be filled with insulation. This insulation will keep your duct work insulated from the brutal Ontario cold! That's what matters.
Ok! This is good news! I was getting nervous about having to redo all the HVAC design had I needed to put the ducts inside the rooms. I was planning on filling the cavity with insulation so that's good.
There is a reason one of the few smilies on the forum is :horse: Let me put it this way though -- aren't you glad you learned this now before you built your room and had to tear it all down because of mold?!!
Yeah! No kidding! I have to say though, I did frame my structure box that covers my main HVAC trunk. I can still remove the enermax/vapor barrier on that wall but I'll have leave whatever is behind that box there. I don't see that being a problem since 90% of the wall will still be open. The plan now is to have the vapour barrier over the structural box and behind the drywall of the inside out wall. I'll post some pictures of this tomorrow to show what I mean.
Francis, I have learned so much on this forum. Of course as you learn something, it typically opens up more curiosity and then you have more questions. There are some great books out there such as this one that is very well written: http://www.roletech.net/books/HandbookAcoustics.pdf I'd suggest reading it and others in your spare time and then try to be active on the forum helping people when you can. There are always new users that have questions you can answer. I feel that you are far along on your studio design journey and are more than capable of helping others on here. Having more contributing forum members is a great help for guys like Stuart and I that try to assist people every day!
Well I'm sure learning a lot on here thanks for you guys! I will for sure do my best to help any newcomers to this site in the future...it's the least I can do! Thanks for sharing the books! I'll def be reading more on the subject, as I will need more knowledge as I progress. Building the studio is one part....I know that treatment is an entirely different monster. I won't lie though, I can't wait to start moving some instruments and gear up there haha. :yahoo: Cheers! Francis,
Speaking of the floor, it's just a basic non-MSM 2 leaf wooden floor. [1/2" drywall -> 14" open-joist (spray foam insulation) -> 5/8" AdvanTech OSB Sheathing). I wondering I should be doing the same calculations? Can I still use the same formula for this type of floor structure?
No because this isn't a decoupled MSM system.
Building the studio is one part....I know that treatment is an entirely different monster.
The book I gave you the link to goes into treatment too. It's a very cool read! Greg
Hey guys, Can someone help me out with the type of insulation I need to use. I know for the outer walls the insulation required is for the added R value but what should I be using in the empty cavity between the two wall structures and also within the inner wall cavity. I can only assume that in an Inside Out configuration I would use "R value" insulation (for lack of better term) up until the inner leaf and then use Safe & Sound within the inner wall cavity? What if I'm NOT doing inside out? Should I use normal insulation everywhere? I've read many different posts where people say Safe & Sound is not much different from the regular Comfort Batt type. Is that true? Thanks again! Francis,
Can someone help me out with the type of insulation I need to use. I know for the outer walls the insulation required is for the added R value but what should I be using in the empty cavity between the two wall structures and also within the inner wall cavity.
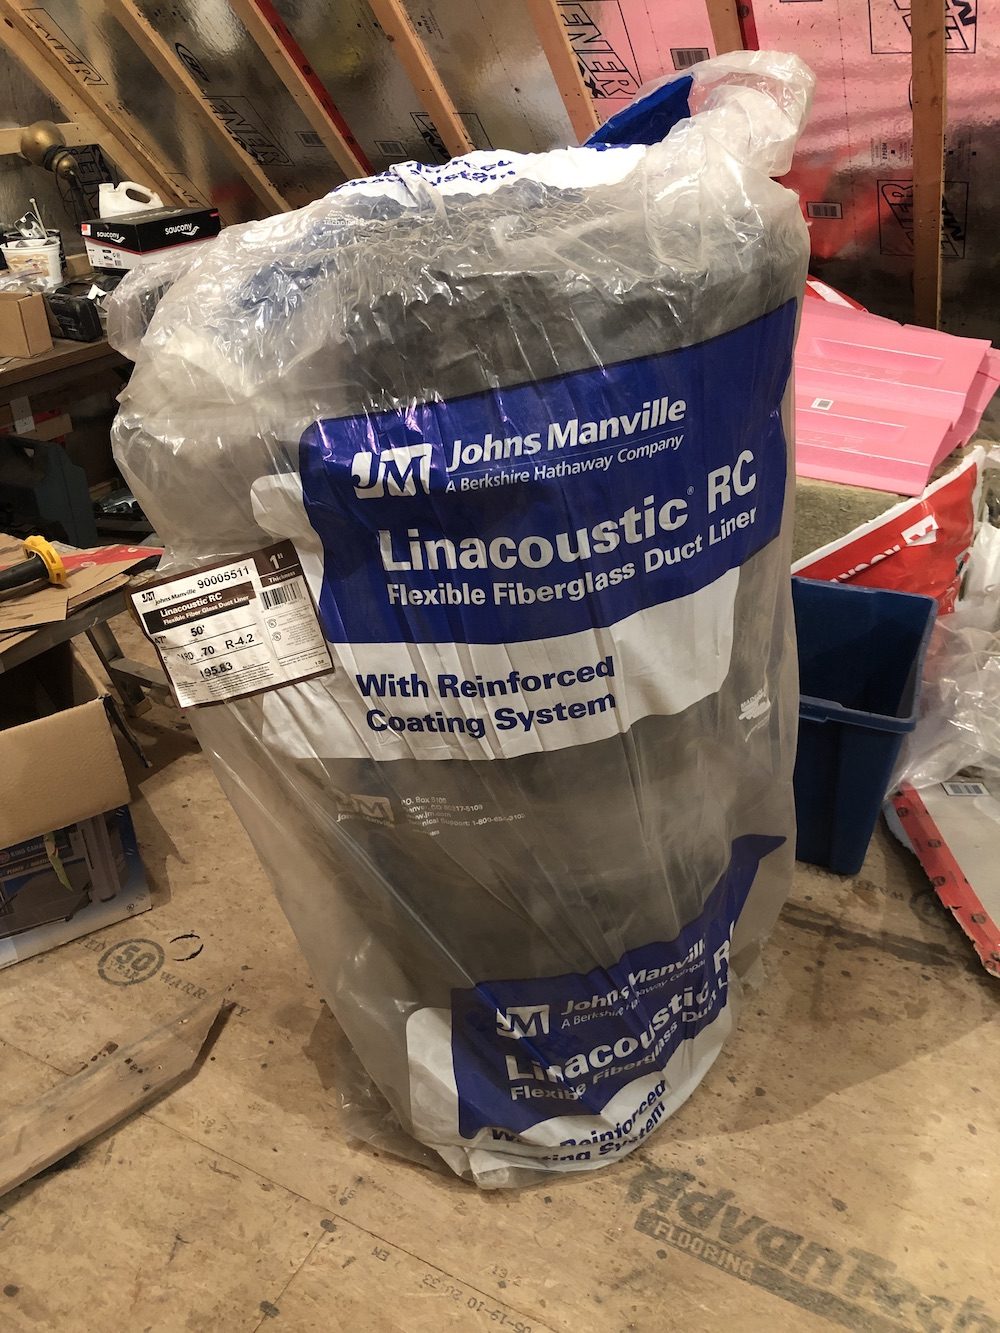
In your MSM cavity, you want an insulation that will dampen the resonant frequency of the cavity. This is usually a nice low frequency. So, you basically want insulation that has favourable absorption coefficients for low frequencies. Since these cavities are usually quite deep and cover a very large area, the price to fill your cavities can get out of control. I called both Johns Manville and Owens Corning who both told me their products are basically twins of one another. I wanted fibreglass insulation as it's easy to work with and usually cheaper. So I asked them what model of fluffy fibreglass was around 20-25 kg/m^3 and they both said their R24 batts (which are 5 1/5" thick) was the heaviest they made. This is the cheapest way to fill your cavities. Obviously R24 is great thermally as well. Fibreglass in kg/m^3 High Freq = around 40 (others say 60-80) Mid Freq = around 35 Low Freq = 20-25 Mineral Wool in kg/m^3 High Freq = around 65 (others say 90-120) Mid Freq = around 55 Low Freq = around 30 (others say 40-45) As an example OC705 is 90 and OC703 is 45 OC EcoTouch R24 or Johns Manville R24 is between 20 and 23 (this is the heaviest pink fluffy they make) In general Lighter is better for bass (light fluffy fiberglass insulation) Heavier is better for higher frequencies (heavy mineral wool)
I can only assume that in an Inside Out configuration I would use "R value" insulation (for lack of better term) up until the inner leaf and then use Safe & Sound within the inner wall cavity? What if I'm NOT doing inside out? Should I use normal insulation everywhere?
Inside of your inner leaf, you should choose your insulation and devices based upon the acoustic response of your room.
I've read many different posts where people say Safe & Sound is not much different from the regular Comfort Batt type. Is that true?
They aren't crazy different for sure, but Safe & Sound does perform well. Check out their website and compare the absorption coefficients. Greg
Thanks for the info Greg, this is perfect! Looks like I'll be going with Rockwool R22 or R24 Comfortbatt. I looked at the specs and the density of the comfortbatt product is 32kg/m3 and the Safe & Sounds stuff is 40kg/m3. That's pretty close to my 30hz limit. I have to say I really like the properties of Rockwool insulation versus Fiberglass. I used Rockwool everywhere during out house build and it was a breeze to use. Sure it's going to cost me a little more but in the end I think it'll be worth it. I still need to post some pictures of the work that's been done so far and that's coming soon. I've been doing a big clean up of the studio since that area had been used as a workshop for the longest time. Lots of stuff has accumulated over time so I'm taking all the stuff I don't need out so I have enough room for bring in some building materials in there and still have the room to work and build. Hope to post something before the weekend. Cheers and thanks again for the help. Francis,
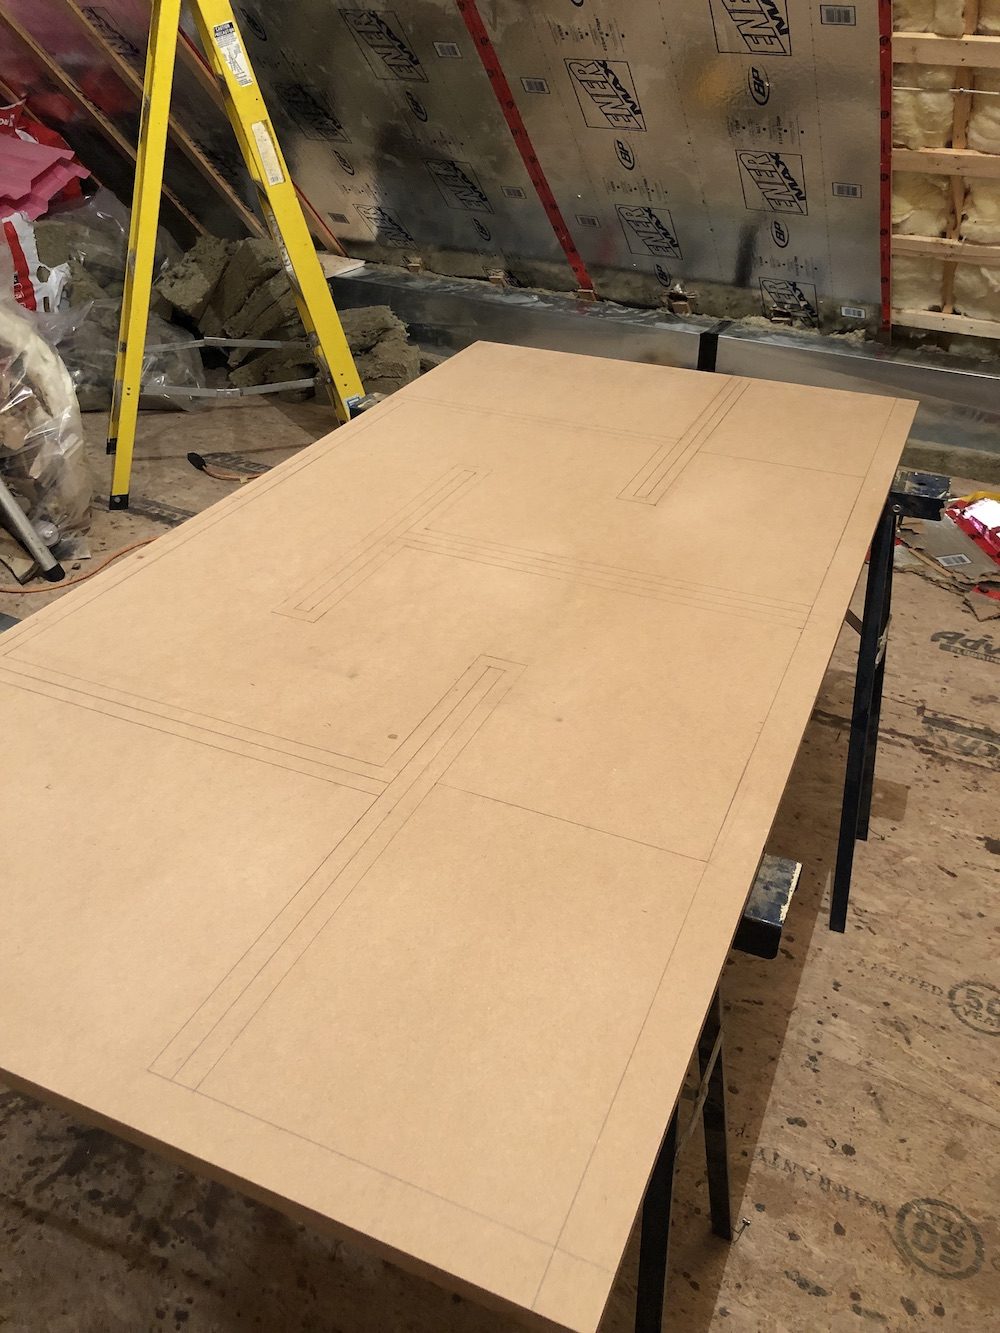
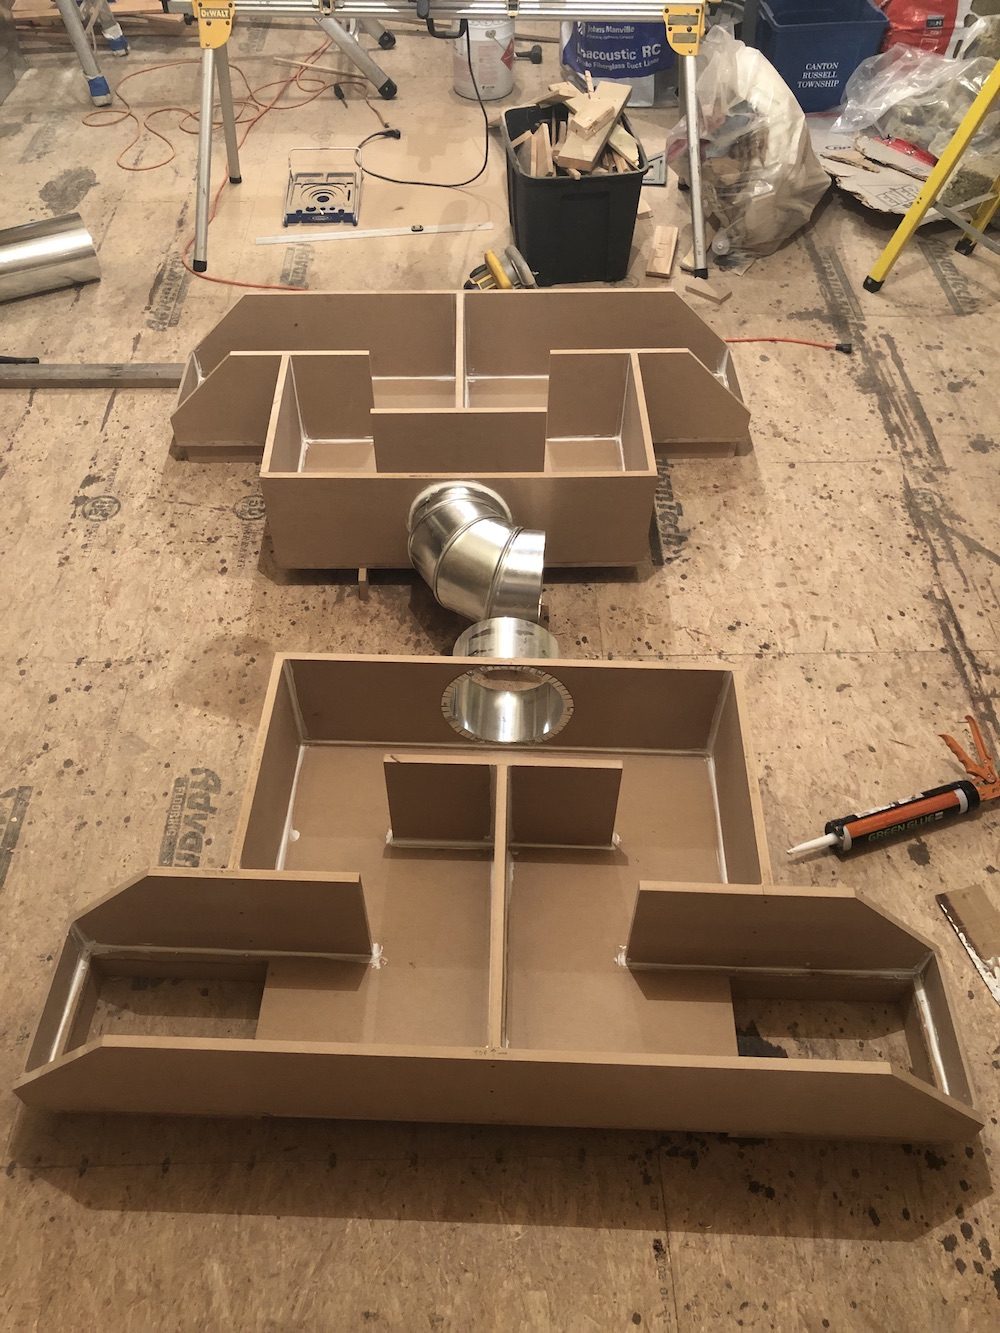
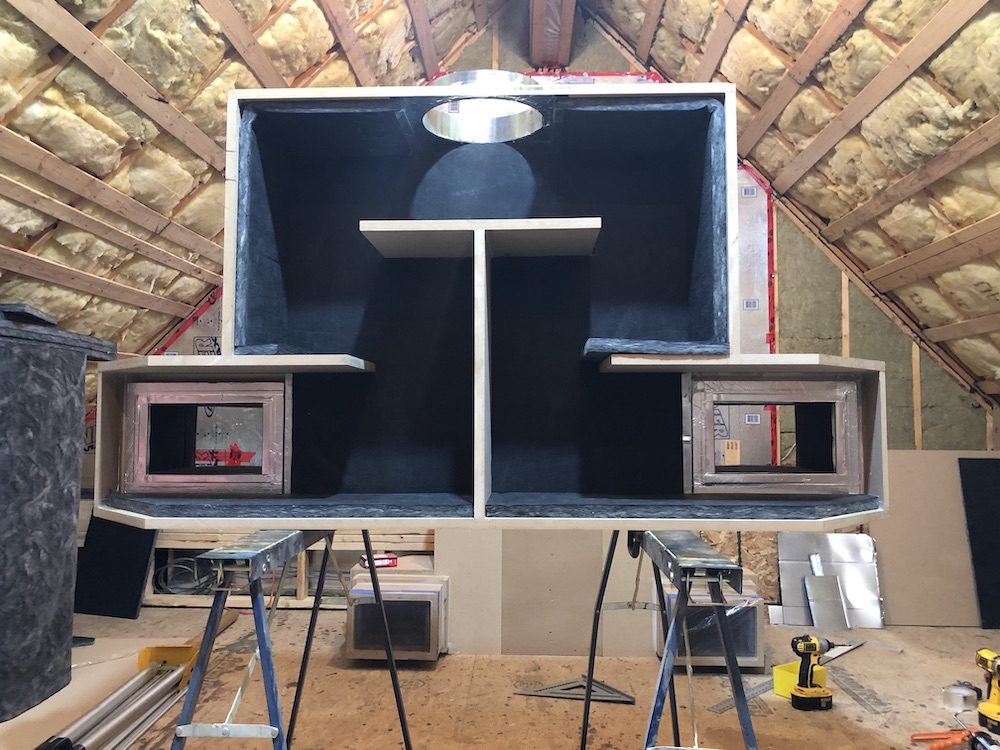
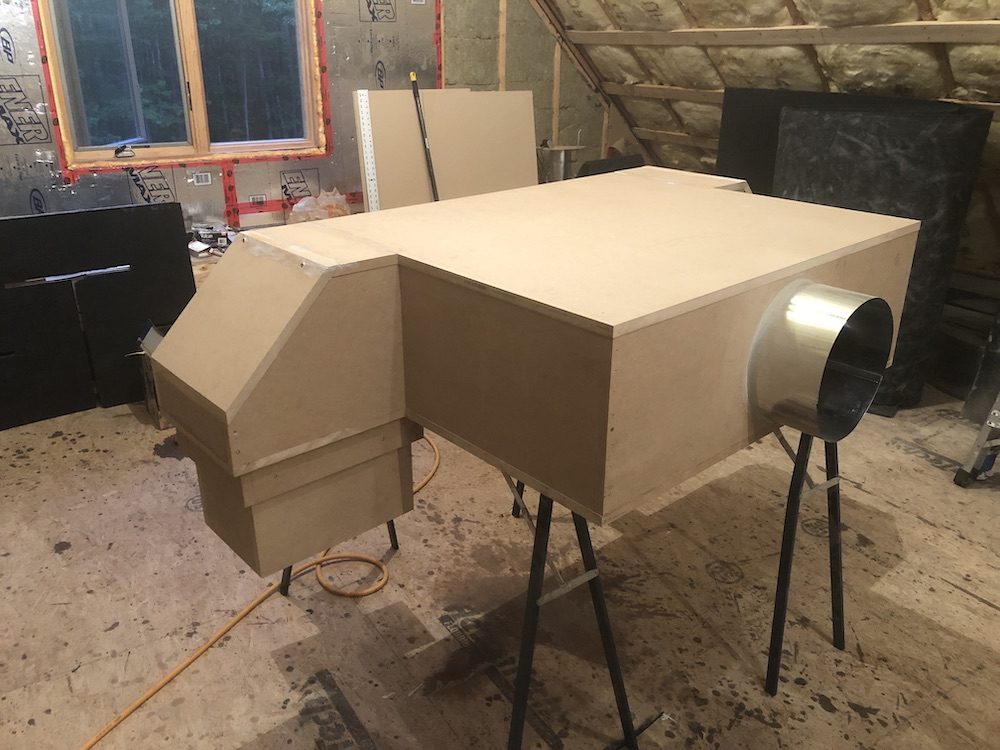
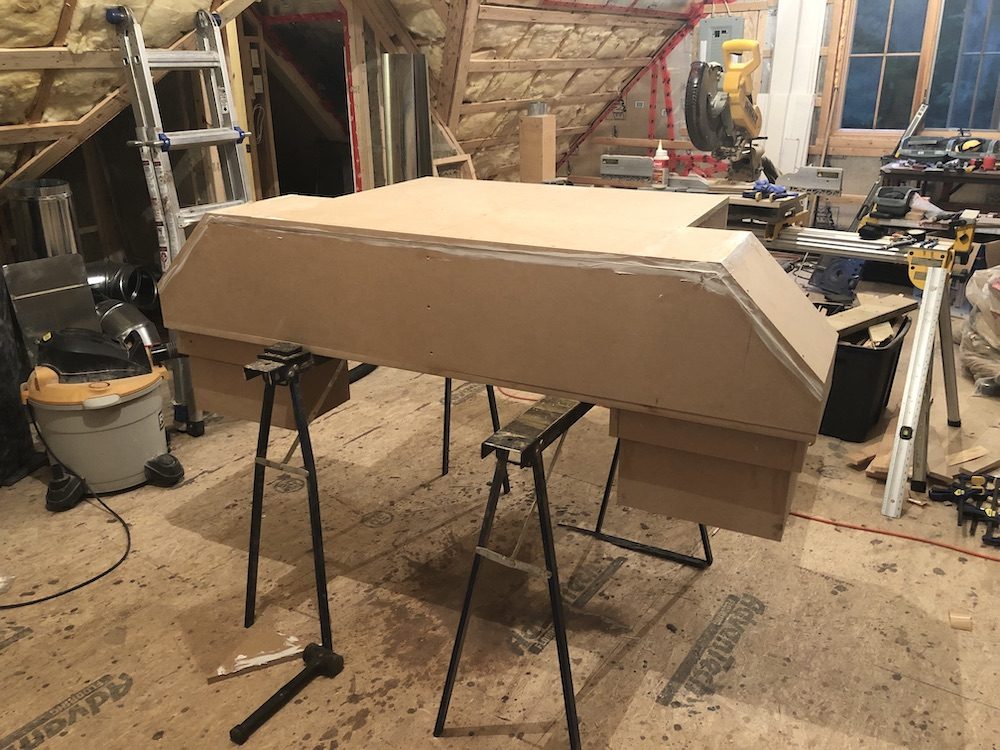
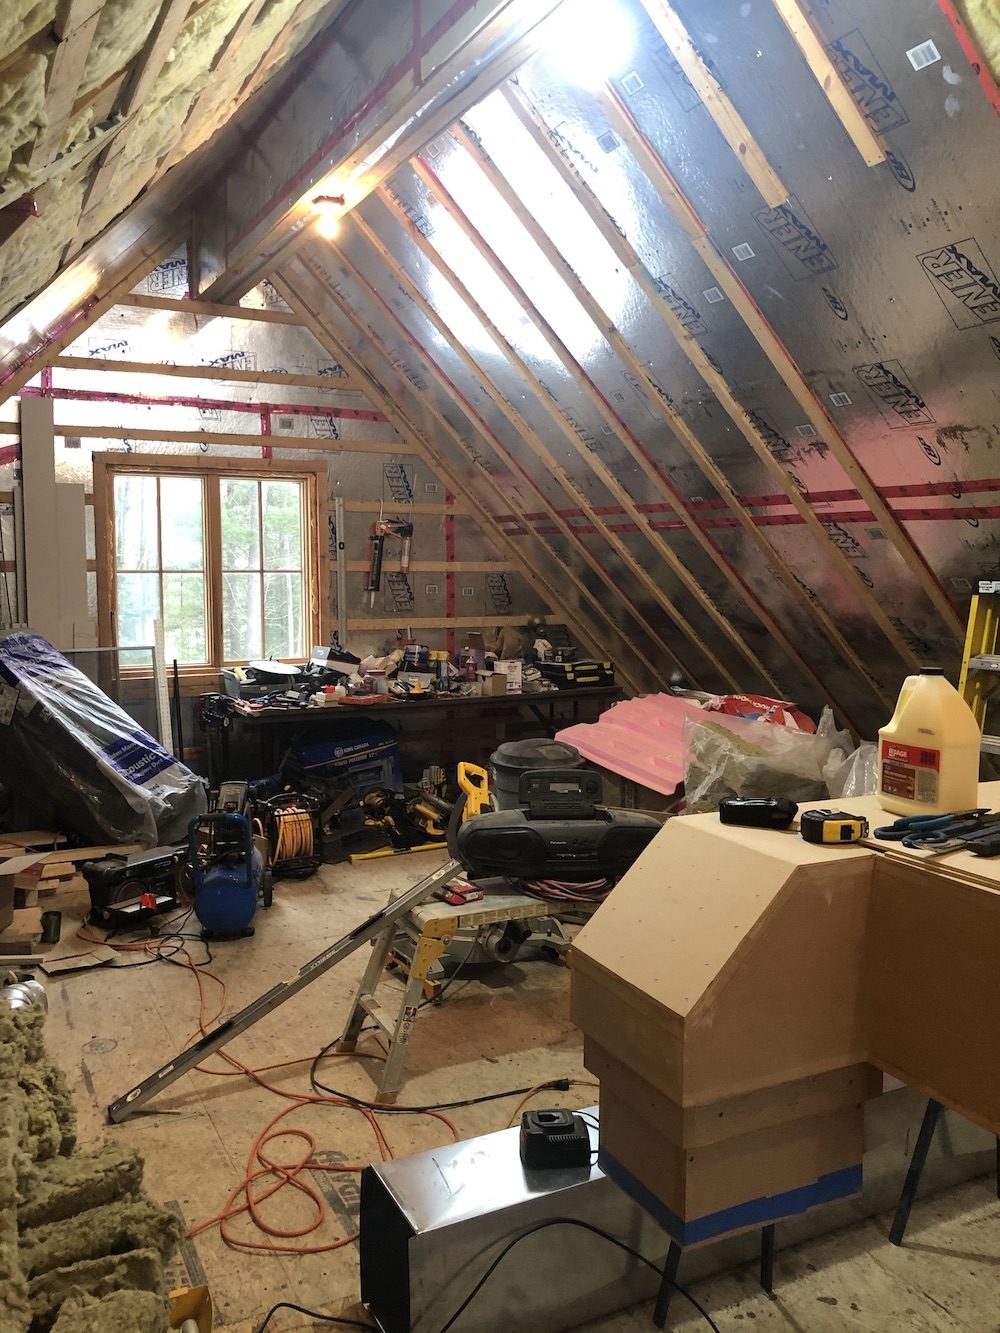
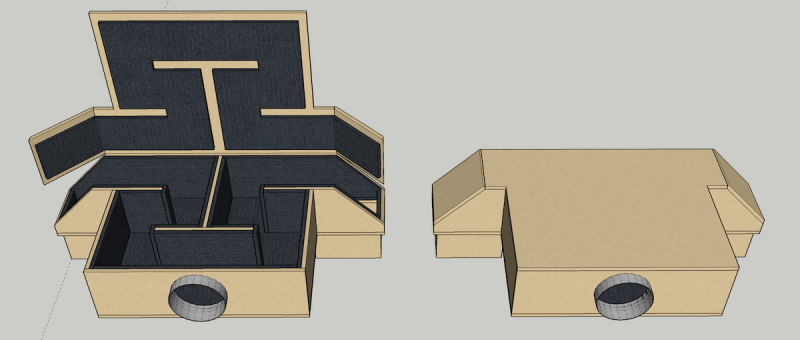
Wow! Over a year since I last posted any progress of my build. I've said it a few times already on this forum but I'll say it again, Time sure does fly! Well first off, I hope that everyone is doing ok considering this global pandemic situation. I've been well and fortunate to be able to work from home. I've taken advantage of the situation and have spent lots of time on my build. A lot has happened since I last posted and have lots of pictures to share. This post will be the first of many to come as I explain the work and progress since last year. Here's a quick summary of the things I'd done and worked on to date: - Built HVAC Silencers for Control Room - Taken all the furrings and Enermax Panels off for the Control Room. - Relocated Fire-Alarm and taken all existing A/C outlets and lights out of the Control Room area. - Opened up the floor above the Garage and strengthened 2 out of 3 required section areas of the floor by adding plywood on each side of the floor joists and solid bridging between affected joists. This was required do to the fact that my inner leaf walls that will be supporting my ceilings are running parallel to my floor joists. Spoke with the structural engineer that designed my house plans. - Built some custom braces and custom struct system to support the silencer boxes. - Built a custom winch and pulley system to raise and secure these HUGE boxes to the ceiling More to come but for now enjoy the progress :). I'll be more than happy to answer any questions about details etc. I will have some questions for Stuart and Greg if they're still around ;). I'm excited to be back at it and hope you're all doing well. :yahoo: HVAC Silencer Boxes I'll start with the famous HVAC silencer boxes. I was really excited about building these so I started with the first two needed for my control room. I really wanted to get a sense of how much room I was going to use up for these. :shock: :shock: :shock: Here are various progress pics of the process of building these HUGE silencers. They sure are HUGE!! This was the original design
Recovered from web.archive.org — originally hosted at https://drive.google.com/uc?export=view&id=1KgcwX1Lk58eOgWdebgJ8Jx76qUyLEr1H
Overall I'm pretty happy with the way they turned out. I was able to reproduce pretty much what I had drawn in sketchup initially with the exception of a few adjustments I had deal with along the way. I'm taken down some notes for when I build the other two down the road for my Live Room. For now I will be focusing on putting my Control Room together and will leave the Live room for last. Note that in these pictures below I don't show the additional 1/4" MDF that was glued and stapled all around each box. You'll be able to notice that later on in the next coming posts.
Recovered from web.archive.org — originally hosted at https://drive.google.com/uc?export=view&id=1BYxgUNXaU11lz9fBciXmK8yBXjryjVee
Recovered from web.archive.org — originally hosted at https://drive.google.com/uc?export=view&id=1Yhv7Qlw0COgP7I-PPOc_lsZNe3x6RwGG
Recovered from web.archive.org — originally hosted at https://drive.google.com/uc?export=view&id=1X1sjVT12HX4d7Nuv6u-4M2WKnvxBAbwU
Recovered from web.archive.org — originally hosted at https://drive.google.com/uc?export=view&id=1iSCNrKLWRKjux0Ooo-sTaEwfpvwhHz2K
Recovered from web.archive.org — originally hosted at https://drive.google.com/uc?export=view&id=1psMh1IUc_h3PKSIfnH3wS8IokAVPVEXl
Recovered from web.archive.org — originally hosted at https://drive.google.com/uc?export=view&id=1Z8CvJwBqfAbZG9WImlh3og-lXcBP39Ci
Recovered from web.archive.org — originally hosted at https://drive.google.com/uc?export=view&id=1XsuasyzoMZsICAb_ZueRlyfoNDOXHy1G
Recovered from web.archive.org — originally hosted at https://drive.google.com/uc?export=view&id=16b46Mc1Rg8f5Yss7SZL59Bdwz0ZvqXdu
I have plenty of other pictures if anyone is interested. Next post will be about the De-Construction of the room and Part 1 of 3 of strengthening up my floor. Stay Tuned :)
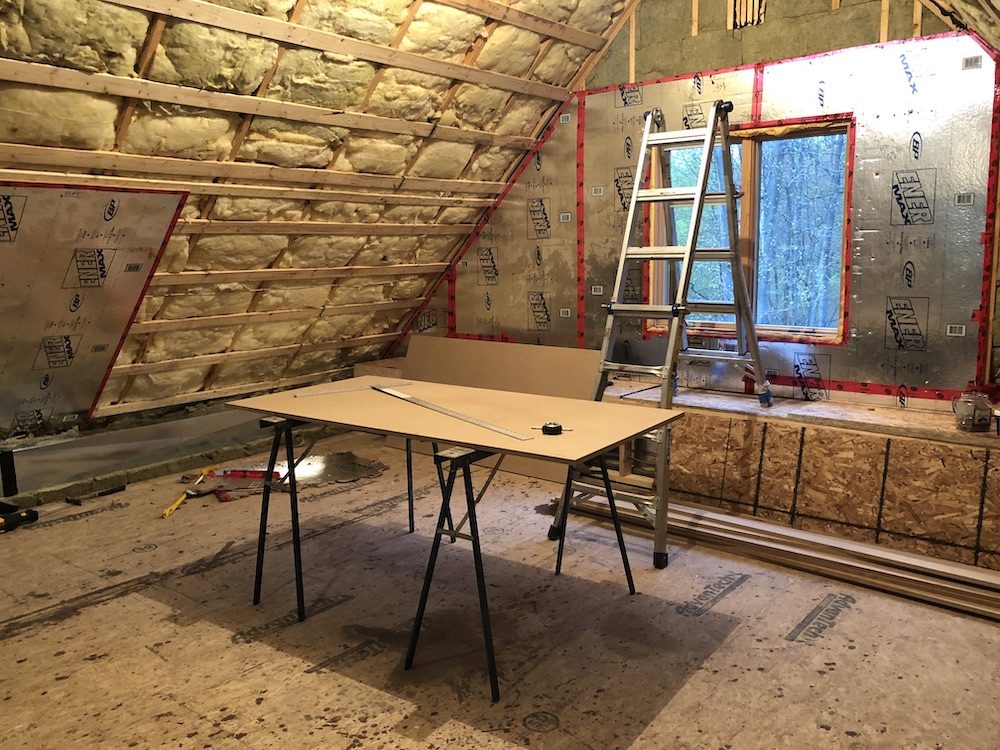
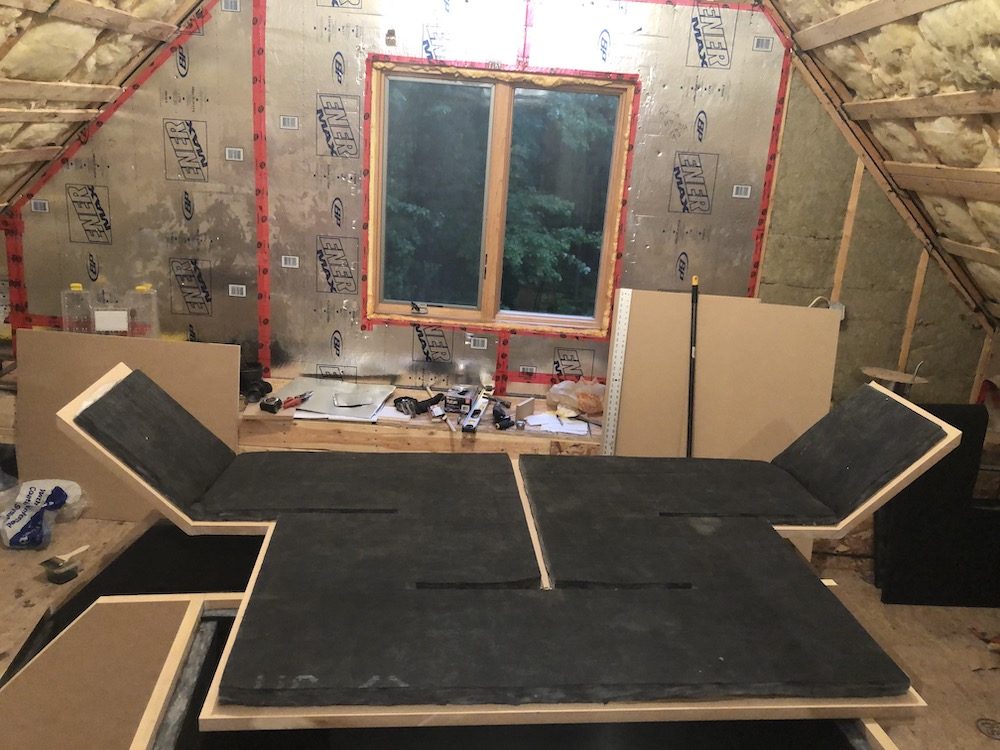
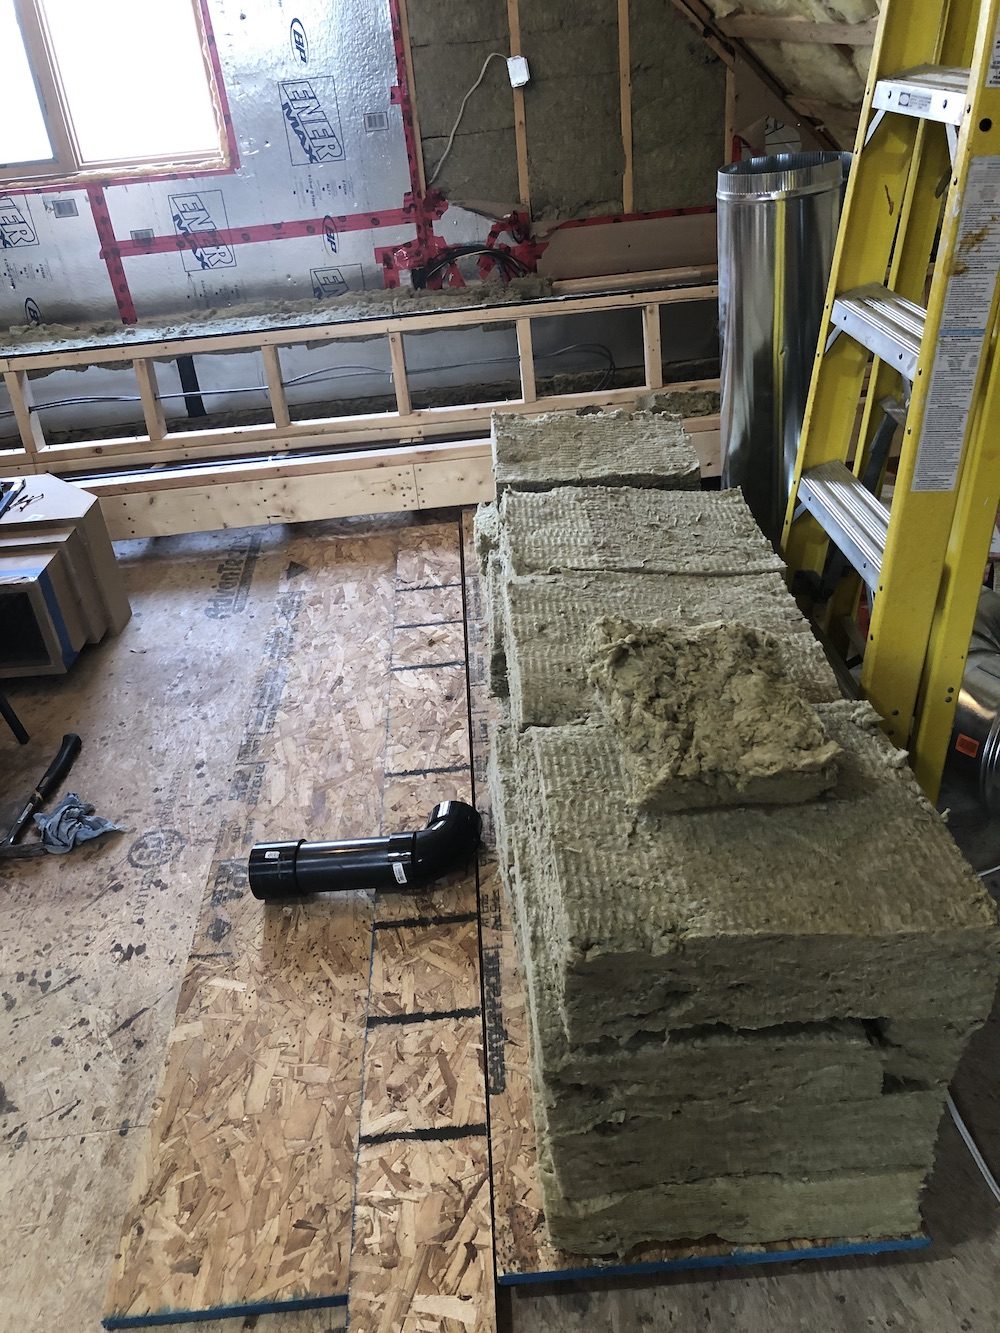
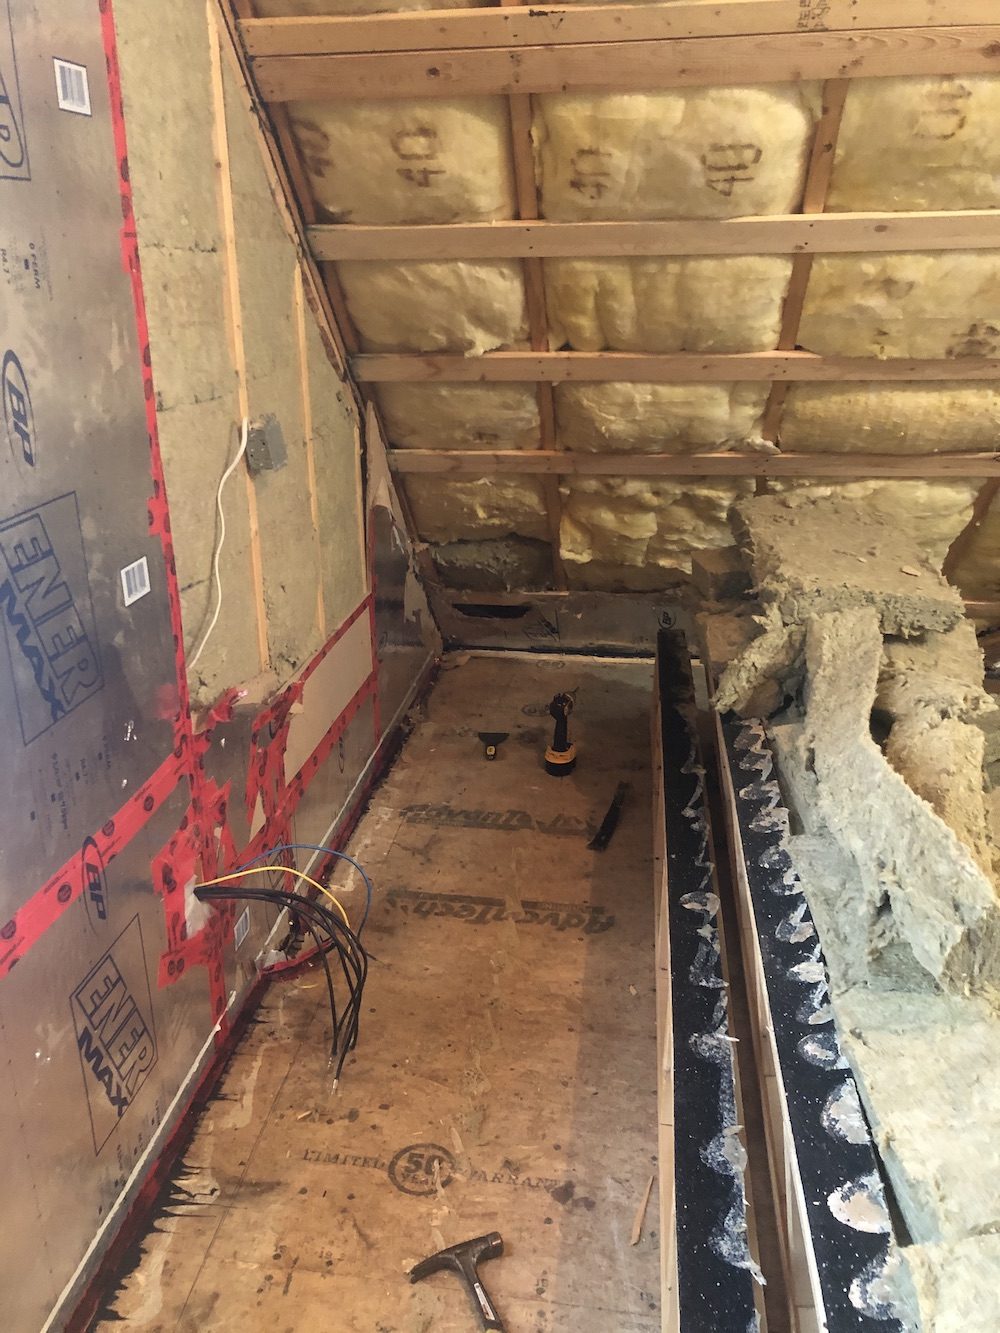
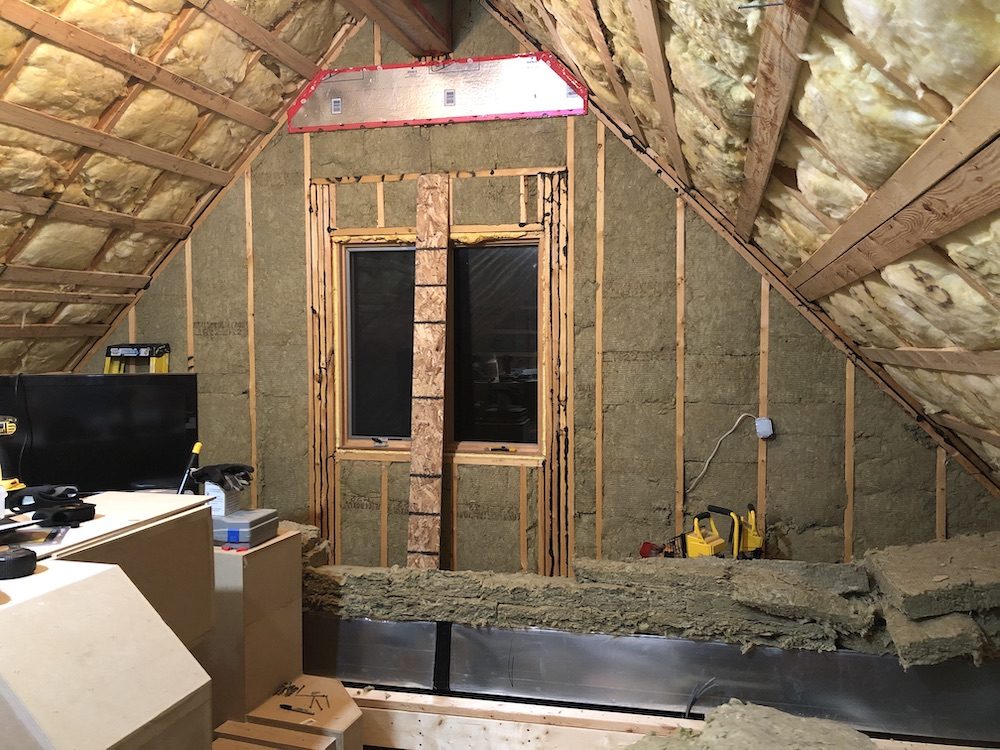
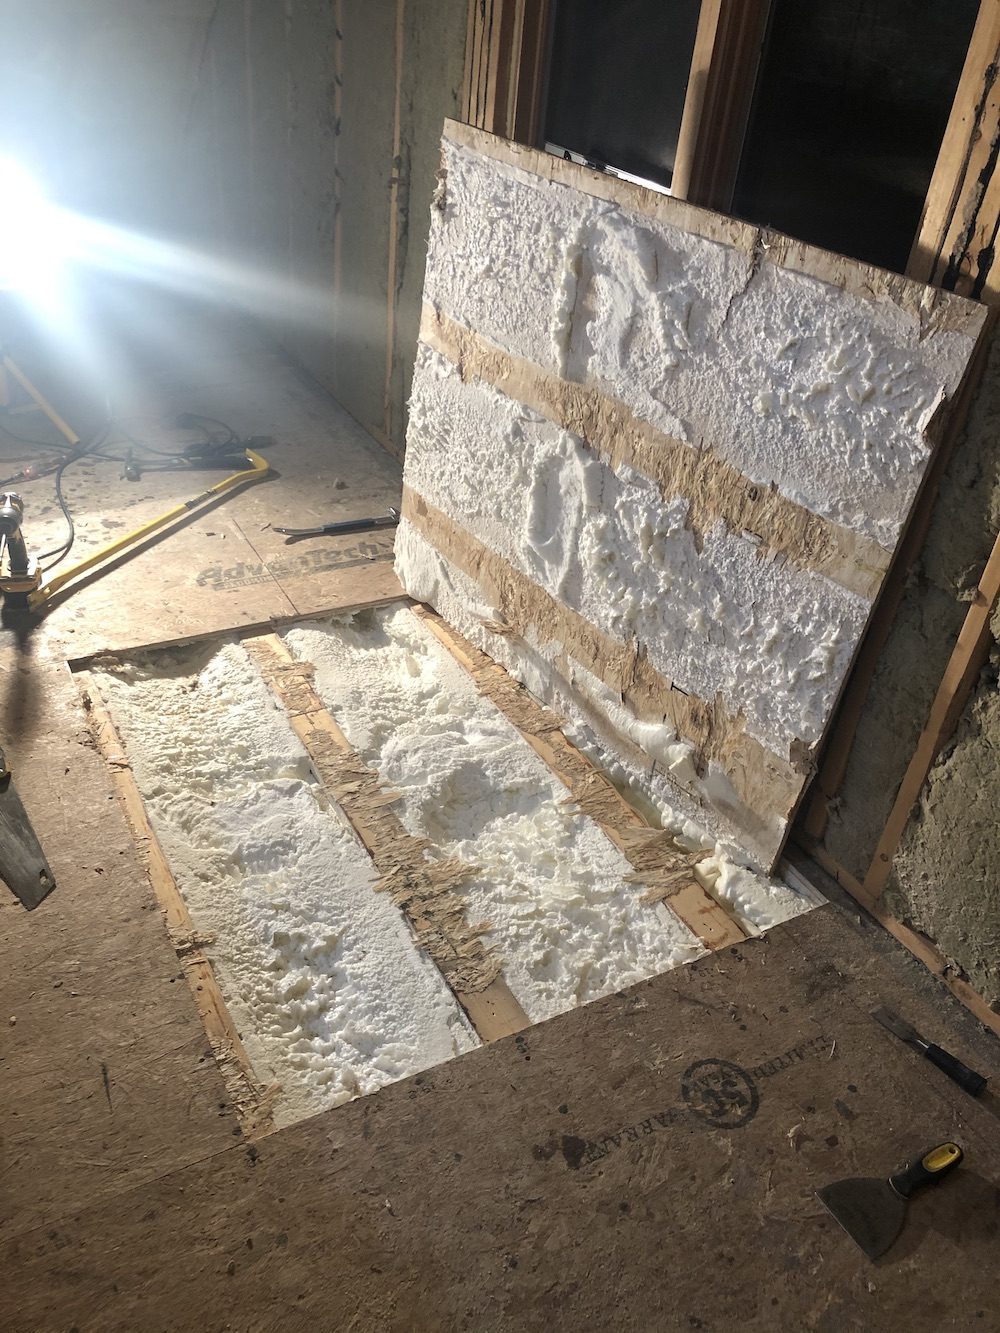
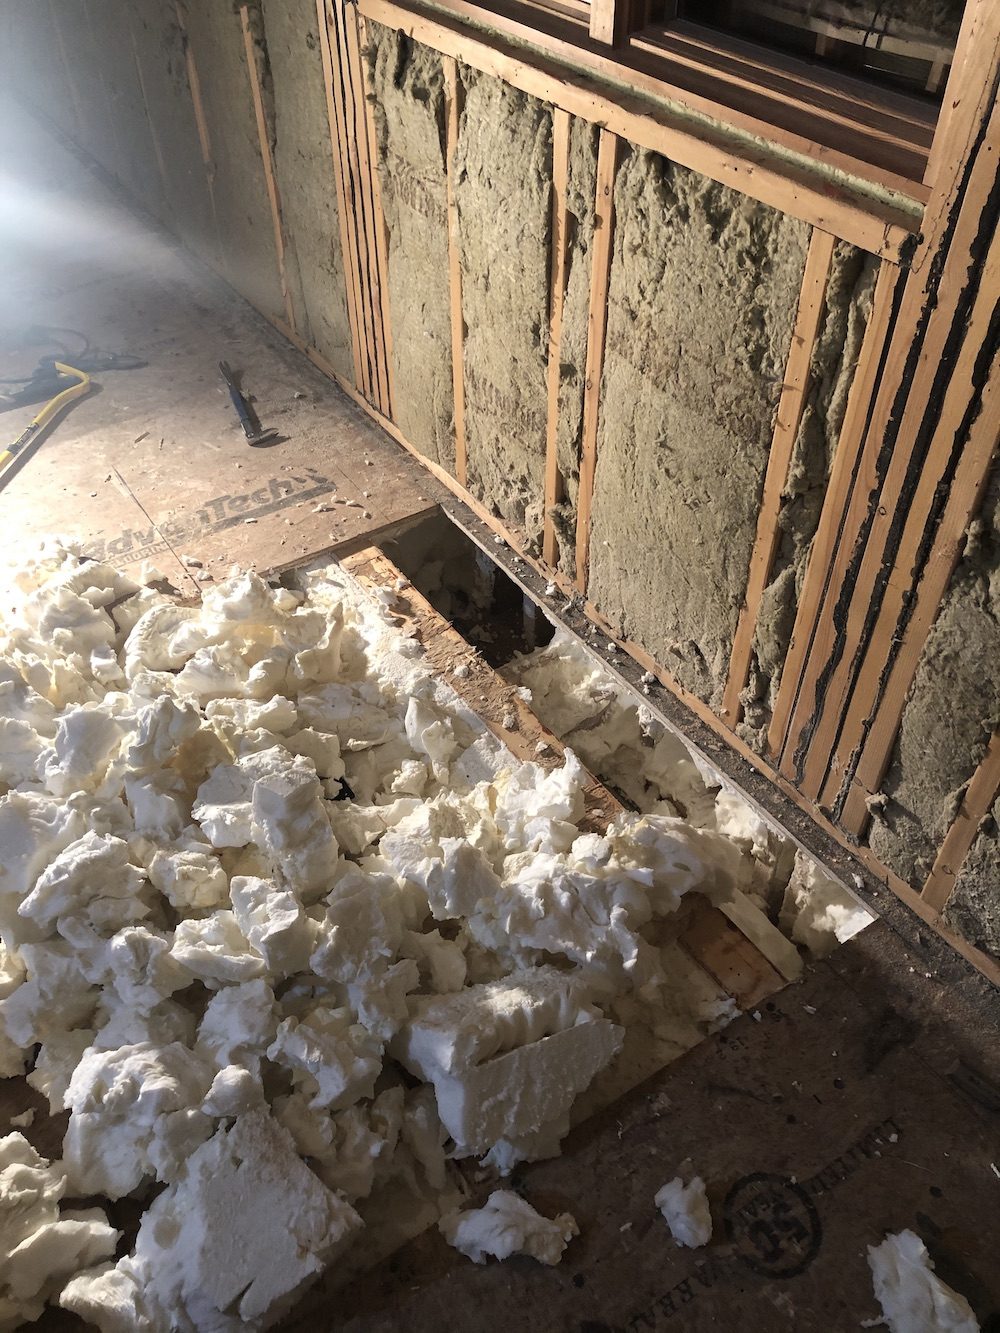
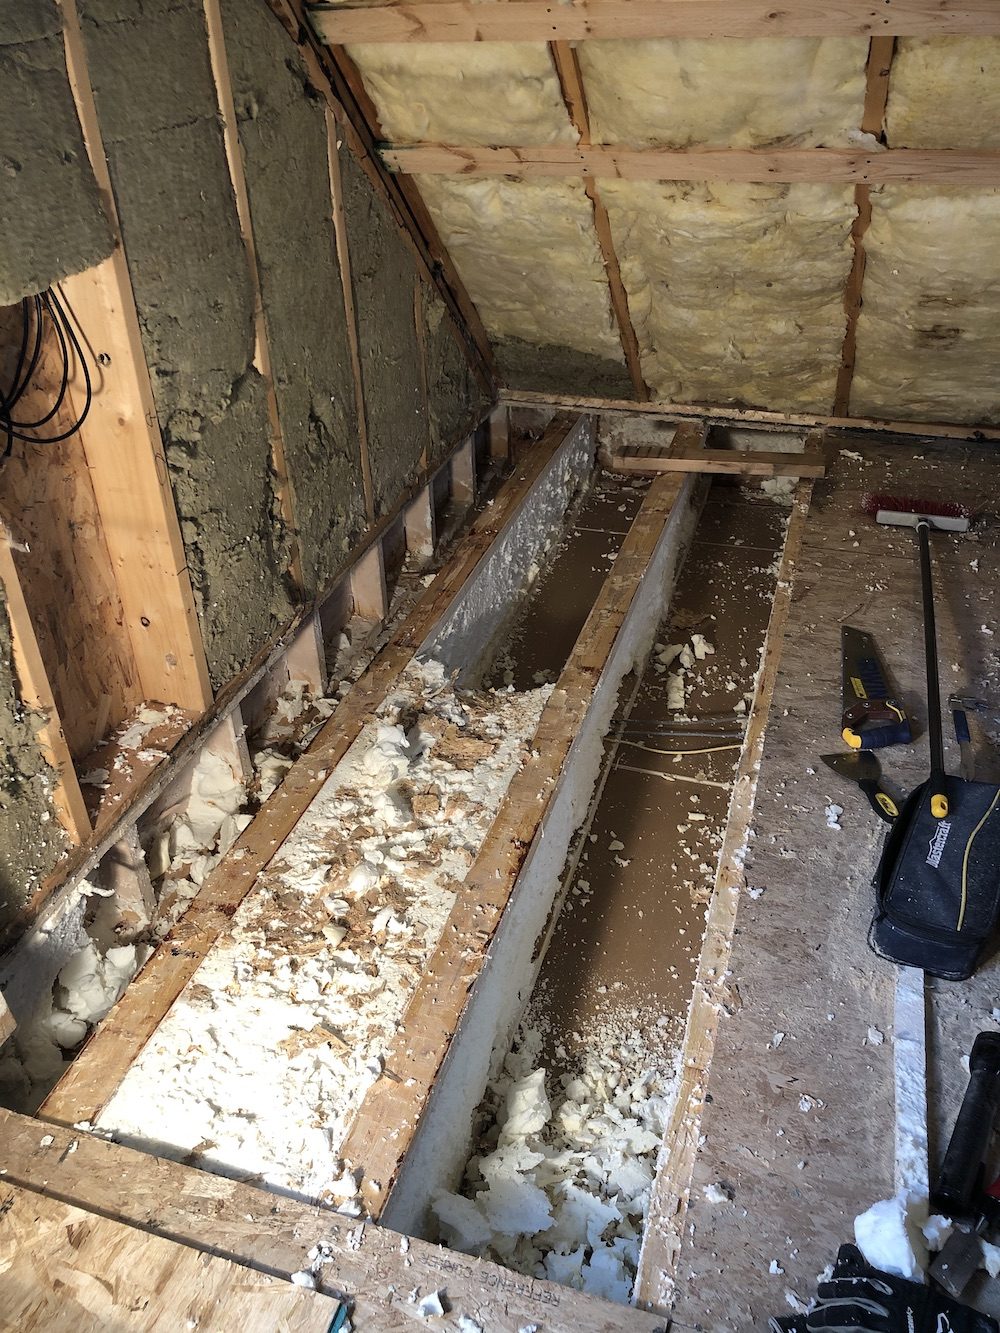
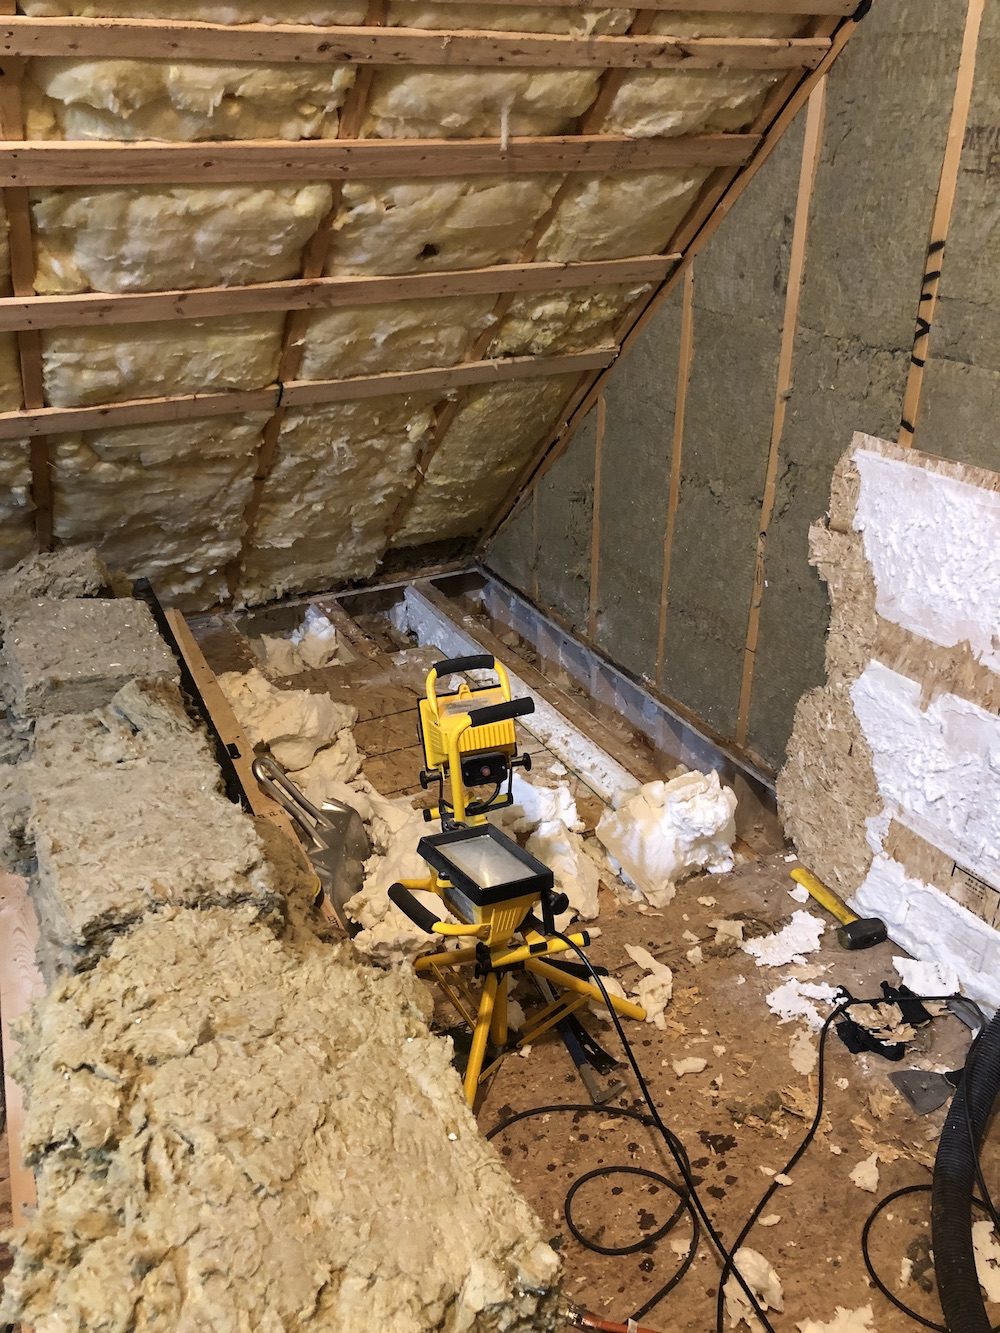
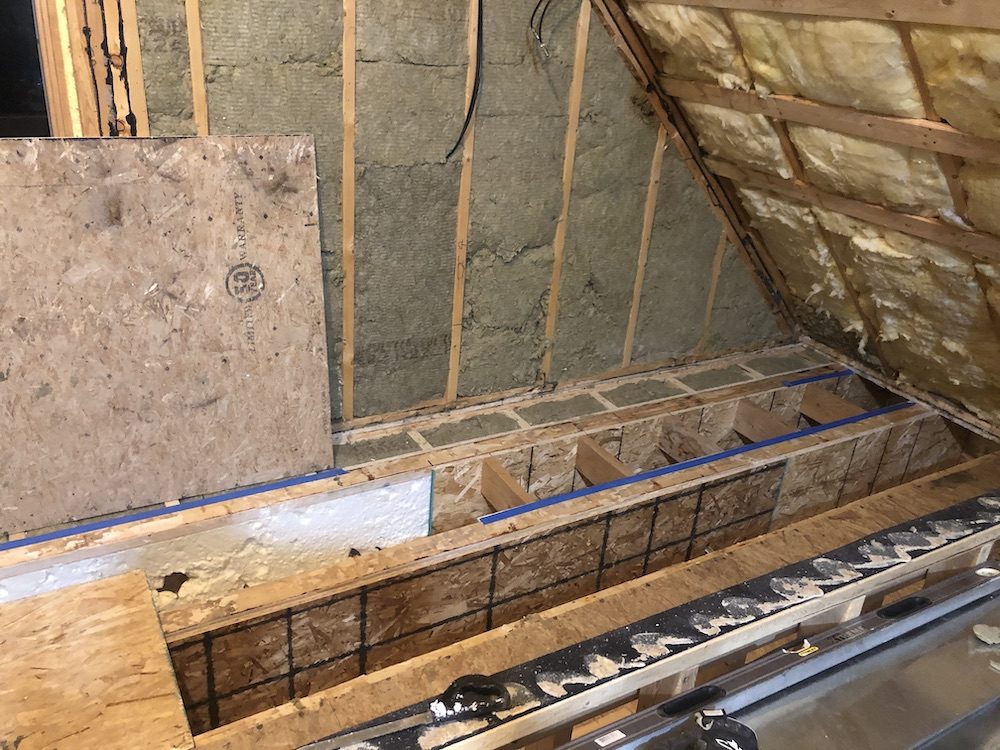
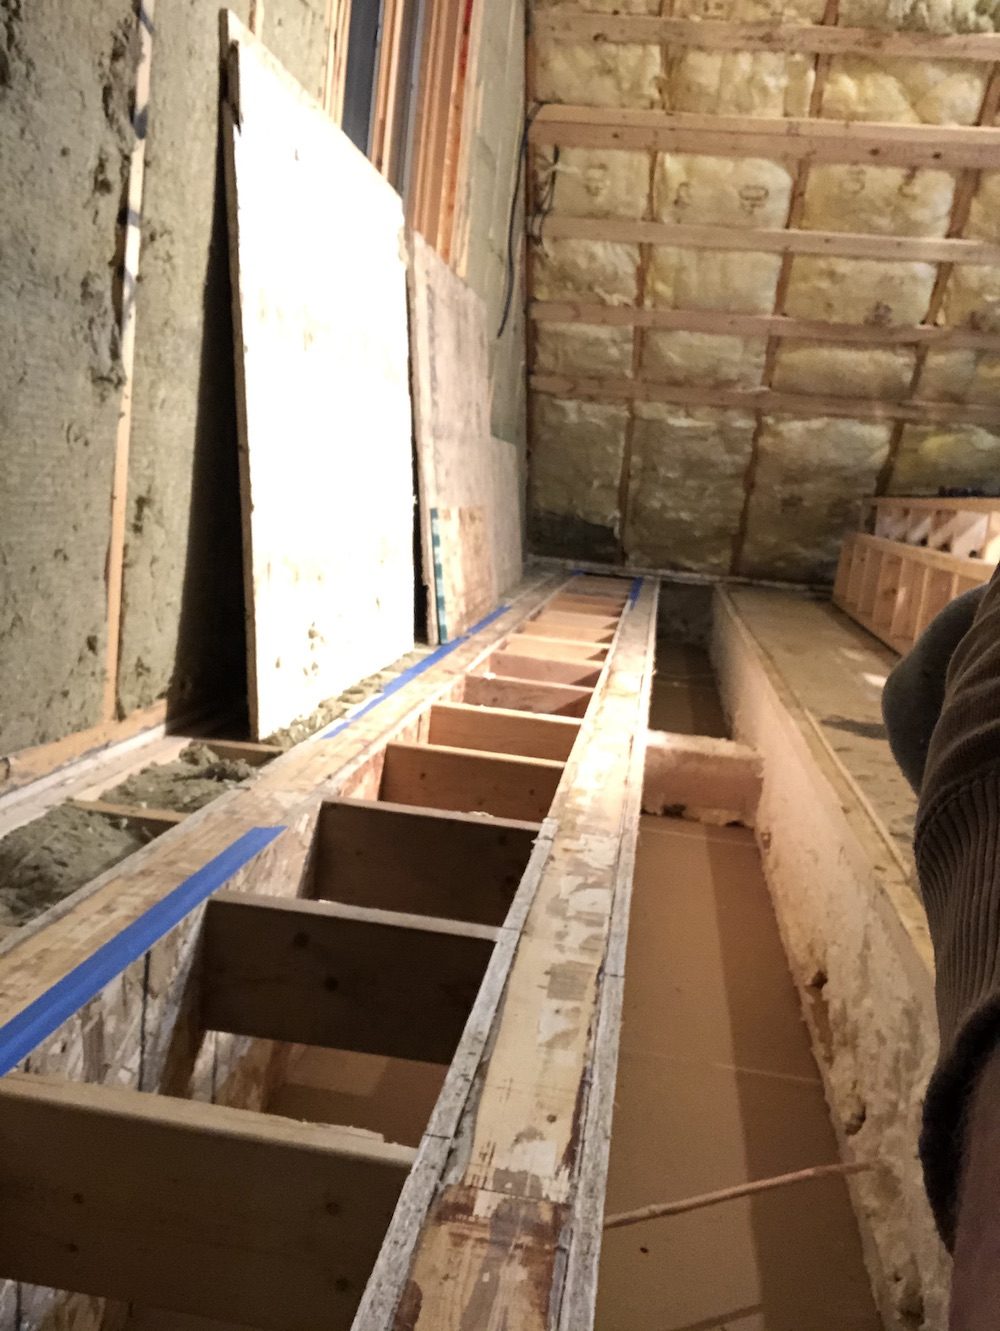
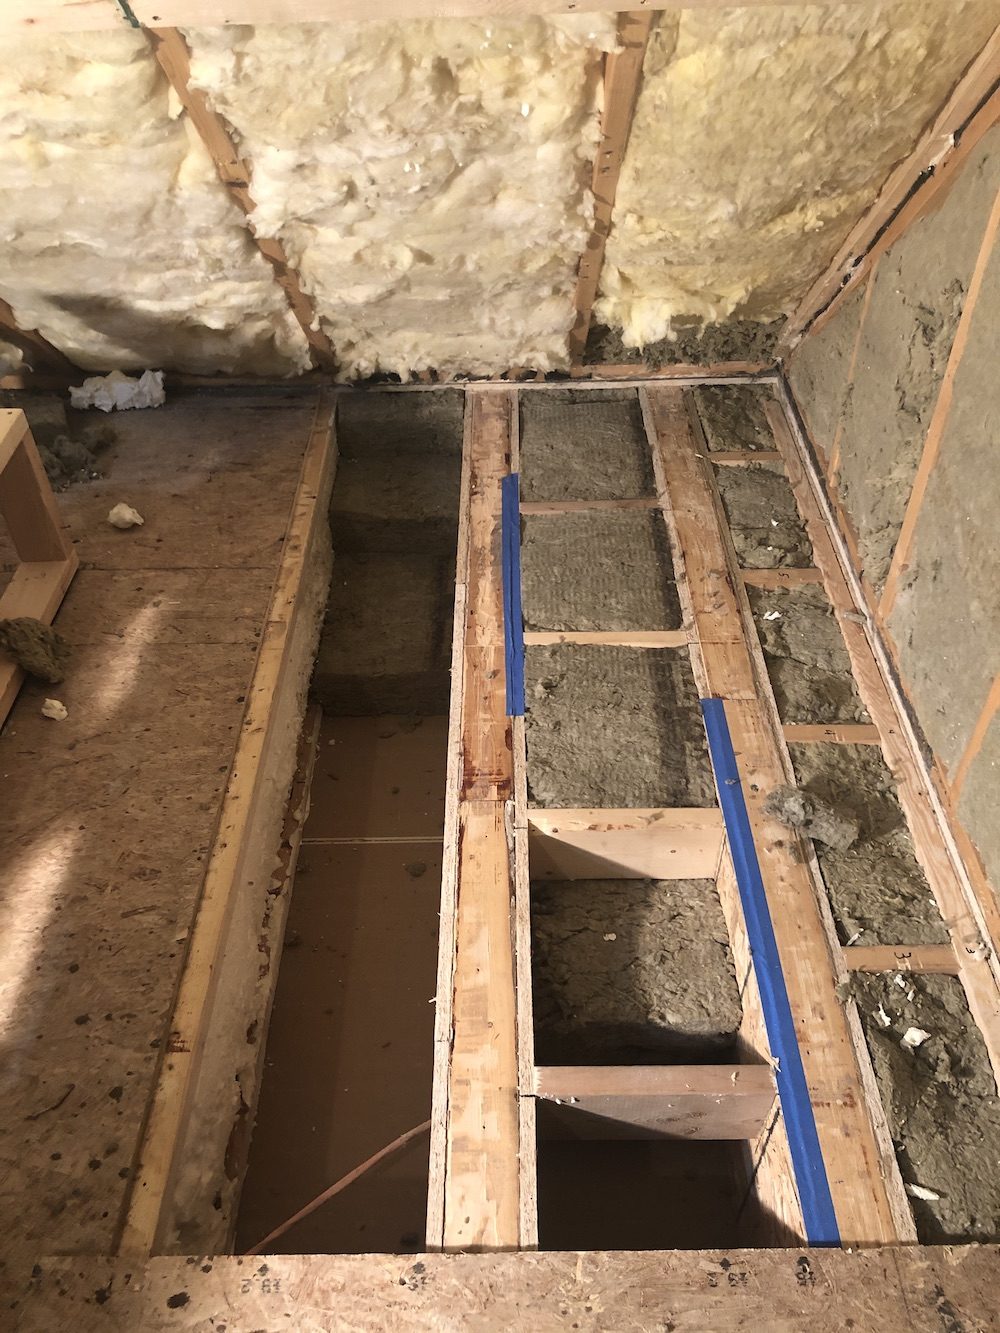
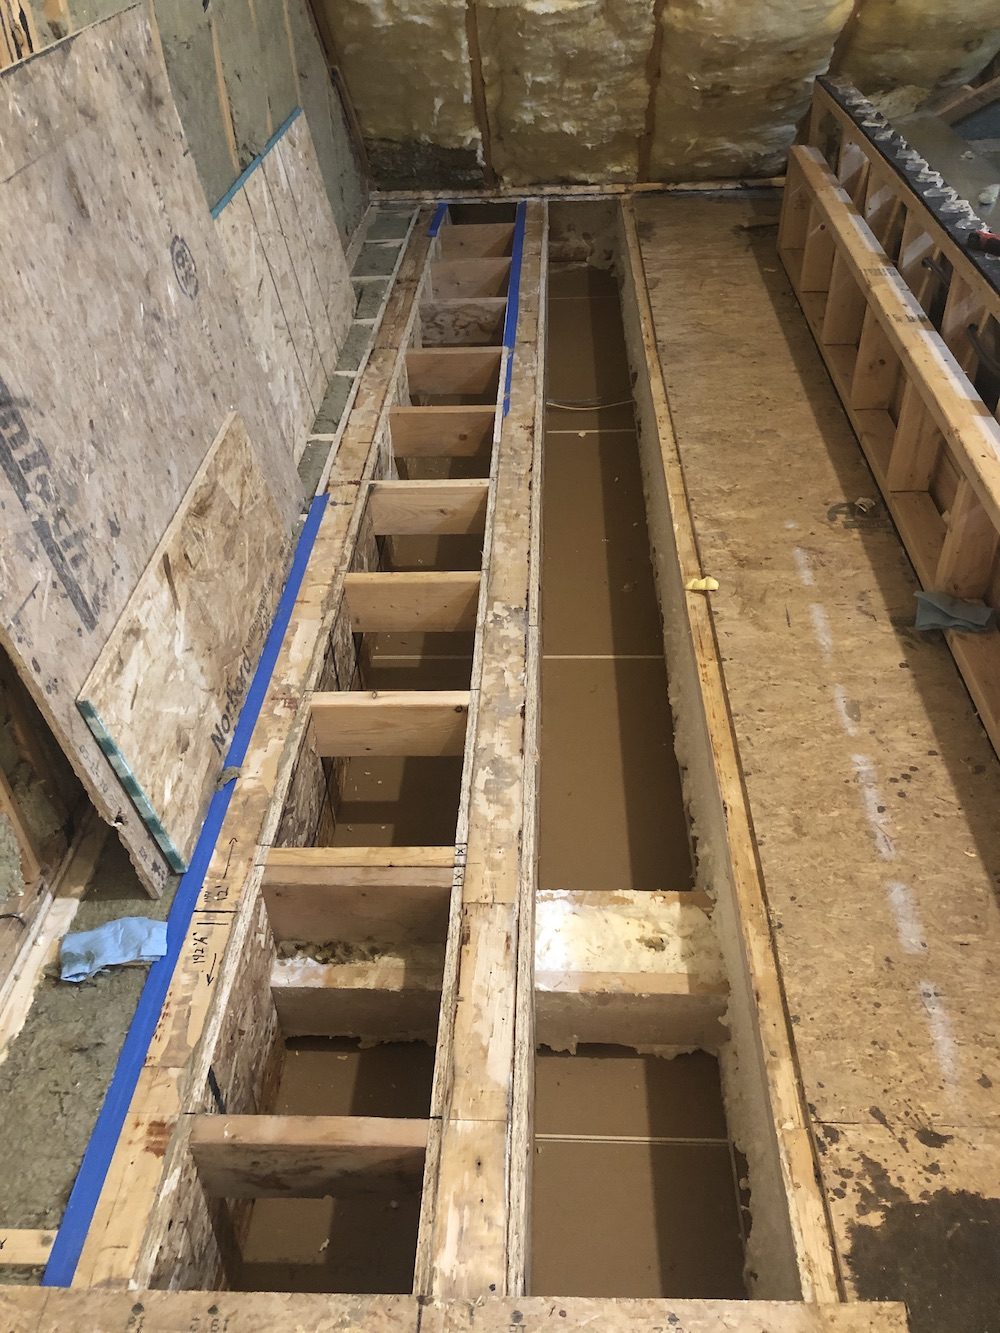
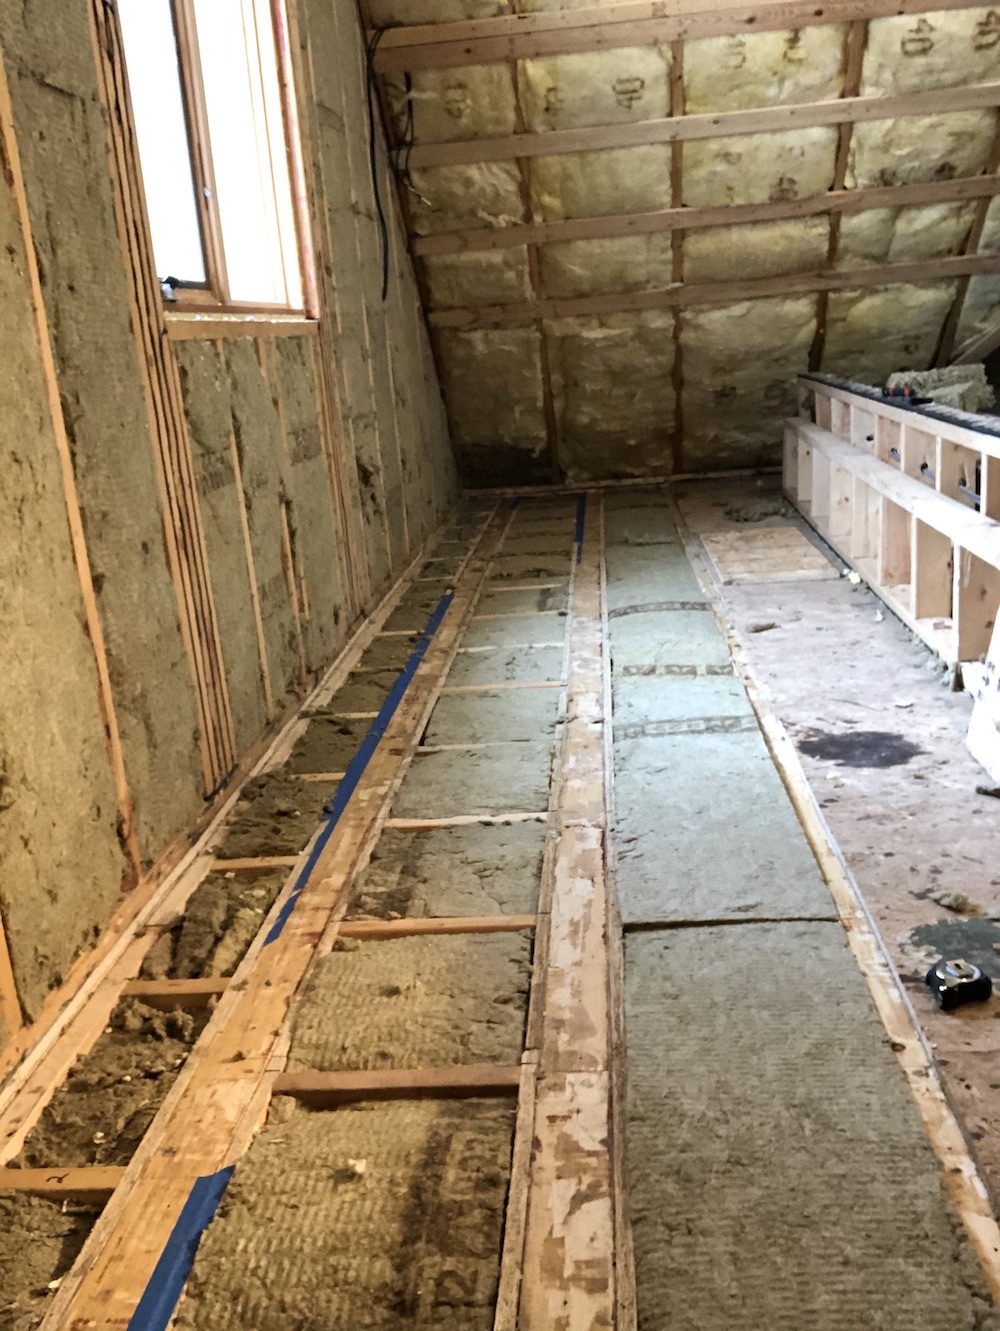
Deconstruction and Part 1 of 3 of Strengthening Floor Joists This was lots of fun! :horse: :horse: After working out the framing details for the studio, I was faced with a situation that required me to do some extensive work on my floor. Basically, the walls that support my ceilings run parallel to the floor joists and are sitting almost right in the middle of two joists. I knew this was going to require that I consult with a structural engineer so I reached out the same person who did the structural engineering work for our house. Good thing he had my plans on his computer and was able to suggest options. He recommended that I glue and screw 3/4" OSB on each side of the 2 floor joists affected by the lightly-loaded wall. You'll see that I'm basically taking apart the original room by taken off the Enermax panels, HVAC box and insulation around it. It was such a mess up there while I was doing all of this. I'm basically stripping the section where the Control Room will be and where I can start fresh. I can't describe how much it sucked ripping off the sub-floor and taking all the spray foam out of there. I think I ended up filling about 25 large garbage bags for this first section alone. The entire sub-floor was glued with PL premium to the floor joists so once I finished ripping off the sub-floor I had to scrape all the PL glue from the joists to keep things smooth and level. Remember, I have a total of 3 sections like this I need to do. This is only the first section and I've completed the biggest middle section which I will show with pictures in another post. Enjoy!
Recovered from web.archive.org — originally hosted at https://drive.google.com/uc?id=1NVWlwMFRP4lZaJoRH_bhPKlFvT0YyXEx
Recovered from web.archive.org — originally hosted at https://drive.google.com/uc?id=1PYl7JUOBqw2XnYL0E0VOgAcDPd2XVo1Z
Recovered from web.archive.org — originally hosted at https://drive.google.com/uc?id=1Y9klEGfqoi_ITjFL5aqgpdac9pmJLsYa
External image, not preserved — original: https://drive.google.com/uc?id=1jN_S0mR64Z44C3X81wbt44WgkVPGk5OY
Recovered from web.archive.org — originally hosted at https://drive.google.com/uc?id=14i07RxP8Ldklbc8WenDFNnReqOvqLohP
Recovered from web.archive.org — originally hosted at https://drive.google.com/uc?id=1zuIztlDv7MHU_CYNsoIr12rJzRMXTpz4
Recovered from web.archive.org — originally hosted at https://drive.google.com/uc?id=1eC8xsP_nlP0icK_dz9x_jE01lyZ6nPxK
Recovered from web.archive.org — originally hosted at https://drive.google.com/uc?id=1q2TGLOEPmBdsqS6GP6sVyR516zdSy1Bq
Recovered from web.archive.org — originally hosted at https://drive.google.com/uc?id=1WpAec7v5_R8PU-FWoEqcQvBXMlE_V7zl
Recovered from web.archive.org — originally hosted at https://drive.google.com/uc?id=1_gM5R8PG8Iz4SnevkXlkwvnjR8jpbWW0
Recovered from web.archive.org — originally hosted at https://drive.google.com/uc?id=1pocTfhmLxak5SUjOSsgVes7PjOBCa8Wa
Recovered from web.archive.org — originally hosted at https://drive.google.com/uc?id=1pf7MaBIMHEXk_aLtPBshngIOyRete5aY
Recovered from web.archive.org — originally hosted at https://drive.google.com/uc?id=1xXXyl0UXB4fuquku2jANhM_agQOWxkwh
Recovered from web.archive.org — originally hosted at https://drive.google.com/uc?id=1r8bYvq0vdDfNlD6tGqJY4FI1x-LxfQGv
Recovered from web.archive.org — originally hosted at https://drive.google.com/uc?id=1mbqHbDTyNwKbCgZidTXBozRkSVYzqJvH
Recovered from web.archive.org — originally hosted at https://drive.google.com/uc?id=1bKDshHTwlvOMJHl4saYu8uYD5FboTQ-F
Recovered from web.archive.org — originally hosted at https://drive.google.com/uc?id=1U_-SO79W-NgiPk51RcElHQsbSM5lW71d
Recovered from web.archive.org — originally hosted at https://drive.google.com/uc?id=1eMQYchC8MkG4wDvPLmstT8u9cZKu_tan
That's it for tonight but I will continue and add more later this week. The next post will show all the work I did to support and raise the first box up against the big support truss at the top of the ceiling. That was also a lot of fun :) Cheers!
Can't see most of your images. Not sure why.I'm logged in.
Hey Frank! Good to hear from you dude! Hope you're going well and that you're enjoying your studio :) Sorry, I'm not sure why the pics aren't showing up...they are showing up fine for me. I am using img tags with links to my shared google drive so may be related to a permission issue. I'll check permissions and confirm they should be shared. Could anyone else please confirm if they're seeing the pictures in my last two posts or not? There should be near 25-30 pictures. I'll be creating a new other posts later today or tonight so I'll read up on why google pics might not be visible to others... thanks for the heads up Frank! Cheers!
Hey Francis. I was about to tell you that I can see them now, but then they stopped working again. I think linking to your google drive instead of uploading them is causing you some problems. Anyways, I did at least see them to bring back some horrible memories of working with that awful insulation! Oh, how I hate it! Stuart is no longer on this forum, as he finally burned one to many clients and got booted. He has his own forum now over at Soundman2020 I think. Greg still pops in every now and again. I'm not around much cause I'm free from this nightmare! :yahoo: I'm still subscribed to your thread, so I got a notification. Nice chunk of progress, brings back lots of memories for sure! I resized most of Stuart's original HVAC design for a variety if reasons. Fortunately, HVAC is one of those things whee you can find ample amounts of info and online calculators. Keep going man!
Thanks for the advice! I will do my next posts by uploading the pics instead to be safe. Yeah, I know you've done crazy amounts of work do date and I can relate to some of the, say "headaches" you've dealt with in the past. I'll show later in another post all the insulation I had to put above the silencer boxes...right at the peak of the ceiling and around the duct work that's there now....that was not fun but glad that part is done for the CR. Wow! Ok, see I wasn't aware of what happened with Soundman. It's an unfortunate situation, I did not know the extent of his client's work. think I recall reading a few threads where frustrations had been expressed but since I haven't been online much, I guess I missed the big bang. I know he contributed a lot to this board so I'm sure he will carry that over to his new site/forum. I can only imagine how great it must be to be have all this work done and finally be able to enjoy :). I'm doing as much as I can while keeping balance with life so it's not always obvious. I do have dreams of it being all completed sometimes hahaha. Cool! Glad to know I have good people watching! Really do appreciate that you reached out. :thu: Do you mind if I ask why you needed to re-size? Did you have to redo the whole thing? :shock: I will admit that it's probably the area where I will have learned the most during the build haha. Never expected it to be that complex, but it all makes sense. I had done so much research last year and was able to finally figure out my numbers and with the help of Greg and Stuart was able to design my system. Alright, I'll create my next post ;) Have a great weekend! Francis
IIRC, Stuart had sized the main trunk at a 12" square which was inadequate for even a 2 ton system, at least here in the US. I had to re-calc all of the box sizes for main trunk fit as well as spacing between the 2 ceilings. Also, I had to rearrange the orientation on 1 or 2 boxes due access and fit in the attic space. Took me awhile, but Stuart had gone MIA at that point(one of many episodes). It kept me busy, which helped with the anger and frustration....
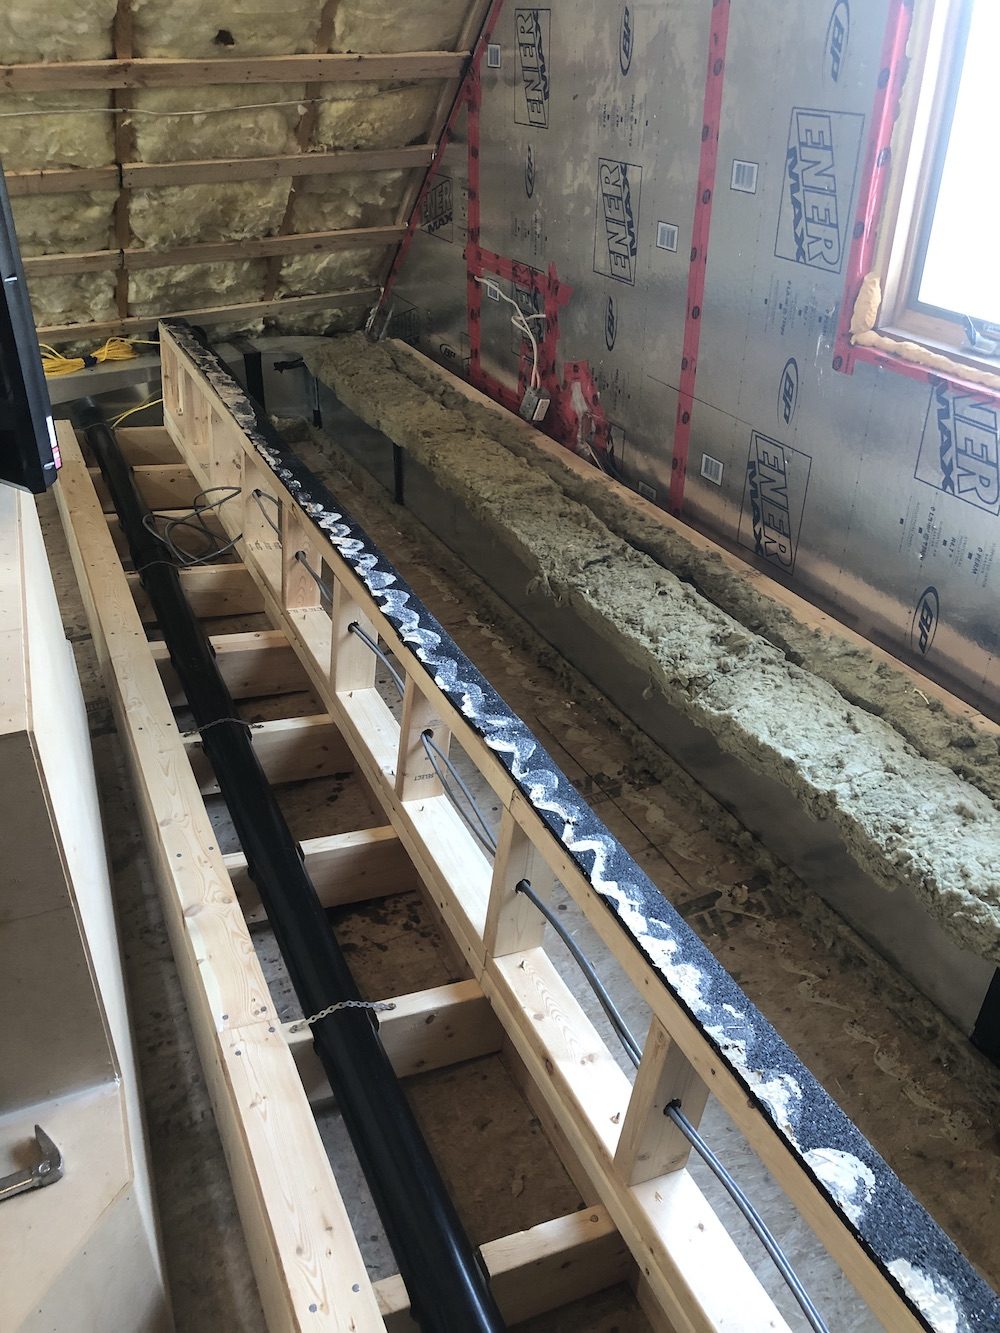
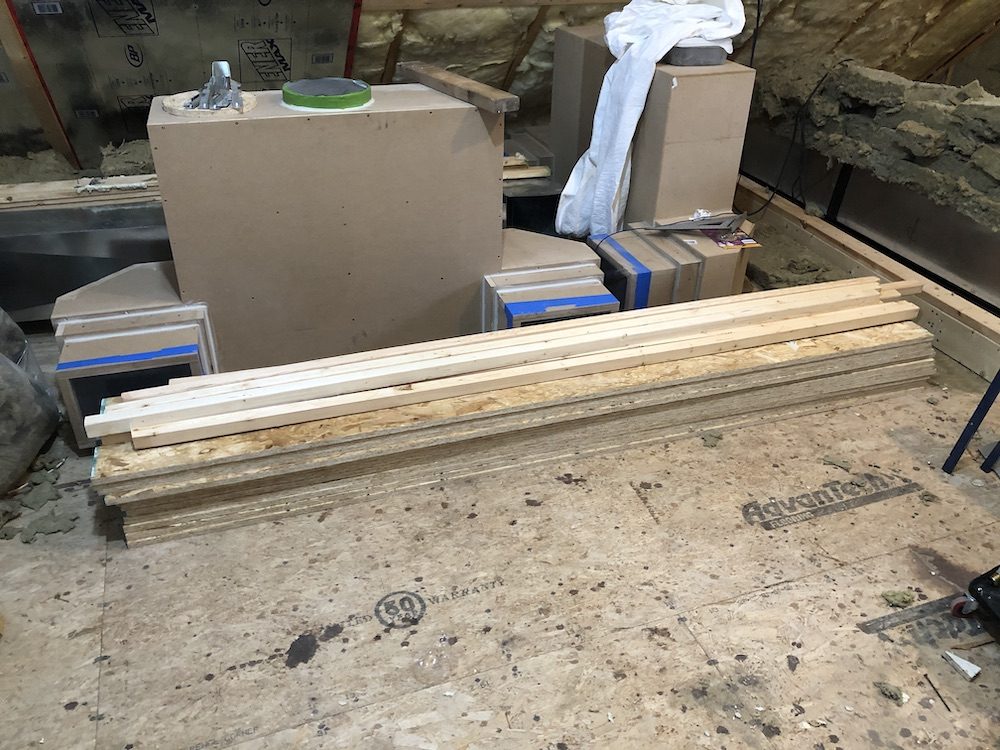
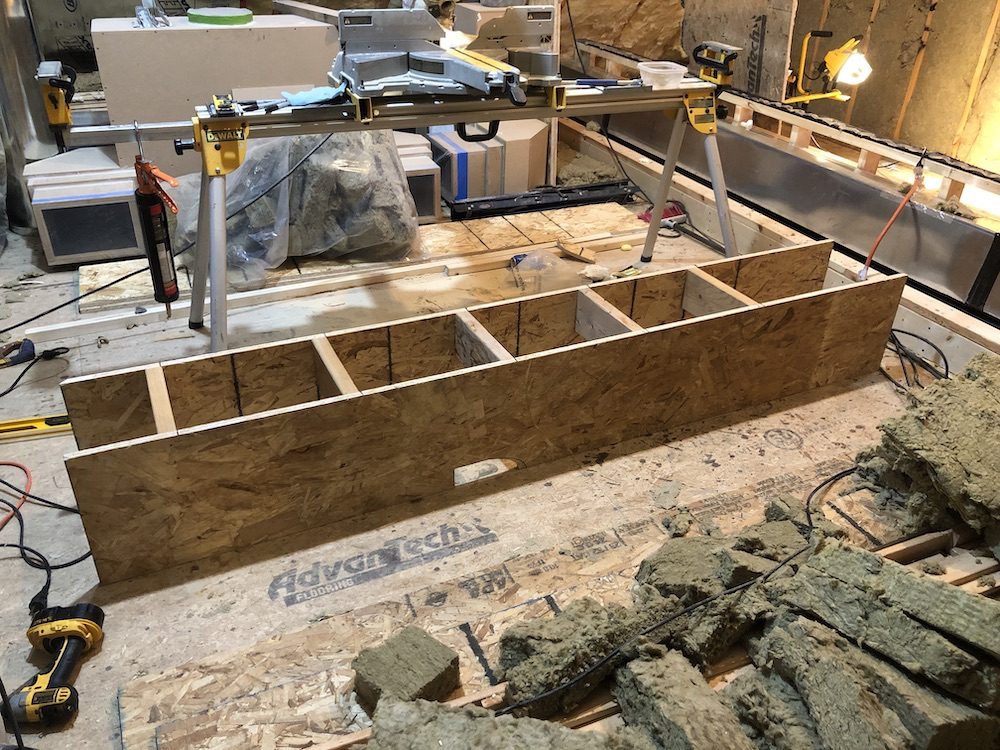
Custom Bracing and Strut Support System for HVAC Silencer Boxes Here's you see how I was able to build some brackets with 2x6 and 3/4" OSB. Everything is glued with PL Premium and fastened with screws. It wasn't obvious trying to get those massive boxes up there but you'll see from the pictures where I bought 4 rope pulley systems on Amazon and was able to create my own lifting winch. Using some hardware, few extra pulleys, nuts and bolts I was able to build something that I can reuse for each lifting of a box. I'll show in later posts the flintstone type winch system haha. My father was there to help and supervise with the first lift. You'll see in the last few pictures when the first "return" box it up there and then I show how I installed a bunch of mineral wool insulation above the box. :)
External image, not preserved — original: https://drive.google.com/uc?id=1SrV_cgopj_B2XLfOZE8q_chpwKw1o_h8
External image, not preserved — original: https://drive.google.com/uc?id=1g9iXt8IDuwVaNxTfEPR_2HeKkyjskbrM
External image, not preserved — original: https://drive.google.com/uc?id=1jBPivGTlxEzFXy6j_J-EQYE3m_LsJu7j
External image, not preserved — original: https://drive.google.com/uc?id=1DLZJK0kVV9IvCLL4fphi9PFUI-lFsO1h
External image, not preserved — original: https://drive.google.com/uc?id=19TOrW03ecpBLK3PGp4LixarFqhiRqP6s
External image, not preserved — original: https://drive.google.com/uc?id=1VInzM62PzD7PDRh6a05P8IBuumb8_mK8
External image, not preserved — original: https://drive.google.com/uc?id=1dEM0oYMNBXxiCLW5BPSuNE0QS5VtLv04
External image, not preserved — original: https://drive.google.com/uc?id=1XvPWn5iJMUy44qJlLvmdGYP3AwxXMAXk
External image, not preserved — original: https://drive.google.com/uc?id=1ZjrNlRMtPZHwnVNbf03EsVj6Auy9a-Ri
External image, not preserved — original: https://drive.google.com/uc?id=1uM1bd2NVwFNiIT5_IB-OB6LfWLLpMmOr
External image, not preserved — original: https://drive.google.com/uc?id=1Y0Yf83-TnfzdcyqZIgjXhrnznIQsqxAk
So there you go! 1 of 4 is done! In the next post, I'll show the 2nd section of the floor that I had to work on and the bracing for the second box. I also had to start installing some of the 10" round duct on there against the peak of the ceiling because once the 2nd box would be lifter, I wouldn't have room to run the duct work. I have to say everything so far is fitting pretty good and very tight in certain areas but it's coming together. Good thing I drafted everything in Sketchup otherwise I would have ran into so many different issues.
Here are a few extra pictures that show the insulation installed all around the first silencer box.
External image, not preserved — original: https://drive.google.com/uc?id=1YSdLUl__XHM-zrX8gexHpTX-U0YpgUsd
External image, not preserved — original: https://drive.google.com/uc?id=1aq75we5D7-ZIuFupkHDJdd8oModEgy-5
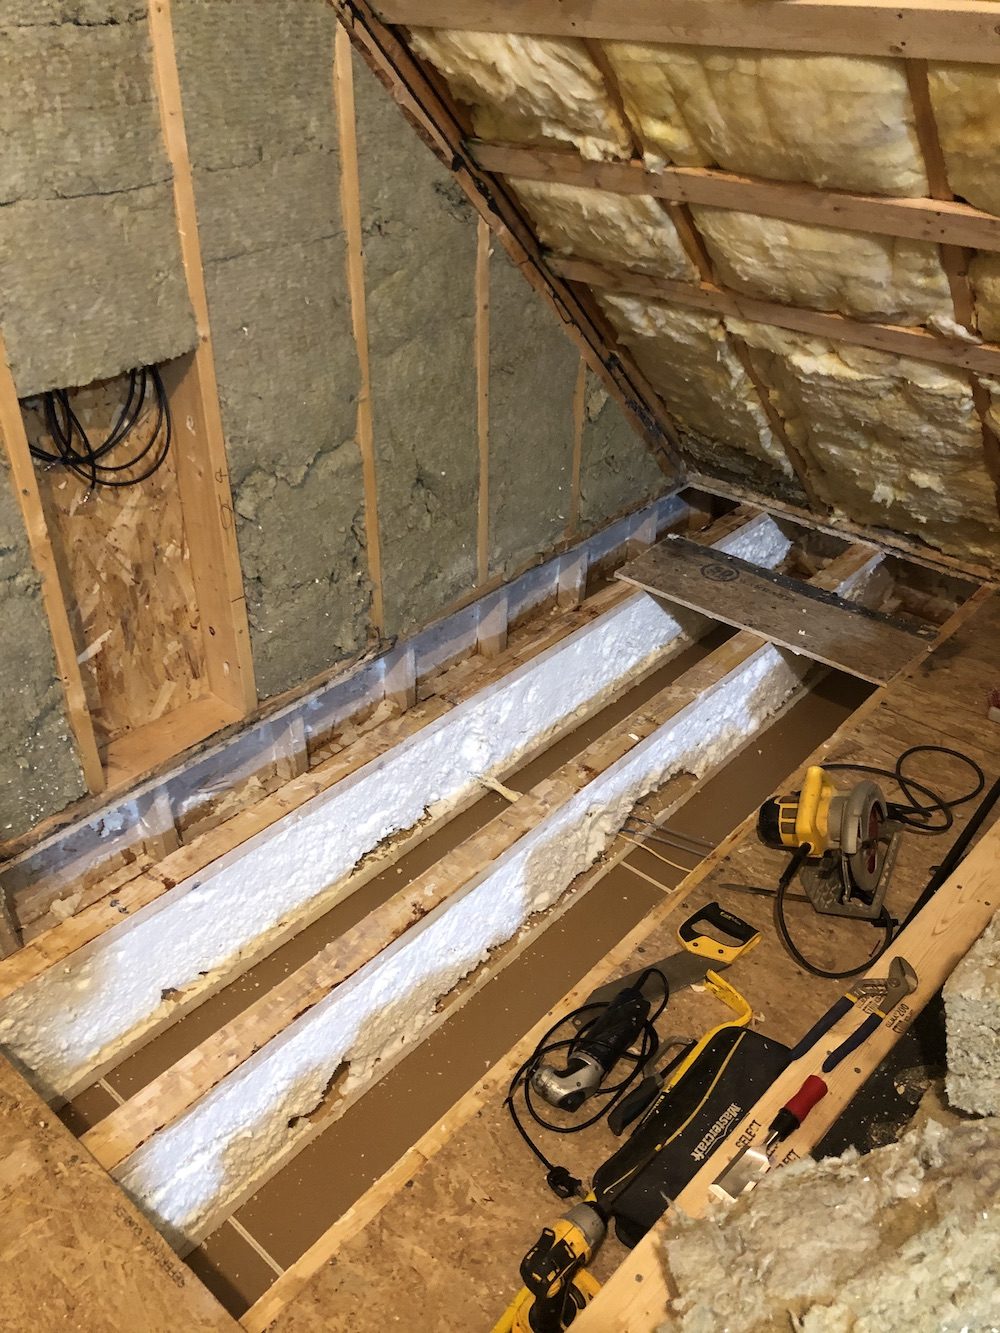
Deconstruction and Part 2 of 3 of Strengthening Floor Joists Here are some pics that again show all the following work done: - Remove existing sub-floor to expose the joists. - Remove all the spray-foam insulation - Install (glue and screw) 3/4" OSB on each side of the floor joists with added bridging/bracing. - Install (glue and screw) new OSB subfloor. Note that for this second section, I had to open up the floor a little wider since I'm going to have both my inner-leaf walls framed roughly 14" apart so I'm adding bracing and OSB to two separate joists.
External image, not preserved — original: https://drive.google.com/uc?id=1s579UbVjgVUEKxx27gJHuq25EFUZw7sK
External image, not preserved — original: https://drive.google.com/uc?id=1ZnQiuKvEDi3BUeYq3l9op2bhgjrLEDLE
External image, not preserved — original: https://drive.google.com/uc?id=1GrodmOTdPgQ8AhuuTEllk5XtplXyM7wS
External image, not preserved — original: https://drive.google.com/uc?id=1DD6dI8P0suv3tuU2iL1WtHoG3VJ0zSGg
External image, not preserved — original: https://drive.google.com/uc?id=1-Kd6U_9nWQt4cWNKw9EmWDRKW1KcxndE
External image, not preserved — original: https://drive.google.com/uc?id=1kg0QUYU-Mt9q-6QQrpAVchHpxIZBfqd3
External image, not preserved — original: https://drive.google.com/uc?id=1WPjFCnJ4b3g38_uoI8sPomjU7vz7SdQX
External image, not preserved — original: https://drive.google.com/uc?id=1UEDdcVrn02NVWlDKauWiPy-YNs7w3M_4
External image, not preserved — original: https://drive.google.com/uc?id=1Wk4DUzOBSYq_XPUtgWM0kJ7Cuf4fy5zS
External image, not preserved — original: https://drive.google.com/uc?id=11UHh_F7HVVhufu2-HaIQeOaUrwd4GnQ6
External image, not preserved — original: https://drive.google.com/uc?id=167lhOPoYnsJkCCi4ht_ssFcvI7hBuVxe
External image, not preserved — original: https://drive.google.com/uc?id=1nvwyVhEX7lg_CRqHKNKJ0xjngUq7Ha7P
External image, not preserved — original: https://drive.google.com/uc?id=1SSJ81_EXPn82D3LI9TTYDA1KdS4HtVrw
External image, not preserved — original: https://drive.google.com/uc?id=1WT5JSFTliHUssBoFOMEKWcZNY8bhYVEz
Next up....framing, bracing, strut system for 2nd silencer box and some duct installation. :) Enjoy!
Hi Francis Sorry for being so late to the party but I've been reading through your posts as they have been really helpful in my design work. But I got to the end and you never posted the set of pictures promised
Studio45 wrote:
Next up....framing, bracing, strut system for 2nd silencer box and some duct installation. :) Enjoy!
Are you able to do that still? Andrew
Wow coming up 6 years on this :shock:
aidanknight wrote:
Wow coming up 6 years on this :shock:
Yeah :D I've been looking at posts back to 2011 where the build is doing similar things to me. Always good to see the end of the story and whether it worked out OK
Hey everyone, sorry for not being very active in posting my progress. I promise to comeback soon and post a status update with tons of pics. I'll try and do it this weekend. In short there's been a lot of good work done and I'm looking forward in sharing and I'm sure will help answer some of your questions. I know this build has been taking forever. I've done a lot of research about attic style studios but there's nothing out there with a room within a room design with full hvac, silencer boxes and inside out walls and ceilings lol. It's been a very long, challenging and frustrating project. At times I'm happy to step away from this lol. It doesn't help that I have many big ongoing projects on our property and the build as you can tell isn't currently #1 on the list. I will say that I'm just about done with a few so good news is the build will be #1 again soon. Lumber material costs have also just been stupid with the pandemic situation but looks like its going down a bit. Anyways, stay tuned ;)