Hey, all!
Sorry it's taken this long from my promise in the Design forum in THIS THREAD before I started posting up pics from the build, but better late than never, hey?
As a bit of a background for those who can't be bothered checking out the design thread, this studio is in Wollongong and is essentially the bottom level of a house.
The house was originally built sometime in the 50s and was built on a slope as a single level house on stilts. The owner at the time decided that he could make use of the space downstairs and dug it out and turned it all into rooms.
In short, it was a TERRIBLE job. Bad brick work, bad power cabling, uneven floors... not great. But good enough for someone with some money and some friends with big hammers to turn it into something good! :)
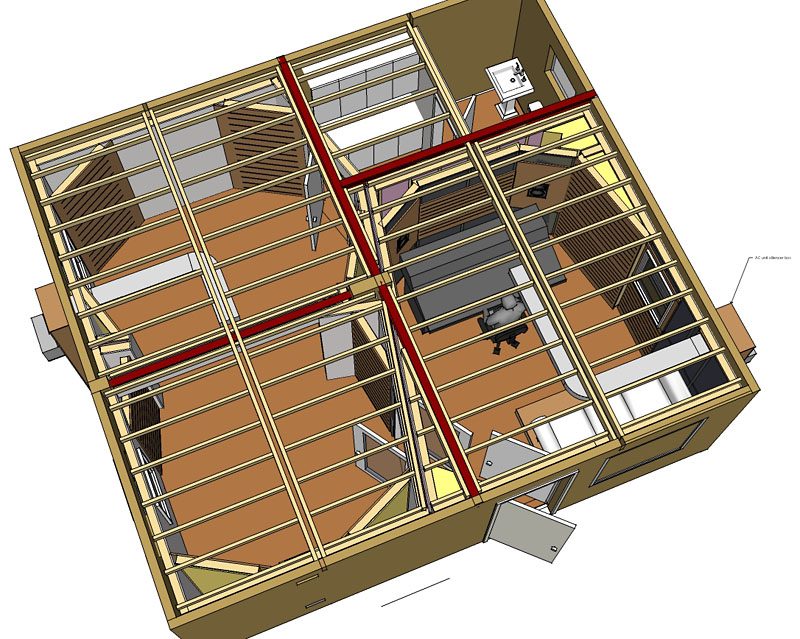
After asking a few questions in that thread I linked to at the start, John came up with an awesome design that eventually evolved into this:
Recovered from web.archive.org — originally hosted at http://www.lord.net.au/slsstudios/images/studio_plan003.jpgPretty awesome, but due to a few factors, we couldn't use all of the ideas, and there was never going to be a large format console in the middle (that was just for illustration purposes).
The project was handed over to Glenn (gulfo) where we nutted out the finer details and Glenn drew up some brilliantly detailed plans that even an idiot could follow (boy am I glad of THAT! HAHA!).
I'd just like to say a big THANK YOU to both John and Glenn for your amazing work on this project - it wouldn't have been possible without your help! Cheers!! :)
Well, things dragged on a little bit. When we were getting plans happening the builders were free but John was really busy, and when I finally had the plans ready to go, the builders were tied up elsewhere. Probably lucky because it took a little while for the funding to come through. Eventually all of the pieces were in place and we were ready to go a few weeks ago. Let the building begin! :D
So, first thing we did was get some prices on things and we soon realised exactly how scary a project like this could cost. :?
On the original plans, there were double sliding doors between the control room and the tracking room, and the tracking room was split in half with double swinging doors. There was also a double glass window between the control room and tracking room, and windows all around the place to the outside world.
The price just for the glass fittings? About $20,000 AUD.
:shock::cry:
Time for a re-think! That was a good chunk of my studio budget on just glass. OK, so why do we need glass at all? I'm a heavy metal musician and I have an Irish heritage - I don't see natural light usually and it wouldn't do my pale skin much good anyway! HAHA! So my solution - trash ALL of the windows and glass doors.
OK, cool. There's $20k saved, but obviously that brought in a whole host of other issues.
I should tell you a bit about the studio at this point and what it's intended for so things make a bit more sense.
Basically, its primary job is to record my band and other projects. It's all computer based, so everything is done in the box with mixing and (if necessary) mastering, etc. I've done a lot of albums out of my place in less than great rooms and they've sounded good but there were always a lot of hoops to jump through at mix time because I had to double check them on different systems, match frequency charts from other songs, etc. - it works but a really pain in the ass. And of course, I couldn't record noisy things like loud drummers, vocalists or cranked amps.
Apart from that, it's also a video/DVD production studio, again all computer based. My video machine would be running signal out to a 42" LCD TV and both computers linked together if either one of them ever needed any more grunt (distributed networked processing).
So because of that, I already had a good lot of gear, including my nice big LCD TV, which could have a lot of uses it seems.
Besides video editing, it could be a secondary monitor, a TV for live-to-air broadcasts or DVDs when I needed break, or we could hook it up to be a video link to the other room.
A-haaaaaa! :)
A way around the missing studio window and the problem of not being able to see if your drummer is on fire in the tracking room or seeing if the engineer is throwing up after your "star" vocal take! ;)
Off to eBay I went and grabbed a cheap 15" LCD TV for the tracking room, 2 mini spy cams, and a length of double video cable. Instead of a $3000 studio window, I ended up with a $300 video link. All good! :)
Apart from that, all of the windows would be boarded up, just normal no glass doors put in and we were good to start trashing the place! Hooray!
So next up, our builder, John from Vorria Builders (who I highly recommend - great dude and is doing a killer job!) came along with his offsider with a couple of big hammers and smashed the living crap out of the house! HAHA!
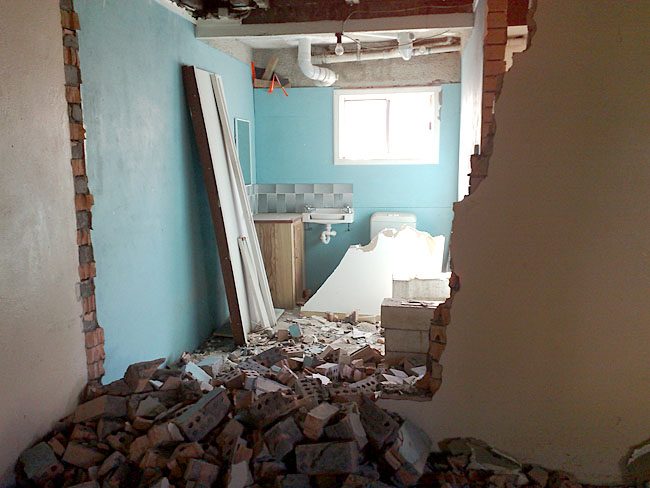
This is what I awoke to on the first day:
Recovered from web.archive.org — originally hosted at http://www.lord.net.au/slsstudios/images/07082007126.jpg:shock:
But before I had a chance to lament the destruction of our house, they'd already turned that warzone into this:
Recovered from web.archive.org — originally hosted at http://www.lord.net.au/slsstudios/images/08082007128.jpgThey're nothing if not efficient! :)
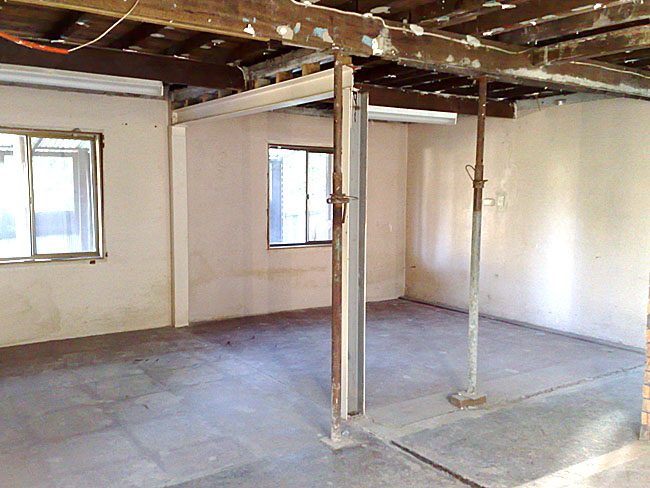
A couple of temporary supports were put in place to stop the house from collapsing (I'm told that's a Good Thing) and it was time to move on to the next stage...
Next up was doing the floors and ceilings.
The way this house was made, the floorboards were the lower level ceiling. There was a thin and very badly applied layer of gyprock in the lower rooms but absolutely nothing for the front of the house which is above open air for a part of it. When the previous owners (about 2 owners along from the people who built the house initially) renovated part of it, they tore up the carpets and polished the floorboards. Looked great but the carpet was also hiding the fact that between each board in places you could actually see the ground through the holes! :? Needless to say we'll be getting to that sometime in the near future - not great for your energy bills!
This also caused an issue with the downstairs rooms where the studio was going. Someone talking at a relatively moderate volume downstairs sounded like they were in the next room - that's how thin the floors were! Imagine a loud drum kit or bass amp... Hmmm... So first thing on our list was to add a bit more insulation to the floor itself by cladding Gyprock to the bottom of it.
This is what the ceiling/upper floor looked like before the work:
Much better! Now people talking downstairs sounds like somewhere else in the house, not just outside your door. Not the final solution to the sound proofing, obviously, but a great start.
You'll also see that one of the main steel beams that was holding up the house was replaced by a thick wooden beam across the middle with extra couplings put in. The irony about this work is that it's actually making the house foundations stronger than what it was despite removing 80% of what was holding the house up originally. All good! :)
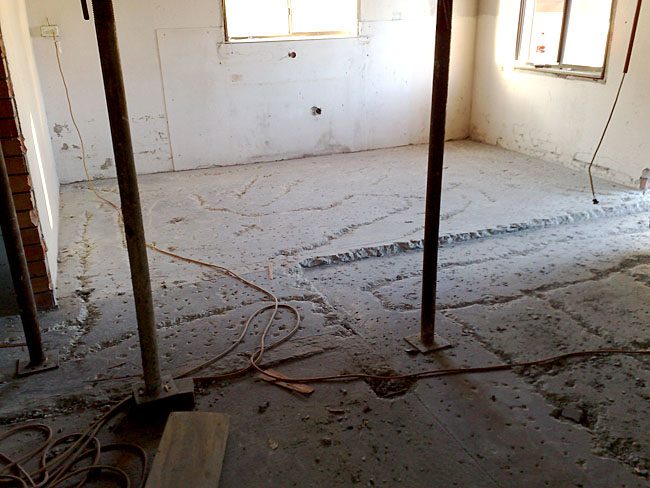
Next up was the floor and out came the jackhammers!
Recovered from web.archive.org — originally hosted at http://www.lord.net.au/slsstudios/images/17082007167.jpgNot everything needed to be dug up, but it needed to have enough for the new layer of concrete to grip what was down properly. Besides the obvious part where the existing walk way was that was slightly lower than the rest of the floor, there was a big bump in the middle of one room and a big dip in another. The guy that poured the floor initially did a great job making everything level.... not. :roll:
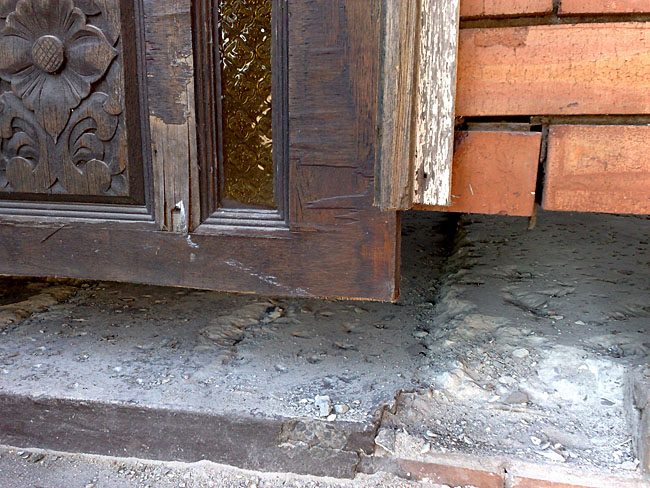
The outside door was being widened and it needed space underneath it to give the new concrete room so it was weird coming down to see the outside of the building look like this:
Recovered from web.archive.org — originally hosted at http://www.lord.net.au/slsstudios/images/17082007155.jpg:?
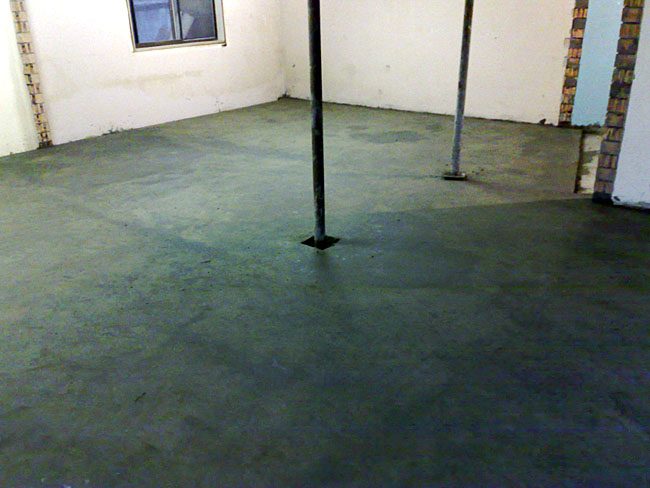
But eventually the new and actually consistently flat concrete floor was in and setting nicely:
Recovered from web.archive.org — originally hosted at http://www.lord.net.au/slsstudios/images/19082007169.jpg
Next up was the basic framing...
The ceiling also had extra support beams put in as well as a permanent steel support joist that replaces the two temporary ones that were there while things were being put into place:
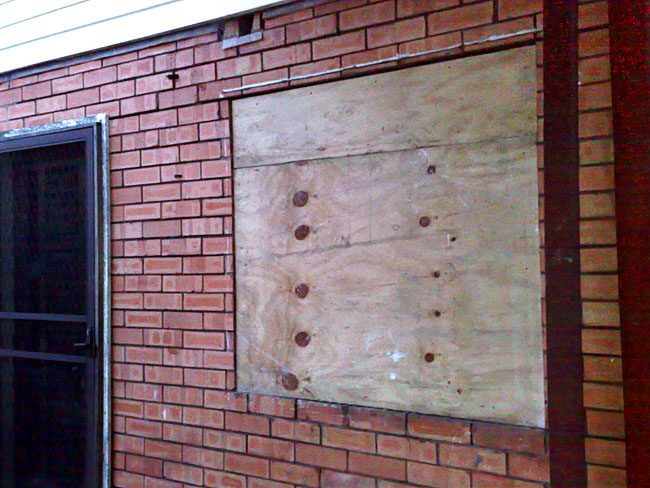
The final thing that was done with this lot of work was to entirely remove and block off all of the windows:
Recovered from web.archive.org — originally hosted at http://www.lord.net.au/slsstudios/images/27082007205.jpgThis was pretty thick mass that was put in to make it roughly the same kind of thickness as the outer brick wall.
That was about all the builders could do at that stage until the electrics and air conditioning was put in, which is another fun can of worms that I'll tell you about next...
So that brings us to late last week. Things were moving along really nicely, work was happening downstairs and I was buying everything I needed to put into the room.
Because of the choice to block off the windows, I had to come up with another way for the building to pass fire code. Basically, you need an escape route from each room and you need some kind of emergency lighting to show you the way out (in case of a fire or a blackout) - think about it, the room is entirely soundproof, airtight and no natural light, if you have a power failure you're gonna be SCREWED and stumbling around in pitch blackness. You're also required to fit smoke alarms in each room.
Thankfully the escape route wasn't an issue - every room has 2 entry/exit points. So the big thing now was to arrange emergency lights and smoke alarms. Luckily, I stumbled across this company: http://www.homeemergencylighting.com.au These guys do a combined emergency lighting system and smoke alarm with a rechargeable battery pack that has a lifespan of 5 years. If the alarm goes off due to a fire, the lights and alarm can go for as long as you need them for on mains power, and if the mains is cut due to the fire or a blackout, you get 2 hours of light and alarm (or if it's just the mains power that's cut with no fire, just the light). Awesome idea! These guys were featured on ABC's New Inventors show and won the viewers' choice award for that week. And on top of that, Jeff the owner is a really nice guy - highly recommended company if you ever need this kind of thing!
Jeff put in the power cables and in-ceiling stuff before the insulation goes in and he'll be back to finish the job and install the actual lights and alarms once the walls and ceiling and insulation is all installed.
The other thing about a soundproof, lightproof and airtight room is ... no air! You close the door and you only have a certain amount of time before people start to... you know, die, and stuff. Plus it tends to get VERY hot in a room when you're drumming or using a lot of cranked tube amps or what have you. OK, so we'll need air conditioning. Easy!
Hmmm, wait... we'll need TWO air conditioners, one for each room since they'll be soundproofed independently, plus what might be a great temperature for a sweatty drummer in the live room might be absolutely freezing for everyone in the control room.
OK cool, 2 air conditioners. Easy!
Hmmm, wait... if I install split systems in my rooms they won't work because they rely on air circulation to make them work properly, and if the room is airtight... ngh! OK, how about ducted systems then? No... not enough room in the ceilings (the ceiling is pretty low), more expensive and needs sound traps on the ducting. Argh! OK... now what?
The solution turned out to still be split systems but also installing one of these babies: http://www.acoustica.com.au/aeropac.html Basically this is a very quiet air ventilator that draws in fresh air from the outside, filters it and has noise suppression in there. Awesome! One for each room please! Again, great company and I highly recommend them.
One company I do NOT recommend is Alpine Air Conditioning in Wollongong. What a mob of dickheads, seriously.
I have a similar build thread running our discussion forum where I go into detail about these cretins. If you're keen (and be warned, there's some strong language being used), check out my rant HERE.
Needless to say I didn't use those morons and I went with a company called RapidCool: www.rapidcool.com.au They got back to me right away (on a Sunday, no less), gave me a great deal, were friendly and competent... highly recommended! :)
Up next was the electrics!
As luck would have it, our guitarist Mark is a licensed electrician! Yay! :)
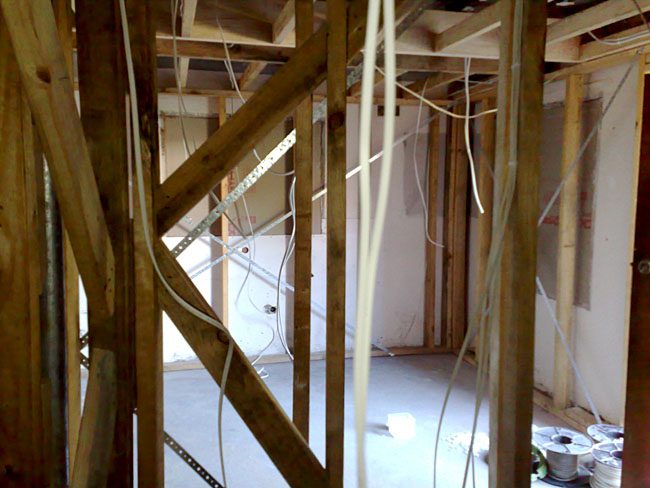
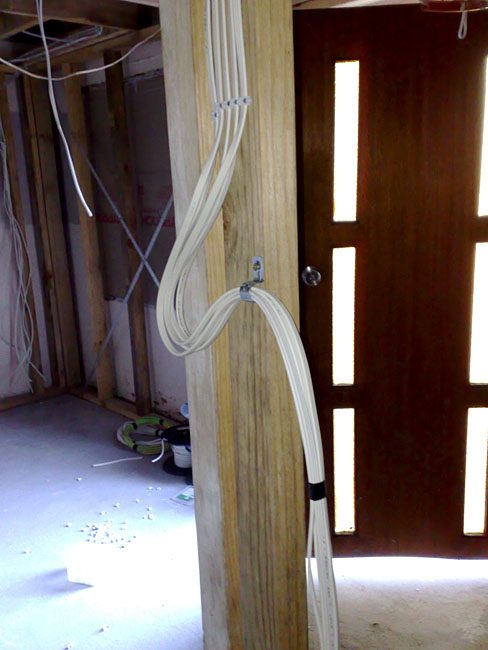
Can we say... welcome to the jungle?
Recovered from web.archive.org — originally hosted at http://www.lord.net.au/slsstudios/images/13092007250.jpg
Thankfully, Mark's a big stickler for neat wiring so after everything was roughly in place, everything was clipped into position and taped up:
Recovered from web.archive.org — originally hosted at http://www.lord.net.au/slsstudios/images/13092007255.jpgHeavy duty mains power was patched through to the main fuse box to the new studio sub switch box that will be installed after the insulation is in (each wire is the same thickness as a heavy duty extension cord which normally has 3 separate wires inside, so MAJOR heavy duty wiring - but it's got to be to carry current from fuse box to fuse box). All of the existing lights were removed, almost without mishap (yay for safety switches and fast reflexes! HAHA!) and the positions of everything was carefully laid out for when the builders return.
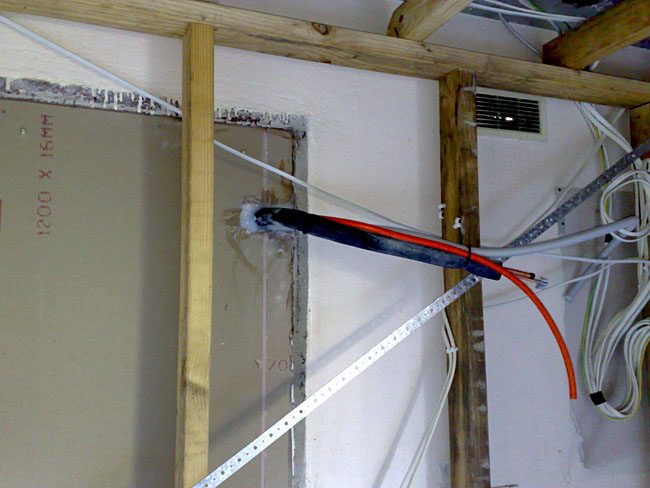
The build was interrupted by the first date of our album launch tour in Brisbane, then a quick flight home to be up and ready for the air conditioner guys to install the pipes into the walls:
Recovered from web.archive.org — originally hosted at http://www.lord.net.au/slsstudios/images/18092007261.jpg
Cheers, John! :)
Well, work continues...
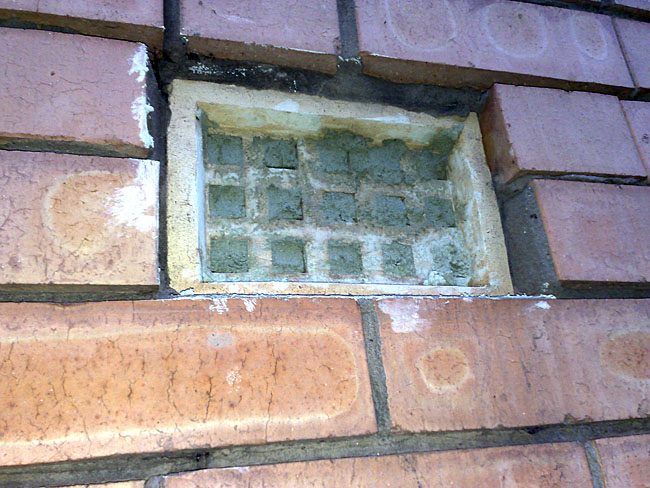
Finally the vents and all of the other holes (including dodgy original brick work) was plugged up:
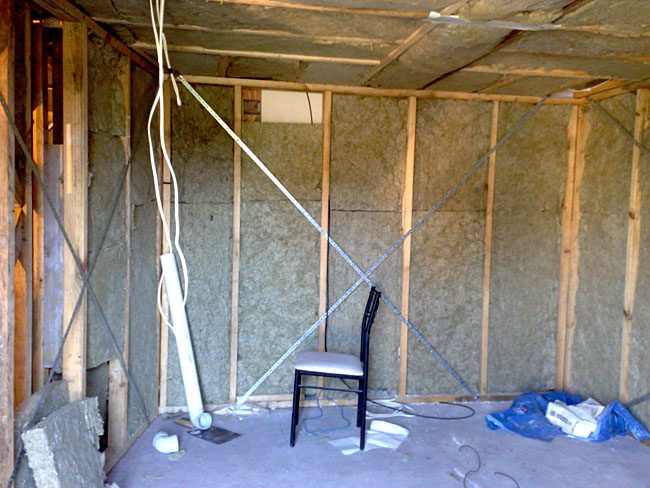
Recovered from web.archive.org — originally hosted at http://www.lord.net.au/slsstudios/images/20092007268.jpgAnd then the rockwool was put in:
Recovered from web.archive.org — originally hosted at http://www.lord.net.au/slsstudios/images/21092007272.jpgI swear, it's the most bizarre thing talking to someone in a room with just exposed rockwool - the sound is so dead, it's just... weird. Unnaturally dead sounding and hard to tell where sound is coming from because it's not being reflected as much as you're used to. :?
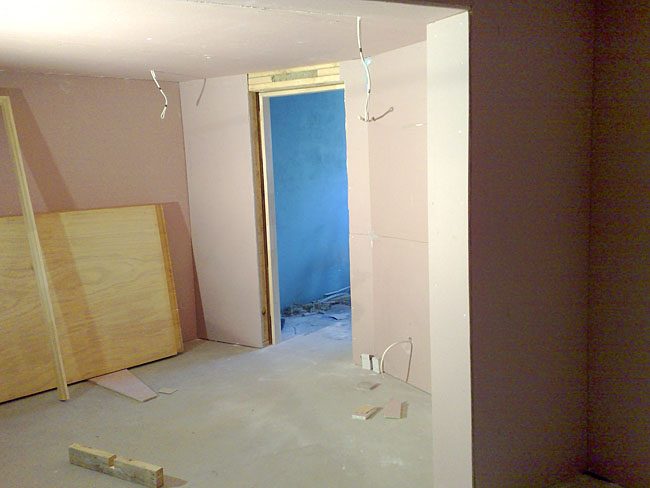
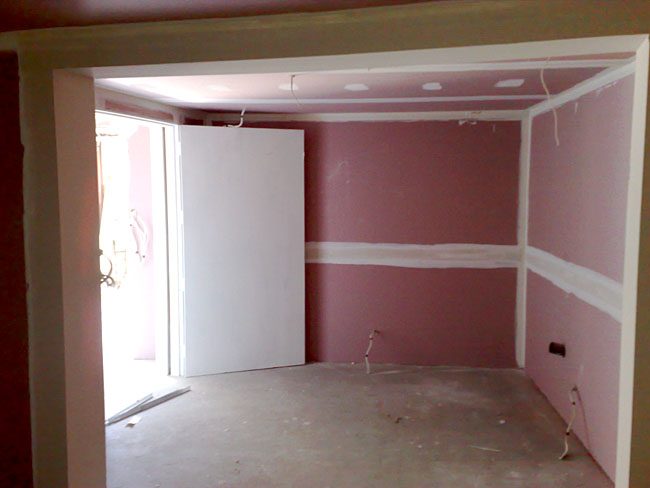
Thankfully, this is only temporary as the Gyprock is now starting to go in:
Crankin' along nicely! Hopefully we'll have all that done over the next week, and then I try my hand at painting... which will no doubt suck, but hey, how bad could it be? ... right...? er... right? :shock:
More updates soon! :)
Recovered from web.archive.org — originally hosted at http://www.lord.net.au/slsstudios/images/26092007294.jpgAnd if that wasn't exciting enough, we now have a million doors too:
Surprisingly no one walked away covered in white paint, which I'll take as a very positive sign! ;)
Next up was the plastering on the Gyprock:
Recovered from web.archive.org — originally hosted at http://www.lord.net.au/slsstudios/images/05102007334.jpgThis is gonna be a slow process as it has to dry between each application, so no work for me until next weekend... then it's full on with painting, electrics, aircon and then the floor tiles.
More updates soon! :)
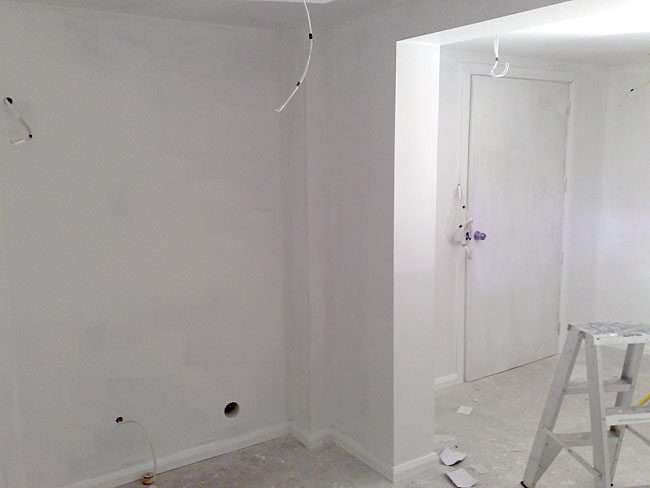
Next up after that was the undercoating. I always said doing this studio stuff would have me end up in a white room. Well.....
Recovered from web.archive.org — originally hosted at http://www.lord.net.au/slsstudios/images/14102007361.jpgThankfully that was only temporary!
The painting began - a very light blue/grey for the ceiling and doors, and a light tan colour for the wall. By itself the wall colour is so-so but the idea is that eventually there'll be dark blue skirting around the bottom and around the door frames, dark flooring and stained wood paneling in the corners for the absorbers and resonators, so a plain wall will be ideal to break that up.
We're still not done on everything - the first coat of everything is down and everything is masked up to keep stuff neat but we plan to have all of the painting finished by Monday night.
While the painting was being done, Mark our guitarist and resident electrician returned and put in the lights + switches, sub mains board and power out for the air con.
I've put in some yellow lights for some of them to add a little more warmth and interest to the lighting while keeping the main work lights white.
One shit thing I found was that each light is 50 watts. In each corner are 2 lights - both 50w each. There's 12 sets of 2 lights. 1200 watts! POWER BILL'D!!!! OW MY WALLET! So the next plan was to get nice cheap energy saving lights to replace them with. I came home with a nice big bag of GU10 energy saver lights at 10 watts each (much better!).... only to find the base of the globes were too short to fit into the housings! Upon checking the bottom of the pack, it reads "fits most standard GU10 style fittings" ... MOST. Argh! :x So back to the store I go tomorrow... *sigh*
But it's coming along well. The cabinet makers who will be doing the resonators and the soffits and racks in the control room will be here on Tuesday morning to go over my plans with me, and the aircon guys are back Wednesday afternoon to put those in.
Hopefully by then I'll even have the flooring down. It's getting there, but slowly....
Looking really lovely Dude - a great job indeed. Can't wait to get to your stage! :roll:Lord Tim Wrote:
I swear, it's the most bizarre thing talking to someone in a room with just exposed rockwool - the sound is so dead, it's just... weird. Unnaturally dead sounding and hard to tell where sound is coming from because it's not being reflected as much as you're used to.
I can so relate to your sentiments on this one - My first studio that I built back in 1989, had a voice-over room that was just bare rockwool all over the walls and ceiling since that was all I could afford. :shock::shock: , man, it was so dead in there, it felt like you'd almost become deaf just by walking into it and closing the door! Bloody horrible!:shock:
I got some great vocals out of it mind you, and the neighbours never heard a thing! :lol:
Warm regards,
Lou. 8)
Hey, cheers for the kind words, Lou! :)
I think there's definitely applications for an entirely dead room, like if you were doing ADR and you were adding in ambient reverbs later to match the dialogue you needed to fix, for example, but I think it'd take a while to get comfortable working in that environment for sure!
Careful what you wish for too - when you get up to the stage I'm at now, it's nothing but endless painting! Argh! Who the hell would want to do this for an every-day job? Even drum track comping is better than this (Hmmm... maybe about on par with it - I HATE editing drums too! HAHA!)
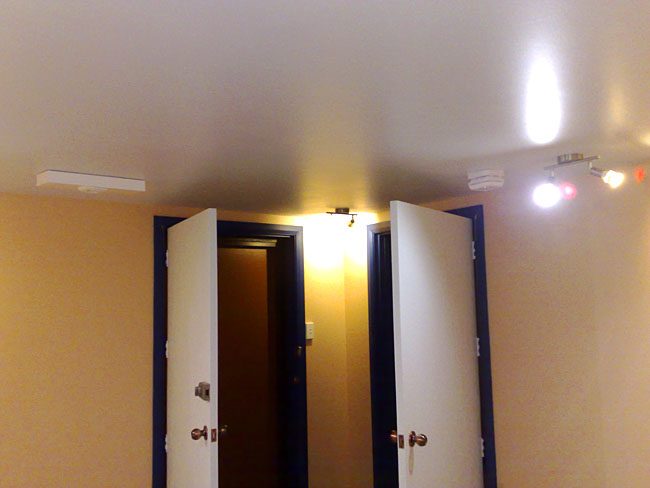
All of the rooms have dark navy blue trims around the doors and floor now, which is really striking (looks black in the pic, but the blue really stands out when you see it in person).
I say "sorta" before because while everything was basically done, we learned an important lesson about cheap masking tape: it's cheap for a reason! The blue bled through underneath it, and it also ripped off some of the tan paint of the walls in places when we took it off! :x So we had to go back to the store and get some good tape, little brushes and fix up all of the crappy bits! *sigh* Nothing is ever straightforward is it?
One thing I am happy about is the lights!
I ended up going to Eurolight and getting 11 watt energy saver lights that actually fit (yay!) and were actually way cheaper than the ones we originally got from Bunnings too - score! :D
I can switch off each row of lights to get whatever mood I like in the room, plus they're all 11 watt lights now, so I'd say I'll usually be running just 1 row - 4 lights, 44 watts. That's HEAPS better than the 200 watts per row I had before, and MUCH cooler to run as well.
But do you know what would make my studio even cooler? Air conditioning! :D
The guys from Rapidcool came back and installed both units, and they work great! Dead quiet too!
Next up after that, Jeff from Home Emergency Lighting returned to install the smoke alarm and emergency lights:
Recovered from web.archive.org — originally hosted at http://www.lord.net.au/slsstudios/images/29102007403.jpgHooray - now I won't burn to death in a blackout! :)
So with that done, it was time to lay the tiles! .... or not! :?
See, here's the thing... I'm a musician and audio guy. I'm not a painter and I'm certainly not a tiler. And that point was rammed home really quickly when we put the tiles down on the cement and... they didn't stick! :mad: And then it dawned on me... we need to prime and seal the concrete first. *sigh* This is all stuff probably every handyman and builder would go "der!" at me for, but hey - why don't you guys mix a world-class album, dammit! HAHA! But the good news is we only put down a couple of test tiles first, so not much harm was done.
Next up was a trip back to Bunnings to get some concrete primer/sealer. This is weird stuff - it's like a gooey kind of milky liquid that dries clear. I have to tell you that when you put this stuff on the floor, it looks remarkably like you're spreading around big globs of semen! :shock:
And even more disturbingly, by the time I'd finished doing the floors, my right hand had blisters on its palm..! That took a little explaining when I went back upstairs later... :oops: HAHA!
But annnyywwwayyy... the floors were finally sealed over a couple of days and left to dry (and sure enough, it did indeed dry clear and had a good stickable type surface now). Time to put the tiles down! :)
I found out quickly that the tiles, while pretty straight, weren't exactly square and neither were the walls. I purposely started in the control room where the soffits were going just in case there was any major screw ups - which surprisingly there wasn't!
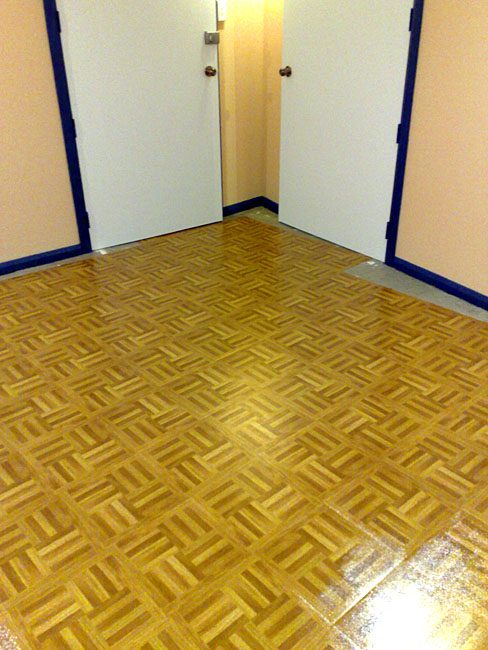
Eventually the entire control room was done as far as full tiles goes:
Recovered from web.archive.org — originally hosted at http://www.lord.net.au/slsstudios/images/01112007416.jpgAnd then I started on the live room:
The annoying thing about these rooms is that they're not exactly square... so after we get everything basically down, then starts the annoying process of doing partial odd-shaped tiles to fit into the walls. I can see that being frustration worthy already!
That's all for now - more tiling tomorrow... and the next day... and the next day... *sobs*
Hey Tim, very nice!
I'm kinda right behind you, check " Bahamas Home Studio construction".
I am almost to the point of installing the sheetrock.Very cool.
Sorry for the lack of updates, guys - things have been cracking along here nicely and I have lots of great pics and info for you, but we've been touring or I've been snowed under with work and haven't had a chance to do too much updating.
I'm still checking in here every few days - your builds are really inspiring to read while I'm getting this done! :)
Anyway, expect some updates in the next couple of days! :D
Alrighty! Let's be havin' some updates! :)
Lots has happened since the last update, so let's see if I can remember it all...
So, the floor tiles all went down... more or less. Even with the prepping we did on the floor, they still started to lift around the edge of each tile a bit after a while. I suspect that I did the job a little too well and once the tiles expanded a bit, they pushed against each other and the crappy adhesive didn't keep them from lifting. *sigh*
Doesn't look terrible bad and we have rugs hiding the worst bits, but still kind of sucky and demoralizing.
Here's some pics of the completed floors:
In good news, however, I managed to track down a cabinet maker to do the soffits and resonators. The owner of our rehearsal rooms had a friend called Brett Cooper who was apparently an amazing builder and did everything from small kitchen work to building mansions from scratch. :shock: He was way too busy to do anything until he told his boss he was quitting (in far more dramatic and obscene fashion! HAHA!). That left him needing some immediate money to go freelance, which worked good for me because I needed immediate work! :)
The next day, Coops rocks up on a Harley, leaps off, introduces himself and then runs into the room with a tape measure and notepad... 5 minutes later he comes out and goes "this is how we're gonna do it" and proceeds to tell me how he's going to create everything, pretty much exactly as I wanted. Holy. Crap. :shock: I don't think I've EVER had a more no-bullshit experience in my entire life. I like this guy! :D
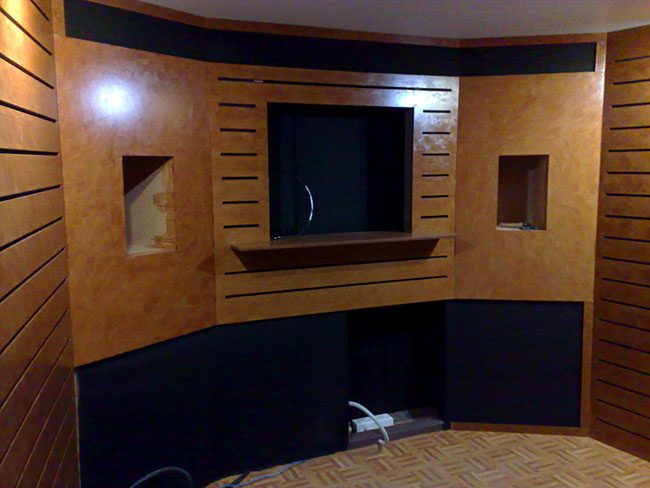
He immediately orders in everything we needed, and first thing the next day he gets to work. First of all, cutting out the panels for the slat resonators and the soffits. Instead of cutting individual slats, he wanted to route out the holes - fine by me!
Here's the as yet un-slotted slat resonator panels:
(Sorry for the photo quality of those ones - I normally take pics with my Nokia N95 phone that has a lovely 5 megapixel camera but I managed to turn it into a $1000 paperweight during a failed software update, and had to use my crappy old 6600. :( I've since fixed it, though, thankfully!)
After that, John the original builder came back and insulated the ceiling of the bathroom area.
We noticed that we were getting a lot of sound leakage through the top there, and it was mostly to do with the sound escaping through the air gap between the ceiling and the inner rooms which wasn't entirely sealed going into the bathroom area. We plan to do a remodel of the bathroom area anyway, so we figured it was worth spending the extra money to get the ceiling looking good now and fix the insulation problem all in one go.
The stain came up great - instead of just doing an even coat, we did 2 coats of a crosshatch effect to give the plain MDF wood a bit of character and to also hide its imperfections. Imperfections in "real" wood with the grain looks great, but on particle board like this, it looks a bit dodgy, so the stain really went a long way to making this look a lot cooler than it otherwise would have.
After that,we pulled the multicore cable through the conduit from the live room to the control room and packed it in behind the soffits, added the black cloth covering to the holes to hide the insulation behind it and got it all into place.
Recovered from web.archive.org — originally hosted at http://www.lord.net.au/slsstudios/images/11122007527.jpgHere's a panoramic shot from the mix position (stitched together from about 12 photos):
Getting there! :)
So, next up is finishing the wooden trim around the black fabric (you can see it's been started on the right hand side), then we'll be adding a door in front of the power outlets and more outlets will be added just out from the soffits that will sit under where the desk will be to power the computers and racks. I'm getting a custom desk made in the next day or so... basically keeping busy until my ECM800 measuring mic finally decides to arrive so I can properly profile the room (ARGH! Hurry up!) and we can start work on the corner slat resonators.
More updates soon! :)
It was Cabots 2-in-1 stain and varnish. I'm sure you'd be able to get something similar in Holland.
Here's a link to the product:
http://www.cabots.com.au/interior/furn_inone.asp
Really good stuff and works well! :)
Hi
Looking great. congrats.
i just have one question hopefully someone can answer:
Will the fact slats are effectively one piece of wood have any effect on its ability to vibrate at different frequencies? If it is the same results as cutting individual slats then i'm sure routing would be much easier and less time consuming than cutting every individual slat.
cheers
Alan