Hello Everyone,
First let me say thank you to everyone who has helped with the design of my room. I'm going to document the entire process from tear down of the existing garage to the build of the new garage and the build of the studio.
The existing garage was 18' x 17'
The new garage will be 19' x 27' with 10' header height and a roof with an 8/12 pitch.
It has taken almost 6 months to get permits for this, and has been a complete nightmare up until now. Hopefully the build will go much smoother.
I can not get my sketchup document below 1MB. So as soon as I can get it down to 500k, then I will upload it. I have already purged and removed all components with the exception of the console.
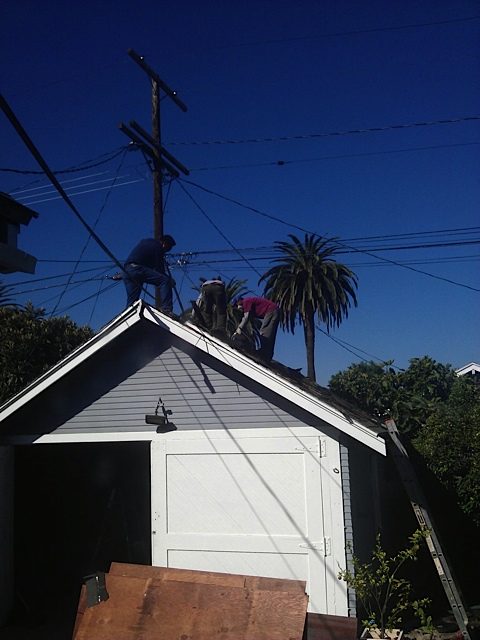
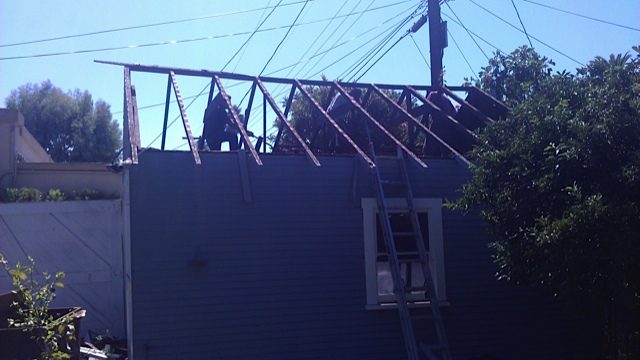
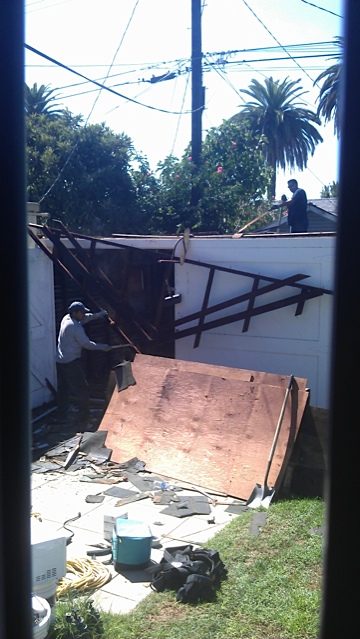
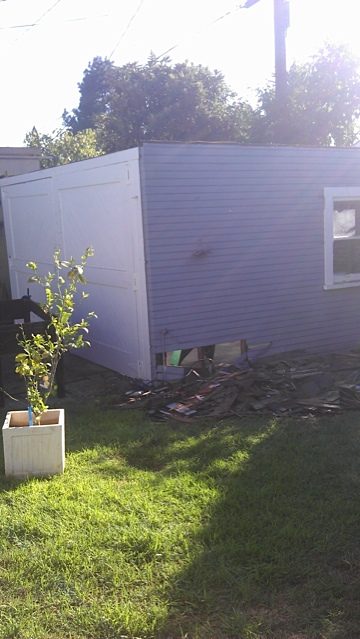
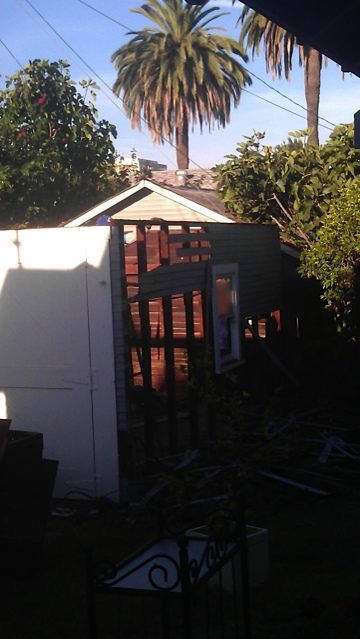
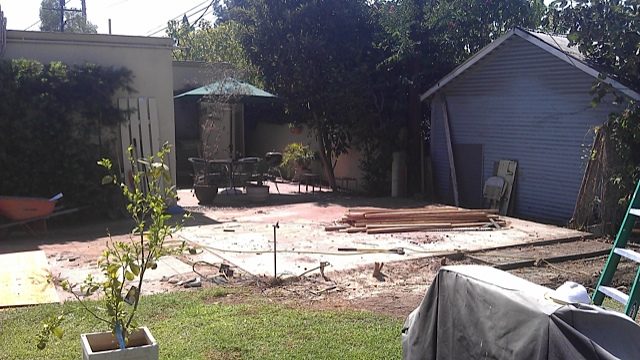
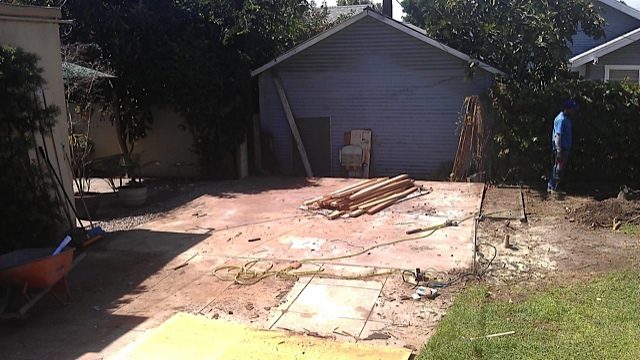
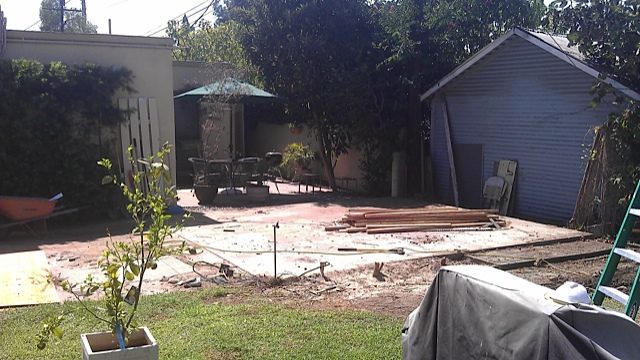
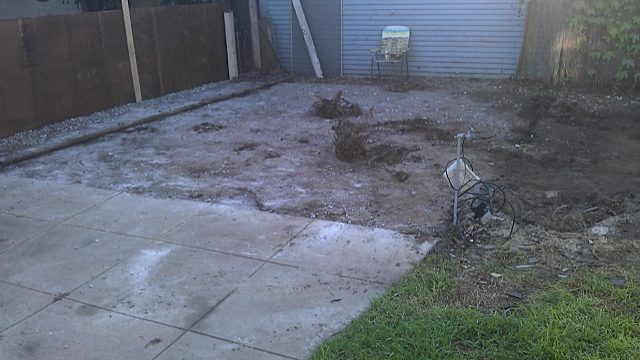
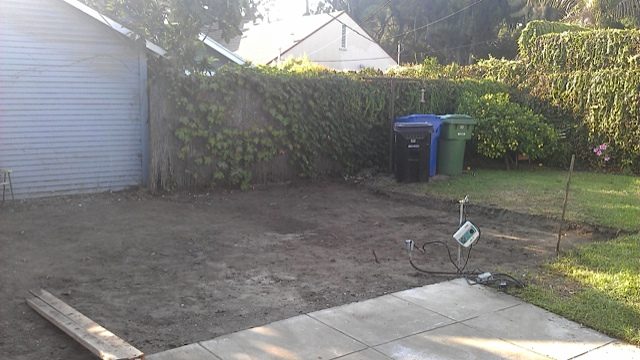
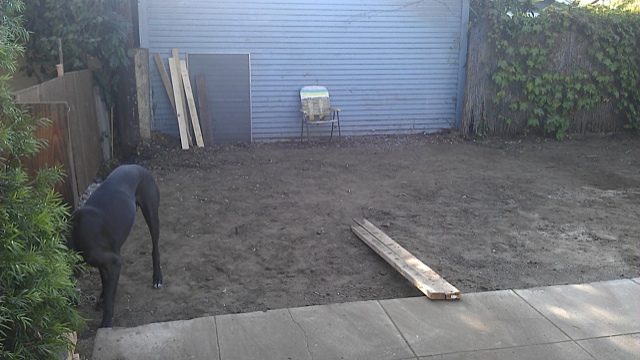
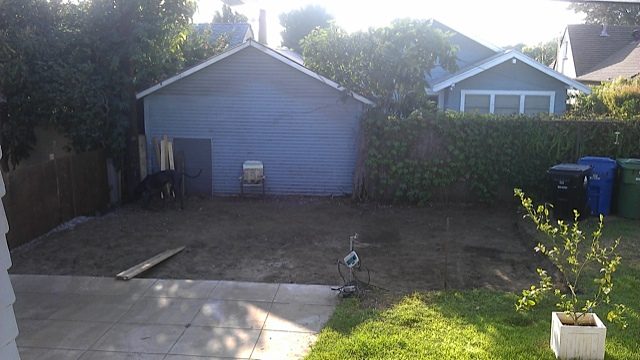
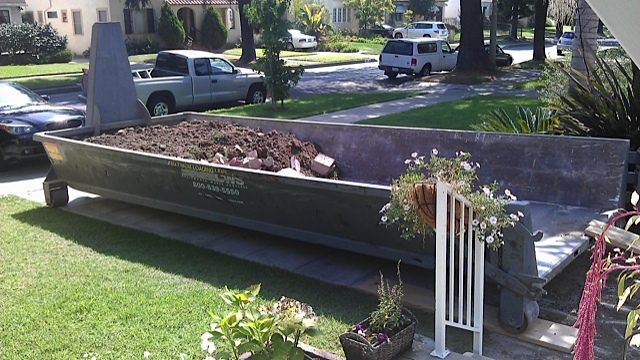
In the mean time, here are some photos of the demolition so far.
The Cottage Studio Build
Originally posted at johnlsayers.com, topic 17822.
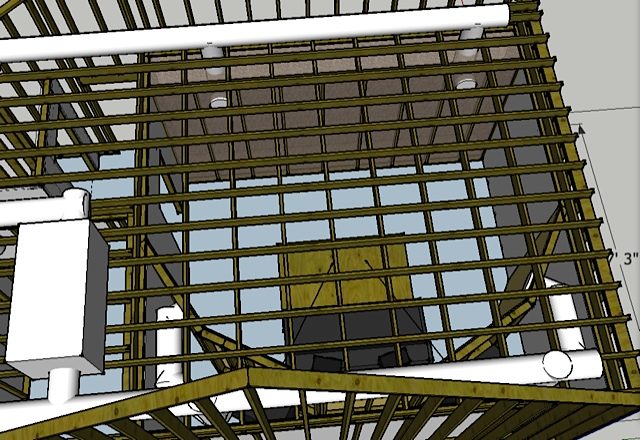
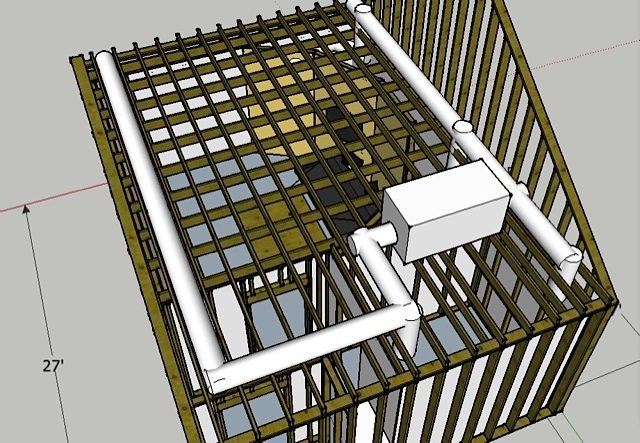
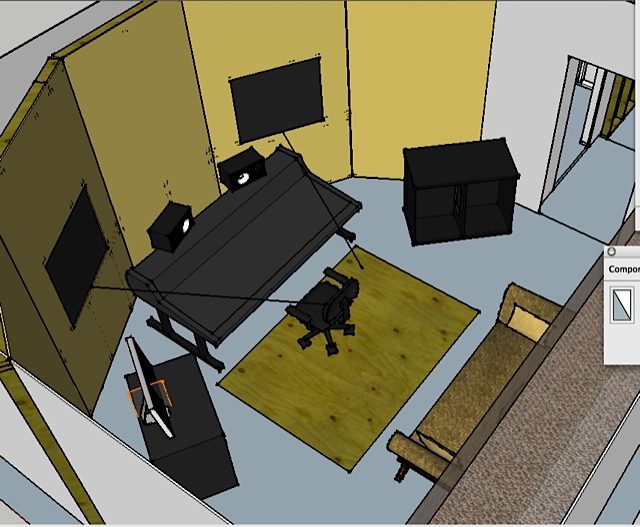
Until I can get the sketchup file down to 500k, here are some screen shots of the design. The control room shell is roughly 17' x 17' x 9' and the iso booth is roughly 9' x 7' x 9'. The AC silencer boxes are not shown, nor electrical or acoustical treatment with the exception of a hanger trap at the rear of the control room.
Framing is going to be 2x4 studs 24"oc with 2 or 3 layers 5/8" drywall for the control room, however, I was contemplating using 1 layer 3/4" OSB and 2 layers 5/8" drywall. This way it would give me more wood to screw fixtures, treatment into, without having to rely on finding studs. (Thoughts??). The iso booth will be 3 layers 5/8" drywall inside out wall with 2x4 studs 24"oc.
I know that a square room is not ideal to start with, but given the proximity of the neighbors, that is what I have to deal with. Control room on the left and iso booth on the right rear and then having to squeeze a bathroom in there too.
Beau
Here are a few shots of the end of day 2. Garage completely torn down.. ready for slab removal.
Beau
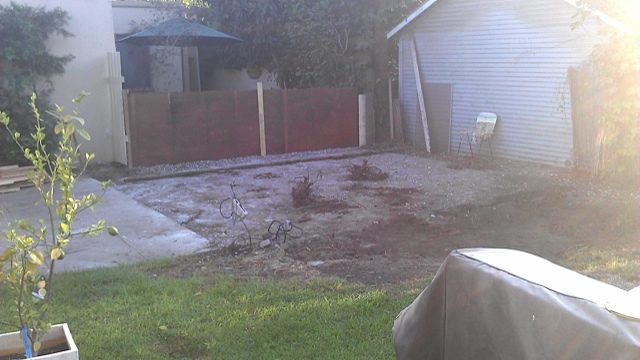
Day 3. Slab removed. Ready to dig up earth and frame up the new foundation.
Beau
Hi Beau,
Just following your new build thread.
It doesn't seem you're seeking advice, but as you mentioned, a square control room has plenty of difficulties that has been heavily documented.
As a suggestion, before you get to locked in, is to consider a modification that would still utilize the needed space, and give you a better chance building a room that would be much easier to treat. Modes are already challenging to control ... but square compounds the issue.
But you need to ask ... that's what this forum is about ... to help create the best room, minimize problems, and make work the best of what you have.
Sincerely.
Hi RJHollins,
I'm totally open to suggestions. I apologize if it seemed like I am not open. We can agree that this is what the forum is all about.
I'd love to see some alternatives.
I need a large control room, iso booth that will accommodate guitars and vocals and a bathroom within a 19'x27' garage. The garage has 10' header height and 6" framing, so the inside dimensions are 18'x 26'x 10
The purpose of the studio will be my private mix and overdub room, so I would like to have the control room as large as possible. I do everything from metal bands to mariachi. I track drums at a separate facility and then track guitars, bass and vocals at my place.
And now for more photos...
There are many post on the forum that deal with 'Room Ratios', along with access to, both, online & Xcell spreadsheet formula that will help you max your room dimensions AND provide you with ways to determine the 'best' ratio [L W H].
It's important homework, obviously ... You may be pleased [surprised] that changing [say] the width/length of the room [just enough] can have a major impact when you start treating the room.
As mentioned, the only thing worse than a square room, is a cube :shock: But that square room will cause doubling of the major modes with the same dimension. From all that we have read here, this is very difficult to treat ... and best to resolve the design before interior walls go up.
I'm sure a lot is going on as you 'clear' the area for your new build ... but you have a great opportunity to get solid advice that will guide you to making the best room for your investment.
As 'Andre' says ... planning/design is 90%.
Sincerely.
How about this? ... 9' x 17'3" x 19'6" Should give me sufficient room for treatment. I'm allowing for 2 feet of trapping at the rear, and a foot of diffusion and trapping on the side walls.
What ratio are you basing that on? Doesn't seem very good to me. It fails one of the three critical BBC tests, the Bonello diagram is all over the place, and doesn't seem to be close to any known good ratio. Why did you choose that one?How about this? ... 9' x 17'3" x 19'6"
It¿s not about having enough room for treatment: it's about choosing a ratio that gives an even spread of the natural resonant modes of the room. That's what "room ratio" is all about.Should give me sufficient room for treatment.
Diffusion should never be used on the side walls in an RFZ design, nor anywhere else that would place the lobing artifacts too close to your ears. And bass trapping is best accomplished in the room corners (rather than against the walls), for two reasons: 1) all room modes terminate in corners, so by treating corners you are guaranteed to get them all. 2) you get a 6 or 12 dB boost in effectiveness of the trapping, due to the corner itself. 6dB if it is a corner where two surfaces meet, or 12 dB if it is a corner where three surfaces meet. Walls can be used for other types of treatment, of course, but bass trapping works best in the corners. You also seem to have a strange "kink" where the side walls meet the front splayed walls: that is going to cause major edge diffraction and reflection problems, and very close to your ears, too. I'd suggest you get rid of that, and transition the side walls into the front walls smoothly. It also looks like you have your listening position very close to 50% of the room depth (distance from front wall to rear wall). That's the worst possible position. You should definitely re-arrange the layout to get your listening position closer to the optimum location. - Stuart -I'm allowing for 2 feet of trapping at the rear, and a foot of diffusion and trapping on the side walls.
However, Slat walls are an example of diffusion absorption recommended for side walls particularly when skewed. :wink:
Thanks guys!
The room was only based off of me trying to get the most volume out of the room and then deal with treatments later. However, I always wanted to go bigger because as you know, control rooms get filled up and small feeling very quickly.
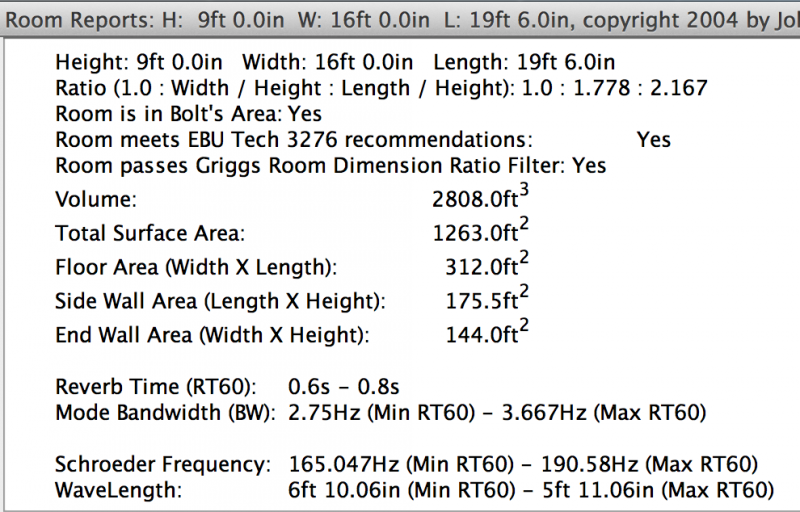
So now I'm at this. 19'6"L x 9'H x 16'w
and here is the room report on mode wizard..
Looking better?
True, but that isn't the primary function of slot walls: At heart, they are broad-band Helmholtz devices that happen to also provide some diffusion as a side effect, and also some absorption outside of their tuned range, as well as a lot of reflection for high frequencies, also outside their tuned range. Plus, the diffusion happens in the vertical plane, not the horizontal plane, so the artifacts are not going to affect the first-reflection speaker sound arriving at your ears so much. I was referring more to QRD and other numeric sequence based diffusers. There are occasions where you might want to use those types of diffusers in a studio, but the room has to be large enough to allow for the artifacts to decay or blend together, and the rest of the room should be designed to benefit from diffusion. Even then, you'd use the diffusion mostly on the rear walls, perhaps on the rear ceiling, but very, very seldom would you want numeric based diffusion at your first reflection points. (There are a couple of exceptions to that as well, but you can count them on the fingers of one hand...) This room might be big enough to use diffusion on the rear wall: it all depends on the rest of the design. - Stuart -Slat walls are an example of diffusion absorption recommended for side walls
You're absolutely correct Stuart, and I know what you mean't regarding diffusion in general, but slat walls are a special case which should not be overlooked - just wanted to get it out there. :)
Thank you Guys!
I really appreciate everyones help with this.
I think I have addressed all of the issues pointed out.
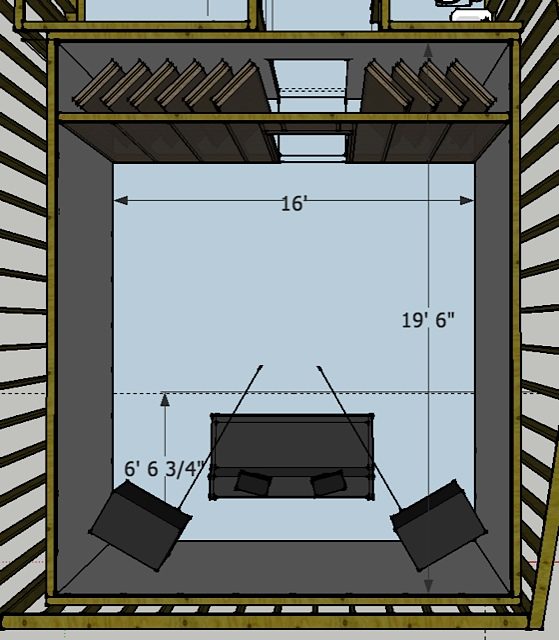
Here is where I'm at. 19.5' L x 16'W x 9'H
This puts my 30% listening position at around 6.5' from the front wall.
Kink is gone. No side wall Diffusion.
Here is an idea I'd like to run past you guys.
I'm thinking of getting the rectangular shell built first. Measuring, treating, measuring, treating. etc. Then once it's in a usable state, start incorporating the mains into the room. This way I can make sure I've experimented with heights angles etc. before committing. Then Building the flush mount wall based around those positions.
So here is what it looks like so far. I'm not sure If the Hanger traps in the rear of the room are a proper solution to whatever problem might be in the room, I just have them in there for now to let myself visualize the space that could be eaten up with treatment and trapping.
38%. Not 30%. :) The "theoretical" best location is at 38% of room depth, and that's where your EARS should be. Looking at your diagram, your head would need to be about three feet wide for that geometry to be correct! :) Might be good for a hippo or an elephant, but for humans you'll probably need to work on that a bit. The idea is that the acoustic axes of the speakers should be aimed directly at your ears (so your lines would cut through your edges of your ear lobes), and meet at a point few inches behind your head. But the "38% rule" is not really a "rule" at all. It is just a guideline, a starting point, and you can move away from there a bit, if you need to. Just stay away from 50% and 25%, which are bad places to be.This puts my 30% listening position ...
Don't forget that building the flush mount soffits will change everything. If built correctly, then that wall becomes the new front wall of the room, and the acoustic response of the room changes drastically. The area behind the speakers (between the flush mount soffit and the original front wall of the room) is no longer part of the room, acoustically speaking, so you need to take that into account. The room will sound very different after you build the soffits. II'm thinking of getting the rectangular shell built first. Measuring, treating, measuring, treating. etc. Then once it's in a usable state, start incorporating the mains into the room. This way I can make sure I've experimented with heights angles etc. before committing. Then Building the flush mount wall based around those positions.
Yes! Very much so. That's an excellent idea. But you don't need a door there: the "wall" between the hangers and the room is just cloth. Some type of fabric that you stretch across a lightweight frame, just to hide the ugliness of the hangers. They are not pretty to look at, so the cloth hides that. It is not a solid wall, and does not need a door. So you need to fix that, and move the door to the real rear wall of the room.'m not sure If the Hanger traps in the rear of the room are a proper solution to whatever problem might be in the room,
Looks about right to me! :) - Stuart -I just have them in there for now to let myself visualize the space that could be eaten up with treatment and trapping.
Thanks Stuart!
Yes, I'm aware that the wall in front of the hangers is just to hide them and is cloth. Yes, the entrance door will be on the shell. Sorry my screen shot did not show that.
I'm thinking the same thing you are about the speaker position and the rhino. hahaha I just started with them there because I usually end up with my monitors somewhere around a 20 degree or even 15 degree angle rather than the recommended 30. But I really won't know until I get in there and start experimenting and listening.
I appreciate your help and advice! and please keep the advice or any other comments coming.
Here is where we are at. Day 6
Before you start pouring concrete, have you considered these two rather important points?
1) You can attain much higher levels of isolation if you pour separate inner-leaf and outer-leaf foundations. (If you have more than one room, that implies pouring separate slabs for each). Now would be the perfect time to do that. Once your foundations and slabs are poured, all of those rather important options are off the table, and you are stuck with fully-coupled common slabs, and limited isolation.
2) If you plan carefully, you can greatly simplify your electrical, signal, plumbing and even HVAC (to a certain extent) systems by running conduits and piping in the concrete slabs. Now would be the time to do that, without any doubt!
You might want to take a break before you pour to think about those. Once you pour, you close out many options that could have made a big difference. It's also a little surprising that you are about to spend a lot of money pouring foundations, but you don't yet even have the basic design ready. Pouring concrete locks you into so many things that you might well regret down the line. I'd really suggest that it would be an excellent time right now to pause, think things through, and get your entire design complete before going any further.
- Stuart -
Hi Stuart,
Unfortunately, this is the largest garage possible to be permitted giving the size of lot, distance to house, backup area, neighbors house, other neighbor's garage and every other code we had to pass. The city would not allow for separate slabs because the building is a garage on a residential property. However I was able to get 10' ceiling height in the garage, which is why I am able to have 9' ceilings in the inner shells. Regarding the design, because of the difficulties of the permitting process, we had to change the size of the garage from 20'x26' to a 19'x27' which as you know, can really mess with the design of the studio inside... So now I am having to adapt, turning the control room, while still trying to retain an iso booth and the powder room, and also keeping the iso booth as far as possible from the closest neighbor. Let me know if there is any other information I can give that will help.
As always, Thank you for your input and help. I really appreciate everyone's input.
And here is where we are at the end of day 6.
Hi there, I am no expert but is all your build having to go through planning and you have to follow pre approved drawings?
If not, is it not possible to alter the way you are going to pour your foundations and slab but obviously keep the same dimensions you have?
If you do this as Stuart is saying I think you could pour the foundation for your outside walls first and build up to above ground level and then isolate all of this external wall before pouring your ground slab, preferably isolating the slabs for your control room and your iso room, otherwise this is a real missed opportunity, you will not be building a room in a room possibly as both your rooms and there external and internal walls will be sharing one common concrete ground slab which at the moment looks to have raised sides for the outer walls,
By the way on your work so far I would like to compliment you as it looks very professional so I am sure you have the required skills to build something that will give great isolation :D
OK, but there's still no reason to not pour separate inner-leaf and outer-leaf foundations. As Roguejackal says, this is a huge missed opportunity if you don't do that, and another huge missed opportunity if you don't embed all your conduit in the foundations. - Stuart -The city would not allow for separate slabs because the building is a garage on a residential property.
Yes, Everything must be submitted to the city, stamped by a structural engineer and then approved by the city. Then an inspector comes out to inspect various stages of the build process. It's a very difficult process. It took almost 6 months to get this building permitted. For instance, we even had to have an inspector come out to have a pre demolition inspection, in order to receive our demolition permit. It's a total nightmare, but I am sure it is meant to prevent poor building methods and to promote safety. BeauHi there, I am no expert but is all your build having to go through planning and you have to follow pre approved drawings?
Ok , I can understand where your coming from I think, you are having to build essentially a garage, but you are going to be using it as a studio,
It just seems a shame that you are going to all this expense of building a studio but are having to use conventional construction methods that have to be approved by engineers etc but this will probably not give you the isolation that you would crave or possibly could have had with some slightly different methods or construction, good luck as I am sure you will still have a decent studio and i will follow your build with interest :D
Yes you are correct. Hopefully this thread will be helpful and maybe even inspiring to someone somewhere. I know I really enjoy reading everyone else's studio construction threads. It is also really nice to have a second set of eyes on here. Even though I am not able to apply some of the construction methods mentioned, someone else might be able to, and we all learn from each other coming together and helping. I've already been able to improve my control room ratio thanks to you guys! :) Thanks again, BeauOk , I can understand where your coming from I think, you are having to build essentially a garage, but you are going to be using it as a studio, It just seems a shame that you are going to all this expense of building a studio but are having to use conventional construction methods that have to be approved by engineers etc but this will probably not give you the isolation that you would crave or possibly could have had with some slightly different methods or construction, good luck as I am sure you will still have a decent studio and i will follow your build with interest :D
Here we are with all of the rebar and foundation framing ready to pour... hopefully we pass inspection and we can pour concrete on friday. :)
Beau
Hello again,
Its been a while. We finally passed all inspections for the slab and poured the foundation. I did decide to lay in 3" piping to run cables from the control room to the iso booth under the concrete. You can barely see it in the 3rd photo. Because of the inspectors, we had to cap them one inch under the surface. Then once the final inspection happens, we can measure out where they are and chip out the concrete to unveil the cable troughs. It took 3 truck loads of 3200 psi concrete to complete the slab! ouch...
The weather was perfect for a slow drying slab. It has been curing for one week and today we are ready to start framing. Here are a couple pictures of the foundation ready for framing. I'll post framing pictures most likely tomorrow.