Samuel Studios - construction thread

Started by Funky Animal on 19 May 2010. 73 replies, 2010–2012. In the Library under Build diaries. Key posts in this thread.

Originally posted at johnlsayers.com, topic 14399.

After months of planning, things are really happening. I'm building my studio, mostly because me (and my wife) both have music as our main hobby. We need a solid room that properly soundproofed. For the control I will be converting the garage, and for my live room I will need to build a new building. As you can see in the photos I allready have most of my insulation ( 140 m2 / 70 packs (40 kilo!! each). Today I started moving them to my messy shed, where I will stock them, I now have 26 done, once I get all 70 into place I can start working on converting my garage to my control room. Next week the first groundwork will start for the foundation of the live room. There will be 2 buildings instead of 1, because of building licences...blablabla...sucks but it will work through video / tv connection. Anyhow enough with the jibajaba..here are the pics and more info: First my shed packed with 26 packs of insulation allready:
External image, not preserved — original: http://www.samuelstudios.nl/samuel_studios-build/P1010284.JPG
Control room dimension: 3.5 x 5 meter = 17.5 m2 ( height is 2.70 ) Here is the before pic, and what it should get to. In the 3D model you see a the backwall will be actually extended to the backwall.
External image, not preserved — original: http://www.samuelstudios.nl/samuel_studios-build/control-1.jpg
External image, not preserved — original: http://www.samuelstudios.nl/samuel_studios-build/control-2.jpg
External image, not preserved — original: http://www.samuelstudios.nl/samuel_studios-build/P1010285.JPG
External image, not preserved — original: http://www.samuelstudios.nl/samuel_studios-build/P1010286.JPG
External image, not preserved — original: http://www.samuelstudios.nl/samuel_studios-build/P1010287.JPG
Overview of the garden, there will be a 10 meter walk between the control & live room. Live room dimensions: 4.5 x 6.5 meter = 29,25 m2 ( height: 3 meter )
External image, not preserved — original: http://www.samuelstudios.nl/samuel_studios-build/P1010289.JPG
External image, not preserved — original: http://www.samuelstudios.nl/samuel_studios-build/P1010291.JPG
Sketchup crashed just after exporting this, so I'm stuck and can't export the views from inside, hopefully tomorrow from work:
External image, not preserved — original: http://www.samuelstudios.nl/samuel_studios-build/Studio.jpg
I've allready got a curious neighboor:
External image, not preserved — original: http://www.samuelstudios.nl/samuel_studios-build/P1010297.JPG
Another view of the currently still fully stock garage ( another 44 packs of insulation & 40 sheets of 20mm MDF to move to my shed...pfff )..
External image, not preserved — original: http://www.samuelstudios.nl/samuel_studios-build/P1010302.JPG
Once I have the foundation ready / walls up and main construction finished I will tidy up the garden, till then, it will get messy anyway!

pleased to see you are finally underway :thu:
Progress! Good news! And I'm wondering if your curious neighbor would look good on the dinner table... :) - Stuart -
Hahaha :) I bet he will! There are about 15 of those neighbours! But instead of that I can get peking duck just 500 meter further at a chinese restaurant :D... As for progress. Had talks with a couple of guys who could dig the hole for me, but pffff most we're way to expensive. Unbelievable! Some guys dared to charge me up to 1500 euro just to dig a hole and fill it with sand. Anyhow, this morning I got two guys who will do it for 500 euro. The job is planned for next week thursday. Then I have a whole week to prepare everything for the concrete slab. Due to the fact that the first meter is in my ground is peat, I will need to dig 1 meter deep holes (where the actual "hard sand" start) of 25cm diameter. Do that every meter around, and put reinforced concrete in those columns. So I've got some preperations ahead of me! The concrete should be coming 2nd week of June... Other option was to complete dig out a hole of 7 x 5 x 1 (deep) meter, and fill that with sand. But according to local contractors, these columns should work, and it will be sufficient enough. This saturday I'm starting with the control room. Cleaning the space and preparing it for framing.
So.....update... Been working hard today, most of the stuff is garden work and cleaning the "garage" to get things going in there. First let's start with some photos: I needed to move still another 40 packs of insulation and 40 MDF sheets out of here: No, where has that stuff gone? So the place is no free of all the big packs & stuff, this week I'll be focusing on getting everything from the inside stripped: The first things I need to do after I've completelly stripped everything inside is: - Remove the doors & replace it with a new wall - Replacing the window, once I have that done I have a great view on the garden while mixing and being busy - Removing the beams accross, they do not carry anything or hold anything up. I only need to get claws first to fix the roof to the walls first - Filling up some holes with concrete - Level the floor - Redoing the roof with new tiles - So...greatttttttt..lot's of work to do before actually starting :) And finally some shots of what's supposed to happen to the actual live room I'm creating: 3 of the 2 walls are "inside out", all walls aren't parallel Anyhow...done a shitload of work today, tired...and still got a lot of work to do! But I'm looking forward to it....
So...it is about time for an update. I had two months of really bad luck (construction wise). Eventually just before the holidays someone who takes care of the building permits came by and roasted my whole plan because of space issues.. Yes I have a garden of 700 square meters, and actually a total including my house of 1050 square meters, so you can see...a 30 square meter brick building can't fit in that garden :roll:. Anyhow, leaving that dissapointment I first thought I'd just do the garden and check out my other options, so my garden now sort of looks like this:
External image, not preserved — original: http://www.samuelstudios.nl/samuel_studios-build/tuin.jpg
I still prepared everything for a concrete slab of 30 square meter tho. I actually got a permit for this tho:
External image, not preserved — original: http://www.samuelstudios.nl/samuel_studios-build/huisje.jpg
Ok, it isn't the ultimate, it isn't perfect (yet), but with still being 30 square meters ( 5 x 6 meters ) and a canopy roof of 2.5 meters deep I think I still can create something beautifull. The biggest disadvantage is actually the side walls ( 2,10 meter ) where as the heighest point is 3 meters. In the past I have recorded in these kind of houses, only smaller ( 3x4 ), and to be honest the slanted roof really made the drums more alive. So in the next days I'll come back and ask for some construction advices that I haven't completelly figured out yet. The house should arrive here in 2 weeks on monday, and concrete slab will be poured now next week. Everything has been preperated it's just waiting. Since I've ordered the house I really had to wait and keep myself busy, so I thought I put a new path on the side of my house, it really was my first time, and I feel very satisfied with the result. (photos are still from the work in progress)
External image, not preserved — original: http://www.samuelstudios.nl/samuel_studios-build/opstap.jpg
External image, not preserved — original: http://www.samuelstudios.nl/samuel_studios-build/pad.jpg
Mate - you've been on this site for two years now - do you really think you are contributing to this site by posting meaningless pictures that just add to the cost of the data??
I've got the pictures stored on my own website, and just linked them, if you prefer I'll delete/amend the post.
Finally progresssssss :yahoo: Anyhow, yesterday I've been busy preparing everything for the concrete. I think the pictures speak for itself, the concrete is coming tuesday. The house come later that week, and I'll be ready to start building it on 11th september. Luckily I'll have plenty of help coming that day and some days after that. First offcourse making sure everything was leveled:
External image, not preserved — original: http://www.samuelstudios.nl/samuel_studios-build/24-08-10-f1.jpg
And the finished product:
External image, not preserved — original: http://www.samuelstudios.nl/samuel_studios-build/24-08-10-f2.jpg
Update time. Yesterday (31st august) it was finally time to poor the concrete. First of, I owe a lot to this guy, Frank, helping me out so far. While his wife is one the verge of delivering a baby, he spend 2 evenings with me tot prepare the concrete casket, and after polishing/buffing the concrete floor. So here's the pics of yesterday: This thing just hung over my head out of nothing: Ow...forgot it was attached to this: Then I made a very quick shot before running to the hose and guiding the concrete into it's place (yes that's my finger): Everything has been pored, vibrated and made it as flat as humanly possible, for me: This morning, after polishing: Now I seriously hope they will be quick with delivery of the shed, since the weather is getting worse; more rain, wind and colder.
So, in wait off the shed and delivery I thought I'd keep myself busy with a desk design! I've allready started work on this, and bought the first materials. I'm only really worried about the design. If you check out the design underneath you see it's slanted a bit at the back of the rack modules. I'm worried there will be comb filtering in my mix seat. Anybody got any ideas..or shouldn't this be much of a problem?
Congrats on the pour :yahoo: Peace Tom
Progress.. yesterday (thursday 7th october) the "shed" was delivered...finally. It was delayed by 10 weeks. Positive thing is I got a small discount. Anyhow, here is how it looks now: To get a good overview, I finished live room part of the studio in sketchup. The outer size = 5.8 m x 4.8 meter. The control room will be attached in the front, thiswill be a size of 3 x 5.8 meter. But for now I will first focus on the live room. The roof of the control room will be immediatelly there tho! This is the plan, from out to in: 44MM pine | 12.5MM Gypsum | insulation 140kg/m3 | AIR GAP | 12.5MM Gypsum | 15MM MDF | 12.5MM Gypsum | insulation 140kg/m3 Top view: And some nice renders: Upcoming weeks I will deffinatelly have more update pics since finally I can really start now
There seems to be some errors in your materials list. It says:
insulation 140kg/m3
:shock: :!: :?: That is WAY too dense! Depending on what it is (fiberglass or mineral wool), you want something in the range of around 30 to 50 kg/m3. If you go to densities much higher than that you start to loose effectiveness for low frequencies. Yours is about 300% to 400% too dense. You should fix that. Also, it says:
12.5MM Gypsum | 15MM MDF | 12.5MM Gypsum
That gypsum is too thin. Too flexible, resonant frequency too high, etc. Use only 5/8" (16mm). Also, the MDF is fine if you really want it, but it would probably be better to have it up against the studs, then put your drywall on top of that. There are two reasons why you might want MDF there: one is to give you a nailing surface across the entire wall instead of just on the studs, and the other is to give you better structural integrity (sheer). Both of those reasons imply that the wood should be on the studs, not separated from them by a sheet of drywall. Finally, I'm curious about the orientation of your ceiling joists / rafters / whatever: they seem to be running the wrong way! They seem to be spanning the length of the building from end to end, rather than across the width, from ridge board to top plate, which is they way I've always seen it done. I'm not sure if it is OK to do it that way. Brien can probably comment on that, but for some reason it just doesn't look right to me. - Stuart -
Soundman2020 wrote:
There seems to be some errors in your materials list. It says:
insulation 140kg/m3
:shock: :!: :?: That is WAY too dense! Depending on what it is (fiberglass or mineral wool), you want something in the range of around 30 to 50 kg/m3. If you go to densities much higher than that you start to loose effectiveness for low frequencies. Yours is about 300% to 400% too dense. You should fix that. Also, it says:
12.5MM Gypsum | 15MM MDF | 12.5MM Gypsum
That gypsum is too thin. Too flexible, resonant frequency too high, etc. Use only 5/8" (16mm). Also, the MDF is fine if you really want it, but it would probably be better to have it up against the studs, then put your drywall on top of that. There are two reasons why you might want MDF there: one is to give you a nailing surface across the entire wall instead of just on the studs, and the other is to give you better structural integrity (sheer). Both of those reasons imply that the wood should be on the studs, not separated from them by a sheet of drywall. Finally, I'm curious about the orientation of your ceiling joists / rafters / whatever: they seem to be running the wrong way! They seem to be spanning the length of the building from end to end, rather than across the width, from ridge board to top plate, which is they way I've always seen it done. I'm not sure if it is OK to do it that way. Brien can probably comment on that, but for some reason it just doesn't look right to me. - Stuart -
Hi Stuart, Thanks for your input. Can I still use the 140 kg/m3 on the outer walls? I bought a whole bunch, simply because I was able to buy it very cheap. 3.5 euro per m2, instead of 8 euro per m2. I have no problem buying less densed material for the inner walls tho. Since I still will be able to sell some of the dense material to a friend that allready asked me if I have something left over. Gypsum, I'll try to find this. Allready called to 4 construction stores telling me they're not able to deliver it. I still have to try and maybe go to one in Germany (I life close to the border). Roof contruction: I know exactly what you mean, that was my first setup. This is a setup a constructional engineer came with to me because of saving height. This helps my roof to be 16 cm higher than having that from side to middle. Today my father in law is painting the beams and tomorrow we will start putting it together with me, my father and the fater in law..so we're making good progress! Cheerio
Update .. just being busy. Still need to set the front poles correctly and a lot of other stuff.... Beginning is there tho..
What I can't understand is that in your initial drawings you have a brickwall shed, and you end up using wood.. what changed? (okay, I haven't read ALL text. maybe I missed something there) :mrgreen:
Ro wrote:
What I can't understand is that in your initial drawings you have a brickwall shed, and you end up using wood.. what changed? (okay, I haven't read ALL text. maybe I missed something there) :mrgreen:
Building permits..building permits... They didn't want to give me any permit for my initial build. So I now did something is along the lines of permit stuff.
bummer...
Ro wrote:
bummer...
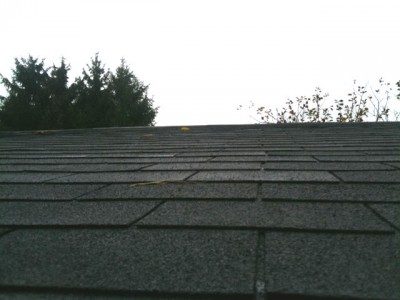
Yep, that's how it felt at first. Allready shifted my mindset now. I still think I can create something beautiful, it probally only needs a bit more effort put into it, since the starting point is not a preferable one. Allready made more progress since then, roof is on + shingles, electricity has been dealt with, network cables have been layed out, first delivery of gypsum & wood is in, now I'm busy caulking...hate that job, Hope to get some more pics up in the next few days..
Hopefully someone can help me. I have all the seals and all the gaps caulked. I want to add an extra layer of gypsum to agains the wooden outside wall. Only some people are saying I shouldn't do it, other say, shouldn't be a problem. So just to know I want: OUTSIDE WALL (44MM PINE) | 16MM GYPSUM | 10CM INSULATION Anyhow then some say I should: OUTSIDE WALL | INSULATION | GYPSUM Anybody got any idea? I've had the first option as initial plan!
I want to add an extra layer of gypsum to agains the wooden outside wall. Only some people are saying I shouldn't do it, other say, shouldn't be a problem. So just to know I want: OUTSIDE WALL (44MM PINE) | 16MM GYPSUM | 10CM INSULATION Use Chip board/OSB or Plywood instead of the Gypsum. But make sure you are sealed well from the outside elements. Keep your first mass layer this way OUTSIDE WALL (44MM PINE) | 16MM CHIP/OSB or PLYWOOD | INSULATION Peace Tom
Thanks tom, Just ordered 18mm osb with an special layer against moist/humidity. So that will be the first layer to go now.. Thanks for the input, osb makes more sense indeed.. Allready had the gypsum ready but i guess ill be saving that for later then..
Got the OSB delivered, now busy with the door, that one is almost finished. Still looking for proper rubber seals. I just need some advice! To add my layer of insulation again my OSB I have 2 options: OPTION 1: Framing the whole wall & ceiling, then adding the insulation in the framing and use wire to keep it on it's place. OPTION 2: Buy these stickpens, I have to use superglue to attach them to my OSB board
External image, not preserved — original: http://www.poppers-technofast.com/01/MyImages/53-4000-ZMP.jpg
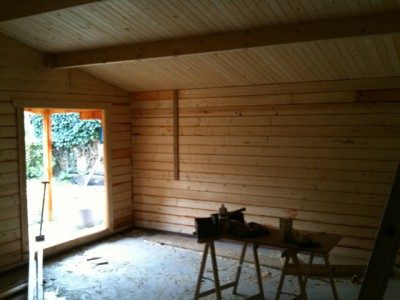
Option 1 is more work and more $$$ Option 2 is easier and less $$$ But I actually want to go for the best solution.. I it was actually easy to add some quick shots... more pics soon.
foto.jpg
foto.jpg
binnen2.jpg
binnen2.jpg
dak.jpg
dak.jpg