Hi there "poormansporsche", and Welcome!

Please read the
forum rules for posting (click here). You seem to be missing a couple of things!
First question: Has the build advanced any more than what is visible in the photos, or is that it so far? If it has gone further, then there isn't much point commenting on things that are visible there. But if it is currently at the stage seen in the photos, then there's a LOT that can be done to improve it.
To share the story and also receive constructive criticism before it's too late.
We're actually pretty good at that!


Hopefully the "too late" stage hasn't been reached yet.
I feel many short comings could have been avoided.
Yup...
including the current "build a small but powerful recording studio in the house next-door." Demolition and re-framing of the home was already underway when I joined the effort. So some things are they way they are and there was little I could do to influence change.
Two things that would be REALLY important here, before you go any further: 1) Post the complete plans for what you are going to do in there, so we can understand where this is all heading, and 2) post a complete description of the goals for this studio, in full detail. In other words, things like: Is this going to be a commercial facility (and therefore subject to ADA), or just a private hobby place? What is the design goal for acoustic isolation? (In other words, how many decibels of "soundproofing" are you planning for). What is the budget for the complete build? etc. The more info you post, the better idea we will be able to get of what your intentions are.
What I can see from where you are now is that clearly isolation is not important to you, so you don't mind noise getting in or out of the studio, and also acoustics are taking a back seat to aesthetics. Is that about right? There's no problem with that: so people really do prefer a studio that looks fantastic but doesn't sound so good, and some people really don't mind living with noise "leakage" if low isolation will save them money. But it would help if you could put that in your own words, so we understand that these rally are part of your design goals.
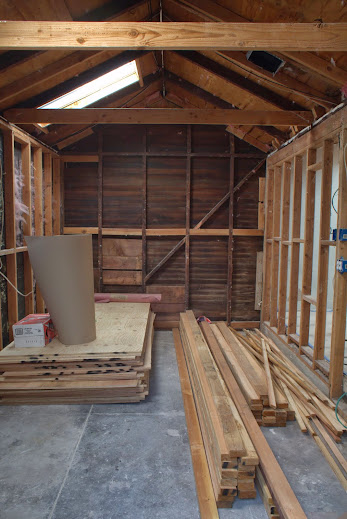
Approximately 300 square feet of space.
How many rooms are going to be in that space? With just 300 ft2, you have enough space for a smallish control room and a single isolation booth. Is that the plan?
One could technically record an entire band.
in 300 ft"

Doubtful... Or rather, do-able, but unlikely to be high quality.
Control room
What are the measurements of that? Width across from stud face to stud face, length from stud face to stud face, and height from floor surface to underside of joists.
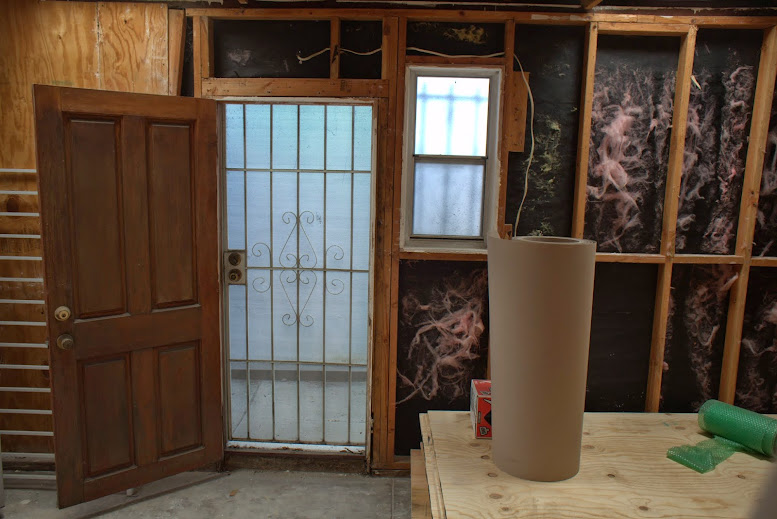
Also, what is the plan for sealing up and beefing up that T&G wall at the far end?
Live/Overdub room
Same as above: dimensions please!
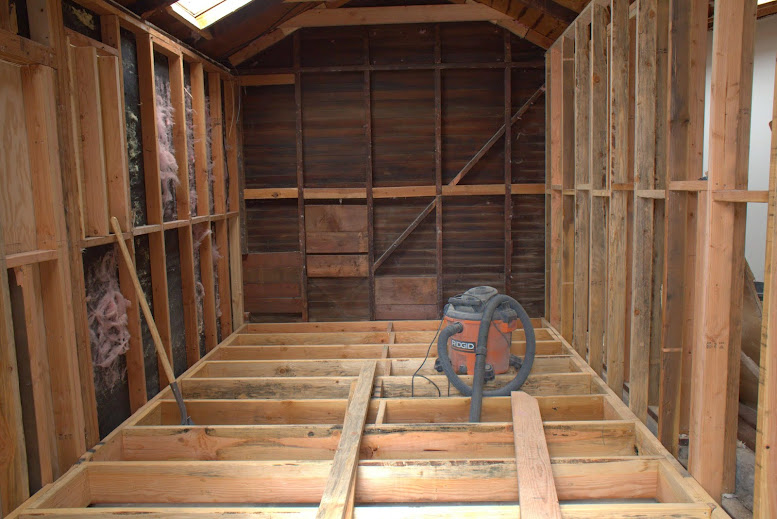
Raising the floor 10 inches should theoretically help with taming room modes
Which room is that floor in? Looks like the control room, right? So what is the room height now that the raised floor is in?
I didn't have much to go on so I ran some calculations. Raising the floor 10 inches should theoretically help with taming room modes.
Which room mode calculator did you use? There are quite a few floating around on the Internet: not all of them are useful...
What ratio did you have before, and what ratio do you have now?
Though due to it's size it probably will not fit anything larger than a 75hz wave.
So the room length is about 15 feet?
The contractor refused to float the floor on u-boats
Smart man, but probably for the wrong reasons. Those things are pretty useless. You should thank him for saving you money.
so we just ran it like a second floor
OK, this is where the "constructive criticism" get's a little in your face: You say you have a 10" air gap down there: Assuming you lay two sheets of 1/2" OSB for your subfloor, then laminate flooring on top, your floor will basically be a resonant box with the center frequency tuned to around 31 Hz, and resonance extending about an octave each way, so down to maybe 15 Hz and up to around 60. Was that your intention, or was that just an accident?
Your floor clearly is not floating, thankfully, but it still is a resonant box, basically a tuned panel trap. You should probably read this thread, so you get an idea of what you have done there:
http://www.johnlsayers.com/phpBB2/viewt ... f=2&t=8173
and built an additional wall between the two rooms.
So what are the new dimensions now, with that added wall? How wide is the room now, stud face to stud face? What ratio does that get you?
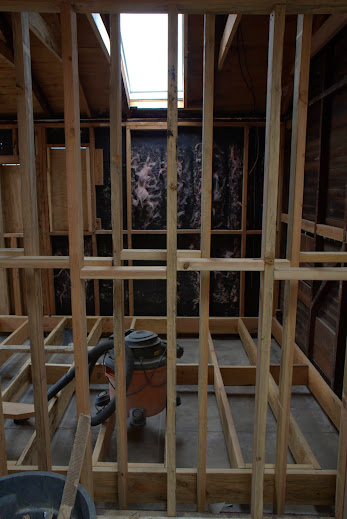
The walls mount more or less to the same ceiling
Ummmm... how do you "more or less" mount a wall?
either it is attached to the ceiling, or it isn't... However, I don't see any ceiling at all in those photos: all I see is what looks like a roof, which is your outer-leaf.
so I have some concerns about flanking.
And rightly so! If it is attached to the roof, then it IS flanking. No two ways about it. even worse, it also seems to be attached to the outer leaf walls at each end of the room, so flanking is going on in all directions. Not a happy situation, if you want to isolate your rooms.
I guess we'll see
There's not much guess work involved here: it is flanking. No question about it.
The live room is on a concrete slab then someone put wood down and poured another slab.

Ummm....
Why? I have no idea but maybe it'll help.
It helped to spend a chunk of the budget, that's for sure! But beyond that, it's hard to see how reducing the height of the live room is helpful. To me it sounds like someone vaguely remembered something about "floating floors" being necessary in a studio (in reality, they aren't), and even more vaguely about pouring concrete on top of wood.... but they forgot one minor little detail: floor jacks!
mason-floating-floor-isolation-jacks.jpg
Those are the things you are supposed to embed in the concrete formwork, then use to jack up the newly poured inner-leaf slab, to create the oh-so-necessary air space and decoupling spring. At the very least, the wood should have gone over a layer of Syolmer, or even plain old 703! Anything would be better than just a piece of wood....
In other words, if that new slab is poured on nothing more than a sheet of wood, then it is nothing more than a waste of money, sad to say. And of room height.
We also constructed second walls in the front facing side and another between the house and live room.
Those are flanking too: they are clearly attached to the joists of the roof (floor?) above.
The rear live room is concrete blocks with sheetrock already glued to it.
Why would you glue sheetrock to concrete block? Did that pass inspection already? If so, I'd be somewhat surprised. If not, then get ready to take it off again: it likely won't pass. But more to the point: why was that done in the first place? What was the reasoning behind that?
Again, due to the design of the house, flanking through the ceiling is a concern which we've tried to address with GB later on.
I must be missing something here: How will gypsum board stop flanking?
The STUDS are creating the flanking path, so your only option at this point is RSIC clips and hat channel, or proper RC-1 resilient channel. Well, you do have the other option: take the framing down and rebuild it properly, without attaching it to the outer leaf. You'll likely have to do that anyway, since there is only one top plate there, and there should be two. I'm guessing that your farming inspection has not been done yet?
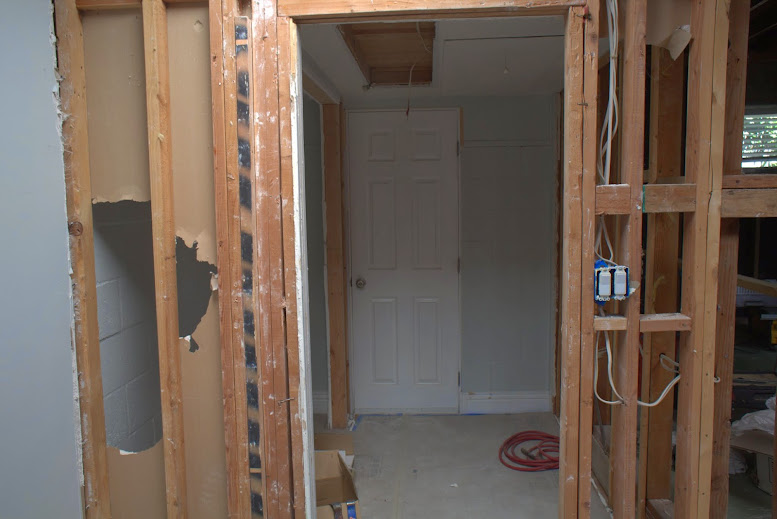
Speaking of framing, there are major issues with the way that door is framed: it has a single king stud on each side with an unsupported header. There should be jack studs and cripple studs on that header, plus an additional king stud on each side, especially if you plan to hang a decent isolation door on there. That will also need to be fixed before your framing inspection.
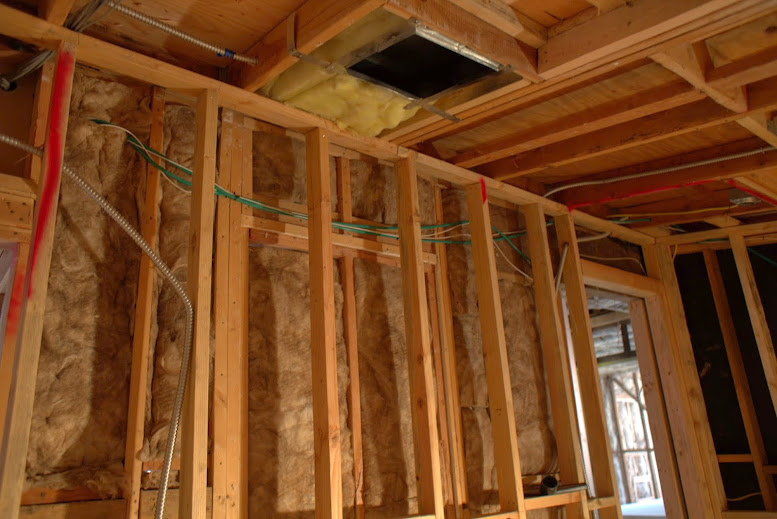
My electrician and I put our heads together and we came up with a plan for the circuit design.
Does it include star-grounding? If not, then you need to add that.
Studio lighting on it's own circuit, Live room on it's own circuit, mixing desk and monitors on it's own circuit, outboard gear on it's own circuit and aux gear on it's own circuit.
What about HVAC? That needs to be on its own circuit too.
I voiced my concerns about grounding and EMI so we ran it through conduit and used 12-2. We removed the old panel and relocated it further away from the studio.
The photos seem to be showing that you have attached outlet boxes to the sides of the studs, implying that you plan to simply do the normal house wall thing: put up the drywall, then cut holes in it where the boxes are? Is that it? There's only one problem with that: if you hope to have any isolation at all, you cannot cut holes in your drywall...
I was also cautious of cable runs avoiding crossing over as much as possible and keeping a clean path for the audio to run.
One good way of wiring studios is to keep all the electrical wiring at the top of the walls, and all the signal wiring at the bottom, and where the absolutely have no choice but to cross over, do that at an angle of 90°.
Still haven't decided what to do for lighting. We avoided cans and are doing some kind of flush or surface mount. Possibly a cloud.
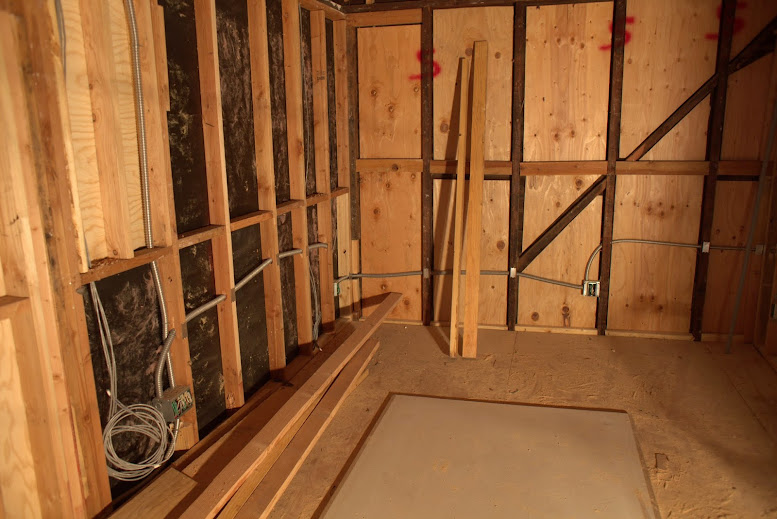
The photo that accompanies that text shows a frankly hopeless mishmash of framing: Sorry to be so blunt, but there's no kind way to put it. Isolation is just not going to happen there: all the framing is firmly connected to all the other framing, with numerous flanking paths all over the place. Not a pretty sight. There even appear to be holes in the outer leaf, on the far wall!
So overall, there's a lot to be concerned about with what has been done (and not done). Some things will very likely have to be undone and re-done in order to pass inspection, others SHOULD be undone and re-done in order to create an isolation system. And yet others should be undone and stay undone.
But one big concern is that I don't see where your HVAC is going. What plans do you have for that? I don't see enough space for it anywhere...
- Stuart -